Product Specifications Sheet
Page 1
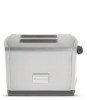
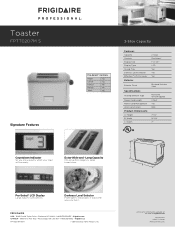
... large bread slices. Accessories information available on the web at frigidaire.com Specifications subject to change. Toaster FPTT02D7M S Signature Features 2-Slice Capacity Toaster Model FPTTF0ea2turDes 7M Frigidaire Professional Capacity Controls Display Size Display Type Crumb Tray Pro-Select® Controls Bagel Yes Cancel Yes Defrost Yes Reheat Yes Toast Yes Darkness Level Selector Effortless™ Lift-Out Lever Exterior Exterior Finish Specifications Heating Element Type Power Cord Length Power Cord Management Watts...
... large bread slices. Accessories information available on the web at frigidaire.com Specifications subject to change. Toaster FPTT02D7M S Signature Features 2-Slice Capacity Toaster Model FPTTF0ea2turDes 7M Frigidaire Professional Capacity Controls Display Size Display Type Crumb Tray Pro-Select® Controls Bagel Yes Cancel Yes Defrost Yes Reheat Yes Toast Yes Darkness Level Selector Effortless™ Lift-Out Lever Exterior Exterior Finish Specifications Heating Element Type Power Cord Length Power Cord Management Watts...
Use and Care Guide
Page 1
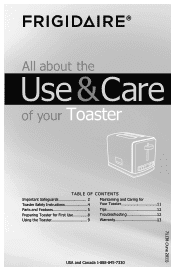
All about the Use &Care of your Toaster TABLE OF CONTENTS Important Safeguards 2 Toaster Safety Instructions 4 Parts and Features 5 Preparing Toaster for First Use 8 Using the Toaster 9 Maintaining and Caring for Your Toaster 11 Tips 12 Troubleshooting 12 Warranty 13 USA and Canada 1-888-845-7330 71138 (June 2011)
All about the Use &Care of your Toaster TABLE OF CONTENTS Important Safeguards 2 Toaster Safety Instructions 4 Parts and Features 5 Preparing Toaster for First Use 8 Using the Toaster 9 Maintaining and Caring for Your Toaster 11 Tips 12 Troubleshooting 12 Warranty 13 USA and Canada 1-888-845-7330 71138 (June 2011)
Use and Care Guide
Page 2
... Cancel button, and then remove the cord by an authorized service provider. Use handles or knobs. 3 To protect against electric shock, do not place cord, plugs, or appliance in any appliance is plugged in. 17 Service should always be pulled on by children or tripped over edge of accessory attachments not recommended by the appliance manufacturer may create a fire...
... Cancel button, and then remove the cord by an authorized service provider. Use handles or knobs. 3 To protect against electric shock, do not place cord, plugs, or appliance in any appliance is plugged in. 17 Service should always be pulled on by children or tripped over edge of accessory attachments not recommended by the appliance manufacturer may create a fire...
Use and Care Guide
Page 3
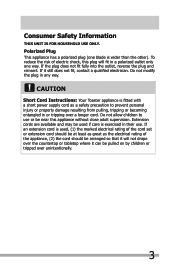
... care is used, (1) the marked electrical rating of the cord set or extension cord should be at least as great as the electrical rating of electric shock, this appliance without close adult supervision. Polarized Plug This appliance has a polarized plug (one way. If it can be near this plug will not drape over unintentionally. 3 CAUTION Short Cord Instructions: Your Toaster appliance is...
... care is used, (1) the marked electrical rating of the cord set or extension cord should be at least as great as the electrical rating of electric shock, this appliance without close adult supervision. Polarized Plug This appliance has a polarized plug (one way. If it can be near this plug will not drape over unintentionally. 3 CAUTION Short Cord Instructions: Your Toaster appliance is...
Use and Care Guide
Page 4
FRIGIDAIRE Toaster SAFETY Product Specifications Model Number Rated Voltage Rated Wattage Rated Capacity FPTT02D7MS 120V/60HZ 900W 2 slices bread 4
FRIGIDAIRE Toaster SAFETY Product Specifications Model Number Rated Voltage Rated Wattage Rated Capacity FPTT02D7MS 120V/60HZ 900W 2 slices bread 4

Use and Care Guide
Page 5
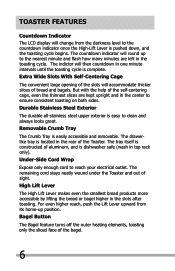
Parts and Features 2 1 5 3 4 6 7 8 9 10 11 12 1 Extra Wide Slots with Self-centering Cage 2 Stainless Steel Housing 3 Removable Crumb Tray 4 Power Cord 5 High-lift Lever 6 Bagel Button 7 Reheat Button 8 Lighter Toast Button 9 LCD Display with Countdown Indicator 10 Darker Toast Button 11 Defrost 12 Cancel 5
Parts and Features 2 1 5 3 4 6 7 8 9 10 11 12 1 Extra Wide Slots with Self-centering Cage 2 Stainless Steel Housing 3 Removable Crumb Tray 4 Power Cord 5 High-lift Lever 6 Bagel Button 7 Reheat Button 8 Lighter Toast Button 9 LCD Display with Countdown Indicator 10 Darker Toast Button 11 Defrost 12 Cancel 5
Use and Care Guide
Page 6
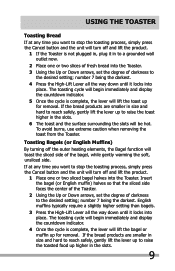
... Crumb Tray is complete. Bagel Button The Bagel feature turns off the outer heating elements, toasting only the sliced face of sight. For even higher reach, push the Lift Lever upward from the darkness level to ensure consistent toasting on both sides. The drawerlike tray is pushed down, and the toasting cycle begins. But with the help of the Toaster. Durable Stainless...
... Crumb Tray is complete. Bagel Button The Bagel feature turns off the outer heating elements, toasting only the sliced face of sight. For even higher reach, push the Lift Lever upward from the darkness level to ensure consistent toasting on both sides. The drawerlike tray is pushed down, and the toasting cycle begins. But with the help of the Toaster. Durable Stainless...
Use and Care Guide
Page 7
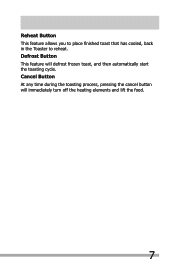
Cancel Button At any time during the toasting process, pressing the cancel button will defrost frozen toast, and then automatically start the toasting cycle. Defrost Button This feature will immediately turn off the heating elements and lift the food. 7 Reheat Button This feature allows you to place finished toast that has cooled, back in the Toaster to reheat.
Cancel Button At any time during the toasting process, pressing the cancel button will defrost frozen toast, and then automatically start the toasting cycle. Defrost Button This feature will immediately turn off the heating elements and lift the food. 7 Reheat Button This feature allows you to place finished toast that has cooled, back in the Toaster to reheat.
Use and Care Guide
Page 8
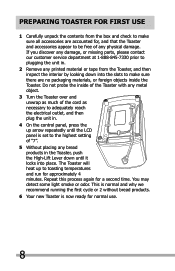
... object. 3 Turn the Toaster over and unwrap as much of any physical damage. If you discover any damage, or missing parts, please contact our customer service department at 1-888-845-7330 prior to plugging the unit in. 2 Remove any bread products in . 4 On the control panel, press the up to toasting temperatures and run for , and that the Toaster and accessories appear...
... object. 3 Turn the Toaster over and unwrap as much of any physical damage. If you discover any damage, or missing parts, please contact our customer service department at 1-888-845-7330 prior to plugging the unit in. 2 Remove any bread products in . 4 On the control panel, press the up to toasting temperatures and run for , and that the Toaster and accessories appear...
Use and Care Guide
Page 9
... into place. Toasting Bagels (or English Muffins) By turning off the outer heating elements, the Bagel function will lift the toast up higher in size and hard to reach safely, gently lift the lever up to the desired setting; Insert the bagel (or English muffin) halves so that the sliced side faces the center of the Toaster. 2 Using the Up or...
... into place. Toasting Bagels (or English Muffins) By turning off the outer heating elements, the Bagel function will lift the toast up higher in size and hard to reach safely, gently lift the lever up to the desired setting; Insert the bagel (or English muffin) halves so that the sliced side faces the center of the Toaster. 2 Using the Up or...
Use and Care Guide
Page 10
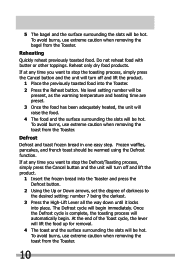
... to stop the Defrost/Toasting process, simply press the Cancel button and the unit will turn off and lift the product. 1 Insert the frozen bread into the Toaster and press the Defrost button. 2 Using the Up or Down arrows, set the degree of the Toast cycle..., the lever will lift the food up for removal. 4 The toast and the surface surrounding the slots will be hot. No level setting number will be present, as the warming temperature and heating...
... to stop the Defrost/Toasting process, simply press the Cancel button and the unit will turn off and lift the product. 1 Insert the frozen bread into the Toaster and press the Defrost button. 2 Using the Up or Down arrows, set the degree of the Toast cycle..., the lever will lift the food up for removal. 4 The toast and the surface surrounding the slots will be hot. No level setting number will be present, as the warming temperature and heating...
Use and Care Guide
Page 11
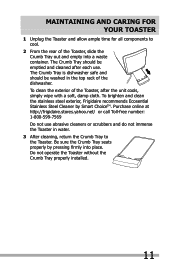
... all components to the Toaster. Purchase online at http://frigidaire.stores.yahoo.net/ or call Toll-free number: 1-800-599-7569 Do not use . The Crumb Tray should be emptied and cleaned after the unit cools, simply wipe with a soft, damp cloth. Do not operate the Toaster without the Crumb Tray properly installed. 11 To clean the exterior of the Toaster, slide the Crumb Tray out and empty...
... all components to the Toaster. Purchase online at http://frigidaire.stores.yahoo.net/ or call Toll-free number: 1-800-599-7569 Do not use . The Crumb Tray should be emptied and cleaned after the unit cools, simply wipe with a soft, damp cloth. Do not operate the Toaster without the Crumb Tray properly installed. 11 To clean the exterior of the Toaster, slide the Crumb Tray out and empty...
Use and Care Guide
Page 12
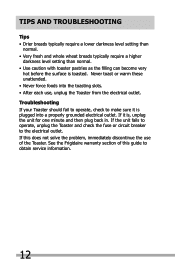
... toasted. If this guide to obtain service information. 12 Never toast or warm these unattended. • Never force foods into a properly grounded electrical outlet. See the Frigidaire warranty section of the Toaster. If it is plugged into the toasting slots. • After each use of this does not solve the problem, immediately discontinue the use , unplug the Toaster from the electrical outlet. TIPS and troubleshooting...
... toasted. If this guide to obtain service information. 12 Never toast or warm these unattended. • Never force foods into a properly grounded electrical outlet. See the Frigidaire warranty section of the Toaster. If it is plugged into the toasting slots. • After each use of this does not solve the problem, immediately discontinue the use , unplug the Toaster from the electrical outlet. TIPS and troubleshooting...
Use and Care Guide
Page 13
... obtain warranty service in accordance with a comparable product of the unit. 4 Products purchased "as-is installed, used in a commercial setting or anything but single family household use. 7 Labor or service visits under any circumstance. 8 Glass parts or containers, filters, non-stick surfaces. 9 Ordinary wear and tear. 10 Damages caused by a one year from the original owner to another party or removed...
... obtain warranty service in accordance with a comparable product of the unit. 4 Products purchased "as-is installed, used in a commercial setting or anything but single family household use. 7 Labor or service visits under any circumstance. 8 Glass parts or containers, filters, non-stick surfaces. 9 Ordinary wear and tear. 10 Damages caused by a one year from the original owner to another party or removed...
Use and Care Guide
Page 14
... OR THE SHORTEST PERIOD ALLOWED BY LAW. THIS WRITTEN WARRANTY GIVES YOU SPECIFIC LEGAL RIGHTS. DISCLAIMER OF IMPLIED WARRANTIES; Product features or specifications as described or illustrated are subject to products purchased in the USA and CANADA. YOU MAY ALSO HAVE OTHER RIGHTS .... Electrolux authorizes no person to change without notice. LIMITATION OF REMEDIES: CUSTOMER'S SOLE AND EXCLUSIVE REMEDY UNDER THIS LIMITED WARRANTY SHALL BE, AT ELECTROLUX'S SOLE DISCRETION, PRODUCT OR PART REPAIR OR REPLACEMENT AS PROVIDED HEREIN. In the USA, your appliance is warranted by Electrolux...
... OR THE SHORTEST PERIOD ALLOWED BY LAW. THIS WRITTEN WARRANTY GIVES YOU SPECIFIC LEGAL RIGHTS. DISCLAIMER OF IMPLIED WARRANTIES; Product features or specifications as described or illustrated are subject to products purchased in the USA and CANADA. YOU MAY ALSO HAVE OTHER RIGHTS .... Electrolux authorizes no person to change without notice. LIMITATION OF REMEDIES: CUSTOMER'S SOLE AND EXCLUSIVE REMEDY UNDER THIS LIMITED WARRANTY SHALL BE, AT ELECTROLUX'S SOLE DISCRETION, PRODUCT OR PART REPAIR OR REPLACEMENT AS PROVIDED HEREIN. In the USA, your appliance is warranted by Electrolux...

