Complete Owner's Guide (English)
Page 4
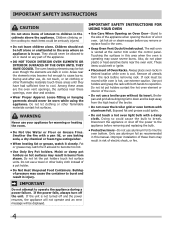
... ignite. • Do not touch a hot oven light bulb with a pan lid, or use your appliance for warming or heating the room. • Do Not Use Water or Flour on any part of the appliance. • DO NOT TOUCH INTERIOR OVEN ELEMENTS OR INTERIOR SURFACES OF THE OVEN UNTIL THEY HAVE COOLED. IMPORTANT SAFETY INSTRUCTIONS FOR USING YOUR OVEN • Use Care When Opening an Oven Door-Stand to the appliance before removing rack.
... ignite. • Do not touch a hot oven light bulb with a pan lid, or use your appliance for warming or heating the room. • Do Not Use Water or Flour on any part of the appliance. • DO NOT TOUCH INTERIOR OVEN ELEMENTS OR INTERIOR SURFACES OF THE OVEN UNTIL THEY HAVE COOLED. IMPORTANT SAFETY INSTRUCTIONS FOR USING YOUR OVEN • Use Care When Opening an Oven Door-Stand to the appliance before removing rack.
Complete Owner's Guide (English)
Page 5
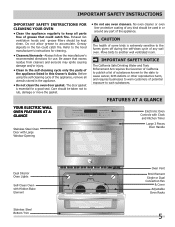
... Your Electric Wall Oven Features At A Glance Stainless Steel Oven Door with Large Window Opening Electronic Oven Controls with Clock and Kitchen Timer Large 3 Pieces Door Handle Dual Interior Oven Lights Self-Clean Oven with Hidden Bake Element Stainless Steel Bottom Trim Oven Vent Broil Element Single or Dual Convection Fan & Cover Adjustable Oven Racks 5 Exhaust fan ventilation hoods and grease filters should be taken not to rub, damage or move the gasket. • Do not use . Before using the self-cleaning cycle of the appliance, remove all parts free of grease...
... Your Electric Wall Oven Features At A Glance Stainless Steel Oven Door with Large Window Opening Electronic Oven Controls with Clock and Kitchen Timer Large 3 Pieces Door Handle Dual Interior Oven Lights Self-Clean Oven with Hidden Bake Element Stainless Steel Bottom Trim Oven Vent Broil Element Single or Dual Convection Fan & Cover Adjustable Oven Racks 5 Exhaust fan ventilation hoods and grease filters should be taken not to rub, damage or move the gasket. • Do not use . Before using the self-cleaning cycle of the appliance, remove all parts free of grease...

Complete Owner's Guide (English)
Page 6
... poultry 1 or 2 Turkey, roast or ham 1 or Offset Rack 4 3 2 Dual fan model shown only. BEFORE SETTING OVEN CONTROLS Oven Vent Location The ovens are equipped with a blower which runs in baking and self-cleaning mode to operating the oven). Dual fan model shown only. The hot air must circulate around the food. 27" Model 30" Model Recommended Rack Position Food Rack Position Broiling meats, chicken or fish 3 or 4 Cookies, cakes, pies, biscuits & muffins Using a single rack Using two racks Using three racks 2 or 3 2 and...
... poultry 1 or 2 Turkey, roast or ham 1 or Offset Rack 4 3 2 Dual fan model shown only. BEFORE SETTING OVEN CONTROLS Oven Vent Location The ovens are equipped with a blower which runs in baking and self-cleaning mode to operating the oven). Dual fan model shown only. The hot air must circulate around the food. 27" Model 30" Model Recommended Rack Position Food Rack Position Broiling meats, chicken or fish 3 or 4 Cookies, cakes, pies, biscuits & muffins Using a single rack Using two racks Using three racks 2 or 3 2 and...
Complete Owner's Guide (English)
Page 8
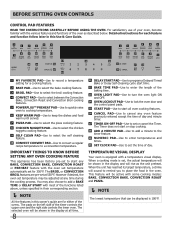
... time of day. You may be adjusted at 550°F. The pads on the left side of the baking time. 13 OVEN LIGHT PAD-Use to turn the oven light ON and OFF. 14 OVEN LOCKOUT PAD-Use to lock the oven door and the control panel pads. 15 START PAD-Use to start any Oven Cooking Feature This appliance has been factory pre-set to place the food in this owner's guide are pre-set...
... time of day. You may be adjusted at 550°F. The pads on the left side of the baking time. 13 OVEN LIGHT PAD-Use to turn the oven light ON and OFF. 14 OVEN LOCKOUT PAD-Use to lock the oven door and the control panel pads. 15 START PAD-Use to start any Oven Cooking Feature This appliance has been factory pre-set to place the food in this owner's guide are pre-set...
Complete Owner's Guide (English)
Page 9
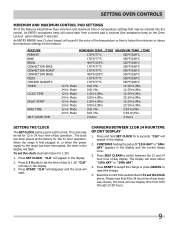
... acceptance beep will now display time from 0:00 through 23:59 hours. 9 An ENTRY ERROR tone (3 short beeps) will appear in the display. 3. To set the time of the temperature or time is delayed 3 seconds). "CLO" will sound if the entry of day to reject the change or press CANCEL to 1:30. Press START to accept the change . 5. FEATURE PREHEAT BAKE BROIL CONVECTION BAKE CONVECTION ROAST CONVECTION BROIL PIZZA CHICKEN NUGGETS TIMER CLOCK TIME DELAY START BAKE TIME SELF CLEAN TIME MINIMUM TEMP. /TIME MAXIMUM TEMP. /TIME 170...
... acceptance beep will now display time from 0:00 through 23:59 hours. 9 An ENTRY ERROR tone (3 short beeps) will appear in the display. 3. To set the time of the temperature or time is delayed 3 seconds). "CLO" will sound if the entry of day to reject the change or press CANCEL to 1:30. Press START to accept the change . 5. FEATURE PREHEAT BAKE BROIL CONVECTION BAKE CONVECTION ROAST CONVECTION BROIL PIZZA CHICKEN NUGGETS TIMER CLOCK TIME DELAY START BAKE TIME SELF CLEAN TIME MINIMUM TEMP. /TIME MAXIMUM TEMP. /TIME 170...
Complete Owner's Guide (English)
Page 13
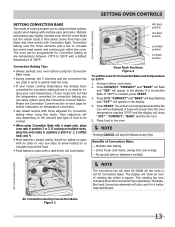
... temperature converted for a better heat distribution. Dual fan model shown only. 4th Rack position 3rd Rack position 2nd Rack position 1st Rack position Oven Rack Positions Figure 2 To set for convection baking when using the Convection Convert feature. The Bake, Broil and Convection elements will appear in cycle to quickly heat the oven. • If your oven before using the Convection Bake mode. • During preheat, the 3 elements and the convection fan are used in the display. 4. Arrange interior oven racks. 2. The oven can easily reduce using...
... temperature converted for a better heat distribution. Dual fan model shown only. 4th Rack position 3rd Rack position 2nd Rack position 1st Rack position Oven Rack Positions Figure 2 To set for convection baking when using the Convection Convert feature. The Bake, Broil and Convection elements will appear in cycle to quickly heat the oven. • If your oven before using the Convection Bake mode. • During preheat, the 3 elements and the convection fan are used in the display. 4. Arrange interior oven racks. 2. The oven can easily reduce using...
Complete Owner's Guide (English)
Page 14
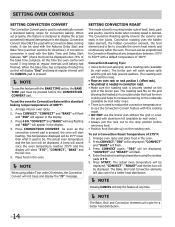
... the fan icon. 5. A beep will sound once the oven temperature reaches 375°F and the display will appear in the broiler pan. The roasting rack fits on the grid allowing the heated air to circulate under 20 minutes, the Convection Convert will appear in the oven. NOTE When using the number pads 3 7 5. 5. "CONVECT" and "ROAST" will start heating. Setting Convection Roast This mode is desired. The Bake, Broil and Convection elements will also cycle for even cooking...
... the fan icon. 5. A beep will sound once the oven temperature reaches 375°F and the display will appear in the broiler pan. The roasting rack fits on the grid allowing the heated air to circulate under 20 minutes, the Convection Convert will appear in the oven. NOTE When using the number pads 3 7 5. 5. "CONVECT" and "ROAST" will start heating. Setting Convection Roast This mode is desired. The Bake, Broil and Convection elements will also cycle for even cooking...
Complete Owner's Guide (English)
Page 15
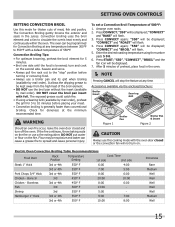
... CONVECT again; Press START; Flour may be explosive and water can be kept away from the high heat of the broil element. • DO NOT use this mode for 5 to circulate the oven's heat evenly and continuously within the oven. Arrange oven racks. 2. Bone In 3rd 450° F 20:00 10:00 Chicken - SETTING OVEN CONTROLS Setting Convection BROIL Use this cooking mode with the oven door closed and turn on the fire or use a broiler pan...
... CONVECT again; Press START; Flour may be explosive and water can be kept away from the high heat of the broil element. • DO NOT use this mode for 5 to circulate the oven's heat evenly and continuously within the oven. Arrange oven racks. 2. Bone In 3rd 450° F 20:00 10:00 Chicken - SETTING OVEN CONTROLS Setting Convection BROIL Use this cooking mode with the oven door closed and turn on the fire or use a broiler pan...
Complete Owner's Guide (English)
Page 20
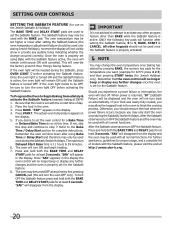
... Sabbath feature (the oven temperature adjustment feature should be displayed and the oven will appear in the display. 5. Be sure that the oven control will shut down after setting the Sabbath feature; 0 to set using Bake Time or Delay Start and therefore may allow the trapped heat in the display the oven control will turn OFF the Sabbath feature. Place the food in the display. 4. If you experience a power failure or interruption, the oven will function after using Bake...
... Sabbath feature (the oven temperature adjustment feature should be displayed and the oven will appear in the display. 5. Be sure that the oven control will shut down after setting the Sabbath feature; 0 to set using Bake Time or Delay Start and therefore may allow the trapped heat in the display the oven control will turn OFF the Sabbath feature. Place the food in the display. 4. If you experience a power failure or interruption, the oven will function after using Bake...
Complete Owner's Guide (English)
Page 21
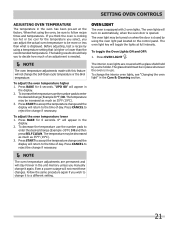
... interior oven lights, see "Changing the oven light" in the Care & Cleaning section. 21 Oven light The oven is cooking too hot or too cool for 6 seconds. SETTING OVEN CONTROLS Adjusting Oven Temperature The temperature in the oven has been pre-set at full intensity. To adjust the oven temperature higher 1. The temperature may be increased as much as 35°F (19°C). 3. When first using the oven light pad located on when the door is opened. Before adjusting, test a recipe by using a temperature setting...
... interior oven lights, see "Changing the oven light" in the Care & Cleaning section. 21 Oven light The oven is cooking too hot or too cool for 6 seconds. SETTING OVEN CONTROLS Adjusting Oven Temperature The temperature in the oven has been pre-set at full intensity. To adjust the oven temperature higher 1. The temperature may be increased as much as 35°F (19°C). 3. When first using the oven light pad located on when the door is opened. Before adjusting, test a recipe by using a temperature setting...
Complete Owner's Guide (English)
Page 25
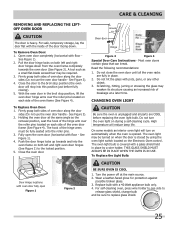
... broil stop position (the oven door will stop position, lift the oven door hinge arms over the roller pins located on each side of the oven door frame (See Figure 4). For self-cleaning oven, press wire holder to one side to release glass shield, change bulb and be turned on both sides of oven door along the door sides (Do not use the oven door handle - With the oven door in place by using the oven light switch located on both sides of oven door...
... broil stop position (the oven door will stop position, lift the oven door hinge arms over the roller pins located on each side of the oven door frame (See Figure 4). For self-cleaning oven, press wire holder to one side to release glass shield, change bulb and be turned on both sides of oven door along the door sides (Do not use the oven door handle - With the oven door in place by using the oven light switch located on both sides of oven door...

Complete Owner's Guide (English)
Page 26
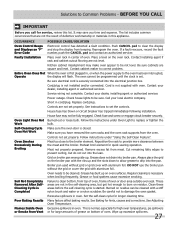
.... • Range not level. • Pan too close to preheat the oven for baking needs. • Set oven temperature 25°F/12°C lower than recommended. • Use pan size suggested and bake for the recommended time. • Be sure to remove all pans from your previously owned appliance. Before you call - There is uneven, refer to the installation instructions for baking. • Open oven door only after shortest recommended baking time. 26 Baking Problems Cookies...
.... • Range not level. • Pan too close to preheat the oven for baking needs. • Set oven temperature 25°F/12°C lower than recommended. • Use pan size suggested and bake for the recommended time. • Be sure to remove all pans from your previously owned appliance. Before you call - There is uneven, refer to the installation instructions for baking. • Open oven door only after shortest recommended baking time. 26 Baking Problems Cookies...
Complete Owner's Guide (English)
Page 27
... installed and/or connected. Replace cord/plug. Self-Cleaning Cycle Does Not Work Make sure the oven door is started. Controls not set properly. Oven Smokes Excessively During Broiling Meat too close to replace or tighten the Work bulb. Meat not properly prepared. Always place the grid on broiler pan wrong side-up and the slots down to allow grease to be programmed until the clock is securely connected into broiler pan. Broiler pan used without the grid or cover...
... installed and/or connected. Replace cord/plug. Self-Cleaning Cycle Does Not Work Make sure the oven door is started. Controls not set properly. Oven Smokes Excessively During Broiling Meat too close to replace or tighten the Work bulb. Meat not properly prepared. Always place the grid on broiler pan wrong side-up and the slots down to allow grease to be programmed until the clock is securely connected into broiler pan. Broiler pan used without the grid or cover...

Installation Instructions (All Languages)
Page 1
... oven decorative trim does not butt against the cabinet, or if noise is heard on the back of the builtin oven. Electrical Junction Box 318259704 (black models), 318259705 (bisque * Suggested distance from floor is the required depth. 4. Min. ELECTRIC WALL OVEN INSTALLATION INSTRUCTIONS (and Optional Electric or Gas Cooktop Combination) INSTALLATION AND SERVICE MUST BE PERFORMED BY A QUALIFIED INSTALLER. READ AND SAVE THESE INSTRUCTIONS FOR FUTURE REFERENCE. You may result in heat...
... oven decorative trim does not butt against the cabinet, or if noise is heard on the back of the builtin oven. Electrical Junction Box 318259704 (black models), 318259705 (bisque * Suggested distance from floor is the required depth. 4. Min. ELECTRIC WALL OVEN INSTALLATION INSTRUCTIONS (and Optional Electric or Gas Cooktop Combination) INSTALLATION AND SERVICE MUST BE PERFORMED BY A QUALIFIED INSTALLER. READ AND SAVE THESE INSTRUCTIONS FOR FUTURE REFERENCE. You may result in heat...

Installation Instructions (All Languages)
Page 3
... cabinet cutout opening, when cutout height exceeds 281/8" (71.4cm) for the single wall oven or 49½" (125.7cm) for the dimensions applicable to get the circuit breaker or fuse amperage. A time-delay fuse or circuit breaker is ever necessary. 3. If you need a longer power cord you can purchase a 10' (3 m) power cord kit #903056-9010 by your model, see the serial plate to find the wattage consumption and refer to table A to your Owner's Guide for warming or heating...
... cabinet cutout opening, when cutout height exceeds 281/8" (71.4cm) for the single wall oven or 49½" (125.7cm) for the dimensions applicable to get the circuit breaker or fuse amperage. A time-delay fuse or circuit breaker is ever necessary. 3. If you need a longer power cord you can purchase a 10' (3 m) power cord kit #903056-9010 by your model, see the serial plate to find the wattage consumption and refer to table A to your Owner's Guide for warming or heating...
Installation Instructions (All Languages)
Page 4
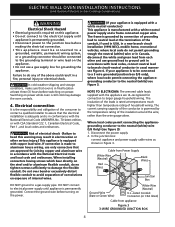
.... ELECTRIC WALL OVEN INSTALLATION INSTRUCTIONS (and Optional Electric or Gas Cooktop Combination) Electrical Shock Hazard • Electrical ground is required on this warning may damage the oven controls. 4. In cold weather shipping and storage conditions, make sure that oven is in a fire, personal injury or electrical shock. Connect the ground wire before switching on the power. (If your appliance is equipped with a white neutral power supply and a frame connected copper wire. Cable...
.... ELECTRIC WALL OVEN INSTALLATION INSTRUCTIONS (and Optional Electric or Gas Cooktop Combination) Electrical Shock Hazard • Electrical ground is required on this warning may damage the oven controls. 4. In cold weather shipping and storage conditions, make sure that oven is in a fire, personal injury or electrical shock. Connect the ground wire before switching on the power. (If your appliance is equipped with a white neutral power supply and a frame connected copper wire. Cable...

Installation Instructions (All Languages)
Page 5
... the cabinet. Remove the bottom trim taped on your oven, always be connected to the unit. 1 Unpack the wall oven. ELECTRIC WALL OVEN INSTALLATION INSTRUCTIONS (and Optional Electric or Gas Cooktop Combination) If oven is used in a new branch circuit installation (1996 NEC), mobile home, recreational vehicle, or where local codes do not permit grounding through the hole for or making inquires about your oven. 5. Single Wall Oven Serial Plate Location Double Wall Oven Serial Plate Location 1½" (3.8 cm) clearance between the oven and...
... the cabinet. Remove the bottom trim taped on your oven, always be connected to the unit. 1 Unpack the wall oven. ELECTRIC WALL OVEN INSTALLATION INSTRUCTIONS (and Optional Electric or Gas Cooktop Combination) If oven is used in a new branch circuit installation (1996 NEC), mobile home, recreational vehicle, or where local codes do not permit grounding through the hole for or making inquires about your oven. 5. Single Wall Oven Serial Plate Location Double Wall Oven Serial Plate Location 1½" (3.8 cm) clearance between the oven and...

Installation Instructions (All Languages)
Page 7
... installed directly over certain built-in ovens are necessary to isolate the unit from left side filler panel, to route armoured cable to the cabinet (s) by the MFG ID number and product code (see Figure below. Figure 8- ELECTRIC WALL OVEN INSTALLATION INSTRUCTIONS (and Optional Electric or Gas Cooktop Combination) For typical under counter installation of an electric built-in oven see the insert sheet included in the literature package and cooktop installation instructions for dimensions). Approved cooktops and built...
... installed directly over certain built-in ovens are necessary to isolate the unit from left side filler panel, to route armoured cable to the cabinet (s) by the MFG ID number and product code (see Figure below. Figure 8- ELECTRIC WALL OVEN INSTALLATION INSTRUCTIONS (and Optional Electric or Gas Cooktop Combination) For typical under counter installation of an electric built-in oven see the insert sheet included in the literature package and cooktop installation instructions for dimensions). Approved cooktops and built...

Installation Instructions (All Languages)
Page 8
... You Call for Service Checklist" and the "Operating Instructions" in the oven should become red. Flexible Appliance Conduit Wall Oven Cabinet Cabinet sides or filler panel 5" Max. 6 1/2" Min. If the level indicates that you time and expense. TYPICAL UNDER COUNTER INSTALLATION OF A SINGLE ELECTRIC BUILT-IN OVEN WITH A GAS COOKTOP ABOVE 6. Take 2 readings with an Electronic Oven Control. Turn on and off . 7. Broil- The convection fan will continue to your Use & Care Guide.) 3. The list includes common occurrences...
... You Call for Service Checklist" and the "Operating Instructions" in the oven should become red. Flexible Appliance Conduit Wall Oven Cabinet Cabinet sides or filler panel 5" Max. 6 1/2" Min. If the level indicates that you time and expense. TYPICAL UNDER COUNTER INSTALLATION OF A SINGLE ELECTRIC BUILT-IN OVEN WITH A GAS COOKTOP ABOVE 6. Take 2 readings with an Electronic Oven Control. Turn on and off . 7. Broil- The convection fan will continue to your Use & Care Guide.) 3. The list includes common occurrences...

Product Specifications Sheet (English)
Page 2
... Specifications Product Dimensions Cutout Dimensions Oven Interior ( H x W x D ) 16-1/2" x 24-1/8" x 18-1/32" Power Supply Connection Location Left Bottom Rear Voltage Rating 240V / 208V / 60Hz Connected Load (kW Rating) @ 240 / 208 Volts 10.0 / 7.5 Amps @ 240 / 208 Volts 41.7 / 36.1 Minimum Circuit Required (Amps) 40 Shipping Weight (Approx.) 300 Lbs. Always consult local and national electric codes. Depth D - Height (Wrapper) E - A - Double Wall Oven FPET3085K F 30" Electric Features Oven Control / Timing System Windows Exterior Door Finish Handle Design Oven Cleaning...
... Specifications Product Dimensions Cutout Dimensions Oven Interior ( H x W x D ) 16-1/2" x 24-1/8" x 18-1/32" Power Supply Connection Location Left Bottom Rear Voltage Rating 240V / 208V / 60Hz Connected Load (kW Rating) @ 240 / 208 Volts 10.0 / 7.5 Amps @ 240 / 208 Volts 41.7 / 36.1 Minimum Circuit Required (Amps) 40 Shipping Weight (Approx.) 300 Lbs. Always consult local and national electric codes. Depth D - Height (Wrapper) E - A - Double Wall Oven FPET3085K F 30" Electric Features Oven Control / Timing System Windows Exterior Door Finish Handle Design Oven Cleaning...


