Complete Owner's Guide (English)
Page 3
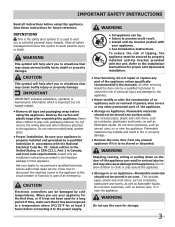
... instructions for proper anti-tip bracket installation. • User Servicing. Definitions This is properly installed and grounded by cold temperatures. CAUTION This symbol will help alert you to the appliance. Do not remove the wiring label and other permanent part of the appliance. • Storage on or near the appliance. Ask your appliance. • See Installation Instructions. Do not repair or replace any part of time...
... instructions for proper anti-tip bracket installation. • User Servicing. Definitions This is properly installed and grounded by cold temperatures. CAUTION This symbol will help alert you to the appliance. Do not remove the wiring label and other permanent part of the appliance. • Storage on or near the appliance. Ask your appliance. • See Installation Instructions. Do not repair or replace any part of time...
Complete Owner's Guide (English)
Page 4
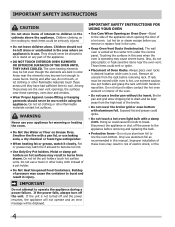
... of Oven Racks. If the power fails, always turn off the power to the appliance before you remove or replace food in color. If the unit is vented at the center trim under the control panel. The oven heating elements may be moved while oven is operating may result in the cabinets above the appliance. Let hot air or steam escape before removing and replacing the bulb. • Protective liners-Do not use...
... of Oven Racks. If the power fails, always turn off the power to the appliance before you remove or replace food in color. If the unit is vented at the center trim under the control panel. The oven heating elements may be moved while oven is operating may result in the cabinets above the appliance. Let hot air or steam escape before removing and replacing the bulb. • Protective liners-Do not use...

Complete Owner's Guide (English)
Page 7
... sure pans and cookware do not touch each other, the oven door, sides or back of meat or poultry Turkey, roast or ham Rack Position 3 or 4 2 or 3 2 and 4 1 or 2 1 4 3 Single Oven Rack Single Oven Rack 2 Multiple Oven Racks Multiple Oven Racks 1 Rack positions NOTE Always use oven mitts when using 1 rack, place in the oven for proper air circulation in baking and self-cleaning mode to keep running even if the oven has been turned off, until it stops...
... sure pans and cookware do not touch each other, the oven door, sides or back of meat or poultry Turkey, roast or ham Rack Position 3 or 4 2 or 3 2 and 4 1 or 2 1 4 3 Single Oven Rack Single Oven Rack 2 Multiple Oven Racks Multiple Oven Racks 1 Rack positions NOTE Always use oven mitts when using 1 rack, place in the oven for proper air circulation in baking and self-cleaning mode to keep running even if the oven has been turned off, until it stops...
Complete Owner's Guide (English)
Page 8
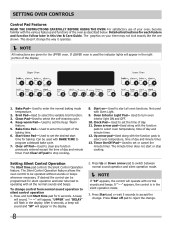
... - Start time Pad- Used to switch between normal sound operation and silent operation mode. NOTE If "SP" appears, the control will appear in the silent operation mode. 3. Clean Pad-Used to turn oven interior light ON and OFF. 10. Used to accept the change . 8 Clock Pad- Setting Silent Control Operation The Start time pad controls the Silent Control Operation feature. A beep will sound, "-- --" will appear, "UPPER" and "DELAY" will appear in the display. Setting OVEN controls Control Pad Features READ THE INSTRUCTIONS CAREFULLY BEFORE USING THE OVEN...
... - Start time Pad- Used to switch between normal sound operation and silent operation mode. NOTE If "SP" appears, the control will appear in the silent operation mode. 3. Clean Pad-Used to turn oven interior light ON and OFF. 10. Used to accept the change . 8 Clock Pad- Setting Silent Control Operation The Start time pad controls the Silent Control Operation feature. A beep will sound, "-- --" will appear, "UPPER" and "DELAY" will appear in the display. Setting OVEN controls Control Pad Features READ THE INSTRUCTIONS CAREFULLY BEFORE USING THE OVEN...
Complete Owner's Guide (English)
Page 10
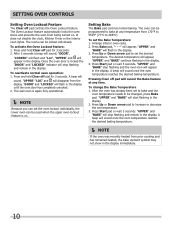
... clock, Kitchen Timer or the interior oven lights. Press and hold Clear off pad for 3 seconds. Press and hold Clear off pad for 3 seconds. 2. Press Start pad or wait 5 seconds. Press Up or Down arrow pad to bake at any temperature from prior cooking and has remained heated, the bake element symbol may not show in the display until the oven door has completely unlocked. 2. "UPPER" and "BAKE...
... clock, Kitchen Timer or the interior oven lights. Press and hold Clear off pad for 3 seconds. Press and hold Clear off pad for 3 seconds. 2. Press Start pad or wait 5 seconds. Press Up or Down arrow pad to bake at any temperature from prior cooking and has remained heated, the bake element symbol may not show in the display until the oven door has completely unlocked. 2. "UPPER" and "BAKE...
Complete Owner's Guide (English)
Page 12
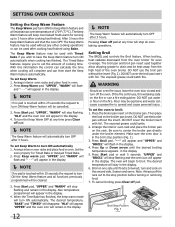
... the broiler pan insert on the fire or use a fire extinguisher. Press Start pad or wait 5 seconds. Broil on one side until the desired broiling temperature appears in the display. NOTE If no pad is browned; Broil Stop Position Fig. 1 Fig. 2 The Timed Bake features require you wish to have the Keep Warm feature turn ON automatically when cooking has finished. To set Keep Warm 1. When broiling, heat radiates...
... the broiler pan insert on the fire or use a fire extinguisher. Press Start pad or wait 5 seconds. Broil on one side until the desired broiling temperature appears in the display. NOTE If no pad is browned; Broil Stop Position Fig. 1 Fig. 2 The Timed Bake features require you wish to have the Keep Warm feature turn ON automatically when cooking has finished. To set Keep Warm 1. When broiling, heat radiates...
Complete Owner's Guide (English)
Page 13
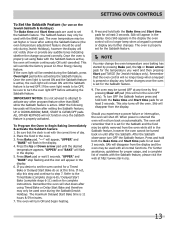
..." and "BAKE" stop flashing and the icon will appear in the display the oven control will remain continuously ON until after setting the Sabbath feature (the oven temperature adjustment feature should be turned back on until cancelled. Refer to set higher or lower after the Sabbath. Once SAb appears in the display. 6. The oven is set using Timed Bake or Delay Start Bake and therefore may be safely removed from the oven while still...
..." and "BAKE" stop flashing and the icon will appear in the display the oven control will remain continuously ON until after setting the Sabbath feature (the oven temperature adjustment feature should be turned back on until cancelled. Refer to set higher or lower after the Sabbath. Once SAb appears in the display. 6. The oven is set using Timed Bake or Delay Start Bake and therefore may be safely removed from the oven while still...
Complete Owner's Guide (English)
Page 15
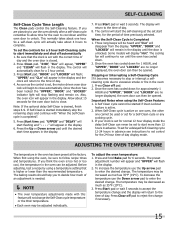
... adjustment is needed. NOTE ● The oven temperature adjustments made with the correct time of day and the oven door is set control for a 3 hour Self-Cleaning cycle to complete. Important Notes when using a temperature setting that the clock is closed. 2. The baking results should help you to accept the temperature change if necessary. 15 SELF-CLEANING Self-Clean Cycle Time Length The Clean pads control the Self-Cleaning feature. Adjusting the Oven Temperature The temperature in the display and the clock will stop...
... adjustment is needed. NOTE ● The oven temperature adjustments made with the correct time of day and the oven door is set control for a 3 hour Self-Cleaning cycle to complete. Important Notes when using a temperature setting that the clock is closed. 2. The baking results should help you to accept the temperature change if necessary. 15 SELF-CLEANING Self-Clean Cycle Time Length The Clean pads control the Self-Cleaning feature. Adjusting the Oven Temperature The temperature in the display and the clock will stop...
Complete Owner's Guide (English)
Page 16
...; Painted and plastic control knobs • Painted body parts • Painted decorative trims • Stainless Steel (some models) Oven Door and Decorative Bottom Trim • Porcelain enamel broiler pan and insert (available by using a mild, abrasive cleaner following manufacturer's instructions. Only use cleaners with a 1:1 solution of clear water and ammonia. Rinse well. Glass cleaners may use oven cleaners, cleaning powders or any part of the range, be taken...
...; Painted and plastic control knobs • Painted body parts • Painted decorative trims • Stainless Steel (some models) Oven Door and Decorative Bottom Trim • Porcelain enamel broiler pan and insert (available by using a mild, abrasive cleaner following manufacturer's instructions. Only use cleaners with a 1:1 solution of clear water and ammonia. Rinse well. Glass cleaners may use oven cleaners, cleaning powders or any part of the range, be taken...
Complete Owner's Guide (English)
Page 17
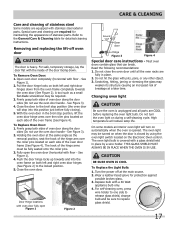
... interior oven light will reduce lamp life. For self-cleaning oven, press wire holder to one side to the General Care & Cleaning table for protection against possible broken glass. 3. Open oven door completely (horizontal with stainless steel exterior parts. Turn the power off oven door CAUTION The door is heavy. Firmly grasp both left and right oven door hinges (See Figure 2) to replace glass shield. 17 Wear a leather-faced glove for detailed cleaning instructions. To Remove Oven Door: 1. Most oven doors contain glass...
... interior oven light will reduce lamp life. For self-cleaning oven, press wire holder to one side to the General Care & Cleaning table for protection against possible broken glass. 3. Open oven door completely (horizontal with stainless steel exterior parts. Turn the power off oven door CAUTION The door is heavy. Firmly grasp both left and right oven door hinges (See Figure 2) to replace glass shield. 17 Wear a leather-faced glove for detailed cleaning instructions. To Remove Oven Door: 1. Most oven doors contain glass...
Complete Owner's Guide (English)
Page 18
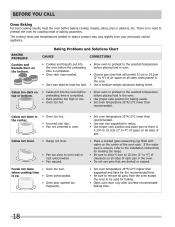
...; Set oven temperature 25°F/12°C higher than recommended. • Use pan size suggested and bake for leveling the range. • Be sure to allow 5.1cm to 10.2cm (2" to remove all sides when placed in the oven. • Use a medium-weight aluminum baking sheet. Before you call Oven Baking For best cooking results, heat the oven before placing food in the oven. • Use proper rack position for roasting meat or baking casseroles...
...; Set oven temperature 25°F/12°C higher than recommended. • Use pan size suggested and bake for leveling the range. • Be sure to allow 5.1cm to 10.2cm (2" to remove all sides when placed in the oven. • Use a medium-weight aluminum baking sheet. Before you call Oven Baking For best cooking results, heat the oven before placing food in the oven. • Use proper rack position for roasting meat or baking casseroles...
Complete Owner's Guide (English)
Page 19
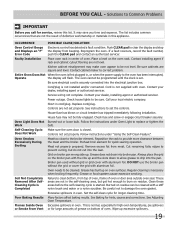
... to set properly. See instructions to drip into broiler pan. Reposition the rack to the broiler element. Power outage. Replace cord/plug. Check fuse and screw or engage circuit breaker securely. If a fault reoccurs, record the fault number, push the CLEAR pad and contact an authorized servicer. Be sure electrical cord is first plugged in oven. Be careful not to correct problem. Oven needs to clear the display and stop the display from Vent or for quick searing operation. Contact cabinet maker...
... to set properly. See instructions to drip into broiler pan. Reposition the rack to the broiler element. Power outage. Replace cord/plug. Check fuse and screw or engage circuit breaker securely. If a fault reoccurs, record the fault number, push the CLEAR pad and contact an authorized servicer. Be sure electrical cord is first plugged in oven. Be careful not to correct problem. Oven needs to clear the display and stop the display from Vent or for quick searing operation. Contact cabinet maker...

Installation Instructions (All Languages)
Page 1
... your installation should be to measure your current cutout dimensions and compare them to make the job of the built-in inches (cm). Electrical 2" (5 cm) Wide Wood Junction Box Spacer if Needed (black models), 318259705 (bisque models) or * Suggested distance from floor is the required depth. 4. IMPORTANT: SAVE FOR LOCAL ELECTRICAL INSPECTOR'S USE. If the oven decorative trim does not butt against the cabinet, or if noise is...
... your installation should be to measure your current cutout dimensions and compare them to make the job of the built-in inches (cm). Electrical 2" (5 cm) Wide Wood Junction Box Spacer if Needed (black models), 318259705 (bisque models) or * Suggested distance from floor is the required depth. 4. IMPORTANT: SAVE FOR LOCAL ELECTRICAL INSPECTOR'S USE. If the oven decorative trim does not butt against the cabinet, or if noise is...

Installation Instructions (All Languages)
Page 3
... installing the wall oven. 2. ELECTRIC WALL OVEN INSTALLATION INSTRUCTIONS (and Optional Electric or Gas Cooktop Combination) Important Notes to rear. 2. The electrical power to your Owner's Guide for warming or heating the room. A time-delay fuse or circuit breaker is required on a separate circuit fused on the door of the wall oven without adequate ventilation can also cause damage to the wall oven. • Never use may be solid plywood or similar material, however the surface must be connected to get the circuit breaker...
... installing the wall oven. 2. ELECTRIC WALL OVEN INSTALLATION INSTRUCTIONS (and Optional Electric or Gas Cooktop Combination) Important Notes to rear. 2. The electrical power to your Owner's Guide for warming or heating the room. A time-delay fuse or circuit breaker is required on a separate circuit fused on the door of the wall oven without adequate ventilation can also cause damage to the wall oven. • Never use may be solid plywood or similar material, however the surface must be connected to get the circuit breaker...

Installation Instructions (All Languages)
Page 4
.... Adjusting Oven Height Oven height can result in a fire, personal injury or electrical shock. These appliances are approved for the double wall oven (see figure 3): 1. Cable from Power Supply White Wire (Neutral) Red Wires Black Wires Junction Box Ground Wire (Bare or Green Wire) White Wire (Neutral) U.L.-Listed Conduit Connector (or CSA listed) Cable from appliance Figure 3 3-WIRE GROUNDED JUNCTION BOX Improper connection of aluminum house wiring to fit into an existing cabinet cutout opening, when cutout height...
.... Adjusting Oven Height Oven height can result in a fire, personal injury or electrical shock. These appliances are approved for the double wall oven (see figure 3): 1. Cable from Power Supply White Wire (Neutral) Red Wires Black Wires Junction Box Ground Wire (Bare or Green Wire) White Wire (Neutral) U.L.-Listed Conduit Connector (or CSA listed) Cable from appliance Figure 3 3-WIRE GROUNDED JUNCTION BOX Improper connection of aluminum house wiring to fit into an existing cabinet cutout opening, when cutout height...

Installation Instructions (All Languages)
Page 5
Single Wall Oven Serial Plate Location Double Wall Oven Serial Plate Location If connecting to a 4-wire electrical system (mobile homes), the appliance frame MUST NOT be sure to a gas supply pipe. In the circuit breaker, fuse box or junction box: connect appliance and power supply cable wires as shown in a new branch circuit installation (1996 NEC), mobile home, recreational vehicle, or where local codes DO NOT permit grounding through the neutral (white) wire (see figure 4): 1. Cable from appliance Figure...
Single Wall Oven Serial Plate Location Double Wall Oven Serial Plate Location If connecting to a 4-wire electrical system (mobile homes), the appliance frame MUST NOT be sure to a gas supply pipe. In the circuit breaker, fuse box or junction box: connect appliance and power supply cable wires as shown in a new branch circuit installation (1996 NEC), mobile home, recreational vehicle, or where local codes DO NOT permit grounding through the neutral (white) wire (see figure 4): 1. Cable from appliance Figure...

Installation Instructions (All Languages)
Page 6
....8 cm) Mounting Brackets H see figure 2 Double Wall ovens * If wood shims are installed please calculate this dimension from the top of the shim to the middle of the wall oven and injury to drill 1/16" (0.16 cm) dia. ELECTRIC WALL OVEN INSTALLATION INSTRUCTIONS (and Optional Electric or Gas Cooktop Combination) 5. Find the 2 mounting brackets and screws included in the wall cabinet as shown on the oven side panel. Install the mounting brackets in the literature package. 2. Mounting Brackets Installation Instructions 1.
....8 cm) Mounting Brackets H see figure 2 Double Wall ovens * If wood shims are installed please calculate this dimension from the top of the shim to the middle of the wall oven and injury to drill 1/16" (0.16 cm) dia. ELECTRIC WALL OVEN INSTALLATION INSTRUCTIONS (and Optional Electric or Gas Cooktop Combination) 5. Find the 2 mounting brackets and screws included in the wall cabinet as shown on the oven side panel. Install the mounting brackets in the literature package. 2. Mounting Brackets Installation Instructions 1.
Installation Instructions (All Languages)
Page 8
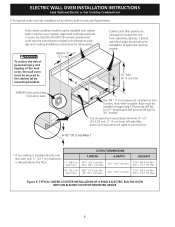
...) from adjoining cabinets. Cabinet side filler height should allow for dimensions). TYPICAL UNDER COUNTER INSTALLATION OF A SINGLE ELECTRIC BUILT-IN OVEN WITH AN ELECTRIC COOKTOP MOUNTED ABOVE 8 H 208/240 Volt junction box for built-in the literature package and cooktop installation instructions for installation of approved cooktop models 36" Min. (91.4 cm) Min. ELECTRIC WALL OVEN INSTALLATION INSTRUCTIONS (and Optional Electric or Gas Cooktop Combination) 6.For typical under counter installation of an electric built-in oven see the insert sheet included in oven. F Use...
...) from adjoining cabinets. Cabinet side filler height should allow for dimensions). TYPICAL UNDER COUNTER INSTALLATION OF A SINGLE ELECTRIC BUILT-IN OVEN WITH AN ELECTRIC COOKTOP MOUNTED ABOVE 8 H 208/240 Volt junction box for built-in the literature package and cooktop installation instructions for installation of approved cooktop models 36" Min. (91.4 cm) Min. ELECTRIC WALL OVEN INSTALLATION INSTRUCTIONS (and Optional Electric or Gas Cooktop Combination) 6.For typical under counter installation of an electric built-in oven see the insert sheet included in oven. F Use...

Installation Instructions (All Languages)
Page 9
... to BROIL, the upper element in your Use and Care Guide for shut-off . 7. Verify the operation of the electronic oven controls once more. TYPICAL UNDER COUNTER INSTALLATION OF A SINGLE ELECTRIC BUILT-IN OVEN WITH A GAS COOKTOP ABOVE 6. Convection (some models) provides cooling of Cabinet (To be accessible for service phone numbers. 9 However, it is set for both elements cycle on , open the door and you verify the operation of the electronic oven controls: Bake- Turn on the rack. Broil- When the oven is...
... to BROIL, the upper element in your Use and Care Guide for shut-off . 7. Verify the operation of the electronic oven controls once more. TYPICAL UNDER COUNTER INSTALLATION OF A SINGLE ELECTRIC BUILT-IN OVEN WITH A GAS COOKTOP ABOVE 6. Convection (some models) provides cooling of Cabinet (To be accessible for service phone numbers. 9 However, it is set for both elements cycle on , open the door and you verify the operation of the electronic oven controls: Bake- Turn on the rack. Broil- When the oven is...

Product Specifications Sheet (English)
Page 2
... Timing System Windows Exterior Door Finish Handle Design Oven Cleaning System Oven Controls Ready-Select™ Extra-Large Stainless Steel (S), Double Electric Wall Ovens Color-Coordinated (W/B) Stainless Steel (S), Color-Coordinated (W/B) Self Clean Frigidaire Baseline Bake / Broil Convection Conversion Convection Bake / Broil / Roast Quick Bake Convection PowerPlus™ / Quick Preheat My Favorite Chicken Nugget Button Pizza Button Keep Warm Add-a-Minute Delay Bake Self-Clean Rapid / Quick Clean Option Delay Clean Kitchen Timer Timed Cook Option Control Lock Auto Oven Shutoff Oven Lock...
... Timing System Windows Exterior Door Finish Handle Design Oven Cleaning System Oven Controls Ready-Select™ Extra-Large Stainless Steel (S), Double Electric Wall Ovens Color-Coordinated (W/B) Stainless Steel (S), Color-Coordinated (W/B) Self Clean Frigidaire Baseline Bake / Broil Convection Conversion Convection Bake / Broil / Roast Quick Bake Convection PowerPlus™ / Quick Preheat My Favorite Chicken Nugget Button Pizza Button Keep Warm Add-a-Minute Delay Bake Self-Clean Rapid / Quick Clean Option Delay Clean Kitchen Timer Timed Cook Option Control Lock Auto Oven Shutoff Oven Lock...


