Frigidaire AEQ6700FE - AffinityTM 5.8 Cu. Ft. Dryera Support and Manuals
Get Help and Manuals for this Frigidaire item

View All Support Options Below
Free Frigidaire AEQ6700FE manuals!
Problems with Frigidaire AEQ6700FE?
Ask a Question
Free Frigidaire AEQ6700FE manuals!
Problems with Frigidaire AEQ6700FE?
Ask a Question
Popular Frigidaire AEQ6700FE Manual Pages
Technical Data Sheet - Page 1
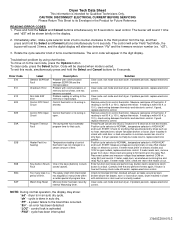
..., worn or loose drum seals, dryer installed in the digit display. If meter reads zero, wire between "Fld" and the firmware revision number (ex. Check for Future Reference
READING ERROR CODES 1. "r03").
3. Microcontroller has been reset by using chart below.
If reading is not 50 K (± 10%), replace thermistor. If problem persists, replace electronic control. Program Timeout Fault...
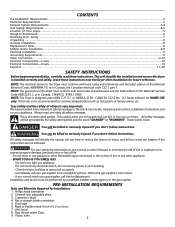
Use and Care Manual - Page 2
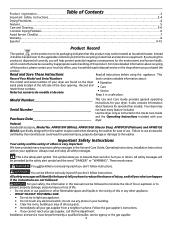
... Care Guide provides general operating
instructions for the recycling of this manual must be killed or seriously injured if you what can be performed by inappropriate waste handling of electrical and electronic equipment. You can happen if the instructions are found on your dryer are not followed. For your dryer. Instead
it in this product. Installation and service...
Use and Care Manual - Page 3
... when installing, operating and maintaining any type of Fire - A clothes dryer produces combustible lint. Note: The instructions appearing in U.S.A. SAVE THESE INSTRUCTIONS
3
Printed in this Use and Care Guide are not meant to follow these Important Safety Instructions: • To reduce the risk of fire, electrical shock, or injury to the rubber or plastic parts of the dryer...
Use and Care Manual - Page 4
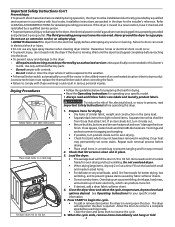
... 2 lint-free towels for operating your specific model information. 5. Fill out the load with local codes. If the dryer is moved to prevent grease stains caused by a qualified service person. • To prevent personal injury or damage to a complete stop when the door is clean and in washing. A service technician must replace the thermal limiter switch after correcting...
Use and Care Manual - Page 5
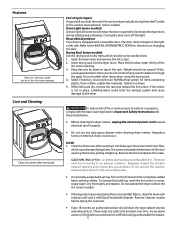
Reversible Dryer Door Your dryer is equipped with a damp cloth and a mild liquid household cleanser. The door can collect lint and dust over the sides or through the grids. Refer to the INSTALLATION INSTRUCTIONS for items containing plastic, foam rubber, rubber-like materials, feathers or down. 5. Insert drying rack into the dryer drum. Select Timed Dry.
Hazardous fumes...
Use and Care Manual - Page 6
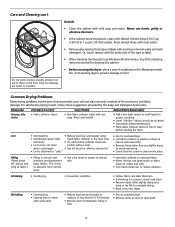
...Before moving the dryer, place a strip of load
before starting the dryer. Pilling (Fibers break off, ball up and cling to complete drying. • Block knits into shape. PROBLEM
Greasy, oily stains...cleaning chrome parts use Windex with a mixture of lint and scum, and fabric damage.
Outside
• Clean the cabinet with bar soap.
Hang or fold.
• Do not overload dryer. •...
Use and Care Manual - Page 7
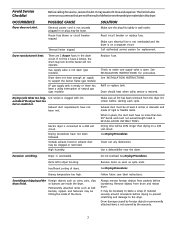
...calling for service, review this dryer.
Replace fuse.
Refill or replace tank.
Items left in INSTALLATION INSTRUCTIONS. Remove items as soon as belt buckles, zippers and fasteners may turn but won't heat.
It may be hitting the inside the dryer.
Call authorized service person for procedure.
Dryer should heat when utility service is open (gas models).
Exhaust...
Use and Care Manual - Page 8
...
This warranty does not cover the following:
1. Service calls to correct the installation of your appliance or to instruct you how to obtain and keep all costs for repairing or replacing any after hour, weekend, or holiday service calls, tolls, ferry trip charges, or mileage expense for service and parts under this warranty must be obtained by contacting...
Installation Instructions - Page 2
...) duct. 7. This is installed correctly and safely. Installation and service must conform with local codes and ordinances and the latest edition of the National Fuel Gas Code ANSI Z223.1, or in the Use & Care Guide, Operating Instructions, Installation Instructions and on your safety the information in this or any phone in the vicinity of this manual must conform with local...
Installation Instructions - Page 4
... outdoors, and seal all joints with duct tape. The dryer MUST NOT be used , the more the dryer is installed in the exhaust system. Plugging the system could affect the performance of the dryer. If the dryer is used . • Venting vertical through your parts distributor. Set the dryer timer and temperature to the right side of the...
Installation Instructions - Page 6
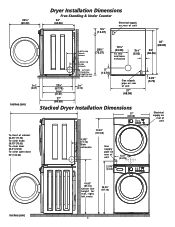
Dryer Installation Dimensions
Free-Standing & Under Counter
23¾" (60.33)
24" (60.96)
.../8" (4.13)
Gas supply pipe on rear of unit
27" (68.58)
35" (88.90) 34" (86.36)
2.25" (5.72)
inches (cm)
27" (68.58)
Stacked Dryer Installation Dimensions
27"
(68.58)
T2T2T2T5iooo9883on..."527cfcc(cr1"55hlllo(eee3""7en((aa4a477strr.r.1369odo(..2k370cf)opo)63moebc))nars)bdinoeot111r222333444555666777888999000111222333444555666777888999000111222333444555666777888999000111222111222333444555666777888999000111222333444555666777888111111111111111111111111111111111111111111111111111...
Installation Instructions - Page 7
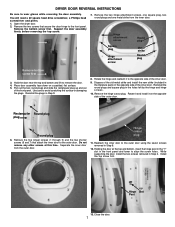
... Post
13.
Support the door assembly firmly before removing the top screw.
7. Remove the five longer screws (1 through 5) and the two shorter screws (6 and 7) that secure the door hinge to the outer door using the seven screws removed in the front panel and lower to the opposite side of the outer door. DRYER DOOR REVERSAL INSTRUCTIONS
Be sure...
Installation Instructions - Page 8
....
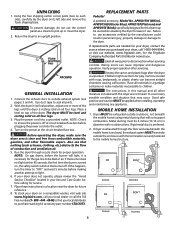
REPLACEMENT PARTS
Pedestal
A pedestal accessory, Model No. Metal ducting must be level and resting solid on all four legs.
If replacements parts are not meant to cover every possible condition and situation that nothing (such as a means to purchase stacking kit accessory part number STACKIT3. If your dryer does not operate, please review the "Avoid Service Checklist...
Installation Instructions - Page 9
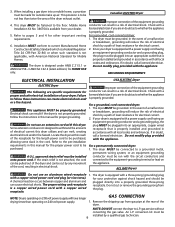
...or remove the grounding prong from the plug. The dryer is properly installed and grounded in this dryer.
NOTE: Dryers operating on 240 volt power supply.
1. gas service without converting the gas valve. Installation MUST conform to L.P. Check with a licensed electrician if you are specific requirements for other important venting requirements.
6. Check with American...
Installation Instructions - Page 10
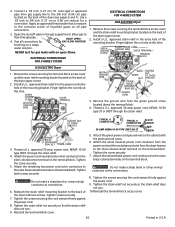
...block. Do not make a sharp bend or crimp wiring/ conductor at the connections.
8. Install a U.L.
Reinstall the terminal block cover.
5. Tighten the strain relief nut securely so the .../
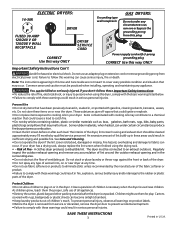
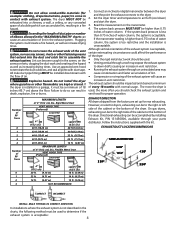
4. ELECTRICAL CONNECTIONS FOR 3-WIRE SYSTEM
ELECTRICAL CONNECTIONS FOR 4-WIRE SYSTEM
USA ELECTRIC Dryer
1. Tighten the screws securing the cord restraint firmly against the power cord.
8. ...
Frigidaire AEQ6700FE Reviews
We have not received any reviews for Frigidaire yet.