User Manual
Page 1
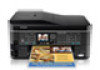
WorkForce® 630 Series Includes WorkForce 630/632/633/635 Quick Guide Basic Copying, Printing, Scanning, and Faxing Maintenance Network Setup Solving Problems
WorkForce® 630 Series Includes WorkForce 630/632/633/635 Quick Guide Basic Copying, Printing, Scanning, and Faxing Maintenance Network Setup Solving Problems
User Manual
Page 3
Maintaining Your Product 26 Checking the Print Head Nozzles 26 Cleaning the Print Head 27 Checking Ink Levels 27 Purchasing Epson Ink Cartridges 28 Replacing Ink Cartridges 29 Network Setup 31 Wireless Network Setup 31 Wired (Ethernet) Network Setup 45 Solving Problems 49 Checking for Software Updates 49 Problems and Solutions 49 Where to Get Help 54 Notices 55 Contents 3
Maintaining Your Product 26 Checking the Print Head Nozzles 26 Cleaning the Print Head 27 Checking Ink Levels 27 Purchasing Epson Ink Cartridges 28 Replacing Ink Cartridges 29 Network Setup 31 Wireless Network Setup 31 Wired (Ethernet) Network Setup 45 Solving Problems 49 Checking for Software Updates 49 Problems and Solutions 49 Where to Get Help 54 Notices 55 Contents 3
User Manual
Page 31
... in this section provide detailed instructions for setting up your product on a wireless or wired network. After the printer is already on your wireless network and you need to print. Network Setup 31 Make sure you have a USB cable, you'll need additional help you want to...your product, see page 45. The on-screen instructions during the installation process help : ■ For wireless network setup, see below. ■ For wired network (Ethernet®) setup, see "Network Problems" on page 49. ■ If this chapter only if you will be prompted to select wireless settings ...
... in this section provide detailed instructions for setting up your product on a wireless or wired network. After the printer is already on your wireless network and you need to print. Network Setup 31 Make sure you have a USB cable, you'll need additional help you want to...your product, see page 45. The on-screen instructions during the installation process help : ■ For wireless network setup, see below. ■ For wired network (Ethernet®) setup, see "Network Problems" on page 49. ■ If this chapter only if you will be prompted to select wireless settings ...

User Manual
Page 32
...the User Account Control screen, click Yes or Continue. Windows XP: When you see this screen, click Install. 32 Wireless Network Setup Mac OS X: Double-click the Epson icon. 4. When you see the Software Installation screen, continue with step 4. Windows 7 and Windows Vista®: If you ...have the following information ready and write it in the space provided below: ■ Network name (SSID Network password Note: If your product...
...the User Account Control screen, click Yes or Continue. Windows XP: When you see this screen, click Install. 32 Wireless Network Setup Mac OS X: Double-click the Epson icon. 4. When you see the Software Installation screen, continue with step 4. Windows 7 and Windows Vista®: If you ...have the following information ready and write it in the space provided below: ■ Network name (SSID Network password Note: If your product...

User Manual
Page 33
Mac OS X 10.6: At the next screen, click Next. When you see this screen, select Wireless connection and click Next. 6. When you see this screen, select Set up the product without using a temporary USB connection. Wireless Network Setup 33 5. Then skip to "Setting Up With the Product Buttons" on page 38 to set up printer for the first time, then click Next. 7.
Mac OS X 10.6: At the next screen, click Next. When you see this screen, select Wireless connection and click Next. 6. When you see this screen, select Set up the product without using a temporary USB connection. Wireless Network Setup 33 5. Then skip to "Setting Up With the Product Buttons" on page 38 to set up printer for the first time, then click Next. 7.
User Manual
Page 34
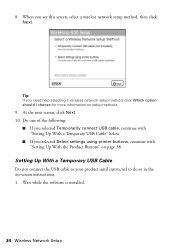
... with "Setting Up With a Temporary USB Cable" below. ■ If you need help selecting a wireless network setup method, click Which option should I choose for more information on setup methods. 9. Wait while the software is installed. 34 Wireless Network Setup Tip: If you selected Select settings using printer buttons, continue with "Setting Up With the Product... not connect the USB cable to your product until instructed to do so in the on page 38. When you see this screen, select a wireless network setup method, then click Next. 8.
... with "Setting Up With a Temporary USB Cable" below. ■ If you need help selecting a wireless network setup method, click Which option should I choose for more information on setup methods. 9. Wait while the software is installed. 34 Wireless Network Setup Tip: If you selected Select settings using printer buttons, continue with "Setting Up With the Product... not connect the USB cable to your product until instructed to do so in the on page 38. When you see this screen, select a wireless network setup method, then click Next. 8.

User Manual
Page 35
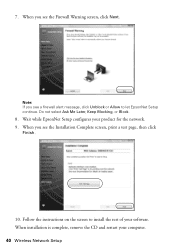
Wireless Network Setup 35 2. When you see this screen, connect the product to your computer with a USB cable. 3. Follow the on-screen instructions to let EpsonNet Setup continue. When you see a firewall alert message, click Unblock or Allow to continue installing the software. 4. Note: If you see the Firewall Warning screen, click Next. Do not select Ask Me Later, Keep Blocking, or Block.
Wireless Network Setup 35 2. When you see this screen, connect the product to your computer with a USB cable. 3. Follow the on-screen instructions to let EpsonNet Setup continue. When you see a firewall alert message, click Unblock or Allow to continue installing the software. 4. Note: If you see the Firewall Warning screen, click Next. Do not select Ask Me Later, Keep Blocking, or Block.

User Manual
Page 36
5. If your network name contains uppercase (ABC) or lowercase (abc) letters, enter them correctly. 36 Wireless Network Setup Note: If your security key or passphrase, then click Next. When you see a screen like the following , select your security key contains uppercase (ABC) or lowercase (abc) letters, enter them correctly. 6. Note: If your network name (SSID) from the list, then click Next. If you see a screen like the following , enter your network name isn't in the list, select Enter Manually.
5. If your network name contains uppercase (ABC) or lowercase (abc) letters, enter them correctly. 36 Wireless Network Setup Note: If your security key or passphrase, then click Next. When you see a screen like the following , select your security key contains uppercase (ABC) or lowercase (abc) letters, enter them correctly. 6. Note: If your network name (SSID) from the list, then click Next. If you see a screen like the following , enter your network name isn't in the list, select Enter Manually.

User Manual
Page 37
Follow the on-screen instructions to install the rest of your product for the network. 8. Wireless Network Setup 37 To set up additional computers to print to remove the USB cable from the product and your computer. Wait while EpsonNet Setup configures your software. When installation is complete, remove the CD and restart your computer. 9. 7. When you see "Setting Up Additional Computers" on the screen to the product, see the Installation Complete screen, print a test page, then click Finish. 10. Follow the instructions on page 42.
Follow the on-screen instructions to install the rest of your product for the network. 8. Wireless Network Setup 37 To set up additional computers to print to remove the USB cable from the product and your computer. Wait while EpsonNet Setup configures your software. When installation is complete, remove the CD and restart your computer. 9. 7. When you see "Setting Up Additional Computers" on the screen to the product, see the Installation Complete screen, print a test page, then click Finish. 10. Follow the instructions on page 42.

User Manual
Page 38
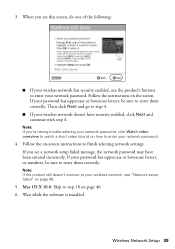
..., then repeat step 2. ■ If you see this screen, use the product's buttons to start the product's wireless Setup Wizard. 2. Continue with the steps in the list, your wireless network, follow these steps to set it up using Mac OS X 10.6, or you don't have a USB cable to select ...d to set up the product on and working correctly. When you're finished, click Next. Follow the instructions on page 41. 38 Wireless Network Setup If your network name isn't listed, try the following: ■ Make sure that your wireless router or access point is turned on your router or access ...
..., then repeat step 2. ■ If you see this screen, use the product's buttons to start the product's wireless Setup Wizard. 2. Continue with the steps in the list, your wireless network, follow these steps to set it up using Mac OS X 10.6, or you don't have a USB cable to select ...d to set up the product on and working correctly. When you're finished, click Next. Follow the instructions on page 41. 38 Wireless Network Setup If your network name isn't listed, try the following: ■ Make sure that your wireless router or access point is turned on your router or access ...
User Manual
Page 39
...screen. Follow the instructions on page 40. 6. If your wireless network, see a network setup failed message, the network password may have security enabled, click Next and continue with step 4. Mac OS X 10.6: Skip to enter your network password. 4. Wait while the software is installed. Follow the ...the product still doesn't connect to your password has uppercase or lowercase letters, or numbers, be sure to enter them correctly. Wireless Network Setup 39 3. Then click Next and go to step 4. ■ If your password has uppercase or lowercase letters, be sure to ...
...screen. Follow the instructions on page 40. 6. If your wireless network, see a network setup failed message, the network password may have security enabled, click Next and continue with step 4. Mac OS X 10.6: Skip to enter your network password. 4. Wait while the software is installed. Follow the ...the product still doesn't connect to your password has uppercase or lowercase letters, or numbers, be sure to enter them correctly. Wireless Network Setup 39 3. Then click Next and go to step 4. ■ If your password has uppercase or lowercase letters, be sure to ...
User Manual
Page 40
When you see the Firewall Warning screen, click Next. Follow the instructions on the screen to let EpsonNet Setup continue. Wait while EpsonNet Setup configures your computer. 40 Wireless Network Setup When installation is complete, remove the CD and restart your product for the network. 9. Do not select Ask Me Later, Keep Blocking, or Block. 8. Note: If you see the Installation Complete screen, print a test page, then click Finish. 10. 7. When you see a firewall alert message, click Unblock or Allow to install the rest of your software.
When you see the Firewall Warning screen, click Next. Follow the instructions on the screen to let EpsonNet Setup continue. Wait while EpsonNet Setup configures your computer. 40 Wireless Network Setup When installation is complete, remove the CD and restart your product for the network. 9. Do not select Ask Me Later, Keep Blocking, or Block. 8. Note: If you see the Installation Complete screen, print a test page, then click Finish. 10. 7. When you see a firewall alert message, click Unblock or Allow to install the rest of your software.

User Manual
Page 41
...case-sensitive. Wireless Network Setup 41 Use the arrow buttons on the control panel to enter your network password. Be sure to delete characters ( ). Continue with step 3 on the product control panel, press u or d to select Other SSIDs, then press OK. 2. Entering Your SSID Manually If your network name, highlight ...and press OK. 4. Press u, d, l, or r to highlight a letter or function button on page 42. When you're done entering your network doesn't broadcast its name (SSID), follow these steps to enter it . To set up additional computers to print to the product, see "Setting Up...
...case-sensitive. Wireless Network Setup 41 Use the arrow buttons on the control panel to enter your network password. Be sure to delete characters ( ). Continue with step 3 on the product control panel, press u or d to select Other SSIDs, then press OK. 2. Entering Your SSID Manually If your network name, highlight ...and press OK. 4. Press u, d, l, or r to highlight a letter or function button on page 42. When you're done entering your network doesn't broadcast its name (SSID), follow these steps to enter it . To set up additional computers to print to the product, see "Setting Up...

User Manual
Page 42
When you see the Software Installation screen, continue with step 4. Mac OS X: Double-click the Epson icon. 4. When you see the User Account Control screen, click Yes or Continue. Windows XP: When you see this screen, click Install. 5. When you see this screen, select Wireless connection and click Next. 42 Wireless Network Setup Windows 7 and Windows Vista: If you see the AutoPlay window, click Run Setup.exe. Make sure your product is turned on. 2. Insert the product software CD. 3. Setting Up Additional Computers 1.
When you see the Software Installation screen, continue with step 4. Mac OS X: Double-click the Epson icon. 4. When you see the User Account Control screen, click Yes or Continue. Windows XP: When you see this screen, click Install. 5. When you see this screen, select Wireless connection and click Next. 42 Wireless Network Setup Windows 7 and Windows Vista: If you see the AutoPlay window, click Run Setup.exe. Make sure your product is turned on. 2. Insert the product software CD. 3. Setting Up Additional Computers 1.
User Manual
Page 43
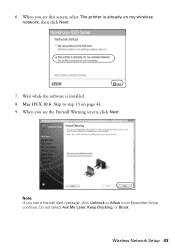
When you see the Firewall Warning screen, click Next. Wireless Network Setup 43 When you see a firewall alert message, click Unblock or Allow to step 13 on my wireless network, then click Next. 7. Mac OS X 10.6: Skip to let EpsonNet Setup continue. Do not select Ask Me Later, Keep Blocking, or Block. 6. Note: If you see this screen, select The printer is installed. 8. Wait while the software is already on page 44. 9.
When you see the Firewall Warning screen, click Next. Wireless Network Setup 43 When you see a firewall alert message, click Unblock or Allow to step 13 on my wireless network, then click Next. 7. Mac OS X 10.6: Skip to let EpsonNet Setup continue. Do not select Ask Me Later, Keep Blocking, or Block. 6. Note: If you see this screen, select The printer is installed. 8. Wait while the software is already on page 44. 9.

User Manual
Page 44
When you would like this one, select the product you see a screen like to install the rest of your software. When installation is complete, remove the CD and restart your product for the network. 12. 10. Follow the instructions on the screen to set up, then click Next. 11. Wait while EpsonNet Setup configures your computer. 44 Wireless Network Setup If you see the Installation Complete screen, print a test page, then click Finish. 13.
When you would like this one, select the product you see a screen like to install the rest of your software. When installation is complete, remove the CD and restart your product for the network. 12. 10. Follow the instructions on the screen to set up, then click Next. 11. Wait while EpsonNet Setup configures your computer. 44 Wireless Network Setup If you see the Installation Complete screen, print a test page, then click Finish. 13.
User Manual
Page 45
... 49. 1. Press 1 to confirm, and press y Back to select Network Settings, then Wireless LAN Setup, then Disable Wireless LAN. When you see the AutoPlay window, click Run Setup.exe. When you can connect to a wired network. Wired (Ethernet) Network Setup 45 Mac OS X: Double-click the Epson icon. 4. Follow these steps to set up your product for...
... 49. 1. Press 1 to confirm, and press y Back to select Network Settings, then Wireless LAN Setup, then Disable Wireless LAN. When you see the AutoPlay window, click Run Setup.exe. When you can connect to a wired network. Wired (Ethernet) Network Setup 45 Mac OS X: Double-click the Epson icon. 4. Follow these steps to set up your product for...

User Manual
Page 46
5. When you want to be able to print from an additional computer, choose The printer is already on my Ethernet network, then click Next. 46 Wired (Ethernet) Network Setup When you see this screen, do one of the following: ■ For a first-time installation, choose Set up printer for the first time, then click Next. ■ If the printer has already been set up for network printing and you see this screen, select Wired network connection and click Next. 6.
5. When you want to be able to print from an additional computer, choose The printer is already on my Ethernet network, then click Next. 46 Wired (Ethernet) Network Setup When you see this screen, do one of the following: ■ For a first-time installation, choose Set up printer for the first time, then click Next. ■ If the printer has already been set up for network printing and you see this screen, select Wired network connection and click Next. 6.

User Manual
Page 47
Mac OS X 10.6: Skip to let EpsonNet Setup continue. Note: If you see a firewall alert message, click Unblock or Allow to step 15 on page 48. 9. 7. For first-time installation only: Connect the product to start network installation. 10. When you see the Firewall Warning screen, click Next. Wait while the software is installed, then click Next to your router, access point, or hub with an Ethernet network cable, then click Next. 8. Wired (Ethernet) Network Setup 47 Do not select Ask Me Later, Keep Blocking, or Block.
Mac OS X 10.6: Skip to let EpsonNet Setup continue. Note: If you see a firewall alert message, click Unblock or Allow to step 15 on page 48. 9. 7. For first-time installation only: Connect the product to start network installation. 10. When you see the Firewall Warning screen, click Next. Wait while the software is installed, then click Next to your router, access point, or hub with an Ethernet network cable, then click Next. 8. Wired (Ethernet) Network Setup 47 Do not select Ask Me Later, Keep Blocking, or Block.

User Manual
Page 48
When installation is complete, remove the CD and restart your software. If you would like this one, select the product you see a screen like to print a test page. 14. Follow the instructions on the screen to install the rest of your computer. 48 Wired (Ethernet) Network Setup Click Finish. 15. 11. If you see an Installation Complete screen that includes a Print Test Page button, click it to set up, then click Next. 12. Wait while EpsonNet Setup configures your product for the network. 13.
When installation is complete, remove the CD and restart your software. If you would like this one, select the product you see a screen like to print a test page. 14. Follow the instructions on the screen to install the rest of your computer. 48 Wired (Ethernet) Network Setup Click Finish. 15. 11. If you see an Installation Complete screen that includes a Print Test Page button, click it to set up, then click Next. 12. Wait while EpsonNet Setup configures your product for the network. 13.


