
Network Installation Guide
Page 29
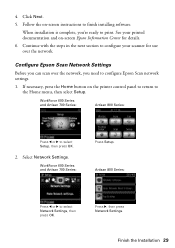
... Artisan 700 Series: Press Setup. Configure Epson Scan Network Settings Before you can scan over the network. Select Network Settings. See your scanner for details. 6. WorkForce 600 Series and Artisan 700 Series: Artisan 800 Series: Press l or r to select Network Settings, then press OK. Press r,...Artisan 800 Series: Press l or r to select Setup, then press OK. 2. Follow the on the printer control panel to return to configure your printed documentation and on-screen Epson Information Center for use over the network, you 're ready to print. Continue with the steps in the...
... Artisan 700 Series: Press Setup. Configure Epson Scan Network Settings Before you can scan over the network. Select Network Settings. See your scanner for details. 6. WorkForce 600 Series and Artisan 700 Series: Artisan 800 Series: Press l or r to select Network Settings, then press OK. Press r,...Artisan 800 Series: Press l or r to select Setup, then press OK. 2. Follow the on the printer control panel to return to configure your printed documentation and on-screen Epson Information Center for use over the network, you 're ready to print. Continue with the steps in the...

Network Installation Guide
Page 31
Select the IP address that you wrote down in the Scanner Name text box. Note: To rename the scanner, type a name for it in step 4. 8. Click Add. Finish the Installation 31 You see this screen: 10. Select Network as the Connection setting. 9.
Select the IP address that you wrote down in the Scanner Name text box. Note: To rename the scanner, type a name for it in step 4. 8. Click Add. Finish the Installation 31 You see this screen: 10. Select Network as the Connection setting. 9.
Network Installation Guide
Page 35
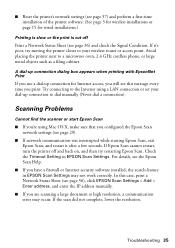
...scanning a large document at high resolution, a communication error may not work correctly. Avoid placing the printer next to your wireless router or access point. Scanning Problems Cannot find the scanner or start Epson Scan ■ If you're using a LAN connection or set your dial-up connection for wired... installations.) Printing is slow or the print is cut off and back on, and then try moving the printer closer to a microwave oven, ...
...scanning a large document at high resolution, a communication error may not work correctly. Avoid placing the printer next to your wireless router or access point. Scanning Problems Cannot find the scanner or start Epson Scan ■ If you're using a LAN connection or set your dial-up connection for wired... installations.) Printing is slow or the print is cut off and back on, and then try moving the printer closer to a microwave oven, ...
Using the Control Panel for Wireless Network Installation
Page 18
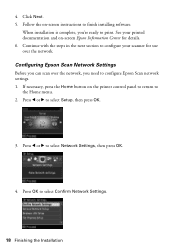
...the network. If necessary, press the Home button on the printer control panel to return to select Confirm Network Settings. 18 Finishing the Installation Press OK to the Home menu. 2. Follow the on -screen Epson Information Center for use over the network, you 're ...ready to configure Epson Scan network settings. 1. Press l or r to finish installing software. Press l or r to configure your printed documentation and on -screen instructions to select Setup, then press OK. 3. When installation is complete, you need to print. See your scanner for details. 6. Continue...
...the network. If necessary, press the Home button on the printer control panel to return to select Confirm Network Settings. 18 Finishing the Installation Press OK to the Home menu. 2. Follow the on -screen Epson Information Center for use over the network, you 're ...ready to configure Epson Scan network settings. 1. Press l or r to finish installing software. Press l or r to configure your printed documentation and on -screen instructions to select Setup, then press OK. 3. When installation is complete, you need to print. See your scanner for details. 6. Continue...

Using the Control Panel for Wireless Network Installation
Page 20
Select Network as the Connection setting. 10. 9. You see this screen: 11. Select the IP address that you wrote down in the Scanner Name text box. 20 Finishing the Installation Note: To rename the scanner, type a name for it in step 5. Click Add.
Select Network as the Connection setting. 10. 9. You see this screen: 11. Select the IP address that you wrote down in the Scanner Name text box. 20 Finishing the Installation Note: To rename the scanner, type a name for it in step 5. Click Add.
Using the Control Panel for Wireless Network Installation
Page 24
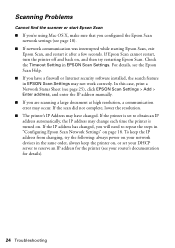
...after a few seconds. Check the Timeout Setting in the same order, always keep the IP address from changing, try restarting Epson Scan. Scanning Problems Cannot find the scanner or start Epson Scan ■ If you're using Mac OS X, make sure that you are scanning a large document at high resolution,... a communication error may occur. If the scan did not complete, lower the resolution. ■ The printer's IP Address may change each time the printer is ...
...after a few seconds. Check the Timeout Setting in the same order, always keep the IP address from changing, try restarting Epson Scan. Scanning Problems Cannot find the scanner or start Epson Scan ■ If you're using Mac OS X, make sure that you are scanning a large document at high resolution,... a communication error may occur. If the scan did not complete, lower the resolution. ■ The printer's IP Address may change each time the printer is ...
Product Brochure
Page 2
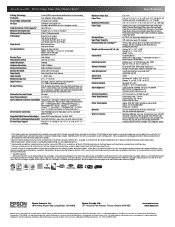
...Size 3 droplet sizes, as small as 3 sec per page Memory: Up to 180 pages Speed dials: 60 (max.) Scanner Type Color flatbed Photoelectric Device Color CIS line sensor Optical Resolution 2400 dpi Hardware Resolution 2400 x 2400 dpi Maximum Resolution 9600 x ...For maximum print life, display all -in-one damage. Epson disclaims any and all purchasers; WorkForce 600 Print | Copy | Scan | Fax | Photo | Wi-Fi® Printing Technology 4-color (CMYK) drop-on . See www.epson.com/ printspeed for priming the printer. Actual print stability will vary based on images...
...Size 3 droplet sizes, as small as 3 sec per page Memory: Up to 180 pages Speed dials: 60 (max.) Scanner Type Color flatbed Photoelectric Device Color CIS line sensor Optical Resolution 2400 dpi Hardware Resolution 2400 x 2400 dpi Maximum Resolution 9600 x ...For maximum print life, display all -in-one damage. Epson disclaims any and all purchasers; WorkForce 600 Print | Copy | Scan | Fax | Photo | Wi-Fi® Printing Technology 4-color (CMYK) drop-on . See www.epson.com/ printspeed for priming the printer. Actual print stability will vary based on images...
Quick Guide
Page 2
Contents Adjusting the Control Panel 4 Loading Paper 5 Using Special Papers 6 Placing Originals for Copying, Scanning, or Faxing 8 Using the Scanner Glass 8 Using the Automatic Document Feeder 9 Copying a Document or Photo 10 Copying a Document 10 Restoring, Cropping, or Copying Photos 11 Faxing a Document or Photo 14 ...
Contents Adjusting the Control Panel 4 Loading Paper 5 Using Special Papers 6 Placing Originals for Copying, Scanning, or Faxing 8 Using the Scanner Glass 8 Using the Automatic Document Feeder 9 Copying a Document or Photo 10 Copying a Document 10 Restoring, Cropping, or Copying Photos 11 Faxing a Document or Photo 14 ...

Quick Guide
Page 8
... Copying, Scanning, or Faxing Before you copy, scan, or fax, place your original face-down on the scanner glass to two at least 1/4 inch (5 mm) apart. 1/4 inch (5 mm) 2. If you can place one or two photos or a document up to make color or black and white copies. 1. Open the document ...cover and place your documents or photos on the scanner glass. or 4 × 6-inch photos, you 're scanning 3 × 5- Place them...
... Copying, Scanning, or Faxing Before you copy, scan, or fax, place your original face-down on the scanner glass to two at least 1/4 inch (5 mm) apart. 1/4 inch (5 mm) 2. If you can place one or two photos or a document up to make color or black and white copies. 1. Open the document ...cover and place your documents or photos on the scanner glass. or 4 × 6-inch photos, you 're scanning 3 × 5- Place them...
Quick Guide
Page 10
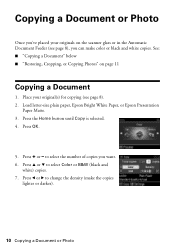
... 11 Copying a Document 1. See: ■ "Copying a Document" below ■ "Restoring, Cropping, or Copying Photos" on the scanner glass or in the Automatic Document Feeder (see page 8). 2. Load letter-size plain paper, Epson Bright White Paper, or Epson Presentation Paper Matte. 3. Press the Home button until Copy is selected. 4. Press OK. 5. Press + or - to...
... 11 Copying a Document 1. See: ■ "Copying a Document" below ■ "Restoring, Cropping, or Copying Photos" on the scanner glass or in the Automatic Document Feeder (see page 8). 2. Load letter-size plain paper, Epson Bright White Paper, or Epson Presentation Paper Matte. 3. Press the Home button until Copy is selected. 4. Press OK. 5. Press + or - to...
Quick Guide
Page 11
...Then press OK. To cancel copying, press y Stop/Clear Settings. Restoring, Cropping, or Copying Photos 11 Note: If you finish selecting your paper), or one of the specific sizes listed. Place them at 100% or Legal -> Letter. ■ Press d to scroll down to fit your settings, press OK...9632; For the Document Type setting, choose Text for instant photo reprints. You can copy one or two photos on the scanner glass. Load 4 × 6-inch, 5 × 7-inch, or letter-size Epson photo paper in faded photos, print with or without borders, convert photos to black and white...
...Then press OK. To cancel copying, press y Stop/Clear Settings. Restoring, Cropping, or Copying Photos 11 Note: If you finish selecting your paper), or one of the specific sizes listed. Place them at 100% or Legal -> Letter. ■ Press d to scroll down to fit your settings, press OK...9632; For the Document Type setting, choose Text for instant photo reprints. You can copy one or two photos on the scanner glass. Load 4 × 6-inch, 5 × 7-inch, or letter-size Epson photo paper in faded photos, print with or without borders, convert photos to black and white...

Quick Guide
Page 12
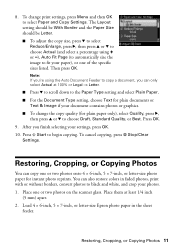
... you copy, press OK to move the image area, use the arrow buttons. ■ To check the zoomed image, press OK. To turn on the scanner glass, press l or r to select On. (If your photos. 10. to select the number (up to select Off.) Then press OK. 7. Press Menu, then press... l or r until Copy is selected. 5. press d to 99). To print more than 1 copy, press + or - If you placed more than one photo on Color Restoration; If you are copying 2 photos, do not turn on Color Restoration to restore colors in faded photos as well. 11. When...
... you copy, press OK to move the image area, use the arrow buttons. ■ To check the zoomed image, press OK. To turn on the scanner glass, press l or r to select On. (If your photos. 10. to select the number (up to select Off.) Then press OK. 7. Press Menu, then press... l or r until Copy is selected. 5. press d to 99). To print more than 1 copy, press + or - If you placed more than one photo on Color Restoration; If you are copying 2 photos, do not turn on Color Restoration to restore colors in faded photos as well. 11. When...
Quick Guide
Page 21
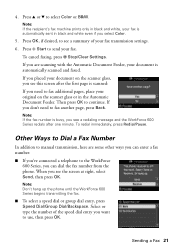
.... Press x Start to manual transmission, here are scanning with the Automatic Document Feeder, your document is scanned: If you see this screen after one minute. Then press OK to select Color or B&W. Press u or d to continue. Other Ways to Dial a Fax Number In addition to send... Send, then press OK. If you placed your original on the scanner glass, you can dial the fax number from the phone. 4. Press OK, if desired, to the WorkForce 600 Series, you see a redialing message and the WorkForce 600 Series redials after the first page is automatically scanned and faxed.
.... Press x Start to manual transmission, here are scanning with the Automatic Document Feeder, your document is scanned: If you see this screen after one minute. Then press OK to select Color or B&W. Press u or d to continue. Other Ways to Dial a Fax Number In addition to send... Send, then press OK. If you placed your original on the scanner glass, you can dial the fax number from the phone. 4. Press OK, if desired, to the WorkForce 600 Series, you see a redialing message and the WorkForce 600 Series redials after the first page is automatically scanned and faxed.

Quick Guide
Page 33
...face-down on your WorkForce 600 Series. Close the cover gently so you can use your WorkForce 600 Series to start Epson Scan: ■ Windows: Double-click the EPSON Scan icon on your desktop. ■ Macintosh: Double-click EPSON Scan in the back left corner, as digital files on the scanner glass, in the ...documents and photos and save your computer and save them as shown on -screen Epson Information Center. Or you don't move the original. 3. Basic Scanning You can scan from your image to a file. 1. Do one of tools. Then open the File menu, choose Import or Acquire, and select...
...face-down on your WorkForce 600 Series. Close the cover gently so you can use your WorkForce 600 Series to start Epson Scan: ■ Windows: Double-click the EPSON Scan icon on your desktop. ■ Macintosh: Double-click EPSON Scan in the back left corner, as digital files on the scanner glass, in the ...documents and photos and save your computer and save them as shown on -screen Epson Information Center. Or you don't move the original. 3. Basic Scanning You can scan from your image to a file. 1. Do one of tools. Then open the File menu, choose Import or Acquire, and select...

Quick Guide
Page 35
Place the page back on the scanner. 7. Scanning Multiple Pages You can scan up to start Epson Scan: ■ Windows: Double-click the EPSON Scan icon on the web: 96 to 150 dpi ■ Print or convert to editable text (OCR): 300 dpi ■ Fax: 200 dpi 8. Select the ... Automatic Document Feeder, you can scan a document and save it in the feeder. 9. Adjust the image quality, if necessary. 10. Scanning Multiple Pages 35 Do one of the other pages and reload them in Windows Explorer or Macintosh Finder. Select the Size of the originals and their Orientation on top of...
Place the page back on the scanner. 7. Scanning Multiple Pages You can scan up to start Epson Scan: ■ Windows: Double-click the EPSON Scan icon on the web: 96 to 150 dpi ■ Print or convert to editable text (OCR): 300 dpi ■ Fax: 200 dpi 8. Select the ... Automatic Document Feeder, you can scan a document and save it in the feeder. 9. Adjust the image quality, if necessary. 10. Scanning Multiple Pages 35 Do one of the other pages and reload them in Windows Explorer or Macintosh Finder. Select the Size of the originals and their Orientation on top of...
Quick Guide
Page 40
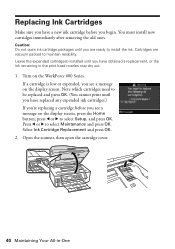
...the old ones. Turn on the display screen. Caution: Do not open the cartridge cover. 40 Maintaining Your All-in the print head nozzles may dry out. 1. Select Ink Cartridge Replacement and press OK. 2. Open the scanner, then...select Setup, and press OK. Replacing Ink Cartridges Make sure you have obtained a replacement, or the ink remaining in -One Cartridges are ready to maintain reliability. Note which cartridges need to be replaced and press OK. (You cannot print until....) If you're replacing a cartridge before you see a message on the WorkForce 600 Series.
...the old ones. Turn on the display screen. Caution: Do not open the cartridge cover. 40 Maintaining Your All-in the print head nozzles may dry out. 1. Select Ink Cartridge Replacement and press OK. 2. Open the scanner, then...select Setup, and press OK. Replacing Ink Cartridges Make sure you have obtained a replacement, or the ink remaining in -One Cartridges are ready to maintain reliability. Note which cartridges need to be replaced and press OK. (You cannot print until....) If you're replacing a cartridge before you see a message on the WorkForce 600 Series.
Quick Guide
Page 41
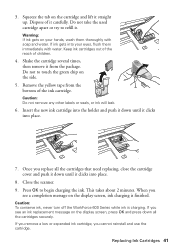
... water. Press OK to begin charging the ink. Caution: To conserve ink, never turn off the WorkForce 600 Series while ink is finished. 3. Replacing Ink Cartridges 41 Once you see a completion message on the side. 5. Close the scanner. 9. Caution: Do not remove any other labels or seals, or ink will leak. 6. Keep ink...
... water. Press OK to begin charging the ink. Caution: To conserve ink, never turn off the WorkForce 600 Series while ink is finished. 3. Replacing Ink Cartridges 41 Once you see a completion message on the side. 5. Close the scanner. 9. Caution: Do not remove any other labels or seals, or ink will leak. 6. Keep ink...
Quick Guide
Page 43
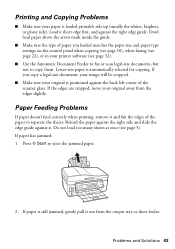
...). If the edges are cropped, move your original is still jammed, gently pull it short edge first, and against the back left corner of the scanner glass. If paper has jammed: 1. Press x Start to eject the jammed paper. 2. Paper Feeding Problems If paper doesn't feed correctly when printing, remove it ... be cropped. ■ Make sure your original away from the output tray or sheet feeder. Printing and Copying Problems ■ Make sure your printer software (see page 32). ■ Use the Automatic Document Feeder to fax or scan legal-size documents, but not to copy them.
...). If the edges are cropped, move your original is still jammed, gently pull it short edge first, and against the back left corner of the scanner glass. If paper has jammed: 1. Press x Start to eject the jammed paper. 2. Paper Feeding Problems If paper doesn't feed correctly when printing, remove it ... be cropped. ■ Make sure your original away from the output tray or sheet feeder. Printing and Copying Problems ■ Make sure your printer software (see page 32). ■ Use the Automatic Document Feeder to fax or scan legal-size documents, but not to copy them.
Quick Guide
Page 44
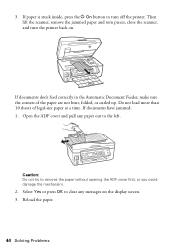
3. Select Yes or press OK to clear any paper out to the left. Caution: Do not try to turn the printer back on the display screen. 3. Reload the paper. 44 Solving Problems Do not load more than 10 sheets of the paper are not bent, folded, ... of legal-size paper at a time. Open the ADF cover and pull any messages on . Then lift the scanner, remove the jammed paper and torn pieces, close the scanner, and turn off the printer. If paper is stuck inside, press the P On button to remove the paper without opening the ADF cover first...
3. Select Yes or press OK to clear any paper out to the left. Caution: Do not try to turn the printer back on the display screen. 3. Reload the paper. 44 Solving Problems Do not load more than 10 sheets of the paper are not bent, folded, ... of legal-size paper at a time. Open the ADF cover and pull any messages on . Then lift the scanner, remove the jammed paper and torn pieces, close the scanner, and turn off the printer. If paper is stuck inside, press the P On button to remove the paper without opening the ADF cover first...
Quick Guide
Page 45
...printouts or they are disconnected when you hang up, make sure a phone or answering machine is connected to the EXT. See the on the WorkForce 600 Series is connected to a telephone wall jack. Problems and Solutions 45 Turn off the V.34 and ECM (Error Correction Mode) settings. ■ ... 40). ■ If you're copying, place the document flat against the scanner glass. ■ Clean the scanner glass with a soft, dry, lint-free cloth (paper towels are not recommended), or use Epson papers (see page 6) and genuine Epson ink cartridges (see page 40). ■ If you notice light or dark...
...printouts or they are disconnected when you hang up, make sure a phone or answering machine is connected to the EXT. See the on the WorkForce 600 Series is connected to a telephone wall jack. Problems and Solutions 45 Turn off the V.34 and ECM (Error Correction Mode) settings. ■ ... 40). ■ If you're copying, place the document flat against the scanner glass. ■ Clean the scanner glass with a soft, dry, lint-free cloth (paper towels are not recommended), or use Epson papers (see page 6) and genuine Epson ink cartridges (see page 40). ■ If you notice light or dark...


