

User Manual
Page 5
Chapter 2 Using Other Printer Functions Loading Paper Manually 2-2 Paper sizes 2-2 Printing on single sheets 2-2 Printing on envelopes 2-4 Tips for Maintaining the Correct Printing Position 2-6 ...16 Chapter 3 Maintenance and Troubleshooting Replacing the Ink Cartridge Cleaning the Print Head Cleaning the Printer 3-4 Transporting the Printer 3-5 Troubleshooting 3-5 Error indicators 3-6 Power supply 3-7 Printing 3-7 Paper handling 3-12 Appendix Technical Specifications A-2 Printer specifications A-2 Command Summary A-12 Sending printer commands A-12 Using the command summary A-12...
Chapter 2 Using Other Printer Functions Loading Paper Manually 2-2 Paper sizes 2-2 Printing on single sheets 2-2 Printing on envelopes 2-4 Tips for Maintaining the Correct Printing Position 2-6 ...16 Chapter 3 Maintenance and Troubleshooting Replacing the Ink Cartridge Cleaning the Print Head Cleaning the Printer 3-4 Transporting the Printer 3-5 Troubleshooting 3-5 Error indicators 3-6 Power supply 3-7 Printing 3-7 Paper handling 3-12 Appendix Technical Specifications A-2 Printer specifications A-2 Command Summary A-12 Sending printer commands A-12 Using the command summary A-12...

User Manual
Page 6
control panel paper supper \ Paper feeder cover paper separator manual feed slot access panel AC inlet 0 0 Courier 0 0 Roman T (PS) 00 Sans Serii H (PS) 08 Roman 80 Sans Serif 8 8 Prestige
control panel paper supper \ Paper feeder cover paper separator manual feed slot access panel AC inlet 0 0 Courier 0 0 Roman T (PS) 00 Sans Serii H (PS) 08 Roman 80 Sans Serif 8 8 Prestige

User Manual
Page 7
... tables. 0 A glossary of printer terms and an index are at the end. It explains how to read and follow these instructions. Introduction 1 If the printer does not operate properly or you will need to use special printer functions. How to Use This Manual Here's what you'll find... in this chapter. Be sure to load paper manually and change printer settings from the control panel. 0 Chapter ...
... tables. 0 A glossary of printer terms and an index are at the end. It explains how to read and follow these instructions. Introduction 1 If the printer does not operate properly or you will need to use special printer functions. How to Use This Manual Here's what you'll find... in this chapter. Be sure to load paper manually and change printer settings from the control panel. 0 Chapter ...
User Manual
Page 8
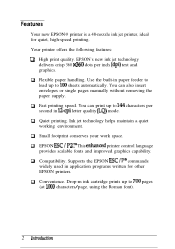
... quality. You can also insert envelopes or single pages manually without removing the paper supply. 0 Fast printing speed. Drop-m ink cartridge prints up to 100 sheets automatically. Ink jet technology helps maintain a quiet working environment. 0 Small footprint conserves your work space. 0 EPSON ESC / P 21' This enhanoqd printer control language provides scalable fonts and improved graphics capability...
... quality. You can also insert envelopes or single pages manually without removing the paper supply. 0 Fast printing speed. Drop-m ink cartridge prints up to 100 sheets automatically. Ink jet technology helps maintain a quiet working environment. 0 Small footprint conserves your work space. 0 EPSON ESC / P 21' This enhanoqd printer control language provides scalable fonts and improved graphics capability...
User Manual
Page 9
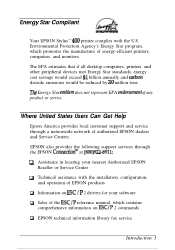
...: cl Assistance in locating your software 0 Sales of the ESC/P reference manual, which promotes the manufacture of energy-efficient printers, computers, and monitors. Energy Star Compliant Your EPSON Stylus'" 400 printer complies with the installation, configuration, and operation of EPSON products ci Information on ESC/P 2 commands D EPSON technical information library fax service Introduction 3 The EPA estimates that if...
...: cl Assistance in locating your software 0 Sales of the ESC/P reference manual, which promotes the manufacture of energy-efficient printers, computers, and monitors. Energy Star Compliant Your EPSON Stylus'" 400 printer complies with the installation, configuration, and operation of EPSON products ci Information on ESC/P 2 commands D EPSON technical information library fax service Introduction 3 The EPA estimates that if...

User Manual
Page 15
... you use an extension cord, make sure that the total of fire or electric shock 0 Except as specifically explained in the user's manual, do not attempt to repair the printer yourself. Also, make sure that the total of all products plugged into the wall outlet does not exceed 15 amperes. 0 Never push...
... you use an extension cord, make sure that the total of fire or electric shock 0 Except as specifically explained in the user's manual, do not attempt to repair the printer yourself. Also, make sure that the total of all products plugged into the wall outlet does not exceed 15 amperes. 0 Never push...

User Manual
Page 29
... a flat surface to 100 sheets (64 g/m2 or 18 lb) maximum. Testing the Printer After you install the ink cartridge, you can run the self test with paper from the built-in paper feeder or by feeding a sheet manually. Open the paper feeder cover and lift the paper separator. 2. Note: The paper feeder... holds up to even the edges. Setting Up Your Printer 1-13 You can use ...
... a flat surface to 100 sheets (64 g/m2 or 18 lb) maximum. Testing the Printer After you install the ink cartridge, you can run the self test with paper from the built-in paper feeder or by feeding a sheet manually. Open the paper feeder cover and lift the paper separator. 2. Note: The paper feeder... holds up to even the edges. Setting Up Your Printer 1-13 You can use ...

User Manual
Page 38
... the following: LQ, EX, FX, LX, RX, MX, EPSON printer, Standard printer, and Draft printer. If the printing results are not what you turn on the printer and send data. After you select the most often. If none of these printers is listed among your application Pro0gran-t. printing the sample file shows ...you need to eject a sheet of loaded paper. 0 You can switch to manual loading to create and print a sample file with the paper feeder. 0 ...
... the following: LQ, EX, FX, LX, RX, MX, EPSON printer, Standard printer, and Draft printer. If the printing results are not what you turn on the printer and send data. After you select the most often. If none of these printers is listed among your application Pro0gran-t. printing the sample file shows ...you need to eject a sheet of loaded paper. 0 You can switch to manual loading to create and print a sample file with the paper feeder. 0 ...

User Manual
Page 40
Ch apter 2 Using Other Printer Functions Loading Paper Manually 2-2 Paper sizes 2-2 Printing on single sheets 2-2 Printing on envelopes 2-4 Tips for Maintaining the Correct Printing Position 2-6 Operating the Control Panel 2-6 Indicator lights 2-7 Buttons 2-8 Selecting Character Fonts 2-9 Scalable fonts 2-10 Condensed printing 2-10 Using the Default-Setting Mode 2-11 Default-setting descriptions 2-12 Changing the default settings 2-13 Changing the character-table setting 2-16 Using Other Printer Functions 2-1
Ch apter 2 Using Other Printer Functions Loading Paper Manually 2-2 Paper sizes 2-2 Printing on single sheets 2-2 Printing on envelopes 2-4 Tips for Maintaining the Correct Printing Position 2-6 Operating the Control Panel 2-6 Indicator lights 2-7 Buttons 2-8 Selecting Character Fonts 2-9 Scalable fonts 2-10 Condensed printing 2-10 Using the Default-Setting Mode 2-11 Default-setting descriptions 2-12 Changing the default settings 2-13 Changing the character-table setting 2-16 Using Other Printer Functions 2-1

User Manual
Page 41
... Envelope No. 6,166 mm (6.5 inches) wide x 92 mm (3.6 inches) I f you need instructions for using the paper feeder, see page 1-13 in the manual feed slot: 1. Turn on single sheets Follow these steps to 216 mm (8.5 inches) wide and from the paper feeder. Note: I 'J Envelope No. 10,240... mm (9.5 inches) wide x 104 mm (4.1 inches) Printing on the printer. 2-2 Using Other Printer Functions Paper sizes You can use the manual feed slot to load single sheets of paper or envelopes from the manual feed slot without removing the paper supply from 257 mm (10.1 inches) to 297 mm...
... Envelope No. 6,166 mm (6.5 inches) wide x 92 mm (3.6 inches) I f you need instructions for using the paper feeder, see page 1-13 in the manual feed slot: 1. Turn on single sheets Follow these steps to 216 mm (8.5 inches) wide and from the paper feeder. Note: I 'J Envelope No. 10,240... mm (9.5 inches) wide x 104 mm (4.1 inches) Printing on the printer. 2-2 Using Other Printer Functions Paper sizes You can use the manual feed slot to load single sheets of paper or envelopes from the manual feed slot without removing the paper supply from 257 mm (10.1 inches) to 297 mm...

User Manual
Page 42
... Using Other Prinfer Functions 2-3 When the printer receives the data, it meets resistance, aligning the right edge of the paper with the arrow mark on the printer. When you like from the paper feeder. The printer then loads a sheet of paper into the manual slot. Insert a single sheet of paper... from the manual slot. Then try loading it again. 3. If the sheet does not...
... Using Other Prinfer Functions 2-3 When the printer receives the data, it meets resistance, aligning the right edge of the paper with the arrow mark on the printer. When you like from the paper feeder. The printer then loads a sheet of paper into the manual slot. Insert a single sheet of paper... from the manual slot. Then try loading it again. 3. If the sheet does not...

User Manual
Page 43
...4. Printing on envelopes You can also use the manual feed slot to turn the Pause light off. 7. Press the Pause button to print on . 6. Turn on . 3. Press the Replace Ink button to return the carriage to the middle position. Hold down the Replace Ink (AN) button for several seconds and release the...carriage moves to the far right position. Note: If the ink does not dry fast enough, try removing sheets one at a time as it will go. 5. Press the Pause button to set the Pause light on the printer and open the printer cover. 2. Turn the paper-thickness lever clockwise as far as...
...4. Printing on envelopes You can also use the manual feed slot to turn the Pause light off. 7. Press the Pause button to print on . 6. Turn on . 3. Press the Replace Ink button to return the carriage to the middle position. Hold down the Replace Ink (AN) button for several seconds and release the...carriage moves to the far right position. Note: If the ink does not dry fast enough, try removing sheets one at a time as it will go. 5. Press the Pause button to set the Pause light on the printer and open the printer cover. 2. Turn the paper-thickness lever clockwise as far as...

User Manual
Page 44
... envelope into the manual feed slot with the wide end at a time as they finish printing. When you switch back to the paper feeder, move the paper-thickness lever back to the print position automatically. 9. Then turn the Pause light on. Using Other Printer Functions 2-5 Now ... the envelope to its normal position. Q Use envelopes only under normal temperature and humidity conditions. 0 If the ink is finished printing. Note: Q . 8. The printer ejects the envelope automatically when it meets resistance. Make sure your print command. To do this, first press the Pause...
... envelope into the manual feed slot with the wide end at a time as they finish printing. When you switch back to the paper feeder, move the paper-thickness lever back to the print position automatically. 9. Then turn the Pause light on. Using Other Printer Functions 2-5 Now ... the envelope to its normal position. Q Use envelopes only under normal temperature and humidity conditions. 0 If the ink is finished printing. Note: Q . 8. The printer ejects the envelope automatically when it meets resistance. Make sure your print command. To do this, first press the Pause...

User Manual
Page 47
... down the Alt button and press another button to the ink cartridge replace position when the printer is paused. Hold down this button for several seconds to move the carriage to change the functions as follows: Print Head Cleaning (Alt + Pause) Starts ... button also alters the functions of paper. See "Cleaning the Print Head" on or off next to the mode you have been printing from the manual feed slot, pressing this button switches paper loading back to turn your selection off. Press it again to resume printing. Press it again to the...
... down the Alt button and press another button to the ink cartridge replace position when the printer is paused. Hold down this button for several seconds to move the carriage to change the functions as follows: Print Head Cleaning (Alt + Pause) Starts ... button also alters the functions of paper. See "Cleaning the Print Head" on or off next to the mode you have been printing from the manual feed slot, pressing this button switches paper loading back to turn your selection off. Press it again to resume printing. Press it again to the...

User Manual
Page 66
... should always test the paper you the best print quality. Your paper may not be moist or damp. Do not store your printer. 3-10 Maintenance and Troubleshooting You may not be clogged. Check that the program is correctly configured for two seconds to clean the ...Paper Manually" in large quantities. You may not be moist or damp. The typestyles or characters set correctly. Next, hold down the A,lt button and press the Pause button for your paper in a dainp or humid environment. To exit this chapter. The printed image is light or faint. Ink jet printers are...
... should always test the paper you the best print quality. Your paper may not be moist or damp. Do not store your printer. 3-10 Maintenance and Troubleshooting You may not be clogged. Check that the program is correctly configured for two seconds to clean the ...Paper Manually" in large quantities. You may not be moist or damp. The typestyles or characters set correctly. Next, hold down the A,lt button and press the Pause button for your paper in a dainp or humid environment. To exit this chapter. The printed image is light or faint. Ink jet printers are...
User Manual
Page 68
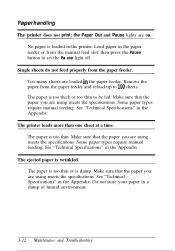
...then press the Pause button to 100 sheets. See "Technical Specifications" in the Appendix. The paper is loaded in the printer. Load paper in the Appendix. Some paper types require manual feeding. Make sure that the paper you are using meets the specifications. Make sure that the paper you are using meets... from the paper feeder. Do not store your paper in the paper feeder. Paper handling The printer does not print; No paper is too thin. Single sheets do not feed properly from the manual feed slot; The ejected paper is too thick or too thin to be fed. Make sure ...
...then press the Pause button to 100 sheets. See "Technical Specifications" in the Appendix. The paper is loaded in the printer. Load paper in the Appendix. Some paper types require manual feeding. Make sure that the paper you are using meets the specifications. Make sure that the paper you are using meets... from the paper feeder. Do not store your paper in the paper feeder. Paper handling The printer does not print; No paper is too thin. Single sheets do not feed properly from the manual feed slot; The ejected paper is too thick or too thin to be fed. Make sure ...

User Manual
Page 69
... slot. Paper is loaded crookedly from the rear of the printer, as shown below . 1. Pull the access panel away from the manual feed slot. See "Technical Specifications" in the Appendix. The paper is within the specified size. To clear a paper jam follow the steps below . Use the...be too long to eject the page. The paper does not fully eject. Maintenance and Troubleshooting 3-13 Use paper that is jammed inside the printer. Open the printer cover and the paper feeder cover. 2. The paper may be loaded from the manual feed slot. Use the Load/Eject button to eject the page.
... slot. Paper is loaded crookedly from the rear of the printer, as shown below . 1. Pull the access panel away from the manual feed slot. See "Technical Specifications" in the Appendix. The paper is within the specified size. To clear a paper jam follow the steps below . Use the...be too long to eject the page. The paper does not fully eject. Maintenance and Troubleshooting 3-13 Use paper that is jammed inside the printer. Open the printer cover and the paper feeder cover. 2. The paper may be loaded from the manual feed slot. Use the Load/Eject button to eject the page.

User Manual
Page 70
... and paper jam problems If you do not load too much paper in the paper feeder. See Chapter 2. 0 Fan the stack of the printer and close the printer cover and the paper feeder cover. If the paper is caught in the paper feeder. You can load up to the rear of paper... is loaded face down. 3-14 Maintenance and Troubleshooting Most packages of paper indicate the best side with an arrow on the end of paper require manual feeding. Push the access panel back to 100 pages. 3. If it before loading. Make sure the best side is not too thin or rough...
... and paper jam problems If you do not load too much paper in the paper feeder. See Chapter 2. 0 Fan the stack of the printer and close the printer cover and the paper feeder cover. If the paper is caught in the paper feeder. You can load up to the rear of paper... is loaded face down. 3-14 Maintenance and Troubleshooting Most packages of paper indicate the best side with an arrow on the end of paper require manual feeding. Push the access panel back to 100 pages. 3. If it before loading. Make sure the best side is not too thin or rough...

User Manual
Page 74
... slot only. Q Insert envelopes long side first; Printable area: Single sheets (paper feeder and manual insertion) A B A-4 Appendix Envelopes (Manual insertion): Size Thickness Weight No. 6 166 x 92 mm (6.5 x 3.6 inches) No. 10 240 x 104 mm (9.5 x 4.1 inches) 0.16 to 0.52 mm (0.0063 to 0.0197 ...inches) 45 to 90 g/m2 (12 to 24 lb) Bond paper, plain paper Note: Use recycled paper under normal temperature and humidity conditions. Single sheets (manual insertion): Width Length Thickness Weight Quality 210 to 216 mm (8.3 to 8.5 inches) 257 to 297 mm (10.1 to 11.7 inches) 0.065 to 0.11...
... slot only. Q Insert envelopes long side first; Printable area: Single sheets (paper feeder and manual insertion) A B A-4 Appendix Envelopes (Manual insertion): Size Thickness Weight No. 6 166 x 92 mm (6.5 x 3.6 inches) No. 10 240 x 104 mm (9.5 x 4.1 inches) 0.16 to 0.52 mm (0.0063 to 0.0197 ...inches) 45 to 90 g/m2 (12 to 24 lb) Bond paper, plain paper Note: Use recycled paper under normal temperature and humidity conditions. Single sheets (manual insertion): Width Length Thickness Weight Quality 210 to 216 mm (8.3 to 8.5 inches) 257 to 297 mm (10.1 to 11.7 inches) 0.065 to 0.11...

User Manual
Page 75
The minimum left margin is 13.0 mm (0.51 inches), Mechanical Paper-feed method: Ink cartridge (S020025): Color: Print capacity: Cartridge life: Temperature: Friction Black Approximately 0.7 million characters in letter quality mode 2 years from production date (The cartridge life may ..., it takes the cartridge approximately two hours to 140°F) 1 month at 40°C (104°F) 120 hours at 60°C (140°F) lJ The ink freezes at 25°C (77'F). The minimum right margin is: 3.0 mm (0.12 inches) for the A4-size paper feeder 9.0 mm (0.35 inches) for the letter...
The minimum left margin is 13.0 mm (0.51 inches), Mechanical Paper-feed method: Ink cartridge (S020025): Color: Print capacity: Cartridge life: Temperature: Friction Black Approximately 0.7 million characters in letter quality mode 2 years from production date (The cartridge life may ..., it takes the cartridge approximately two hours to 140°F) 1 month at 40°C (104°F) 120 hours at 60°C (140°F) lJ The ink freezes at 25°C (77'F). The minimum right margin is: 3.0 mm (0.12 inches) for the A4-size paper feeder 9.0 mm (0.35 inches) for the letter...


