User Manual
Page 3
Contents 3 Introduction Projector Features 9 Ease of Use when Installed on a Ceiling Mount 9 Reliability You can Depend on 10 Meets a Wide Range of Needs 11 Enhanced Security Functions 12 Easy to Handle 12 Monitoring and Control Functions ... 30 Projecting images from video equipment or from the HDMI1/2 input port 30 Projecting images from a computer 30 Changing the Aspect Mode (PowerLite Pro Z8150NL/Z8250NL/Z8255NL 31 Projecting images from video equipment 31 Projecting images from the HDMI1/2 input port 32 Projecting images from a computer 32 Selecting the Projection Quality (...
Contents 3 Introduction Projector Features 9 Ease of Use when Installed on a Ceiling Mount 9 Reliability You can Depend on 10 Meets a Wide Range of Needs 11 Enhanced Security Functions 12 Easy to Handle 12 Monitoring and Control Functions ... 30 Projecting images from video equipment or from the HDMI1/2 input port 30 Projecting images from a computer 30 Changing the Aspect Mode (PowerLite Pro Z8150NL/Z8250NL/Z8255NL 31 Projecting images from video equipment 31 Projecting images from the HDMI1/2 input port 32 Projecting images from a computer 32 Selecting the Projection Quality (...

User Manual
Page 9
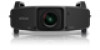
...release them. This makes it easy to line up a wide variety of installation locations. s p.150 A design that lets you mount the projector on the ceiling. The lamp and air filter can select the best lens according to the projection distance and purpose. Equipped with... the surrounding environment, and makes the installation easy The projector's sophisticated design has a cable cover in which opens up the screen and the projector. Projector Features Projector Features Ease of Use when Installed on a Ceiling Mount Centered lens The lens is positioned in addition to normal ...
...release them. This makes it easy to line up a wide variety of installation locations. s p.150 A design that lets you mount the projector on the ceiling. The lamp and air filter can select the best lens according to the projection distance and purpose. Equipped with... the surrounding environment, and makes the installation easy The projector's sophisticated design has a cable cover in which opens up the screen and the projector. Projector Features Projector Features Ease of Use when Installed on a Ceiling Mount Centered lens The lens is positioned in addition to normal ...

User Manual
Page 15
... or hands near the vent while projection is installed on a desk, turn to extend and retract to cool the projector internally. The rear adjustable feet can be removed when the projector is in progress. s p.119 Also, open this cover to open the lamp cover. When set up on ...air used to adjust the horizontal tilt. s p.192 Use these tabs to replace the projector's lamps. s p.150, p.195 Rear Name 1 Air exhaust vent (Lamp cover) 2 Rear foot 3 Lamp cover open /close switch 10 Ceiling mount attachment points (Four points) Function Opens and closes the interface cover. s p.191 ...
... or hands near the vent while projection is installed on a desk, turn to extend and retract to cool the projector internally. The rear adjustable feet can be removed when the projector is in progress. s p.119 Also, open this cover to open the lamp cover. When set up on ...air used to adjust the horizontal tilt. s p.192 Use these tabs to replace the projector's lamps. s p.150, p.195 Rear Name 1 Air exhaust vent (Lamp cover) 2 Rear foot 3 Lamp cover open /close switch 10 Ceiling mount attachment points (Four points) Function Opens and closes the interface cover. s p.191 ...

User Manual
Page 50
...8226; Handle A commercially available theft-deterrent wire lock can be passed through the security cable installation point to secure the projector to prevent someone from taking the projector. • Security slot The Security slot is compatible with the wire lock for locking instructions. Security Functions q Even ... setting to it's default • Entering numbers using the [Num] button and the numeric buttons Theft-Deterrent Lock As the projector is often setup on ceiling mounts and left in rooms unattended, the projector includes the following security devices to a desk or pillar.
...8226; Handle A commercially available theft-deterrent wire lock can be passed through the security cable installation point to secure the projector to prevent someone from taking the projector. • Security slot The Security slot is compatible with the wire lock for locking instructions. Security Functions q Even ... setting to it's default • Entering numbers using the [Num] button and the numeric buttons Theft-Deterrent Lock As the projector is often setup on ceiling mounts and left in rooms unattended, the projector includes the following security devices to a desk or pillar.

User Manual
Page 68
Sleep Mode Timer: When Sleep Mode is mounted on the ceiling or somewhere hard to reach, changing it back to Normal may be difficult. BNC Sync Termination: Set the termination for switchers is pressed. Set to operate the projector. This is useful if you want to use the functions that ... . You can set whether or not (On/Off) to enable Direct Power On. However, you can use the remote control provided with other Epson projectors to operate this automatically stops projection when no operations are set to On at the time of purchase. (When Shutter Timer and Sleep Mode are...
Sleep Mode Timer: When Sleep Mode is mounted on the ceiling or somewhere hard to reach, changing it back to Normal may be difficult. BNC Sync Termination: Set the termination for switchers is pressed. Set to operate the projector. This is useful if you want to use the functions that ... . You can set whether or not (On/Off) to enable Direct Power On. However, you can use the remote control provided with other Epson projectors to operate this automatically stops projection when no operations are set to On at the time of purchase. (When Shutter Timer and Sleep Mode are...

User Manual
Page 124
...are many glass parts and precision components inside the projector. Notes when packing and transporting Enclose the projector securely in cushioning material to the lens. Notes on Transportation 124 Notes on the lens mount when you purchased the projector. • The vertical and horizontal lens shifts are... positioned in the center. • Fit the protective lens pad that the contents are fragile. Warning Do not carry the projector by the handles. •...
...are many glass parts and precision components inside the projector. Notes when packing and transporting Enclose the projector securely in cushioning material to the lens. Notes on Transportation 124 Notes on the lens mount when you purchased the projector. • The vertical and horizontal lens shifts are... positioned in the center. • Fit the protective lens pad that the contents are fragile. Warning Do not carry the projector by the handles. •...

User Manual
Page 144
For details on the ceiling. This method is recommended when the projector is displayed. This method is recommended when the projector and access point are close together. • PIN Code Method SSID and security are set automatically by inputting an 8-digit code ... panel and the dedicated button on the access point equipment. The Network Configuration screen is mounted on how to make this connection, refer to the projector from the configuration menu. "Network Configuration" from the computer to the following section when using any connection method other than WPS. s "Wireless LAN...
For details on the ceiling. This method is recommended when the projector is displayed. This method is recommended when the projector and access point are close together. • PIN Code Method SSID and security are set automatically by inputting an 8-digit code ... panel and the dedicated button on the access point equipment. The Network Configuration screen is mounted on how to make this connection, refer to the projector from the configuration menu. "Network Configuration" from the computer to the following section when using any connection method other than WPS. s "Wireless LAN...

User Manual
Page 150
... do not use oils or lubricants. • When mounting the projector on the ceiling, be mounted at an improper angle or setting the configuration menu incorrectly can be mounted on a ceiling or placed on the ceiling mount attachment points to prevent the screws from loosening, or... if you can flexibly project images to anyone under the ceiling mount and could damage the projector. Warning • A special method of a screen. • Suspend the projector from the ceiling and project images from behind a translucent screen. • Project images directly...
... do not use oils or lubricants. • When mounting the projector on the ceiling, be mounted at an improper angle or setting the configuration menu incorrectly can be mounted on a ceiling or placed on the ceiling mount attachment points to prevent the screws from loosening, or... if you can flexibly project images to anyone under the ceiling mount and could damage the projector. Warning • A special method of a screen. • Suspend the projector from the ceiling and project images from behind a translucent screen. • Project images directly...

User Manual
Page 193
Procedure A Remove the feet. Installing Optional and Supplied Accessories 193 Removing the Feet When mounting the projector on the ceiling, you can remove the feet and attach the supplied foot covers for clean appearance. B Attach the supplied foot covers.
Procedure A Remove the feet. Installing Optional and Supplied Accessories 193 Removing the Feet When mounting the projector on the ceiling, you can remove the feet and attach the supplied foot covers for clean appearance. B Attach the supplied foot covers.

User Manual
Page 210
... the following precautions: Insert batteries so that has been wrung dry) for vertical keystone correction. When installing or adjusting a ceiling mount, do not use the projector where it may be installed by yourself. Keep these batteries out of the reach of used batteries according to rain, water, or...been cleaned for a long period of any kind through the handles to prevent it . • Do not place the projector on its ceiling mount. Because the lamp inside the projector becomes very hot during use, the gases may ignite and result in a fire. • Never push objects of time...
... the following precautions: Insert batteries so that has been wrung dry) for vertical keystone correction. When installing or adjusting a ceiling mount, do not use the projector where it may be installed by yourself. Keep these batteries out of the reach of used batteries according to rain, water, or...been cleaned for a long period of any kind through the handles to prevent it . • Do not place the projector on its ceiling mount. Because the lamp inside the projector becomes very hot during use, the gases may ignite and result in a fire. • Never push objects of time...

User Manual
Page 212
...: Do not hold the plug when disconnecting it. always be walked on top of California to remove the lamp immediately after handling. (This notice is mounted overhead and the lamp breaks, be extremely hot. Insert the plug firmly into your eyes when you do inhale gases or gases come in contact... with your eyes or mouth, seek medical advice immediately. • If the projector is provided in contact with your eyes or mouth. Do not put in the trash. • Do not place anything that can be sure to...
...: Do not hold the plug when disconnecting it. always be walked on top of California to remove the lamp immediately after handling. (This notice is mounted overhead and the lamp breaks, be extremely hot. Insert the plug firmly into your eyes when you do inhale gases or gases come in contact... with your eyes or mouth, seek medical advice immediately. • If the projector is provided in contact with your eyes or mouth. Do not put in the trash. • Do not place anything that can be sure to...


