
User Manual
Page 12
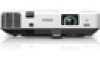
...EPSON (800-463-7766). sales) or www.epson.ca (Canadian sales). See your device. PowerLite 1945W/1955/1965) Wireless LAN module (ELPA07; PowerLite 1945W/1955/1965) EPSON DC-06 document camera (ELPDC06) EPSON DC-11 document camera Accolade Duet portable projector screen Universal projector ceiling mount Adjustable suspended ceiling channel kit False ceiling... USB key (ELPAP09; Or you can purchase screens, other optional accessories, and replacement parts from an EPSON authorized reseller. Additional Components Depending on how you plan to use the projector, you may need a commercially ...
...EPSON (800-463-7766). sales) or www.epson.ca (Canadian sales). See your device. PowerLite 1945W/1955/1965) Wireless LAN module (ELPA07; PowerLite 1945W/1955/1965) EPSON DC-06 document camera (ELPDC06) EPSON DC-11 document camera Accolade Duet portable projector screen Universal projector ceiling mount Adjustable suspended ceiling channel kit False ceiling... USB key (ELPAP09; Or you can purchase screens, other optional accessories, and replacement parts from an EPSON authorized reseller. Additional Components Depending on how you plan to use the projector, you may need a commercially ...

User Manual
Page 24
...Lens Cover Projector Placement You can set up or install your projector for use it on a sturdy, level surface or install it using a compatible mount. • Leave plenty of a grounded electrical outlet or extension cord. Keep these sections to set up your projector to view presentations in the... Setting Up the Projector Follow the instructions in these considerations in mind as you want to use . You can also install the projector in a ceiling mount if you select a projector location: • Place the projector on top of or next to anything that could block the vents. • ...
...Lens Cover Projector Placement You can set up or install your projector for use it on a sturdy, level surface or install it using a compatible mount. • Leave plenty of a grounded electrical outlet or extension cord. Keep these sections to set up your projector to view presentations in the... Setting Up the Projector Follow the instructions in these considerations in mind as you want to use . You can also install the projector in a ceiling mount if you select a projector location: • Place the projector on top of or next to anything that could block the vents. • ...

User Manual
Page 76
...Automatically Correcting Image Shape With Screen Fit You can detect the screen size and shape in these conditions: • Projector is not mounted on your screen (PowerLite 1945W/1955/1965). You see a message on the projector or remote control. Zoom into the image until its yellow frame extends ...beyond the edges of images to fit on the ceiling • Screen size is 100 inches (254 cm) or less • Projection distance is about 3 feet...
...Automatically Correcting Image Shape With Screen Fit You can detect the screen size and shape in these conditions: • Projector is not mounted on your screen (PowerLite 1945W/1955/1965). You see a message on the projector or remote control. Zoom into the image until its yellow frame extends ...beyond the edges of images to fit on the ceiling • Screen size is 100 inches (254 cm) or less • Projection distance is about 3 feet...
User Manual
Page 86
...Turn on how you positioned the projector, you project from a table in front of the screen. • Front/Ceiling flips the image over top-to-bottom to project upside-down from a ceiling or wall mount. • Rear flips the image horizontally to -bottom. 1. Changing the Projection Mode Using the Remote Control Changing the... setting) lets you may need to change the projection mode to flip the image over top-to-bottom and horizontally to project from the ceiling and behind a translucent screen. • Rear/Ceiling flips the image over top-to project from behind a translucent screen.
...Turn on how you positioned the projector, you project from a table in front of the screen. • Front/Ceiling flips the image over top-to-bottom to project upside-down from a ceiling or wall mount. • Rear flips the image horizontally to -bottom. 1. Changing the Projection Mode Using the Remote Control Changing the... setting) lets you may need to change the projection mode to flip the image over top-to-bottom and horizontally to project from the ceiling and behind a translucent screen. • Rear/Ceiling flips the image over top-to project from behind a translucent screen.

User Manual
Page 141
Caution: Do not use any detergent or solvent to clean or replace it . If dust is difficult to remove or the air filter is mounted to the ceiling, if necessary. Turn off the projector and unplug the power cord. 141 2. Do not rinse the air filter in the following situations: • After cleaning...
Caution: Do not use any detergent or solvent to clean or replace it . If dust is difficult to remove or the air filter is mounted to the ceiling, if necessary. Turn off the projector and unplug the power cord. 141 2. Do not rinse the air filter in the following situations: • After cleaning...
User Manual
Page 144
... projector is broken, glass fragments may be hot. Turn off the projector and unplug the power cord. 2. Be careful removing any broken glass to the ceiling, if necessary. 1. Warning: If the lamp is mounted to avoid injury. 144
... projector is broken, glass fragments may be hot. Turn off the projector and unplug the power cord. 2. Be careful removing any broken glass to the ceiling, if necessary. 1. Warning: If the lamp is mounted to avoid injury. 144
User Manual
Page 166
...) 3000:1 with Auto Iris on and Normal Power Consumption mode PowerLite 1940W/1945W: 29 inches (0.74 m) to 280 inches (7.11 m) PowerLite 1950/1955/1960/1965: 30 inches (0.76 m) to 300 inches (7.62 m) 33 inches (0.84 m) to 336 inches (8.54 m) Front, rear, ceiling-mounted PowerLite 1940W/1945W: 16:10 PowerLite 1950/1955/1960/1965: 4:3 Manual Manual 1:1.6 10 W monaural 166
...) 3000:1 with Auto Iris on and Normal Power Consumption mode PowerLite 1940W/1945W: 29 inches (0.74 m) to 280 inches (7.11 m) PowerLite 1950/1955/1960/1965: 30 inches (0.76 m) to 300 inches (7.62 m) 33 inches (0.84 m) to 336 inches (8.54 m) Front, rear, ceiling-mounted PowerLite 1940W/1945W: 16:10 PowerLite 1950/1955/1960/1965: 4:3 Manual Manual 1:1.6 10 W monaural 166

User Manual
Page 175
...unless proper ventilation is provided. 175 Do not tilt the projector more than 30° forward or back. • If the projector is mounted on its ceiling mount. Do not pull the power cord when disconnecting the plug; Use a dry cloth (or, for stubborn dirt or stains, a moist cloth...rug, or other soft surface, or set it should be walked on . Failure to comply with this projector. • When installing or adjusting a ceiling or wall mount, do not use the projector near a wall, leave at least 7.9 inches (20 cm) of loose papers, which could block vents underneath the ...
...unless proper ventilation is provided. 175 Do not tilt the projector more than 30° forward or back. • If the projector is mounted on its ceiling mount. Do not pull the power cord when disconnecting the plug; Use a dry cloth (or, for stubborn dirt or stains, a moist cloth...rug, or other soft surface, or set it should be walked on . Failure to comply with this projector. • When installing or adjusting a ceiling or wall mount, do not use the projector near a wall, leave at least 7.9 inches (20 cm) of loose papers, which could block vents underneath the ...


