User Manual
Page 12
...Epson DC-11 document camera BrightLink Solo interactive module (IU-01) BrightLink Solo interactive module with RM Easiteach (IU-01) AP-60 Projector Sound Solution PixiePlus Control System Accolade Duet portable projector screen ES1000 Ultra Portable Tabletop Projection screen ES3000 Ultra Portable Tabletop Projection screen Universal projector ceiling mount Adjustable suspended ceiling... channel kit False ceiling plate kit Structural Round ceiling plate Adjustable Extension Column (pipe) 8" ...
...Epson DC-11 document camera BrightLink Solo interactive module (IU-01) BrightLink Solo interactive module with RM Easiteach (IU-01) AP-60 Projector Sound Solution PixiePlus Control System Accolade Duet portable projector screen ES1000 Ultra Portable Tabletop Projection screen ES3000 Ultra Portable Tabletop Projection screen Universal projector ceiling mount Adjustable suspended ceiling... channel kit False ceiling plate kit Structural Round ceiling plate Adjustable Extension Column (pipe) 8" ...
User Manual
Page 22
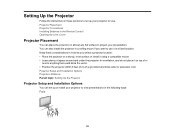
You can also install the projector in a ceiling mount if you select a projector location: • Place the projector on a sturdy, level surface or install it using a compatible mount. • Leave plenty of a grounded electrical outlet or extension cord. Setting Up the Projector Follow the instructions in these considerations in mind as you want ...
You can also install the projector in a ceiling mount if you select a projector location: • Place the projector on a sturdy, level surface or install it using a compatible mount. • Leave plenty of a grounded electrical outlet or extension cord. Setting Up the Projector Follow the instructions in these considerations in mind as you want ...
User Manual
Page 54
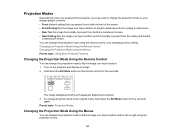
...8226; Front (default setting) lets you project from a table in front of the screen. • Front/Ceiling flips the image over top-to-bottom to project upside-down from a ceiling or wall mount. • Rear flips the image horizontally to project from behind a translucent screen. Changing the Projection Mode ... You can change the projection mode to flip the image over top-to-bottom and/or left-to project from the ceiling and behind a translucent screen. • Rear/Ceiling flips the image over top-to-bottom. 1. You can change projection back to -bottom. 3. The image disappears briefly...
...8226; Front (default setting) lets you project from a table in front of the screen. • Front/Ceiling flips the image over top-to-bottom to project upside-down from a ceiling or wall mount. • Rear flips the image horizontally to project from behind a translucent screen. Changing the Projection Mode ... You can change the projection mode to flip the image over top-to-bottom and/or left-to project from the ceiling and behind a translucent screen. • Rear/Ceiling flips the image over top-to-bottom. 1. You can change projection back to -bottom. 3. The image disappears briefly...

User Manual
Page 90
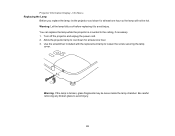
... gases may leave a residue. 3. Turn off the projector and unplug the power cord. 90 Note: You can replace the air filter while the projector is mounted to remove or the air filter is difficult to the ceiling, if necessary.
... gases may leave a residue. 3. Turn off the projector and unplug the power cord. 90 Note: You can replace the air filter while the projector is mounted to remove or the air filter is difficult to the ceiling, if necessary.
User Manual
Page 93
... to avoid injury. Projector Information Display - Warning: Let the lamp fully cool before replacing it to avoid injury. 93 Warning: If the lamp is mounted to the ceiling, if necessary. 1. Use the screwdriver included with the replacement lamp to cool down for at least one hour. 3. Allow the projector lamp to loosen...
... to avoid injury. Projector Information Display - Warning: Let the lamp fully cool before replacing it to avoid injury. 93 Warning: If the lamp is mounted to the ceiling, if necessary. 1. Use the screwdriver included with the replacement lamp to cool down for at least one hour. 3. Allow the projector lamp to loosen...

User Manual
Page 117
...21118 standard) Color light output 2800 lumens ECO Power Consumption mode: White light output 2240 lumens (ISO 21118 standard) 3000:1 with Normal Power Consumption mode EX3210: 21 to 350 inches (0.53 to 8.89 m) EX5210: 28 to 300 inches (0.71 to 7.62 m) EX7210: 29 to 320 inches (0.74 to 8.13... m) EX3210: 25 to 555 inches (0.64 to 14.10 m) EX5210: 35 to 431 inches (0.89 to 10.95 m) EX7210: 36 to 429 inches (0.91 to 10.90 m) Front, rear, ceiling-mounted EX3210/EX5210: 4:3 EX7210: 16:10 Manual EX3210: Digital EX5210/EX7210: Manual (optical) 117
...21118 standard) Color light output 2800 lumens ECO Power Consumption mode: White light output 2240 lumens (ISO 21118 standard) 3000:1 with Normal Power Consumption mode EX3210: 21 to 350 inches (0.53 to 8.89 m) EX5210: 28 to 300 inches (0.71 to 7.62 m) EX7210: 29 to 320 inches (0.74 to 8.13... m) EX3210: 25 to 555 inches (0.64 to 14.10 m) EX5210: 35 to 431 inches (0.89 to 10.95 m) EX7210: 36 to 429 inches (0.91 to 10.90 m) Front, rear, ceiling-mounted EX3210/EX5210: 4:3 EX7210: 16:10 Manual EX3210: Digital EX5210/EX7210: Manual (optical) 117

User Manual
Page 125
...not place the projector on an unstable cart, stand, or table. • Do not operate the projector on its ceiling mount. This could cause serious injury to anyone under the mount and could damage the projector. • Do not use liquid or aerosol cleaners. • Do not block the slots...the projector. • If you are using mounting hardware designed for cleaning. Do not use the projector near a wall, leave at least 2 feet (60 cm) of any kind into an outlet with this projector. • When installing or adjusting a ceiling mount, do not use adhesives to one side. Do...
...not place the projector on an unstable cart, stand, or table. • Do not operate the projector on its ceiling mount. This could cause serious injury to anyone under the mount and could damage the projector. • Do not use liquid or aerosol cleaners. • Do not block the slots...the projector. • If you are using mounting hardware designed for cleaning. Do not use the projector near a wall, leave at least 2 feet (60 cm) of any kind into an outlet with this projector. • When installing or adjusting a ceiling mount, do not use adhesives to one side. Do...


