Information Guide
Page 2
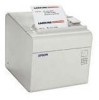
... sets alphanumeric: 95 characters; Accessories Paper Other options Printer Specifications Printing Printing method Dot density Paper width thermal line printing (single and two-color) 203 dpi × 203 dpi 3.15" {80 mm} (default) or variable with an optional paper roll spacer EPSON TM-L90 Printable area 2.83" {72 mm} for 80 mm paper Print direction unidirectional with friction feed Paper feed speed 5.91"/sec. {150 mm/sec.} maximum (continuous paper feed) Print speed single-color: normal printing mode...
... sets alphanumeric: 95 characters; Accessories Paper Other options Printer Specifications Printing Printing method Dot density Paper width thermal line printing (single and two-color) 203 dpi × 203 dpi 3.15" {80 mm} (default) or variable with an optional paper roll spacer EPSON TM-L90 Printable area 2.83" {72 mm} for 80 mm paper Print direction unidirectional with friction feed Paper feed speed 5.91"/sec. {150 mm/sec.} maximum (continuous paper feed) Print speed single-color: normal printing mode...
Information Guide
Page 3
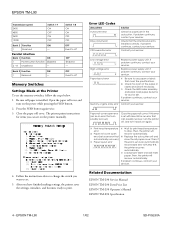
... is offline or feeding paper, and flashes when an error occurs. POWER LED On when the power is out, or nearly out, of a self-test or a macro. PAPER OUT LED On when the printer is on .) 2 - EPSON TM-L90 1/02 Buffer Sizes Receive User Macro 4KB or 45 bytes, selectable via memory switch 12KB 2KB NV (non-volatile) bit image 0 through 384KB NV user 1KB through 192KB Page mode area 106KB Control Panel 3. EPSON TM-L90...
... is offline or feeding paper, and flashes when an error occurs. POWER LED On when the power is out, or nearly out, of a self-test or a macro. PAPER OUT LED On when the printer is on .) 2 - EPSON TM-L90 1/02 Buffer Sizes Receive User Macro 4KB or 45 bytes, selectable via memory switch 12KB 2KB NV (non-volatile) bit image 0 through 384KB NV user 1KB through 192KB Page mode area 106KB Control Panel 3. EPSON TM-L90...

Information Guide
Page 4
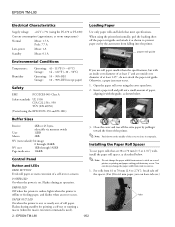
... under "Clearing the Autocutter" below . 3. When printing starts, release the button. DIP Switches Serial interface 1/02 EPSON TM-L90 - 3 Push the paper roll spacer until you feel it prints "*** completed ***." Removing Jammed Paper ❑ ❑ 1. Clearing the Autocutter 1. Follow the instructions in the direction of the spacer with the spacer into the slots on the printer. The printer is jammed in the autocutter. Power off the unit, open the paper roll cover, paper is ready...
... under "Clearing the Autocutter" below . 3. When printing starts, release the button. DIP Switches Serial interface 1/02 EPSON TM-L90 - 3 Push the paper roll spacer until you feel it prints "*** completed ***." Removing Jammed Paper ❑ ❑ 1. Clearing the Autocutter 1. Follow the instructions in the direction of the spacer with the spacer into the slots on the printer. The printer is jammed in the autocutter. Power off the unit, open the paper roll cover, paper is ready...
Information Guide
Page 5
...After you have finished making settings, the printer saves the settings, initializes, and becomes ready to set the memory switches, follow the steps below. 1. Close the paper roll cover. Related Documentation EPSON TM-L90 Service Manual EPSON TM-L90 Parts Price List EPSON TM-L90 Operator's Manual EPSON TM-L90 Specification 4 - Be sure roll paper is installed. EPSON TM-L90 1/02 SD-PIGL90A Follow the instructions above to change the switch you can set on the power while pressing the button. 2. Open the paper roll cover and turn on the printer manually. ① ① ②...
...After you have finished making settings, the printer saves the settings, initializes, and becomes ready to set the memory switches, follow the steps below. 1. Close the paper roll cover. Related Documentation EPSON TM-L90 Service Manual EPSON TM-L90 Parts Price List EPSON TM-L90 Operator's Manual EPSON TM-L90 Specification 4 - Be sure roll paper is installed. EPSON TM-L90 1/02 SD-PIGL90A Follow the instructions above to change the switch you can set on the power while pressing the button. 2. Open the paper roll cover and turn on the printer manually. ① ① ②...


