
Installation Guide
Page 78
... markers onto the screen with the thinner end of the marker facing the touch unit. • For non-magnetic screens: Use the supplied tape to manually adjust the angle of the marker facing the touch unit. When adjustments are on the marker. Attach the two markers to begin the auto adjustment...
... markers onto the screen with the thinner end of the marker facing the touch unit. • For non-magnetic screens: Use the supplied tape to manually adjust the angle of the marker facing the touch unit. When adjustments are on the marker. Attach the two markers to begin the auto adjustment...

Installation Guide
Page 79
... in the correct position. Touch each of the touch unit. If the touch unit moves out of position, use the labels to determine where to manually adjust the touch unit alignment. See the online User's Guide for more details on the screen and verify that may obstruct your fingers.
... in the correct position. Touch each of the touch unit. If the touch unit moves out of position, use the labels to determine where to manually adjust the touch unit alignment. See the online User's Guide for more details on the screen and verify that may obstruct your fingers.

Installation Guide
Page 90
... the marker over the projected cross until the lines of the markers onto the screen. • For non-magnetic screens: Use the supplied tape to manually adjust the bracket position and run auto adjustment again. 90 Do not place anything other objects are complete, remove the markers. 7. If other than the...
... the marker over the projected cross until the lines of the markers onto the screen. • For non-magnetic screens: Use the supplied tape to manually adjust the bracket position and run auto adjustment again. 90 Do not place anything other objects are complete, remove the markers. 7. If other than the...

Installation Guide
Page 91
... on the touch calibration. 91 Perform touch calibration by pressing Menu on the screen. Finger touch operations may not function correctly if you need to manually adjust the touch unit alignment. Try touching the four dots again and repeat this process until the touch indicators appear in the correct position. English...
... on the touch calibration. 91 Perform touch calibration by pressing Menu on the screen. Finger touch operations may not function correctly if you need to manually adjust the touch unit alignment. Try touching the four dots again and repeat this process until the touch indicators appear in the correct position. English...
Users Guide
Page 3
... Projector Parts - Interface...25 Projector Parts - Interactive Pens 30 Projector Parts - Pen Stand (BrightLink 1485Fi 31 Projector Parts - Top/Side ...24 Projector Parts - Control Panel ...27 Projector Parts - Remote Control 28 ...1485Fi User's Guide 13 Introduction to Your Projector ...14 Projector Features...14 Product Box Contents...16 Additional Components ...17 Optional Equipment and Replacement Parts 18 Warranty and Registration Information 19 Notations Used in the Documentation 20 Where to a Computer for Additional Information 20 Additional Projector Software and Manuals...
... Projector Parts - Interface...25 Projector Parts - Interactive Pens 30 Projector Parts - Pen Stand (BrightLink 1485Fi 31 Projector Parts - Top/Side ...24 Projector Parts - Control Panel ...27 Projector Parts - Remote Control 28 ...1485Fi User's Guide 13 Introduction to Your Projector ...14 Projector Features...14 Product Box Contents...16 Additional Components ...17 Optional Equipment and Replacement Parts 18 Warranty and Registration Information 19 Notations Used in the Documentation 20 Where to a Computer for Additional Information 20 Additional Projector Software and Manuals...

Users Guide
Page 5
Selecting Wireless Network Settings Manually 75 Wireless LAN Menu Settings ...80 Selecting Wireless Network Settings in Windows 83 Selecting Wireless Network Settings on Mac 83 Setting Up Wireless Network Security ...
Selecting Wireless Network Settings Manually 75 Wireless LAN Menu Settings ...80 Selecting Wireless Network Settings in Windows 83 Selecting Wireless Network Settings on Mac 83 Setting Up Wireless Network Security ...

Users Guide
Page 8
... Interactive Pens ...210 Using the Pens ...211 Pen Calibration ...213 Calibrating Automatically ...214 Calibrating Manually ...216 Using Finger Touch Interactivity ...219 Touch Unit Safety Instructions...219 Calibrating for Finger Touch Interactivity 220 Using Finger Touch Operations 224 Using BrightLink with a Computer ...226 Adjusting the Pen Operation Area 227 Easy Interactive Tools ...230...
... Interactive Pens ...210 Using the Pens ...211 Pen Calibration ...213 Calibrating Automatically ...214 Calibrating Manually ...216 Using Finger Touch Interactivity ...219 Touch Unit Safety Instructions...219 Calibrating for Finger Touch Interactivity 220 Using Finger Touch Operations 224 Using BrightLink with a Computer ...226 Adjusting the Pen Operation Area 227 Easy Interactive Tools ...230...

Users Guide
Page 14
... Scan and display content from a connected scanner • Import content from a USB drive • Share your projector and this manual. white light output measured in accordance with tablets, smartphones, and other devices Bright, high-resolution projection system • Up to ... toolbar for Windows and Mac • Touch-based interactivity for Additional Information Additional Projector Software and Manuals Projector Part Locations Projector Features The BrightLink 1480Fi/1485Fi projector includes these sections to learn more about your projected content with ISO 21118. • 1080p...
... Scan and display content from a connected scanner • Import content from a USB drive • Share your projector and this manual. white light output measured in accordance with tablets, smartphones, and other devices Bright, high-resolution projection system • Up to ... toolbar for Windows and Mac • Touch-based interactivity for Additional Information Additional Projector Software and Manuals Projector Part Locations Projector Features The BrightLink 1480Fi/1485Fi projector includes these sections to learn more about your projected content with ISO 21118. • 1080p...
Users Guide
Page 20
...View FAQs (frequently asked questions) and e-mail your questions to Epson technical support 24 hours a day. • If you still need help after checking this manual and any other sources listed here, you can use the Epson PrivateLine Support service to get help fast. Parent topic: Introduction ...Get Help." For details, see "Where to Get Help Additional Projector Software and Manuals After connecting and setting up the projector, install the projector software as necessary. You can use the Epson PrivateLine Support service to get help fast. Parent topic: Introduction to Your Projector ...
...View FAQs (frequently asked questions) and e-mail your questions to Epson technical support 24 hours a day. • If you still need help after checking this manual and any other sources listed here, you can use the Epson PrivateLine Support service to get help fast. Parent topic: Introduction ...Get Help." For details, see "Where to Get Help Additional Projector Software and Manuals After connecting and setting up the projector, install the projector software as necessary. You can use the Epson PrivateLine Support service to get help fast. Parent topic: Introduction to Your Projector ...

Users Guide
Page 21
.../support (Canada) and select your projector. Go to epson.com/support (U.S.) or epson.ca/support (Canada) and select your projector. Manual Epson Projector Management Operation Guide Epson iProjection Operation Guide (Windows/Mac) Instructions are included with the app Easy Interactive Tools Operation Guide Open Source Software License Description Lets you project the ...
.../support (Canada) and select your projector. Go to epson.com/support (U.S.) or epson.ca/support (Canada) and select your projector. Manual Epson Projector Management Operation Guide Epson iProjection Operation Guide (Windows/Mac) Instructions are included with the app Easy Interactive Tools Operation Guide Open Source Software License Description Lets you project the ...

Users Guide
Page 22
... 22 Projector Parts - Top/Side Projector Parts - Pen Stand (BrightLink 1485Fi) Projector Parts - Interactive Pens Projector Parts - Front/Side Projector Parts - Touch Unit Parent topic: Introduction to learn about the parts on your projector. Note: The BrightLink 1485Fi is shown in most illustrations in this manual, unless noted otherwise. Base Projector Parts - Remote Control Projector...
... 22 Projector Parts - Top/Side Projector Parts - Pen Stand (BrightLink 1485Fi) Projector Parts - Interactive Pens Projector Parts - Front/Side Projector Parts - Touch Unit Parent topic: Introduction to learn about the parts on your projector. Note: The BrightLink 1485Fi is shown in most illustrations in this manual, unless noted otherwise. Base Projector Parts - Remote Control Projector...
Users Guide
Page 56
... (BrightLink 1485Fi) and use it to the projector's HDMI, Computer, or Video port and to the corresponding port on the document camera. Make sure the printer meets the control command requirements. Note: You can connect an Epson printer or all-in the Interactive menu. 1. Parent topic: Projector Connections 56 See the document camera manual...
... (BrightLink 1485Fi) and use it to the projector's HDMI, Computer, or Video port and to the corresponding port on the document camera. Make sure the printer meets the control command requirements. Note: You can connect an Epson printer or all-in the Interactive menu. 1. Parent topic: Projector Connections 56 See the document camera manual...

Users Guide
Page 60
... came with the projector. Do not install batteries of Projectors > Infrared Intensity setting to right Parent topic: Connecting Multiple Projectors of batteries specified in this manual. Caution: Use only the type of the Same Model Installing Batteries in number order from left to Strong. Non-interactive Setup (2-4 Projectors) Setting Projector 1 Projectors...
... came with the projector. Do not install batteries of Projectors > Infrared Intensity setting to right Parent topic: Connecting Multiple Projectors of batteries specified in this manual. Caution: Use only the type of the Same Model Installing Batteries in number order from left to Strong. Non-interactive Setup (2-4 Projectors) Setting Projector 1 Projectors...

Users Guide
Page 64
...projection. Wired Network Projection Wireless Network Projection Wireless Network Projection from a software CD, if included, or download the software and manuals as necessary. Using the Projector on a Network Follow the instructions in these sections to set up your projector and computer for... Settings Parent topic: Using the Projector on a Network Related references Additional Projector Software and Manuals 64 To do this, you can project through the access point using the Epson network software. After connecting and setting up the projector, install the projector software.
...projection. Wired Network Projection Wireless Network Projection Wireless Network Projection from a software CD, if included, or download the software and manuals as necessary. Using the Projector on a Network Follow the instructions in these sections to set up your projector and computer for... Settings Parent topic: Using the Projector on a Network Related references Additional Projector Software and Manuals 64 To do this, you can project through the access point using the Epson network software. After connecting and setting up the projector, install the projector software.

Users Guide
Page 67
... press Enter to return to the Network Settings menu. 12. Select Network Projection and press Enter. Note: To highlight the numbers you must set addresses manually, turn off DHCP and enter the projector's IP Address, Subnet Mask, and Gateway Address as necessary: • If your IP settings as needed. To select...
... press Enter to return to the Network Settings menu. 12. Select Network Projection and press Enter. Note: To highlight the numbers you must set addresses manually, turn off DHCP and enter the projector's IP Address, Subnet Mask, and Gateway Address as necessary: • If your IP settings as needed. To select...

Users Guide
Page 68
...to select them. 15. Select Set, and follow the on a security password to prevent access to the projector wirelessly through the access point using Epson iProjection. Parent topic: Wired Network Projection Wireless Network Projection You can select an option to display a QR code that includes a wireless access point,... the menus. To do this, you must enter a displayed, randomized keyword from a software CD, if included, or download the software and manuals as necessary: • Display LAN Info lets you select whether to return the Network Settings menu. 16. Set the...
...to select them. 15. Select Set, and follow the on a security password to prevent access to the projector wirelessly through the access point using Epson iProjection. Parent topic: Wired Network Projection Wireless Network Projection You can select an option to display a QR code that includes a wireless access point,... the menus. To do this, you must enter a displayed, randomized keyword from a software CD, if included, or download the software and manuals as necessary: • Display LAN Info lets you select whether to return the Network Settings menu. 16. Set the...
Users Guide
Page 69
... Selecting Wireless Network Settings Manually Selecting Wireless Network Settings in Windows Selecting Wireless Network Settings on Mac Setting Up Wireless Network Security Parent topic: Using the Projector on a Network Related references Additional Projector Software and Manuals Installing the Wireless LAN Module... To use the additional wireless connections, install the optional Epson 802.11b/g/n wireless module in the projector. You may damage the module or...
... Selecting Wireless Network Settings Manually Selecting Wireless Network Settings in Windows Selecting Wireless Network Settings on Mac Setting Up Wireless Network Security Parent topic: Using the Projector on a Network Related references Additional Projector Software and Manuals Installing the Wireless LAN Module... To use the additional wireless connections, install the optional Epson 802.11b/g/n wireless module in the projector. You may damage the module or...

Users Guide
Page 75
...administrator authority to disable the firewall. Parent topic: Wireless Network Projection Related references Additional Projector Software and Manuals Selecting Wireless Network Settings Manually Before you can share the USB key with other computers without disconnecting your wireless network, you can ...connect the USB key to install the Epson iProjection software. Run your computer. 9. Note: If you finish projecting wirelessly, ...
...administrator authority to disable the firewall. Parent topic: Wireless Network Projection Related references Additional Projector Software and Manuals Selecting Wireless Network Settings Manually Before you can share the USB key with other computers without disconnecting your wireless network, you can ...connect the USB key to install the Epson iProjection software. Run your computer. 9. Note: If you finish projecting wirelessly, ...

Users Guide
Page 78
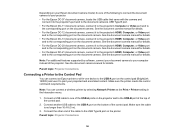
Select IP Settings and press Enter. 14. Select the Wireless LAN menu and press Enter. 11. Select the network you need to assign the SSID manually, select SSID to enter the SSID. 13. Note: If you want to connect to 255) for IP Address, 255.255.255.255 or 0.0.0.0 through ...necessary. Select your IP settings as necessary: • If your network assigns addresses automatically, turn on the DHCP setting. • If you must set addresses manually, turn off DHCP and enter the projector's IP Address, Subnet Mask, and Gateway Address as needed. Note: Do not use the following IP 78 The...
Select IP Settings and press Enter. 14. Select the Wireless LAN menu and press Enter. 11. Select the network you need to assign the SSID manually, select SSID to enter the SSID. 13. Note: If you want to connect to 255) for IP Address, 255.255.255.255 or 0.0.0.0 through ...necessary. Select your IP settings as necessary: • If your network assigns addresses automatically, turn on the DHCP setting. • If you must set addresses manually, turn off DHCP and enter the projector's IP Address, Subnet Mask, and Gateway Address as needed. Note: Do not use the following IP 78 The...

Users Guide
Page 81
... WPA3-PSK: uses WPA3 security with AES for encryption. Use the Passphrase value to establish a connection from a web browser, the maximum is 63 characters) Description Manually set to WPA3-PSK or WPA2/WPA3-PSK. 81 Setting SSID Security Passphrase Options Up 32 alphanumeric characters WPA2/WPA3-PSK WPA2/WPA3-EAP WPA3...
... WPA3-PSK: uses WPA3 security with AES for encryption. Use the Passphrase value to establish a connection from a web browser, the maximum is 63 characters) Description Manually set to WPA3-PSK or WPA2/WPA3-PSK. 81 Setting SSID Security Passphrase Options Up 32 alphanumeric characters WPA2/WPA3-PSK WPA2/WPA3-EAP WPA3...

