

User Manual
Page 7
...Using the Power Management Features 3-10 Automatic Features 3-12 Manual Features 3-13 Resuming Activity From Suspend Mode 3-14 Using the APM Interface 3-15 Using Suspend to Disk Mode 3-16 Creating the Suspend to Disk data file 3-17 Recreating the Suspend to Disk data file 3-19 Chapter 4 Installing Optional Devices Connecting an External Monitor 4-1 Connecting a Parallel Device 4-3 Connecting a Serial Device 4-4 Checking the Serial Port Settings 4-5 Connecting an External Keyboard or Mouse 4-5 Installing a PC Card 4-7 Installing a Memory Module 4-8 Removing and Replacing the Hard...
...Using the Power Management Features 3-10 Automatic Features 3-12 Manual Features 3-13 Resuming Activity From Suspend Mode 3-14 Using the APM Interface 3-15 Using Suspend to Disk Mode 3-16 Creating the Suspend to Disk data file 3-17 Recreating the Suspend to Disk data file 3-19 Chapter 4 Installing Optional Devices Connecting an External Monitor 4-1 Connecting a Parallel Device 4-3 Connecting a Serial Device 4-4 Checking the Serial Port Settings 4-5 Connecting an External Keyboard or Mouse 4-5 Installing a PC Card 4-7 Installing a Memory Module 4-8 Removing and Replacing the Hard...

User Manual
Page 8
... 5-1 Error Messages 5-3 The Computer Won't Start 5-3 Battery Problems 5-4 AC Adapter Problems 5-5 The LCD Screen Is Blank 5-6 The External Monitor Screen Is Blank 5-7 The Computer Locks Up 5-8 Password Problems 5-9 Embedded Keypad Problems 5-9 Trackball Problems 5-9 External Pointing Device Problems 5-10 Diskette Problems 5-11 Diskette Drive Problems 5-12 Hard Disk Problems 5-12 Software Problems 5-13 Printer Problems 5-14 Memory Module Problems 5-14 PC Card Problems 5-15 Appendix A Specifications CPU and Memory A-l Controllers A-2 Interfaces A-3 Keyboard A-3 Trackball...
... 5-1 Error Messages 5-3 The Computer Won't Start 5-3 Battery Problems 5-4 AC Adapter Problems 5-5 The LCD Screen Is Blank 5-6 The External Monitor Screen Is Blank 5-7 The Computer Locks Up 5-8 Password Problems 5-9 Embedded Keypad Problems 5-9 Trackball Problems 5-9 External Pointing Device Problems 5-10 Diskette Problems 5-11 Diskette Drive Problems 5-12 Hard Disk Problems 5-12 Software Problems 5-13 Printer Problems 5-14 Memory Module Problems 5-14 PC Card Problems 5-15 Appendix A Specifications CPU and Memory A-l Controllers A-2 Interfaces A-3 Keyboard A-3 Trackball...

User Manual
Page 9
..., display quality, and expaddability-all packaged in the latest in notebook computer technology. just connect an external monitor, keyboard, mouse, and printer. The ActionNote computer has 4MB of program and data files you create as you use your computer's two PCMCIA card slots allow you to quickly and easily add flash RAM, fax/ modem, local area network (LAN), and other software so you can even use your system startup screen). And...
..., display quality, and expaddability-all packaged in the latest in notebook computer technology. just connect an external monitor, keyboard, mouse, and printer. The ActionNote computer has 4MB of program and data files you create as you use your computer's two PCMCIA card slots allow you to quickly and easily add flash RAM, fax/ modem, local area network (LAN), and other software so you can even use your system startup screen). And...
User Manual
Page 10
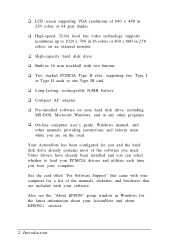
... PCMCIA Type II slots, supporting two Type I or Type II cards or one Type III card u Long-lasting, rechargeable NiMH battery u Compact AC adapter u Pre-installed software on your hard disk drive, including MS-DOS, Microsoft Windows, and in any other programs u On-line computer user's guide, Windows manual, and other manuals providing instructions and inform ation while you are on an external monitor u High-capacity hard disk drive u Built-in 16 mm trackball with your software. u LCD screen supporting VGA...
... PCMCIA Type II slots, supporting two Type I or Type II cards or one Type III card u Long-lasting, rechargeable NiMH battery u Compact AC adapter u Pre-installed software on your hard disk drive, including MS-DOS, Microsoft Windows, and in any other programs u On-line computer user's guide, Windows manual, and other manuals providing instructions and inform ation while you are on an external monitor u High-capacity hard disk drive u Built-in 16 mm trackball with your software. u LCD screen supporting VGA...

User Manual
Page 27
SCU options [continued) Option Description Settings Memory menu Cache Enable Controls the processor's internal cache operation = Enabled* No = Disabled PowerMgmt menu See "Setting the Power Management Options," below Defaults Sets all options to enter the specific parameters; If you set two types of passwords on your computer. Setting Up the Computer 1-13 Setting, Deleting, and Changing a Password You can try to enter it . If you to automatically configure your computer, including the System Configuration utility. select Custom to their default values Exit See "...
SCU options [continued) Option Description Settings Memory menu Cache Enable Controls the processor's internal cache operation = Enabled* No = Disabled PowerMgmt menu See "Setting the Power Management Options," below Defaults Sets all options to enter the specific parameters; If you set two types of passwords on your computer. Setting Up the Computer 1-13 Setting, Deleting, and Changing a Password You can try to enter it . If you to automatically configure your computer, including the System Configuration utility. select Custom to their default values Exit See "...

User Manual
Page 45
... diskette drive is configured to both for these drivers using the Windows ChipsCPL utility in the SCU; Also, be sure to remove the diskette before you use the SCU utility or the Fn keys to switch your hard disk drive. Using an Fn key only changes the display mode for more information. see Chapter 1 for the current session, while using the Display Mode option in the Control Panel. You can also set the default video mode the computer uses every...
... diskette drive is configured to both for these drivers using the Windows ChipsCPL utility in the SCU; Also, be sure to remove the diskette before you use the SCU utility or the Fn keys to switch your hard disk drive. Using an Fn key only changes the display mode for more information. see Chapter 1 for the current session, while using the Display Mode option in the Control Panel. You can also set the default video mode the computer uses every...
User Manual
Page 46
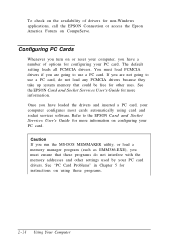
... drivers for non-Windows applications, call the EPSON Connection or access the Epson America Forum on or reset your computer, you have loaded the drivers and inserted a PC card, your computer configures most cards automatically using these programs do not load any PCMCIA drivers because they take up system memory that could be free for other settings used by your PC card drivers. Configuring PC Cards Whenever you turn on CompuServe. The default setting...
... drivers for non-Windows applications, call the EPSON Connection or access the Epson America Forum on or reset your computer, you have loaded the drivers and inserted a PC card, your computer configures most cards automatically using these programs do not load any PCMCIA drivers because they take up system memory that could be free for other settings used by your PC card drivers. Configuring PC Cards Whenever you turn on CompuServe. The default setting...
User Manual
Page 47
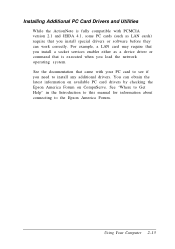
... card drivers by checking the Epson America Forum on CompuServe. See "Where to Get Help" in the Introduction to this manual for information about connecting to install any additional drivers. See the documentation that you load the network operating system. For example, a LAN card may require that you install a socket services enabler either as LAN cards) require that came with your PC card to see if you need...
... card drivers by checking the Epson America Forum on CompuServe. See "Where to Get Help" in the Introduction to this manual for information about connecting to install any additional drivers. See the documentation that you load the network operating system. For example, a LAN card may require that you install a socket services enabler either as LAN cards) require that came with your PC card to see if you need...
User Manual
Page 76
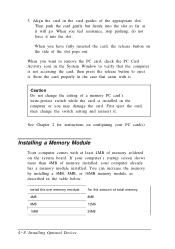
... card(s). If your computer's startup screen shows more than 4MB of memory soldered on the system board. then press the release button to remove the PC card, check the PC Card Activity icon in the computer or you have fully inserted the card, the release button on configuring your computer already has a memory module installed. See Chapter 2 for instructions on the side of total memory 8MB 12MB 20MB 4-8 Installing Optional Devices Installing a Memory Module...
... card(s). If your computer's startup screen shows more than 4MB of memory soldered on the system board. then press the release button to remove the PC card, check the PC Card Activity icon in the computer or you have fully inserted the card, the release button on configuring your computer already has a memory module installed. See Chapter 2 for instructions on the side of total memory 8MB 12MB 20MB 4-8 Installing Optional Devices Installing a Memory Module...

User Manual
Page 77
so if you must first remove the memory module cover and the CPU heat spreader. To install a memory module, you don't feel confident about installing it is expensive to the computer. 3. Close the LCD screen, if necessary. 4. Turn off the computer and any external device cables connected to replace; Installing Optional Devices 4-9 Disconnect any peripheral devices. 2. Turn the computer over so it yourself, ask your Authorized EPSON Servicer for assistance. Caution The memory module can be easily damaged and is upside down. Follow these steps: 1.
so if you must first remove the memory module cover and the CPU heat spreader. To install a memory module, you don't feel confident about installing it is expensive to the computer. 3. Close the LCD screen, if necessary. 4. Turn off the computer and any external device cables connected to replace; Installing Optional Devices 4-9 Disconnect any peripheral devices. 2. Turn the computer over so it yourself, ask your Authorized EPSON Servicer for assistance. Caution The memory module can be easily damaged and is upside down. Follow these steps: 1.

User Manual
Page 81
... remove the hard disk drive, follow these steps: 1. Follow the steps on your computer's hard disk drive so its size corresponds to your suspend mode, you later remove or change the memory module, be sure to the computer. 3. Turn the computer over so the bottom faces up. 5. Removing and Replacing the Hard Disk Drive If you need to remove the memory module cover and the CPU heat spreader. Turn the computer over and open the LCD screen. 15. Installing Optional Devices...
... remove the hard disk drive, follow these steps: 1. Follow the steps on your computer's hard disk drive so its size corresponds to your suspend mode, you later remove or change the memory module, be sure to the computer. 3. Turn the computer over so the bottom faces up. 5. Removing and Replacing the Hard Disk Drive If you need to remove the memory module cover and the CPU heat spreader. Turn the computer over and open the LCD screen. 15. Installing Optional Devices...

User Manual
Page 87
... configuration settings shown on the SCU screen and Power Management screen. Troubleshooting 5-1 Identifying Your System When you request technical assistance, be ready to identify your system and make a note of any software programs you setup and use the guidelines below to provide the serial number of your computer, its system BIOS version number, its configuration (including the types of disk drives and options), and the names and version numbers of any error...
... configuration settings shown on the SCU screen and Power Management screen. Troubleshooting 5-1 Identifying Your System When you request technical assistance, be ready to identify your system and make a note of any software programs you setup and use the guidelines below to provide the serial number of your computer, its system BIOS version number, its configuration (including the types of disk drives and options), and the names and version numbers of any error...

User Manual
Page 90
... using the AC adapter. 5-4 Troubleshooting See Chapter 3 for instructions. 3. Turn on powering your computer, then use the second battery to recharge the other battery. Try removing and reinstalling it reaches its maximum capacity. 4. 3. If the computer still does not start, the problem is probably caused by the power source; Battery Problems If you replace the battery and the computer does not work properly, the new battery may not be fully charged...
... using the AC adapter. 5-4 Troubleshooting See Chapter 3 for instructions. 3. Turn on powering your computer, then use the second battery to recharge the other battery. Try removing and reinstalling it reaches its maximum capacity. 4. 3. If the computer still does not start, the problem is probably caused by the power source; Battery Problems If you replace the battery and the computer does not work properly, the new battery may not be fully charged...

User Manual
Page 92
... external monitor mode. See Chapters 1 and 2 for your display to resume. 2. The computer may have set a timeout period for instructions. 4. Press any key or the Suspend/ Resume button to adjust the screen display. (The contrast adjustment has no system activity. Use the brightness and contrast key commands to resume. Press Fn F12 until you are correct for more information. 5-6 Troubleshooting You may have switched your system. Make sure the default display...
... external monitor mode. See Chapters 1 and 2 for your display to resume. 2. The computer may have set a timeout period for instructions. 4. Press any key or the Suspend/ Resume button to adjust the screen display. (The contrast adjustment has no system activity. Use the brightness and contrast key commands to resume. Press Fn F12 until you are correct for more information. 5-6 Troubleshooting You may have switched your system. Make sure the default display...

User Manual
Page 96
...'s serial port, make sure the device and the COM port option in the SCU are set to the external key boardl mouse port before you connected it in order to select these solutions: 1. See Chapter 1 for more information. 5-10 Troubleshooting Is the external device connected properly? Make sure you turned on your device for Windows and MS-DOS applications are already installed on the computer, as described in the System Configuration utility? If you disable...
...'s serial port, make sure the device and the COM port option in the SCU are set to the external key boardl mouse port before you connected it in order to select these solutions: 1. See Chapter 1 for more information. 5-10 Troubleshooting Is the external device connected properly? Make sure you turned on your device for Windows and MS-DOS applications are already installed on the computer, as described in the System Configuration utility? If you disable...

User Manual
Page 97
...? Troubleshooting 5-11 Diskette Problems If you need to change or lose. Is the diskette properly inserted in your computer can store data on -line Windows manual for your on it works using the right type of the diskette, use the copy. If it . Is the diskette write-protected? A new diskette must be formatted before you still have trouble with an external device, check the manual that...
...? Troubleshooting 5-11 Diskette Problems If you need to change or lose. Is the diskette properly inserted in your computer can store data on -line Windows manual for your on it works using the right type of the diskette, use the copy. If it . Is the diskette write-protected? A new diskette must be formatted before you still have trouble with an external device, check the manual that...
User Manual
Page 102
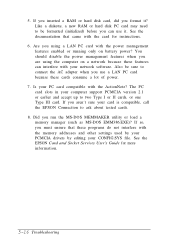
... your PC card compatible with the power management features enabled or running only on a network because these cards consume a lot of power. 7. See the EPSON Card and Socket Services User's Guide for instructions. 6. The PC card slots in your network software. Are you are using a LAN PC card with the ActionNote? You should disable the power management features when you using the computer on battery power? If you run the MS-DOS MEMMAKER utility or load a memory manager (such as...
... your PC card compatible with the power management features enabled or running only on a network because these cards consume a lot of power. 7. See the EPSON Card and Socket Services User's Guide for instructions. 6. The PC card slots in your network software. Are you are using a LAN PC card with the ActionNote? You should disable the power management features when you using the computer on battery power? If you run the MS-DOS MEMMAKER utility or load a memory manager (such as...
User Manual
Page 110
... 2-14-15 Connection, Intro-5, 5-1 Extra Care Road Service, Intro-5 help, Intro-6, 5-7 marketing locations, Intro-4, Intro-6 Error messages, 5-3 External keyboard configuring, 4-6 connecting, 4-5-6 port specifications, A-3 problems, 5-10-11 External monitor connecting, 4-1-3 problems, 5-7 resolutions, A-2 specifications, A-3 switching display, 2-5,2-13, 4-2-3 F Fn key functions, 1-6, 2-3-5 G Global Standby option, 1-16 H Hard disk drive activity icon, 1-7, 2-2 backup, 1-8 configuring, 1-11, 4-17 controller, A-2 power management option, 1-17 problems, 5-12-13 protecting, 2-2 replacing, 4-13-17...
... 2-14-15 Connection, Intro-5, 5-1 Extra Care Road Service, Intro-5 help, Intro-6, 5-7 marketing locations, Intro-4, Intro-6 Error messages, 5-3 External keyboard configuring, 4-6 connecting, 4-5-6 port specifications, A-3 problems, 5-10-11 External monitor connecting, 4-1-3 problems, 5-7 resolutions, A-2 specifications, A-3 switching display, 2-5,2-13, 4-2-3 F Fn key functions, 1-6, 2-3-5 G Global Standby option, 1-16 H Hard disk drive activity icon, 1-7, 2-2 backup, 1-8 configuring, 1-11, 4-17 controller, A-2 power management option, 1-17 problems, 5-12-13 protecting, 2-2 replacing, 4-13-17...

User Manual
Page 111
..., see Battery Num Lock configuring default mode, 1-11 icon, 1-7 key functions, 2-3 ,2-5-6 O On-line documentation, Intro-2 Options available, A-6 installing, 4-1-18 0S/ 2, 1-6 P Parallel port configuring, 1-11,4-3 device connection, 4-34 specifications, A-3 Passwords changing, 1-13-15 deleting, 1-13-15 entering, 2-10-11 problems, 5-9 setting, 1-12-15 PC card activity icon, 1-7,4-8 additional drivers and utilities, 2-15 driver prompt, 1-5,2-14 installing, 1-6, 4-7-8 problems, 5-15-16 removing, 4-8 specifications, 4-7, A-2 storing, 4-8 using, 3-1-2 write-protect switch, 4-8 PCMCIA slots address...
..., see Battery Num Lock configuring default mode, 1-11 icon, 1-7 key functions, 2-3 ,2-5-6 O On-line documentation, Intro-2 Options available, A-6 installing, 4-1-18 0S/ 2, 1-6 P Parallel port configuring, 1-11,4-3 device connection, 4-34 specifications, A-3 Passwords changing, 1-13-15 deleting, 1-13-15 entering, 2-10-11 problems, 5-9 setting, 1-12-15 PC card activity icon, 1-7,4-8 additional drivers and utilities, 2-15 driver prompt, 1-5,2-14 installing, 1-6, 4-7-8 problems, 5-15-16 removing, 4-8 specifications, 4-7, A-2 storing, 4-8 using, 3-1-2 write-protect switch, 4-8 PCMCIA slots address...
User Manual
Page 112
..., A-1 Resetting the computer, 2--9 ROM, 1-8,5-3, A-1 S Safety instructions, see iii-iv at front of manual Scanner, 4-34 Scroll Lock icon, 1-7 Serial number, 5-1 Serial port address, 4-5 configuring, 1-11, 3-3,4-5 device connection, 4-4-5 specifications, A-3 Shadow RAM, A-1 Software pre-installed, Intro-2 problems, 5-13 support, Intro-2 version numbers, 5-l-2 Specifications, A-l-6 Standby modes configuring, 1-16, 3-12 power-saving operations, 3-10-11 Suspend modes configuring, 1-16-17, 3-3, 3-12 icon, 1-7, 3-13 power-saving operations, 3-10-11 problems, 5-4,5 -6,5-8 resuming from, 3-14 to disk...
..., A-1 Resetting the computer, 2--9 ROM, 1-8,5-3, A-1 S Safety instructions, see iii-iv at front of manual Scanner, 4-34 Scroll Lock icon, 1-7 Serial number, 5-1 Serial port address, 4-5 configuring, 1-11, 3-3,4-5 device connection, 4-4-5 specifications, A-3 Shadow RAM, A-1 Software pre-installed, Intro-2 problems, 5-13 support, Intro-2 version numbers, 5-l-2 Specifications, A-l-6 Standby modes configuring, 1-16, 3-12 power-saving operations, 3-10-11 Suspend modes configuring, 1-16-17, 3-3, 3-12 icon, 1-7, 3-13 power-saving operations, 3-10-11 problems, 5-4,5 -6,5-8 resuming from, 3-14 to disk...
