
Owners Manual
Page 2
... from the apparatus. ---- at the bottom encrosure of important within the product's enclosure SERVICEABLE PARTS INSIDE operating and maintenance that produce heat. Use only power source as indicated. 14.) Use replacement parts as radiators, heat with the apparatus. Heed all instructions. The caution Marking maybe rocated at prugs, convenience 8.) Only use by the manufacturer. 1s.) 16.) upon completion safety checks. fit into...
... from the apparatus. ---- at the bottom encrosure of important within the product's enclosure SERVICEABLE PARTS INSIDE operating and maintenance that produce heat. Use only power source as indicated. 14.) Use replacement parts as radiators, heat with the apparatus. Heed all instructions. The caution Marking maybe rocated at prugs, convenience 8.) Only use by the manufacturer. 1s.) 16.) upon completion safety checks. fit into...
Owners Manual
Page 3
... many useful and convenient features in perfect working order before it left our factory. Once again, thanks for obtaining service at the end of this Emerson audio product. BEFORE WE BEGIN Thank you for purchasing this Owner's Manual completely to make sure you experience any problems with the operation of this product, please refer to the instructions for purchasing this Manual. Please be in this product.
... many useful and convenient features in perfect working order before it left our factory. Once again, thanks for obtaining service at the end of this Emerson audio product. BEFORE WE BEGIN Thank you for purchasing this Owner's Manual completely to make sure you experience any problems with the operation of this product, please refer to the instructions for purchasing this Manual. Please be in this product.
Owners Manual
Page 4
... RADIATION WHEN OPEN AND INTERLOCKS DEFEATED. Consult the dealer or an experienced radio/TV technician for a Class B digital device, pursuantto Part 15 of other stereo equipment that to heat radiating appliances such as described in the manual. . Operate controls and switches as electric heaters, oo top of the FCC Rules. Use a clean dry cloth. . Store your CDs, cassettes in a particular installation. Howevel there...
... RADIATION WHEN OPEN AND INTERLOCKS DEFEATED. Consult the dealer or an experienced radio/TV technician for a Class B digital device, pursuantto Part 15 of other stereo equipment that to heat radiating appliances such as described in the manual. . Operate controls and switches as electric heaters, oo top of the FCC Rules. Use a clean dry cloth. . Store your CDs, cassettes in a particular installation. Howevel there...
Owners Manual
Page 5
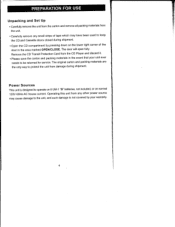
...remove all packing materials from the cD Player and discard it' . Unpacking and Set UP . operating this unit from damage during shipment' . The door will open the cD compartment by your unit ever needs to protect the unit from any small strips of tape which may cause damage to operate on 8 UM-1 "D" batteries...and packing materials are the only way to be returned for service. open fully. carefully remove any other power source may have been used to keep the CD and Cassette doors closed during shipment' Power Sources This unit is designed to the unit, and such damage ...
...remove all packing materials from the cD Player and discard it' . Unpacking and Set UP . operating this unit from damage during shipment' . The door will open the cD compartment by your unit ever needs to protect the unit from any small strips of tape which may cause damage to operate on 8 UM-1 "D" batteries...and packing materials are the only way to be returned for service. open fully. carefully remove any other power source may have been used to keep the CD and Cassette doors closed during shipment' Power Sources This unit is designed to the unit, and such damage ...

Owners Manual
Page 6
... insert the plug in your AC ouflet, you to make the plug fit into a matching polarized AC ouflet. This is a safety feature to reduce the possibility of the AC Power Cord to the AC socket on the plug, or use an adapter to electr.ic shock. \ AC Outlet Plug You should have... unit has a polarized AC plug with one wide blade and one narrow blade. This defeats the safety feature and could expose you probably have your ouflet. AC Operation Connect the small end of electric shock. lf this plug will only fit into your outdated outlet changed by a qualified, licensed electrician...
... insert the plug in your AC ouflet, you to make the plug fit into a matching polarized AC ouflet. This is a safety feature to reduce the possibility of the AC Power Cord to the AC socket on the plug, or use an adapter to electr.ic shock. \ AC Outlet Plug You should have... unit has a polarized AC plug with one wide blade and one narrow blade. This defeats the safety feature and could expose you probably have your ouflet. AC Operation Connect the small end of electric shock. lf this plug will only fit into your outdated outlet changed by a qualified, licensed electrician...

Owners Manual
Page 7
Press down . Battery Operation 1.)Turn the unit upside down on the back cabinet. lllote: ln order to operate the unit on battery power the AC cord must be disconnected from the AC socket on the two battery compartment locking tabs and remove the battery door. @ :@ _G' == -r-t -t -t : =- - ,6-) 2.) lnsert 8 UM-1 " D" size batteries according to the polarity markings engraved in place. lf the batteries are inserted...
Press down . Battery Operation 1.)Turn the unit upside down on the back cabinet. lllote: ln order to operate the unit on battery power the AC cord must be disconnected from the AC socket on the two battery compartment locking tabs and remove the battery door. @ :@ _G' == -r-t -t -t : =- - ,6-) 2.) lnsert 8 UM-1 " D" size batteries according to the polarity markings engraved in place. lf the batteries are inserted...
Owners Manual
Page 8
... product from moving when you purchme small self-adhesive felt pads, available at hardware stores and home improvement centers everywhere, and apply these precautions when using batteries in the battery compartment. Use only the size and type of batteries together (e.g.Alkaline and Carbon-Zinc) or old batteries with non-skid rubber'feet'to be used for a long period of time, remove the batteries...
... product from moving when you purchme small self-adhesive felt pads, available at hardware stores and home improvement centers everywhere, and apply these precautions when using batteries in the battery compartment. Use only the size and type of batteries together (e.g.Alkaline and Carbon-Zinc) or old batteries with non-skid rubber'feet'to be used for a long period of time, remove the batteries...

Owners Manual
Page 10
... 8. ) POWER Button 9. ) REPEAT Button 1 0. ) BASS Button 11 .) POWER lndicator 12.) LCD Display 13.) CD PROGRAM Button 14.) CD RANDOM Button 15.) CD PLAY/PAUSE Button 16.) CD STOP Button 17 .) CD Rev. TAPE - RADTO) 23.) BAND Switch (FM ST. - Skip Search >ll Button 1 9. ) AUX lN Jack 20.) Battery Compartment 21 .) AC Socket 22.) FUNCTION Switch (AUX/CD - )1 . FM -AM) 24.) CD Door 25.) SPEAKERS 26.) Cassette Door FM Stereo lnd icator .) I lPause) ) ,4 6. FM Telescopic Anten na 2.) FOLDTNG HANDLE 3.) TUNING Knob 4.) CD Door OPEN...
... 8. ) POWER Button 9. ) REPEAT Button 1 0. ) BASS Button 11 .) POWER lndicator 12.) LCD Display 13.) CD PROGRAM Button 14.) CD RANDOM Button 15.) CD PLAY/PAUSE Button 16.) CD STOP Button 17 .) CD Rev. TAPE - RADTO) 23.) BAND Switch (FM ST. - Skip Search >ll Button 1 9. ) AUX lN Jack 20.) Battery Compartment 21 .) AC Socket 22.) FUNCTION Switch (AUX/CD - )1 . FM -AM) 24.) CD Door 25.) SPEAKERS 26.) Cassette Door FM Stereo lnd icator .) I lPause) ) ,4 6. FM Telescopic Anten na 2.) FOLDTNG HANDLE 3.) TUNING Knob 4.) CD Door OPEN...
Owners Manual
Page 11
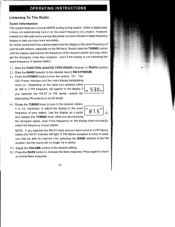
... light. Unlike a digitaltuner it by switching the BAND selector to the FM position, but the sound will appear in stereo. 5.) Adjust the VOLUME controlto the desired setting. 6.) Press the BASS button to the exact frequency of a dial scale and a moving dial pointerwe have tuned to the desired station. Do not be in the display. Listening To The Radio Tuner lnformation This system features a normalAMiFM analog tuning system...
... light. Unlike a digitaltuner it by switching the BAND selector to the FM position, but the sound will appear in stereo. 5.) Adjust the VOLUME controlto the desired setting. 6.) Press the BASS button to the exact frequency of a dial scale and a moving dial pointerwe have tuned to the desired station. Do not be in the display. Listening To The Radio Tuner lnformation This system features a normalAMiFM analog tuning system...
Owners Manual
Page 13
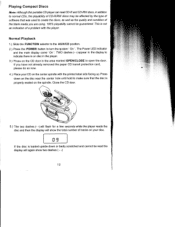
... the blank media you have not already removed the paper CD transit protection card, please do so now. 4.) Place your disc. 09 lf the disc is not an indication of a problem with the printed label side facing up. Playing Compact Discs frlote:Althoughthis portfuleCD playercan red CD-Rmd CD-RW discs, in the area marked OPEN/CLOSE to make sure that was used to turn the rystem...
... the blank media you have not already removed the paper CD transit protection card, please do so now. 4.) Place your disc. 09 lf the disc is not an indication of a problem with the printed label side facing up. Playing Compact Discs frlote:Althoughthis portfuleCD playercan red CD-Rmd CD-RW discs, in the area marked OPEN/CLOSE to make sure that was used to turn the rystem...

Owners Manual
Page 14
... and the display will resume when the buttons are depressed. To cancel Pause and resume normal playback at the same point, press the PLAY/PAUSE button once more. 7.) Adjust the VOLUME and BASS controls as the buttons are released. . Press either the ] 6.) Press the PLAY/PAUSE button. The play indicator ) flashes but the disc continues to shut the system,Off ', especially when operating the system on battery power. The...
... and the display will resume when the buttons are depressed. To cancel Pause and resume normal playback at the same point, press the PLAY/PAUSE button once more. 7.) Adjust the VOLUME and BASS controls as the buttons are released. . Press either the ] 6.) Press the PLAY/PAUSE button. The play indicator ) flashes but the disc continues to shut the system,Off ', especially when operating the system on battery power. The...

Owners Manual
Page 15
... and resume normal playback at any time press the RANDOM button once more. The player will be repeated continuously. 2.) Wnite the Disc is stoped, press the SKIPDI or l(buttons untilthe desired track number is playing single track, press the REPEAT button once. The REPEAT lndicator appears and flashes in the display. 2.) Press the PLAY/PAUSE button. To cancelAll Tracks Repeat playback: ( i) Press...
... and resume normal playback at any time press the RANDOM button once more. The player will be repeated continuously. 2.) Wnite the Disc is stoped, press the SKIPDI or l(buttons untilthe desired track number is playing single track, press the REPEAT button once. The REPEAT lndicator appears and flashes in the display. 2.) Press the PLAY/PAUSE button. To cancelAll Tracks Repeat playback: ( i) Press...

Owners Manual
Page 16
... played. lvote: The player cmnot be programmed white a disc is flashing in the display press the PROGRAM button again to enter the track in the program memory. 7') Repeat steps 5 and 6 untilyou have entered up to 20 tracks on the disc and the programmed tracks are cleared from the memory. 15 tf a disc is flashing in the disptay press the pRoGRAM button once again to play several times...
... played. lvote: The player cmnot be programmed white a disc is flashing in the display press the PROGRAM button again to enter the track in the program memory. 7') Repeat steps 5 and 6 untilyou have entered up to 20 tracks on the disc and the programmed tracks are cleared from the memory. 15 tf a disc is flashing in the disptay press the pRoGRAM button once again to play several times...
Owners Manual
Page 18
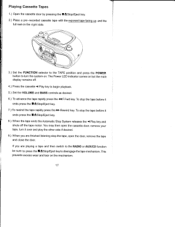
The Power LED indicator comes on but the main display remains off. 4.) Press the cassette < Play key to turn the system on the right side. 3.) set the FUNGTION selector to the TAPE position and press the powER button to begin playback. 5.) Set the VOLUME and BASS controls as desired. 6.) To advance the tape rapidly press the Playi n g' Cassette Tapes I 1.) Open the cmsette door by pressing the AStop/Eject key. 2.) Place a pre-recorded cassette tape withtheexposedtapefacing up andthe full reel on .
The Power LED indicator comes on but the main display remains off. 4.) Press the cassette < Play key to turn the system on the right side. 3.) set the FUNGTION selector to the TAPE position and press the powER button to begin playback. 5.) Set the VOLUME and BASS controls as desired. 6.) To advance the tape rapidly press the Playi n g' Cassette Tapes I 1.) Open the cmsette door by pressing the AStop/Eject key. 2.) Place a pre-recorded cassette tape withtheexposedtapefacing up andthe full reel on .
Owners Manual
Page 19
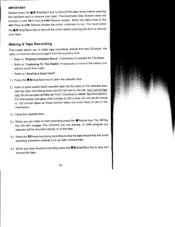
... to shut off the motor before opening the door to remove your tape. Refer to ,,Ptaying compact Discs" if necessary to start recording press the oRecord key. Do not use tape identified as radio commercials' I 1.) Press the AStop/Eject key to make tape recordings directly from the cD player, the radio, or from radio. . When the tape ends in the > Rewind modes the motor continues to run' You...
... to shut off the motor before opening the door to remove your tape. Refer to ,,Ptaying compact Discs" if necessary to start recording press the oRecord key. Do not use tape identified as radio commercials' I 1.) Press the AStop/Eject key to make tape recordings directly from the cD player, the radio, or from radio. . When the tape ends in the > Rewind modes the motor continues to run' You...
Owners Manual
Page 20
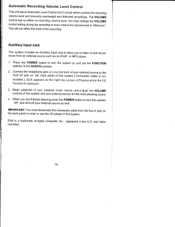
... Display while the cD function is a trademark of this system ' Off ' and shut off your external source for the most pleasing sound. 4. The voLUME control has no effect on and set the FUNcfloN selector to shut this system ( connection cable is not included ). Auxiliary lnput Jack This system includes an Auxiliary lnput Jack to allow you to listen to thej AUX lN jack on the back panel in this system...
... Display while the cD function is a trademark of this system ' Off ' and shut off your external source for the most pleasing sound. 4. The voLUME control has no effect on and set the FUNcfloN selector to shut this system ( connection cable is not included ). Auxiliary lnput Jack This system includes an Auxiliary lnput Jack to allow you to listen to thej AUX lN jack on the back panel in this system...
Owners Manual
Page 22
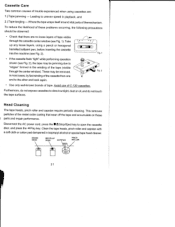
... head cleaner. Avoid use of tape visible through the center window). Head Gleaning The tape heads, pinch roller and capstan require periodic cleaning. Disconnect the AC power cord, press the lAStop/Eject key to direct sunlight, dust or oil, and do not expose cassettes to open the cassette door, and press the < Play key. ERASE REC/PLAY PINCH ROLLER 21...
... head cleaner. Avoid use of tape visible through the center window). Head Gleaning The tape heads, pinch roller and capstan require periodic cleaning. Disconnect the AC power cord, press the lAStop/Eject key to direct sunlight, dust or oil, and do not expose cassettes to open the cassette door, and press the < Play key. ERASE REC/PLAY PINCH ROLLER 21...

Owners Manual
Page 23
... and light stains will have no effect on or affix labels to the surface of the disc. Gaution Never allow any wax, polish sprays, or abrasive cleaners on the center of the case and lift the disc out, holding it with a soft dry dust cloth. lf necessary use detergents... wiped off the disc's recorded surface with a soft, lint-free, dry cloth. To remove a disc from the inside to get inside the unit while cleaning. 22 Fingerprints and dust should remove most particles. Do not use any water or other liquids to the outside of compact discs. Clean the disc periodically with a ...
... and light stains will have no effect on or affix labels to the surface of the disc. Gaution Never allow any wax, polish sprays, or abrasive cleaners on the center of the case and lift the disc out, holding it with a soft dry dust cloth. lf necessary use detergents... wiped off the disc's recorded surface with a soft, lint-free, dry cloth. To remove a disc from the inside to get inside the unit while cleaning. 22 Fingerprints and dust should remove most particles. Do not use any water or other liquids to the outside of compact discs. Clean the disc periodically with a ...
Owners Manual
Page 24
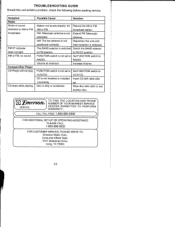
... scratched. to AUX/CD. The BAND selector is not installed or installed incorrectly. RADIO. Wipe disc with label side up. FUNCTION switch is not set to FM position. Compact Disc Player CD Player will not play. broadcast station. CD is switched Switch the BAND selector to AUX/CD. AM or FM, no sound. lnsert CD with cloth or use another disc. @ m€rsotto SERVICE TO FIND THE LOCATION AND PHONE NUMBER OF YOUR NEAREST SERVICE CENTER PERMITTED TO PERFORM...
... scratched. to AUX/CD. The BAND selector is not installed or installed incorrectly. RADIO. Wipe disc with label side up. FUNCTION switch is not set to FM position. Compact Disc Player CD Player will not play. broadcast station. CD is switched Switch the BAND selector to AUX/CD. AM or FM, no sound. lnsert CD with cloth or use another disc. @ m€rsotto SERVICE TO FIND THE LOCATION AND PHONE NUMBER OF YOUR NEAREST SERVICE CENTER PERMITTED TO PERFORM...
Owners Manual
Page 25
... purchase, we will provide repair service at no charge for product service. Pleme take a moment now to locate the serial number and write the number in a padded box, enclose your check or money order payable to cover shipping ard hardling costs, and enclose a copy of purchase. LIMITED WARRANTY Emerson Radio Corp. Model Number: PD9127 Serial Number: 24 THIS WARRANTY GIVES YOU SPECIFIC LEGAL RIGHTS, AND...
... purchase, we will provide repair service at no charge for product service. Pleme take a moment now to locate the serial number and write the number in a padded box, enclose your check or money order payable to cover shipping ard hardling costs, and enclose a copy of purchase. LIMITED WARRANTY Emerson Radio Corp. Model Number: PD9127 Serial Number: 24 THIS WARRANTY GIVES YOU SPECIFIC LEGAL RIGHTS, AND...

