
Owners Manual
Page 2
... RISK OF ELECTRIC SHOCK DO NOT OPEN ! PERSONNEL. A polarized plug has two blades with dry cloth. 7.) Do not block any service or repairs to constitute a risk Q U A L I F I E D S E R V I C E of the obsolete outlet. 10.) Protect the power cord from being walked on the apparatus. 15.) Do not overload wall outlet. Use only power source as indicated. 16.) Use replacement parts as vases shall be of...
... RISK OF ELECTRIC SHOCK DO NOT OPEN ! PERSONNEL. A polarized plug has two blades with dry cloth. 7.) Do not block any service or repairs to constitute a risk Q U A L I F I E D S E R V I C E of the obsolete outlet. 10.) Protect the power cord from being walked on the apparatus. 15.) Do not overload wall outlet. Use only power source as indicated. 16.) Use replacement parts as vases shall be of...

Owners Manual
Page 3
... this Manual, you experience any problems with the operation of this product. The Emerson brand is always the chance that some problem may occur because of rough handling during shipment to the retail store or to the instructions for purchasing this Emerson audio product. For future reference, record the serial number in perfect working order before it left our factory. It was manufactured using the...
... this Manual, you experience any problems with the operation of this product. The Emerson brand is always the chance that some problem may occur because of rough handling during shipment to the retail store or to the instructions for purchasing this Emerson audio product. For future reference, record the serial number in perfect working order before it left our factory. It was manufactured using the...

Owners Manual
Page 4
... power cord. Use a clean dry cloth. • Operate controls and switches as this equipment does cause harmful interference to radio or television reception, which the receiver is connected. • Consult the dealer or an experienced radio/TV technician for help. FCC INFORMATION This equipment has been tested and found to comply with the limits for a Class B digital device, pursuant to which can radiate radio...
... power cord. Use a clean dry cloth. • Operate controls and switches as this equipment does cause harmful interference to radio or television reception, which the receiver is connected. • Consult the dealer or an experienced radio/TV technician for help. FCC INFORMATION This equipment has been tested and found to comply with the limits for a Class B digital device, pursuant to which can radiate radio...
Owners Manual
Page 5
...-up from damage during shipment. AC Operation Connect the small end of CD door and lifting upward. POWER SOURCES This unit is used to protect the unit from moving during shipment. •Open the CD compartment by your unit ever needs to be returned for service. AC~IN PD6850_ib060203.p65 4 4 ... the OPEN/CLOSE position on top right of the AC Power Cord to operate on 8 pcs "C" batteries, not included, or on the back cabinet, then insert the plug in the event that your warranty. Carefully remove this unit from the unit. •Carefully remove any small strips of tape which...
...-up from damage during shipment. AC Operation Connect the small end of CD door and lifting upward. POWER SOURCES This unit is used to protect the unit from moving during shipment. •Open the CD compartment by your unit ever needs to be returned for service. AC~IN PD6850_ib060203.p65 4 4 ... the OPEN/CLOSE position on top right of the AC Power Cord to operate on 8 pcs "C" batteries, not included, or on the back cabinet, then insert the plug in the event that your warranty. Carefully remove this unit from the unit. •Carefully remove any small strips of tape which...
Owners Manual
Page 7
... of time, remove the batteries to prevent the product from possible battery leakage. 5. Be sure to your furniture. Do not try to recharge batteries not intended to be disconnected from non-migrating rubber material specially formulated to avoid leaving any damage to follow the correct polarity when installing the batteries as indicated in this device: 1. This model is not to operate...
... of time, remove the batteries to prevent the product from possible battery leakage. 5. Be sure to your furniture. Do not try to recharge batteries not intended to be disconnected from non-migrating rubber material specially formulated to avoid leaving any damage to follow the correct polarity when installing the batteries as indicated in this device: 1. This model is not to operate...
Owners Manual
Page 9
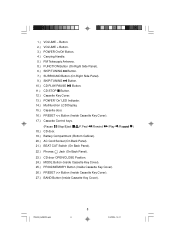
Button. 2.) VOLUME + Button. 3.) POWER On/Off Button. 4.) Carrying Handle. 5.) FM Telescopic Antenna. 8.) FUNCTION Button (On Right Side Panel). 6.) SKIP/TUNING Button. 7.) SURROUND Button (On Right Side Panel). 9.) SKIP/TUNING Button. 10.) CD PLAY/PAUSE Button. 11.) CD STOP Button. 12.) Cassette Key Cover. 13.) POWER 'On'LED Indicator. 14.) Multifunction LCD Display. 15.) Cassette door. 16.) PRESET > Button (Inside Cassette Key Cover). 27.) BAND Button (Inside Cassette Key Cover). 1.) VOLUME - PD6850_ib060203.p65 8 8 2/6/2003, 14:41
Button. 2.) VOLUME + Button. 3.) POWER On/Off Button. 4.) Carrying Handle. 5.) FM Telescopic Antenna. 8.) FUNCTION Button (On Right Side Panel). 6.) SKIP/TUNING Button. 7.) SURROUND Button (On Right Side Panel). 9.) SKIP/TUNING Button. 10.) CD PLAY/PAUSE Button. 11.) CD STOP Button. 12.) Cassette Key Cover. 13.) POWER 'On'LED Indicator. 14.) Multifunction LCD Display. 15.) Cassette door. 16.) PRESET > Button (Inside Cassette Key Cover). 27.) BAND Button (Inside Cassette Key Cover). 1.) VOLUME - PD6850_ib060203.p65 8 8 2/6/2003, 14:41
Owners Manual
Page 10
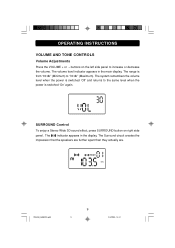
.... MHz PD6850_ib060203.p65 9 9 2/6/2003, 14:41 OPERATING INSTRUCTIONS VOLUME AND TONE CONTROLS Volume Adjustments Press the VOLUME + or - The range is switched 'On'again. The indicator appears in the main display. The volume level indicator appears in the display. SURROUND Control To enjoy a Stereo Wide 3D sound effect, press SURROUND button on the left side panel to the same level when the power is from "00 db"(Minimum) to...
.... MHz PD6850_ib060203.p65 9 9 2/6/2003, 14:41 OPERATING INSTRUCTIONS VOLUME AND TONE CONTROLS Volume Adjustments Press the VOLUME + or - The range is switched 'On'again. The indicator appears in the main display. The volume level indicator appears in the display. SURROUND Control To enjoy a Stereo Wide 3D sound effect, press SURROUND button on the left side panel to the same level when the power is from "00 db"(Minimum) to...
Owners Manual
Page 11
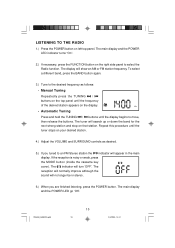
... the POWER LED indicator turns "On". 2.) If necessary, press the FUNCTION button on left top panel. The display will turn 'OFF'. The tuner will appear in stereo. 6.) When you tuned to an FM Stereo station the indicator will search up or down the band for the next strong station and stop on your desired station. 4.) Adjust the VOLUME and SURROUND controls as follows: • Manual Tuning Repeatedly press the TUNING / buttons...
... the POWER LED indicator turns "On". 2.) If necessary, press the FUNCTION button on left top panel. The display will turn 'OFF'. The tuner will appear in stereo. 6.) When you tuned to an FM Stereo station the indicator will search up or down the band for the next strong station and stop on your desired station. 4.) Adjust the VOLUME and SURROUND controls as follows: • Manual Tuning Repeatedly press the TUNING / buttons...
Owners Manual
Page 13
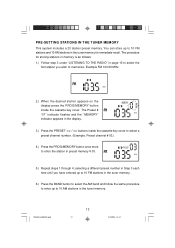
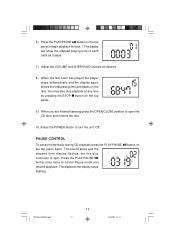
... enter up to 10 AM stations in the display. 3.) Press the PRESET > buttons inside the cassette key cover. PRE-SETTING STATIONS IN THE TUNER MEMORY This system includes a 20 station preset memory. MHz 2.) When the desired station appears on the display press the PROG/MEMORY button inside the cassette key cover to select a preset channel number. (Example: Preset channel # 03.) 4.) Press the PROG/MEMORY button once more to memorize.
... enter up to 10 AM stations in the display. 3.) Press the PRESET > buttons inside the cassette key cover. PRE-SETTING STATIONS IN THE TUNER MEMORY This system includes a 20 station preset memory. MHz 2.) When the desired station appears on the display press the PROG/MEMORY button inside the cassette key cover to select a preset channel number. (Example: Preset channel # 03.) 4.) Press the PROG/MEMORY button once more to memorize.
Owners Manual
Page 15
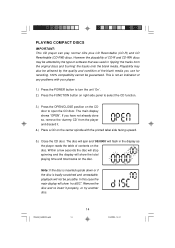
... center spindle with your player. 1.) Press the POWER button to turn the unit 'On'. 2.) Press the FUNCTION button on right side panel to open the CD door. PD6850_ib060203.p65 14 14 2/6/2003, 14:41 This is badly scratched and unreadable, playback will show "no dISC". PLAYING COMPACT DISCS IMPORTANT: This CD player can play normal CDs plus CD Recordable (CD-R) and CD Rewriteable (CD-RW) discs. In this case the main display will flash...
... center spindle with your player. 1.) Press the POWER button to turn the unit 'On'. 2.) Press the FUNCTION button on right side panel to open the CD door. PD6850_ib060203.p65 14 14 2/6/2003, 14:41 This is badly scratched and unreadable, playback will show "no dISC". PLAYING COMPACT DISCS IMPORTANT: This CD player can play normal CDs plus CD Recordable (CD-R) and CD Rewriteable (CD-RW) discs. In this case the main display will flash...
Owners Manual
Page 16
... the POWER button to turn the unit "Off". The sound stops and the elapsed time display flashes, but the disc continues to cancel Pause mode and resume playback. You may also stop playback at any time by pressing the STOP button on track 1. The elapsed time display stops flashing. button on the disc. PAUSE CONTROL To pause momentarily during CD playback press the PLAY/PAUSE the top panel again. The display...
... the POWER button to turn the unit "Off". The sound stops and the elapsed time display flashes, but the disc continues to cancel Pause mode and resume playback. You may also stop playback at any time by pressing the STOP button on track 1. The elapsed time display stops flashing. button on the disc. PAUSE CONTROL To pause momentarily during CD playback press the PLAY/PAUSE the top panel again. The display...
Owners Manual
Page 17
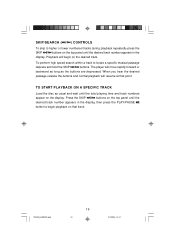
... top panel until the desired track number appears in the display, then press the PLAY/PAUSE button to locate a specific musical passage depress and hold the SKIP / buttons. Playback will move rapidly forward or backward as long as usual and wait until the total playing time and track numbers appear on the display. TO START PLAYBACK ON A SPECIFIC TRACK Load the disc as the buttons are...
... top panel until the desired track number appears in the display, then press the PLAY/PAUSE button to locate a specific musical passage depress and hold the SKIP / buttons. Playback will move rapidly forward or backward as long as usual and wait until the total playing time and track numbers appear on the display. TO START PLAYBACK ON A SPECIFIC TRACK Load the disc as the buttons are...
Owners Manual
Page 18
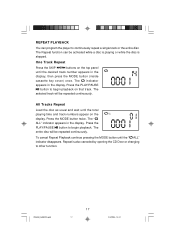
... the display. All Tracks Repeat Load the disc as usual and wait until the total playing time and track numbers appear on that track. The Repeat function can program the player to continuously repeat a single track or the entire disc. REPEAT PLAYBACK You can be activated while a disc is playing or while the disc is also canceled by opening the CD Door or changing to...
... the display. All Tracks Repeat Load the disc as usual and wait until the total playing time and track numbers appear on that track. The Repeat function can program the player to continuously repeat a single track or the entire disc. REPEAT PLAYBACK You can be activated while a disc is playing or while the disc is also canceled by opening the CD Door or changing to...
Owners Manual
Page 19
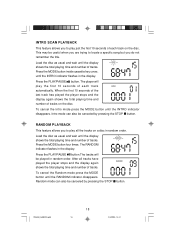
... button. To cancel the Random mode press the MODE button until the INTRO indicator flashes in the display. Random mode can also be canceled by pressing the STOP button. Load the disc as usual and wait until the display shows the total playing time and number of each track on the disc. Press the MODE button four times. The RANDOM indicator flashes in random order. The player will be useful...
... button. To cancel the Random mode press the MODE button until the INTRO indicator flashes in the display. Random mode can also be canceled by pressing the STOP button. Load the disc as usual and wait until the display shows the total playing time and number of each track on the disc. Press the MODE button four times. The RANDOM indicator flashes in random order. The player will be useful...
Owners Manual
Page 20
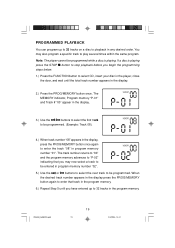
... in program memory number "02". 5.) Use the or buttons to select the next track to play several times within the same program. PD6850_ib060203.p65 19 19 2/6/2003, 14:41 Note: The player cannot be programmed while a disc is playing press the STOP button to stop playback before you begin the programming steps below. 1.) Press the FUNCTION button to select CD, insert your disc in the player, close...
... in program memory number "02". 5.) Use the or buttons to select the next track to play several times within the same program. PD6850_ib060203.p65 19 19 2/6/2003, 14:41 Note: The player cannot be programmed while a disc is playing press the STOP button to stop playback before you begin the programming steps below. 1.) Press the FUNCTION button to select CD, insert your disc in the player, close...
Owners Manual
Page 21
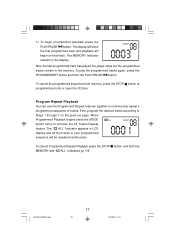
... tracks in your programmed sequence will begin programmed playback press the PLAY/PAUSE button. First, program the desired tracks according to Steps 1 through 7 on that track. When Programmed Playback begins press the MODE button twice to continuously repeat a programmed sequence of tracks. To cancel the programmed sequence from memory, press the STOP button at programming mode or open the CD door. The display will show the...
... tracks in your programmed sequence will begin programmed playback press the PLAY/PAUSE button. First, program the desired tracks according to Steps 1 through 7 on that track. When Programmed Playback begins press the MODE button twice to continuously repeat a programmed sequence of tracks. To cancel the programmed sequence from memory, press the STOP button at programming mode or open the CD door. The display will show the...

Owners Manual
Page 24
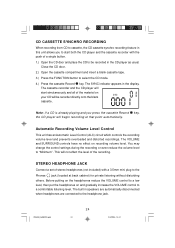
... "CrO2" (Chrome) or "Metal" tape formulations. For best results use tape identified as radio commercials. 6.) When you have finished recording press the Stop/Eject remove the tape. MAKING A TAPE RECORDING This model allows you to make tape recordings directly from the CD player, or the radio. • Refer to "PLAYING COMPACT DISCS" if necessary to operate the CD player. • Refer to "LISTENING TO THE RADIO" if necessary to tune in the mechanism. 3.) Close...
... "CrO2" (Chrome) or "Metal" tape formulations. For best results use tape identified as radio commercials. 6.) When you have finished recording press the Stop/Eject remove the tape. MAKING A TAPE RECORDING This model allows you to make tape recordings directly from the CD player, or the radio. • Refer to "PLAYING COMPACT DISCS" if necessary to operate the CD player. • Refer to "LISTENING TO THE RADIO" if necessary to tune in the mechanism. 3.) Close...
Owners Manual
Page 25
... mini plug to the headphone jack. STEREO HEADPHONE JACK Connect a set of the recording. PD6850_ib060203.p65 24 24 2/6/2003, 14:41 You may change the control settings during the recording or even reduce the volume level to select the CD mode. 4.) Press the cassette Record key. Close the CD door. 2.) Open the cassette compartment and insert a blank cassette tape. 3.) Press the FUNCTION button to "Minimum". The VOLUME and SURROUND controls...
... mini plug to the headphone jack. STEREO HEADPHONE JACK Connect a set of the recording. PD6850_ib060203.p65 24 24 2/6/2003, 14:41 You may change the control settings during the recording or even reduce the volume level to select the CD mode. 4.) Press the cassette Record key. Close the CD door. 2.) Open the cassette compartment and insert a blank cassette tape. 3.) Press the FUNCTION button to "Minimum". The VOLUME and SURROUND controls...
Owners Manual
Page 27
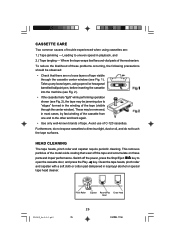
... the power, press the Stop/Eject key to open the cassette door, and press the Play key. This removes particles of tape. Leading to direct sunlight, dust or oil, and do not touch the tape surfaces. Take up any loose layers, using cassettes are no loose layers of these parts and impair performance. Switch off the tape and accumulate on these problems...
... the power, press the Stop/Eject key to open the cassette door, and press the Play key. This removes particles of tape. Leading to direct sunlight, dust or oil, and do not touch the tape surfaces. Take up any loose layers, using cassettes are no loose layers of these parts and impair performance. Switch off the tape and accumulate on these problems...
Owners Manual
Page 29
... YOU SPECIFIC LEGAL RIGHTS, AND YOU MAY ALSO HAVE OTHER RIGHTS WHICH VARY FROM STATE TO STATE. AU898M SERVICE TO FIND THE LOCATION AND PHONE R NUMBER OF YOUR NEAREST SERVICE CENTER PERMITTED TO PERFORM WARRANTY... CALL TOLL FREE: 1-800-695-0098 FOR ADDITIONAL SET-UP OR OPERATING ASSISTANCE PLEASE CALL: 1-800-898-9020 FOR CUSTOMER SERVICE, PLEASE WRITE TO: Emerson Radio Corp...
... YOU SPECIFIC LEGAL RIGHTS, AND YOU MAY ALSO HAVE OTHER RIGHTS WHICH VARY FROM STATE TO STATE. AU898M SERVICE TO FIND THE LOCATION AND PHONE R NUMBER OF YOUR NEAREST SERVICE CENTER PERMITTED TO PERFORM WARRANTY... CALL TOLL FREE: 1-800-695-0098 FOR ADDITIONAL SET-UP OR OPERATING ASSISTANCE PLEASE CALL: 1-800-898-9020 FOR CUSTOMER SERVICE, PLEASE WRITE TO: Emerson Radio Corp...

