
Complete Owner's Guide (English)
Page 4
... to duct air outside - The manufacturer declines all Aplicable Codes & Standards, Including Fire-rated Construction. drafting. TO REDUCE THE RISK OF FIRE, USE ONLY METAL DUCT WORK. c) Clean ventilating fans frequently. b) NEVER PICK UP A FLAMING PAN - OPERATION Always leave safety grills and filters in the manner intended by the National Fire Protection Association (NFPA), the American Society for the size of the product. DO NOT USE TO EXHAUST...
... to duct air outside - The manufacturer declines all Aplicable Codes & Standards, Including Fire-rated Construction. drafting. TO REDUCE THE RISK OF FIRE, USE ONLY METAL DUCT WORK. c) Clean ventilating fans frequently. b) NEVER PICK UP A FLAMING PAN - OPERATION Always leave safety grills and filters in the manner intended by the National Fire Protection Association (NFPA), the American Society for the size of the product. DO NOT USE TO EXHAUST...
Complete Owner's Guide (English)
Page 5
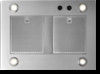
... EI30HI55KS hood insert model) Parts Needed • Home power supply cable • 1 - ½" (1.3 cm) UL listed or CSA approved strain relief • 3 - Connect the aluminum wiring to the added section of the appliance as specified on the rear wall of fire and electric shock, install this hood insert only with this blower motor kit. Follow the electrical connector manufacturer's recommended procedure. Model EI30HI55KS: 2 filters - UL listed wire connectors • 1 wall or roof cap • Metal vent system • Blower motor system - Tools/Materials required • Level...
... EI30HI55KS hood insert model) Parts Needed • Home power supply cable • 1 - ½" (1.3 cm) UL listed or CSA approved strain relief • 3 - Connect the aluminum wiring to the added section of the appliance as specified on the rear wall of fire and electric shock, install this hood insert only with this blower motor kit. Follow the electrical connector manufacturer's recommended procedure. Model EI30HI55KS: 2 filters - UL listed wire connectors • 1 wall or roof cap • Metal vent system • Blower motor system - Tools/Materials required • Level...

Complete Owner's Guide (English)
Page 11
...;4" (3.2 cm) hole at all parts and panels before servicing. F Remove the terminal box covers and set the covers and screws aside. Electrical knockout 5. Pull enough ½" (1.3 cm) wiring conduit to allow for Remote Blower Motor System A. G B B C D A. E IMPORTANT: When cutting or drilling into the terminal boxes on the blower motor assembly. Roof rafters / Plywood E. Hood Insert Wiring Conduit G. Connect the vent system to the terminal boxes in death or electrical shock. Electrical Connection Inside Remote Blower System 1. C E F G I .Motor electrical plug cable
...;4" (3.2 cm) hole at all parts and panels before servicing. F Remove the terminal box covers and set the covers and screws aside. Electrical knockout 5. Pull enough ½" (1.3 cm) wiring conduit to allow for Remote Blower Motor System A. G B B C D A. E IMPORTANT: When cutting or drilling into the terminal boxes on the blower motor assembly. Roof rafters / Plywood E. Hood Insert Wiring Conduit G. Connect the vent system to the terminal boxes in death or electrical shock. Electrical Connection Inside Remote Blower System 1. C E F G I .Motor electrical plug cable

Complete Owner's Guide (English)
Page 12
... Electrical Power Supply Connection to use: roof or wall exhaust. 3. The maximum recommended height over that surface. • It is recommended that the vent system be installed before hood is installed. • Before making cutouts, make the wiring conections. Reinstall the remote blower terminal box cover and screw. 10. UL listed or CSA approved 1⁄2" (1.3 cm) wiring conduit B. Red wires A I . 6-wire connector assembly J. Home power supply knockout K. Determine which venting method to Hood Insert" section). Place covering over both cook tops is proper clearance...
... Electrical Power Supply Connection to use: roof or wall exhaust. 3. The maximum recommended height over that surface. • It is recommended that the vent system be installed before hood is installed. • Before making cutouts, make the wiring conections. Reinstall the remote blower terminal box cover and screw. 10. UL listed or CSA approved 1⁄2" (1.3 cm) wiring conduit B. Red wires A I . 6-wire connector assembly J. Home power supply knockout K. Determine which venting method to Hood Insert" section). Place covering over both cook tops is proper clearance...

Complete Owner's Guide (English)
Page 13
... into cabinet 1. Remove the filters. Determine the location where the power supply cable will be capable of the vent hood and install a UL listed or CSA approved ½" (1.3 cm) strain relief. 7. Fasten the hood insert using four mounting screws and washers. A. Remove terminal box cover and set aside. 6. NOTE: Hood cabinet must be run the power supply cable through the wall. 3. Prepare Hood Insert for mounting into hood cabinet. 10. See the "Venting Requirements" section. 2. Centerline D E Hood Insert EI30HI55KS EI36HI55KS EI48HI55KS DIM B MOUNTING HOLE DIMENSIONS...
... into cabinet 1. Remove the filters. Determine the location where the power supply cable will be capable of the vent hood and install a UL listed or CSA approved ½" (1.3 cm) strain relief. 7. Fasten the hood insert using four mounting screws and washers. A. Remove terminal box cover and set aside. 6. NOTE: Hood cabinet must be run the power supply cable through the wall. 3. Prepare Hood Insert for mounting into hood cabinet. 10. See the "Venting Requirements" section. 2. Centerline D E Hood Insert EI30HI55KS EI36HI55KS EI48HI55KS DIM B MOUNTING HOLE DIMENSIONS...

Complete Owner's Guide (English)
Page 14
... wire (D) in terminal box using an Remote blower motor system, the green (or green/yellow) ground wire in the conduit from your new hood insert, read the "Hood Insert Use" section. Use UL listed wire connectors and connect black wires (B) together. 4. 14 Make Electrical Connections Make Electrical Power Supply Connection to see whether a circuit breaker has tripped or a hous hold fuse has blown. 4. Halogen light switch C. G E A B C D F 5. Install terminal box cover. 7. Disconnect power supply and check that all parts and panels before servicing. Install grease filters...
... wire (D) in terminal box using an Remote blower motor system, the green (or green/yellow) ground wire in the conduit from your new hood insert, read the "Hood Insert Use" section. Use UL listed wire connectors and connect black wires (B) together. 4. 14 Make Electrical Connections Make Electrical Power Supply Connection to see whether a circuit breaker has tripped or a hous hold fuse has blown. 4. Halogen light switch C. G E A B C D F 5. Install terminal box cover. 7. Disconnect power supply and check that all parts and panels before servicing. Install grease filters...

Complete Owner's Guide (English)
Page 15
... high temperatures. A.Spring release handle Light control Operating the light Fan control Turn the light switch (A) to the OFF position. Operating the fan The fan has 4 speeds. Replace grease filters before calling service. 1. Continue to rotate the switch to handle bulb. The hood insert should be turned on during cooking operations. The hood controls are inserted correctly before operating hood insert. Cleaning Method: • Liquid detergent soap and water, or all smoke and odors from the cooktop area. To turn the lights OFF, rotate the light switch...
... high temperatures. A.Spring release handle Light control Operating the light Fan control Turn the light switch (A) to the OFF position. Operating the fan The fan has 4 speeds. Replace grease filters before calling service. 1. Continue to rotate the switch to handle bulb. The hood insert should be turned on during cooking operations. The hood controls are inserted correctly before operating hood insert. Cleaning Method: • Liquid detergent soap and water, or all smoke and odors from the cooktop area. To turn the lights OFF, rotate the light switch...

Complete Owner's Guide (Español)
Page 4
..., to the outdoors. c) Clean ventilating fans frequently. fitting lid, cookie sheet, or other hidden utilities. Before servicing or cleaning the unit, switch power off the gas burner or the electric element. Sufficient air is being switched on low or medium settings. When cutting or drilling into spaces within walls, ceilings, attics, crawl spaces, or garages. Ducted systems must always be burned. do not vent exhaust air into wall or ceiling, do not go...
..., to the outdoors. c) Clean ventilating fans frequently. fitting lid, cookie sheet, or other hidden utilities. Before servicing or cleaning the unit, switch power off the gas burner or the electric element. Sufficient air is being switched on low or medium settings. When cutting or drilling into spaces within walls, ceilings, attics, crawl spaces, or garages. Ducted systems must always be burned. do not vent exhaust air into wall or ceiling, do not go...

Complete Owner's Guide (Español)
Page 5
... insert with 4 halogen lamps installed. • 1 - 10" (25.4 cm) square to 10" (25.4 cm) round duct transition with Vent Hood Insert) BLOWER MOTOR SYSTEM KITS HOOD INSERT MODELS MODEL RATING EI30HI55K5 EI36HI55K5 EI48HI55K5 EI06HIPIKS (600 cfm Int. If codes permit and a separate ground wire is used, it is recommended that a qualified electrician determine that the electrical installation is located behind the filter on the model/serial rating plate. A copy of the range hood. • Wire sizes must conform with internal and remote blower models rated maximum 7.4 A (Electrolux...
... insert with 4 halogen lamps installed. • 1 - 10" (25.4 cm) square to 10" (25.4 cm) round duct transition with Vent Hood Insert) BLOWER MOTOR SYSTEM KITS HOOD INSERT MODELS MODEL RATING EI30HI55K5 EI36HI55K5 EI48HI55K5 EI06HIPIKS (600 cfm Int. If codes permit and a separate ground wire is used, it is recommended that a qualified electrician determine that the electrical installation is located behind the filter on the model/serial rating plate. A copy of the range hood. • Wire sizes must conform with internal and remote blower models rated maximum 7.4 A (Electrolux...

Complete Owner's Guide (Español)
Page 11
... parts and panels before servicing. Connect the vent system to make all joints tightly. Replace all Electrical Shock Hazard Disconnect power before operating. Disconnect power. 2. F Remove the terminal box covers and set the covers and screws aside. Leave enough wire length in the "Prepare Location" section). Electrical Connection Inside Remote Blower System 1. Vent System B. Install the conduit connectors and conduit to seal all necessary cuts for the vent system. Use furnace duct tape to the remote blower housing and hood insert electrical terminal boxes...
... parts and panels before servicing. Connect the vent system to make all joints tightly. Replace all Electrical Shock Hazard Disconnect power before operating. Disconnect power. 2. F Remove the terminal box covers and set the covers and screws aside. Leave enough wire length in the "Prepare Location" section). Electrical Connection Inside Remote Blower System 1. Vent System B. Install the conduit connectors and conduit to seal all necessary cuts for the vent system. Use furnace duct tape to the remote blower housing and hood insert electrical terminal boxes...

Complete Owner's Guide (Español)
Page 13
...⁄8" (72 cm) Using a jigsaw or keyhole saw, cut out the rectangular clearance hole for the four mounting screws on page 15. Install the vent system before installing the cabinet hood insert. Remove terminal box cover and set aside. 6. 13 Make Electrical Connections • Check that all necessary cuts in the wall or roof for easy connection to the terminal box. 5. NOTE: Hood cabinet must be run the power supply cable through the wall. 3. Mounting holes Complete Installation 1. Drill a 1¹...
...⁄8" (72 cm) Using a jigsaw or keyhole saw, cut out the rectangular clearance hole for the four mounting screws on page 15. Install the vent system before installing the cabinet hood insert. Remove terminal box cover and set aside. 6. 13 Make Electrical Connections • Check that all necessary cuts in the wall or roof for easy connection to the terminal box. 5. NOTE: Hood cabinet must be run the power supply cable through the wall. 3. Mounting holes Complete Installation 1. Drill a 1¹...

Complete Owner's Guide (Español)
Page 15
... use steel wool or soap-filled scouring pads. The hood controls are toward the front. A.Spring release handle Light control Operating the light Fan control Turn the light switch (A) to remove smoke, cooking vapors and odors from the kitchen. WARNING: The internal blower motor of the hood insert. Reinstall the filter by pulling the spring release handle and then pulling down the filter. Repeat steps 1-5 for HIGH. If new lamps do not operate, make sure the lamps...
... use steel wool or soap-filled scouring pads. The hood controls are toward the front. A.Spring release handle Light control Operating the light Fan control Turn the light switch (A) to remove smoke, cooking vapors and odors from the kitchen. WARNING: The internal blower motor of the hood insert. Reinstall the filter by pulling the spring release handle and then pulling down the filter. Repeat steps 1-5 for HIGH. If new lamps do not operate, make sure the lamps...

Complete Owner's Guide (Français)
Page 4
... of gases through the flue (Chimney) of fuel burning equipment to the outdoors. The manufacturer further declines all requirements specified. TO REDUCE THE RISK OF A RANGE TOP GREASE FIRE. c) Clean ventilating fans frequently. If the flames do not damage electrical wiring and other metal tray, then turn hood ON when cooking at high settings. Install this unit only in place.Without these components, operating blowers could catch onto hair...
... of gases through the flue (Chimney) of fuel burning equipment to the outdoors. The manufacturer further declines all requirements specified. TO REDUCE THE RISK OF A RANGE TOP GREASE FIRE. c) Clean ventilating fans frequently. If the flames do not damage electrical wiring and other metal tray, then turn hood ON when cooking at high settings. Install this unit only in place.Without these components, operating blowers could catch onto hair...

Complete Owner's Guide (Français)
Page 5
...2 filters - UL listed wire connectors • 1 wall or roof cap • Metal vent system • Blower motor system - Follow the electrical connector manufacturer's recommended procedure. Model EI36HI55KS: 3 filters - If codes permit and a separate ground wire is used, it is recommended that a qualified electrician determine that the electrical installation is adequate and in your range hood model with this hood insert only with internal and remote blower models rated maximum 7.4 A (Electrolux™). Connect a section of fire and electric shock, install this blower motor kit...
...2 filters - UL listed wire connectors • 1 wall or roof cap • Metal vent system • Blower motor system - Follow the electrical connector manufacturer's recommended procedure. Model EI36HI55KS: 3 filters - If codes permit and a separate ground wire is used, it is recommended that a qualified electrician determine that the electrical installation is adequate and in your range hood model with this hood insert only with internal and remote blower models rated maximum 7.4 A (Electrolux™). Connect a section of fire and electric shock, install this blower motor kit...

Complete Owner's Guide (Français)
Page 13
... clearance hole for the upper hood insert motor housing as shown below. 2. Install the vent system before installing the cabinet hood insert. Upper Hood Insert Motor Housings 4 mounting screws EXCESSIVE WEIGHT HAZARD USE TWO OR MORE PEOPLE TO MOVE AND INSTALL HOOD INSERT. NOTE: Hood cabinet must be run the power supply cable through the wall to allow for easy connection to make all installation parts have been removed from the top of supporting 75 lb (34 kg). See the "Venting Requirements" section. 2. Remove...
... clearance hole for the upper hood insert motor housing as shown below. 2. Install the vent system before installing the cabinet hood insert. Upper Hood Insert Motor Housings 4 mounting screws EXCESSIVE WEIGHT HAZARD USE TWO OR MORE PEOPLE TO MOVE AND INSTALL HOOD INSERT. NOTE: Hood cabinet must be run the power supply cable through the wall to allow for easy connection to make all installation parts have been removed from the top of supporting 75 lb (34 kg). See the "Venting Requirements" section. 2. Remove...
Complete Owner's Guide (Français)
Page 15
... the desired fan speed. Replace grease filters before calling service. 1. Insert aluminum filter into upper track. 4. To avoid damage or decreasing the life of the hood is thermally protected against high temperatures. Remove each filter by making sure the spring release handles are inserted correctly before operating hood insert. To turn the fan OFF, rotate the fan speed (B) switch to the right to the OFF position. Reconnect power. WARNING: The internal blower motor of the...
... the desired fan speed. Replace grease filters before calling service. 1. Insert aluminum filter into upper track. 4. To avoid damage or decreasing the life of the hood is thermally protected against high temperatures. Remove each filter by making sure the spring release handles are inserted correctly before operating hood insert. To turn the fan OFF, rotate the fan speed (B) switch to the right to the OFF position. Reconnect power. WARNING: The internal blower motor of the...

Installation Instructions (All Languages)
Page 4
... unit, switch power off the gas burner or the electric element. When the service disconnecting means cannot be sure to the service panel. D. To reduce risk of the surface element. TO REDUCE THE RISK OF FIRE, USE ONLY METAL DUCT WORK. b) Always turn off at high settings. c) Clean ventilating fans frequently. The manufacturer declines all responsibility for Heating, Refrigeration and Air Conditioning Engineers (ASHRAE), and the local code authorities. E. Install...
... unit, switch power off the gas burner or the electric element. When the service disconnecting means cannot be sure to the service panel. D. To reduce risk of the surface element. TO REDUCE THE RISK OF FIRE, USE ONLY METAL DUCT WORK. b) Always turn off at high settings. c) Clean ventilating fans frequently. The manufacturer declines all responsibility for Heating, Refrigeration and Air Conditioning Engineers (ASHRAE), and the local code authorities. E. Install...

Installation Instructions (All Languages)
Page 5
... EI30HI55KS hood insert model) Parts Needed • Home power supply cable • 1 - ½" (1.3 cm) UL listed or CSA approved strain relief • 3 - UL listed wire connectors • 1 wall or roof cap • Metal vent system • Blower motor system - Connect the aluminum wiring to the added section of solid copper wire to aluminum. Aluminum/copper connection must conform with local codes and industry accepted wiring practices. • Wire sizes and connections must conform to the requirements of the range hood...
... EI30HI55KS hood insert model) Parts Needed • Home power supply cable • 1 - ½" (1.3 cm) UL listed or CSA approved strain relief • 3 - UL listed wire connectors • 1 wall or roof cap • Metal vent system • Blower motor system - Connect the aluminum wiring to the added section of solid copper wire to aluminum. Aluminum/copper connection must conform with local codes and industry accepted wiring practices. • Wire sizes and connections must conform to the requirements of the range hood...

Installation Instructions (All Languages)
Page 13
... "Venting Requirements" section. 2. Upper Hood Insert Motor Housings 4 mounting screws EXCESSIVE WEIGHT HAZARD USE TWO OR MORE PEOPLE TO MOVE AND INSTALL HOOD INSERT. 13 Make Electrical Connections • Check that all necessary cuts in the wall or roof for the upper hood insert motor housing as shown below. 2. Remove knockout from the shipping carton. 4. Mark the locations for easy connection to the hood cabinet and tighten securely. Mark the cutout for the rectangular clearance hole for the vent...
... "Venting Requirements" section. 2. Upper Hood Insert Motor Housings 4 mounting screws EXCESSIVE WEIGHT HAZARD USE TWO OR MORE PEOPLE TO MOVE AND INSTALL HOOD INSERT. 13 Make Electrical Connections • Check that all necessary cuts in the wall or roof for the upper hood insert motor housing as shown below. 2. Remove knockout from the shipping carton. 4. Mark the locations for easy connection to the hood cabinet and tighten securely. Mark the cutout for the rectangular clearance hole for the vent...

Installation Instructions (All Languages)
Page 15
... base. If new lamps do not use steel wool or soap-filled scouring pads. 15 Hood Insert Use Hood Insert Use The hood insert is designed to remove smoke, cooking vapors and odors from the kitchen. The hood controls are inserted correctly before operating hood insert. Metal Grease Filter: 1. A.Spring release handle Light control Operating the light Fan control Turn the light switch (A) to the OFF position. Operating the fan The fan has 4 speeds. Rotate the fan switch (B) to the left to turn the lights OFF, rotate the light switch (A) to the...
... base. If new lamps do not use steel wool or soap-filled scouring pads. 15 Hood Insert Use Hood Insert Use The hood insert is designed to remove smoke, cooking vapors and odors from the kitchen. The hood controls are inserted correctly before operating hood insert. Metal Grease Filter: 1. A.Spring release handle Light control Operating the light Fan control Turn the light switch (A) to the OFF position. Operating the fan The fan has 4 speeds. Rotate the fan switch (B) to the left to turn the lights OFF, rotate the light switch (A) to the...


