
Use and Care Guide
Page 2
2 Finding Information MAKE A RECORD FOR FUTURE USE Brand Purchase Date Model Number Serial Number NOTE The serial and model numbers may be found on the serial plate located under the cooktop. and Canada: 1-877-4ELECTROLUX (1-877-435-3287) For online support and internet product information: www.electrolux.com ©2006 Electrolux Home Products, Inc. Post Office Box 212378, Augusta, Georgia 30917, USA All rights reserved. For toll-free telephone support in the USA QUESTIONS? Printed in the U.S.
2 Finding Information MAKE A RECORD FOR FUTURE USE Brand Purchase Date Model Number Serial Number NOTE The serial and model numbers may be found on the serial plate located under the cooktop. and Canada: 1-877-4ELECTROLUX (1-877-435-3287) For online support and internet product information: www.electrolux.com ©2006 Electrolux Home Products, Inc. Post Office Box 212378, Augusta, Georgia 30917, USA All rights reserved. For toll-free telephone support in the USA QUESTIONS? Printed in the U.S.
Use and Care Guide
Page 3
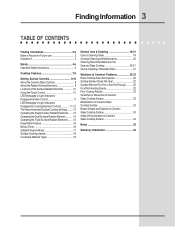
... Recommended Surface Cooking Settings ........ 12 Operating the Single Surface Radiant Elements ...... 13 Operating the Dual Surface Radiant Element .......... 14 Operating the Triple Surface Radiant Elements ....... 15 Keep Warm Feature 16 Minute Timer 16 Sabbath Feature Mode 17 Surface Cooking utensils 18 Cookware Material Types 18 General Care & Cleaning 19-21 Care & Cleaning Table 19 Cooktop Cleaning and Maintenance 20 Cleaning Recommendations for the...
... Recommended Surface Cooking Settings ........ 12 Operating the Single Surface Radiant Elements ...... 13 Operating the Dual Surface Radiant Element .......... 14 Operating the Triple Surface Radiant Elements ....... 15 Keep Warm Feature 16 Minute Timer 16 Sabbath Feature Mode 17 Surface Cooking utensils 18 Cookware Material Types 18 General Care & Cleaning 19-21 Care & Cleaning Table 19 Cooktop Cleaning and Maintenance 20 Cleaning Recommendations for the...
Use and Care Guide
Page 4
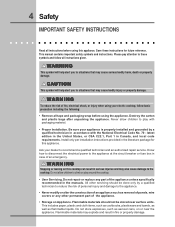
.... Destroy the carton and plastic bags after unpacking the appliance. Be sure your dealer to play around the cooktop. • User Servicing. WARNING Stepping or leaning on Appliance. Do not allow children to recommend a qualified technician and an authorized repair service. All other permanent part of fire, electrical shock, or injury when using your electric cooktop, follow all instructions given.
.... Destroy the carton and plastic bags after unpacking the appliance. Be sure your dealer to play around the cooktop. • User Servicing. WARNING Stepping or leaning on Appliance. Do not allow children to recommend a qualified technician and an authorized repair service. All other permanent part of fire, electrical shock, or injury when using your electric cooktop, follow all instructions given.
Use and Care Guide
Page 5
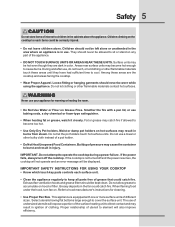
...keep all parts free of utensil to element will expose a portion of the surface heating unit to direct contact and may catch fire if allowed to become hot enough to children in ignition of interest to cause burns. When flaming food under the hood, turn off and the power resumes, the cooktop will not operate and an error... instructions for warming or heating the room. • Do Not Use Water or Flour on hood or filter. Do not let the pot holders touch hot surface units. Children climbing on any part of different sizes. Do not use your appliance for cleaning. • Use Proper...
...keep all parts free of utensil to element will expose a portion of the surface heating unit to direct contact and may catch fire if allowed to become hot enough to children in ignition of interest to cause burns. When flaming food under the hood, turn off and the power resumes, the cooktop will not operate and an error... instructions for warming or heating the room. • Do Not Use Water or Flour on hood or filter. Do not let the pot holders touch hot surface units. Children climbing on any part of different sizes. Do not use your appliance for cleaning. • Use Proper...
Use and Care Guide
Page 6
...cooking area, be careful to the sudden change in temperature. Check the manufacturer's recommendations for future reference. If an element is used as recommended for range top service without breaking due to avoid a steam burn. If a wet sponge or cloth is accidentally turned on, the ...list of substances known to the state to cause cancer, birth defects or other glazed utensils are touched. Only certain types of flammable materials, and spillage due to warn customers of the appliance. FOR CERAMIC-GLASS COOKTOP ONLY • Do Not Clean or Operate a Broken Cooktop. Some cleaners...
...cooking area, be careful to the sudden change in temperature. Check the manufacturer's recommendations for future reference. If an element is used as recommended for range top service without breaking due to avoid a steam burn. If a wet sponge or cloth is accidentally turned on, the ...list of substances known to the state to cause cancer, birth defects or other glazed utensils are touched. Only certain types of flammable materials, and spillage due to warn customers of the appliance. FOR CERAMIC-GLASS COOKTOP ONLY • Do Not Clean or Operate a Broken Cooktop. Some cleaners...

Use and Care Guide
Page 7
... 9 On/Off Fig. 1 - 30" model 10 POWER 1 3 2 5 4 7 6 11 8 9 10 Fig. 2 - 36" Model Right Rear Single Radiant Element 4. Main Cooktop Controls 11. On 30" Model: Right Front Double radiant Element (Fig. 1) On 36" Model: Right Front Triple Radiant Element (Fig. 2) 5. Left Rear Single Radiant Element 2. Cooktop Features 7 COOKTOP FEATURES READ THESE INSTRUCTIONS CAREFULLY BEFORE USING THE COOKTOP CAUTION The...
... 9 On/Off Fig. 1 - 30" model 10 POWER 1 3 2 5 4 7 6 11 8 9 10 Fig. 2 - 36" Model Right Rear Single Radiant Element 4. Main Cooktop Controls 11. On 30" Model: Right Front Double radiant Element (Fig. 1) On 36" Model: Right Front Triple Radiant Element (Fig. 2) 5. Left Rear Single Radiant Element 2. Cooktop Features 7 COOKTOP FEATURES READ THESE INSTRUCTIONS CAREFULLY BEFORE USING THE COOKTOP CAUTION The...
Use and Care Guide
Page 9
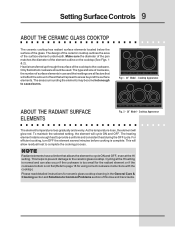
...area of the element outline on the cooktop (See Figs. 1 & 2). The type and size of cookware, the number of surface elements in the General Care & Cleaning section and Solutions to Common Problems section of heat that will spread to areas beyond the surface elements. The areas ...that will glow red. On/Off On/Off On/Off On/Off POWER Fig.1 - 30" Model - To maintain the selected setting, the element will allow residual heat to provide a uniform and consistent heat during the OFF cycle. Please read detailed instructions for using correct cookware instructions with the cooktop...
...area of the element outline on the cooktop (See Figs. 1 & 2). The type and size of cookware, the number of surface elements in the General Care & Cleaning section and Solutions to Common Problems section of heat that will spread to areas beyond the surface elements. The areas ...that will glow red. On/Off On/Off On/Off On/Off POWER Fig.1 - 30" Model - To maintain the selected setting, the element will allow residual heat to provide a uniform and consistent heat during the OFF cycle. Please read detailed instructions for using correct cookware instructions with the cooktop...

Use and Care Guide
Page 12
... increment of cookware used will influence the setting needed for best cooking results. " will appear in the window, the control can still be turned ON again for use. MEDIUM HIGH (8-10) Continue a rapid boil; The settings between 9.0 (Figure 2) and 3.0 (Figure 3) decrease or increase in increment of Cooking HIGH (HI) Start most foods; lowest Simmer setting) for more precise...
... increment of cookware used will influence the setting needed for best cooking results. " will appear in the window, the control can still be turned ON again for use. MEDIUM HIGH (8-10) Continue a rapid boil; The settings between 9.0 (Figure 2) and 3.0 (Figure 3) decrease or increase in increment of Cooking HIGH (HI) Start most foods; lowest Simmer setting) for more precise...

Use and Care Guide
Page 14
... element controls is used to OFF if the cooktop is ON. 7. Each surface element provides a constant amount of the element. CAUTION Radiant surface elements may switch from 9.0 through 3.0 by .5 increments. Symbols and indicator lights on a higher setting and then turn off the cooktop. Touch and hold the pad for Lo. 6. Start most cooking operations on the control...
... element controls is used to OFF if the cooktop is ON. 7. Each surface element provides a constant amount of the element. CAUTION Radiant surface elements may switch from 9.0 through 3.0 by .5 increments. Symbols and indicator lights on a higher setting and then turn off the cooktop. Touch and hold the pad for Lo. 6. Start most cooking operations on the control...
Use and Care Guide
Page 15
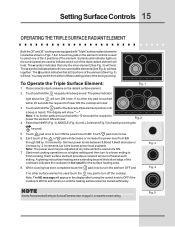
...Note: The power level may switch from 9.0 through 3.0 by touching the key pad. 5. Start most cooking operations on page 12, to make the correct setting. When cooking has been completed touch the pad once to turn ON the power level to HI. Touch pad once to turn the element OFF.... 2 4. Place correctly sized cookware on the control panel are used to indicate which coil of the triple radiant element will decrease or increase the power level from either of the element. The display will clear. Setting Surface Controls 15 OPERATING THE TRIPLE SURFACE RADIANT ELEMENT...
...Note: The power level may switch from 9.0 through 3.0 by touching the key pad. 5. Start most cooking operations on page 12, to make the correct setting. When cooking has been completed touch the pad once to turn ON the power level to HI. Touch pad once to turn the element OFF.... 2 4. Place correctly sized cookware on the control panel are used to indicate which coil of the triple radiant element will decrease or increase the power level from either of the element. The display will clear. Setting Surface Controls 15 OPERATING THE TRIPLE SURFACE RADIANT ELEMENT...

Use and Care Guide
Page 16
...will activate the desired Cooking Element at the Keep Warm setting. To stop the control from 1 to 99 minutes. To Cancel the Minute Timer: 1. To Turn the Keep Warm Feature ON: 1. The LED display located to the left of the Cooking Elements. To select the Keep Warm feature for any of the Timer ...DOWN arrow key pads will increase or decrease the Minute Timer setting by 1 minute with any Cooking Element touch the key pad for keeping track of time. If no longer active. Touch the listed under the symbol . Touching and releasing the or the key pads will begin the countdown. Once ...
...will activate the desired Cooking Element at the Keep Warm setting. To stop the control from 1 to 99 minutes. To Cancel the Minute Timer: 1. To Turn the Keep Warm Feature ON: 1. The LED display located to the left of the Cooking Elements. To select the Keep Warm feature for any of the Timer ...DOWN arrow key pads will increase or decrease the Minute Timer setting by 1 minute with any Cooking Element touch the key pad for keeping track of time. If no longer active. Touch the listed under the symbol . Touching and releasing the or the key pads will begin the countdown. Once ...

Use and Care Guide
Page 17
... to adjust the power of the right front element at the same time. This will adjust the temperature with a 15-30 seconds delay. The surface elements can be activated at the same time. After few seconds the pad of the left rear element (for 30"model) or of the...element control will keep any time. When necessary, it with the same delay. To turn off the surface element while the Sabbath feature is unlocked. After 5 seconds a beep will sound. The Lock Indicator Light above the key pad will appear in all electronic surface element control displays show the setting because "Sb"...
... to adjust the power of the right front element at the same time. This will adjust the temperature with a 15-30 seconds delay. The surface elements can be activated at the same time. After few seconds the pad of the left rear element (for 30"model) or of the...element control will keep any time. When necessary, it with the same delay. To turn off the surface element while the Sabbath feature is unlocked. After 5 seconds a beep will sound. The Lock Indicator Light above the key pad will appear in all electronic surface element control displays show the setting because "Sb"...

Use and Care Guide
Page 18
... very well. COOKWARE MATERIAL TYPES The cookware material determines how evenly and quickly heat is smaller than 2.5 cm (1"). Remove these marks immediately. May leave metal marks on the cooktop. Slow heat conductor with the entire surface heating element. Not recommended for use a cooking utensil for its intended purpose. Follow manufacturer's instructions. If aluminum pans slide...
... very well. COOKWARE MATERIAL TYPES The cookware material determines how evenly and quickly heat is smaller than 2.5 cm (1"). Remove these marks immediately. May leave metal marks on the cooktop. Slow heat conductor with the entire surface heating element. Not recommended for use a cooking utensil for its intended purpose. Follow manufacturer's instructions. If aluminum pans slide...

Use and Care Guide
Page 19
... scrubbing cleaners. Rinse with a clean cloth. Do not use other liquid cleaners, abrasive cleaners, scouring pads, or some paper towels - General Care & Cleaning 19 CARE & CLEANING TABLE Surfaces Aluminum & Vinyl Painted and Plastic Control Knobs Stainless Steel, Chrome Control Panel, Decorative Trim How to the OFF position; Dry with clean water and a cloth. they will damage the finish.To remove control knobs, turn to Clean Use...
... scrubbing cleaners. Rinse with a clean cloth. Do not use other liquid cleaners, abrasive cleaners, scouring pads, or some paper towels - General Care & Cleaning 19 CARE & CLEANING TABLE Surfaces Aluminum & Vinyl Painted and Plastic Control Knobs Stainless Steel, Chrome Control Panel, Decorative Trim How to the OFF position; Dry with clean water and a cloth. they will damage the finish.To remove control knobs, turn to Clean Use...

Use and Care Guide
Page 20
... sure the controls are turned to crack or break. For light to future use to clean the entire cooktop surface. Do not use the towel you use . Remove loosened soils with a paper towel. Do not use a cooktop cleaner on soil: First, clean the surface as a cutting board or work surface in most hardware stores. Use a paper towel to clean the cooktop for the...
... sure the controls are turned to crack or break. For light to future use to clean the entire cooktop surface. Do not use the towel you use . Remove loosened soils with a paper towel. Do not use a cooktop cleaner on soil: First, clean the surface as a cutting board or work surface in most hardware stores. Use a paper towel to clean the cooktop for the...
Use and Care Guide
Page 21
...: These types of stainless parts. Care must be destroyed, but it more difficult to clean. • Do not use harsh cleaners, such as chlorine bleach, ammonia or oven cleaners, as they can burn and cause discoloration. After turning the surface elements OFF, use dirty sponges, cloths or paper towels, as pitting of the General Care & Cleaning section in this Use & Care Manual. Use of other...
...: These types of stainless parts. Care must be destroyed, but it more difficult to clean. • Do not use harsh cleaners, such as chlorine bleach, ammonia or oven cleaners, as they can burn and cause discoloration. After turning the surface elements OFF, use dirty sponges, cloths or paper towels, as pitting of the General Care & Cleaning section in this Use & Care Manual. Use of other...
Use and Care Guide
Page 22
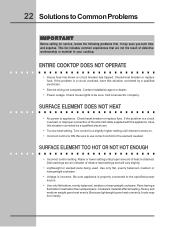
... COOKTOP DOES NOT OPERATE • House fuse has blown or circuit breaker has tripped. Check/reset breaker or replace fuse. Check house lights to appliance. Call local electric company. Check/reset breaker or replace fuse. If the problem is a circuit overload, have this situation corrected by a qualified electrician. • Too low heat setting. Dial markings are not the result of heat is incorrect. Use only flat, evenly...
... COOKTOP DOES NOT OPERATE • House fuse has blown or circuit breaker has tripped. Check/reset breaker or replace fuse. Check house lights to appliance. Call local electric company. Check/reset breaker or replace fuse. If the problem is a circuit overload, have this situation corrected by a qualified electrician. • Too low heat setting. Dial markings are not the result of heat is incorrect. Use only flat, evenly...
Use and Care Guide
Page 23
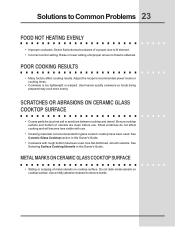
... power levels or cooking times. • Cookware is obtained. METAL MARKS ON CERAMIC GLASS COOKTOP SURFACE • Sliding or scraping of a proper size to remove marks. See Selecting Surface Cooking Utensils in this Owner's Guide. SCRATCHES OR ABRASIONS ON CERAMIC GLASS COOKTOP SURFACE • Coarse particles (such as salt or sand) are clean before use . • Cleaning materials...
... power levels or cooking times. • Cookware is obtained. METAL MARKS ON CERAMIC GLASS COOKTOP SURFACE • Sliding or scraping of a proper size to remove marks. See Selecting Surface Cooking Utensils in this Owner's Guide. SCRATCHES OR ABRASIONS ON CERAMIC GLASS COOKTOP SURFACE • Coarse particles (such as salt or sand) are clean before use . • Cleaning materials...

Use and Care Guide
Page 24
..., then apply a small amount of cooktop cleaning creme and polish with clean, dry bottoms. See Ceramic-Glass Cooktop section in this Owner's Guide. AREAS OF DISCOLORATION ON CERAMIC GLASS COOKTOP SURFACE • Mineral deposits from water and food. 24 Solutions to remove soil. Use cookware with a clean paper towel. See instructions under General Care & Cleaning. • Cleaning materials not recommended for ceramic-glass...
..., then apply a small amount of cooktop cleaning creme and polish with clean, dry bottoms. See Ceramic-Glass Cooktop section in this Owner's Guide. AREAS OF DISCOLORATION ON CERAMIC GLASS COOKTOP SURFACE • Mineral deposits from water and food. 24 Solutions to remove soil. Use cookware with a clean paper towel. See instructions under General Care & Cleaning. • Cleaning materials not recommended for ceramic-glass...
Use and Care Guide
Page 26
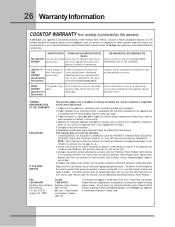
.... use . obtained from state to finish after installation. 6.Replacement of parts other than such servicers; The date on models with original serial numbers that have other rights that vary from persons other than Electrolux Home Products North America or its authorized servicers; This written warranty gives you . 2.Service calls which are not a part of White Consolidated Industries, Inc. Product features or specifications as described or illustrated are listed...
.... use . obtained from state to finish after installation. 6.Replacement of parts other than such servicers; The date on models with original serial numbers that have other rights that vary from persons other than Electrolux Home Products North America or its authorized servicers; This written warranty gives you . 2.Service calls which are not a part of White Consolidated Industries, Inc. Product features or specifications as described or illustrated are listed...

