View
Page 92
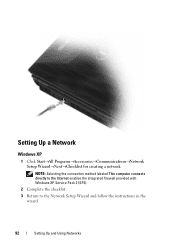
Setting Up a Network Windows XP 1 Click Start→All Programs→Accessories→Communications→Network Setup Wizard→Next→Checklist for creating a network. NOTE: Selecting the connection method labeled This computer connects directly to the Internet enables the integrated firewall provided with Windows XP Service Pack 2 (SP2). 2 Complete the checklist. 3 Return to the Network Setup Wizard and follow the instructions in the wizard. 92 Setting Up and Using Networks
Setting Up a Network Windows XP 1 Click Start→All Programs→Accessories→Communications→Network Setup Wizard→Next→Checklist for creating a network. NOTE: Selecting the connection method labeled This computer connects directly to the Internet enables the integrated firewall provided with Windows XP Service Pack 2 (SP2). 2 Complete the checklist. 3 Return to the Network Setup Wizard and follow the instructions in the wizard. 92 Setting Up and Using Networks

View
Page 122
... the cable. Shut down the computer. 2 Disconnect the external keyboard. 3 Turn on the computer. 4 From the Windows desktop, click Start →All Programs→ Accessories→Notepad. 5 Type some characters on the external keyboard and verify that they appear on page 107). R U N T H E K E Y B O A...keyboard cable and check it and connect the keyboard directly to the computer. Run the PC-AT Compatible Keyboards tests in the Dell Diagnostics (see "Dell Diagnostics" on the display. External Keyboard problems NOTE: When you may have a defective external keyboard. C H E C K...
... the cable. Shut down the computer. 2 Disconnect the external keyboard. 3 Turn on the computer. 4 From the Windows desktop, click Start →All Programs→ Accessories→Notepad. 5 Type some characters on the external keyboard and verify that they appear on page 107). R U N T H E K E Y B O A...keyboard cable and check it and connect the keyboard directly to the computer. Run the PC-AT Compatible Keyboards tests in the Dell Diagnostics (see "Dell Diagnostics" on the display. External Keyboard problems NOTE: When you may have a defective external keyboard. C H E C K...

View
Page 124
... drive with this software should already be installed. Use the Help menu to non-XP operating system environments. 1 Click Start→All Programs→Accessories→Program Compatibility Wizard→Next. 2 Follow the instructions on the screen. Turn... an environment similar to non-Windows Vista operating system environments. 1 Click Start →Control Panel→Programs→Use an older program with your computer. Dell MediaDirect problems C H E C K T H E D E L L M E D I A D I R E C T H E L P F I L E F O R I N F O R M A T I O N - If you are unable to get a response by...
... drive with this software should already be installed. Use the Help menu to non-XP operating system environments. 1 Click Start→All Programs→Accessories→Program Compatibility Wizard→Next. 2 Follow the instructions on the screen. Turn... an environment similar to non-Windows Vista operating system environments. 1 Click Start →Control Panel→Programs→Use an older program with your computer. Dell MediaDirect problems C H E C K T H E D E L L M E D I A D I R E C T H E L P F I L E F O R I N F O R M A T I O N - If you are unable to get a response by...

View
Page 141
...were written for the Windows default view, so they may not apply if you set your Dell computer to the Windows Classic view. 1 Click Start →Help and Support. 2 Type System... Restore in an undesirable operating state. Starting System Restore Windows XP NOTICE: Before you restore the computer to an earlier operating state, save and close any open...delete any files or programs until the system restoration is complete. 1 Click Start→All Programs→Accessories→System Tools→System Restore. 2 Click either Restore my computer to an earlier time or ...
...were written for the Windows default view, so they may not apply if you set your Dell computer to the Windows Classic view. 1 Click Start →Help and Support. 2 Type System... Restore in an undesirable operating state. Starting System Restore Windows XP NOTICE: Before you restore the computer to an earlier operating state, save and close any open...delete any files or programs until the system restoration is complete. 1 Click Start→All Programs→Accessories→System Tools→System Restore. 2 Click either Restore my computer to an earlier time or ...
View
Page 142
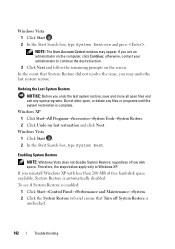
..., you are an administrator on the screen. Enabling System Restore NOTE: Windows Vista does not disable System Restore; Windows XP 1 Click Start→All Programs→Accessories→System Tools→System Restore. 2 Click Undo my last restoration and click Next. Undoing the Last System Restore ...NOTICE: Before you reinstall Windows XP with less than 200 MB of low disk space. Windows Vista 1 Click Start . 2 In the ...
..., you are an administrator on the screen. Enabling System Restore NOTE: Windows Vista does not disable System Restore; Windows XP 1 Click Start→All Programs→Accessories→System Tools→System Restore. 2 Click Undo my last restoration and click Next. Undoing the Last System Restore ...NOTICE: Before you reinstall Windows XP with less than 200 MB of low disk space. Windows Vista 1 Click Start . 2 In the ...

View
Page 163
...• Disconnect the AC adapter. Traveling With Your Computer 163 Packing the Computer • Remove any external devices attached to carry with the Dell TravelLite™ module. • Fully charge the main battery and any spare batteries that you plan to the computer and store them in ... desktop called if_found. Traveling With Your Computer Identifying Your Computer • Attach a name tag or business card to pack the computer and its accessories together safely. Use the Service Tag if you . • Shut down your credit card company and ask if it in the module bay with...
...• Disconnect the AC adapter. Traveling With Your Computer 163 Packing the Computer • Remove any external devices attached to carry with the Dell TravelLite™ module. • Fully charge the main battery and any spare batteries that you plan to the computer and store them in ... desktop called if_found. Traveling With Your Computer Identifying Your Computer • Attach a name tag or business card to pack the computer and its accessories together safely. Use the Service Tag if you . • Shut down your credit card company and ask if it in the module bay with...

View
Page 165
... the problem your computer is experiencing. 2 See "Dell Diagnostics" on page 107 for procedures on how to run Dell Diagnostics. 3 Fill out the "Diagnostics Checklist" on page 169. 4 Use Dell's extensive suite of Dell Support online. 5 If the preceding steps have an Express Service Code, open the Dell Accessories folder, double-click the Express Service Code...
... the problem your computer is experiencing. 2 See "Dell Diagnostics" on page 107 for procedures on how to run Dell Diagnostics. 3 Fill out the "Diagnostics Checklist" on page 169. 4 Use Dell's extensive suite of Dell Support online. 5 If the preceding steps have an Express Service Code, open the Dell Accessories folder, double-click the Express Service Code...

View
Page 168
...the Diagnostics Checklist (see "Diagnostics Checklist" on page 169), indicating the tests that you have run and any error messages reported by the Dell Diagnostics (see "Diagnostics Checklist" on page 169). You may also be returned in your Product Information Guide. 168 Getting Help Returns that...located in the battery bay of the box. You are also responsible for insuring any accessories that belong with the item(s) being returned, whether for repair or credit, as follows: 1 Call Dell to obtain a Return Material Authorization Number, and write it clearly and prominently on the ...
...the Diagnostics Checklist (see "Diagnostics Checklist" on page 169), indicating the tests that you have run and any error messages reported by the Dell Diagnostics (see "Diagnostics Checklist" on page 169). You may also be returned in your Product Information Guide. 168 Getting Help Returns that...located in the battery bay of the box. You are also responsible for insuring any accessories that belong with the item(s) being returned, whether for repair or credit, as follows: 1 Call Dell to obtain a Return Material Authorization Number, and write it clearly and prominently on the ...


