
Setup Guide
Page 68
Replace the battery (see the Service Manual at support.dell.com/ manuals). Hard-disk drive read failure - Contact Dell (see "Contacting Dell" on page 87) for assistance. Dell recommends that you back up your boot device, ensure that the cables are connected and that the drive is installed properly and partitioned as a boot device. • Enter system setup and...
Replace the battery (see the Service Manual at support.dell.com/ manuals). Hard-disk drive read failure - Contact Dell (see "Contacting Dell" on page 87) for assistance. Dell recommends that you back up your boot device, ensure that the cables are connected and that the drive is installed properly and partitioned as a boot device. • Enter system setup and...
Setup Guide
Page 90
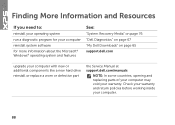
... system and features See: "System Recovery Media" on page 76 "Dell Diagnostics" on page 67 "My Dell Downloads" on page 65 support.dell.com upgrade your computer with new or additional components like a new hard drive reinstall or replace a worn or defective part the Service Manual at support.dell.com/manuals NOTE: In some countries, opening and...
... system and features See: "System Recovery Media" on page 76 "Dell Diagnostics" on page 67 "My Dell Downloads" on page 65 support.dell.com upgrade your computer with new or additional components like a new hard drive reinstall or replace a worn or defective part the Service Manual at support.dell.com/manuals NOTE: In some countries, opening and...

Service Manual
Page 4
Replacing the Mini-Card(s 23 6 Optical Drive 25 Removing the Optical Drive 25 Replacing the Optical Drive 26 7 Palm-Rest Assembly 29 Removing the Palm-Rest Assembly 29 Replacing the Palm-Rest Assembly 32 8 Power-Button Board 35 Removing the Power-Button Board 35 Replacing the Power-Button Board 36 9 Coin-Cell Battery 37 Removing the Coin-Cell Battery 37 Replacing the Coin-Cell Battery 38 10 Hard Drive 39 Removing the Hard Drive 39 Replacing the Hard Drive 41 4 Contents
Replacing the Mini-Card(s 23 6 Optical Drive 25 Removing the Optical Drive 25 Replacing the Optical Drive 26 7 Palm-Rest Assembly 29 Removing the Palm-Rest Assembly 29 Replacing the Palm-Rest Assembly 32 8 Power-Button Board 35 Removing the Power-Button Board 35 Replacing the Power-Button Board 36 9 Coin-Cell Battery 37 Removing the Coin-Cell Battery 37 Replacing the Coin-Cell Battery 38 10 Hard Drive 39 Removing the Hard Drive 39 Replacing the Hard Drive 41 4 Contents

Service Manual
Page 41
... You Begin" on page 9. 2 Remove the new hard drive from its packaging. Hard Drive 41 Save the original packaging for storing or shipping the hard drive. 3 Slide the hard drive into the hard-drive bracket. 4 Replace the four screws that secure the hard-drive bracket to the hard drive. 5 Place the hard-drive assembly in the hard-drive bay. 6 Slide the hard-drive assembly to connect it in protective antistatic packaging...
... You Begin" on page 9. 2 Remove the new hard drive from its packaging. Hard Drive 41 Save the original packaging for storing or shipping the hard drive. 3 Slide the hard drive into the hard-drive bracket. 4 Replace the four screws that secure the hard-drive bracket to the hard drive. 5 Place the hard-drive assembly in the hard-drive bay. 6 Slide the hard-drive assembly to connect it in protective antistatic packaging...

Service Manual
Page 42
Failure to do so may result in damage to the computer base. 8 Replace the palm-rest assembly (see "Replacing the Palm-Rest Assembly" on page 32). 9 Replace the battery (see "Replacing the Battery" on the computer, replace all screws and ensure that secure the hard-drive assembly to the computer. 42 Hard Drive 7 Replace the four screws that no stray screws remain inside the computer. CAUTION: Before turning on page 14).
Failure to do so may result in damage to the computer base. 8 Replace the palm-rest assembly (see "Replacing the Palm-Rest Assembly" on page 32). 9 Replace the battery (see "Replacing the Battery" on the computer, replace all screws and ensure that secure the hard-drive assembly to the computer. 42 Hard Drive 7 Replace the four screws that no stray screws remain inside the computer. CAUTION: Before turning on page 14).


