
Setup Guide
Page 76
...restore your operating system permanently removes any newly added internal hardware. Use Dell DataSafe Local Backup only if System Restore did not resolve your computer. Disconnect all the devices (USB drive, printer, and so on your computer before using Dell DataSafe Local Backup. NOTE: If Dell DataSafe Local Backup is ... Image Restore" on page 77) to restore your operating system. 74 You can use Dell DataSafe Local Backup to restore your hard drive to the operating state it was in when you purchased your computer to an earlier operating state • Create system recovery media...
...restore your operating system permanently removes any newly added internal hardware. Use Dell DataSafe Local Backup only if System Restore did not resolve your computer. Disconnect all the devices (USB drive, printer, and so on your computer before using Dell DataSafe Local Backup. NOTE: If Dell DataSafe Local Backup is ... Image Restore" on page 77) to restore your operating system. 74 You can use Dell DataSafe Local Backup to restore your hard drive to the operating state it was in when you purchased your computer to an earlier operating state • Create system recovery media...

Setup Guide
Page 79
..., music files, and so on the computer. 2. If possible, back up all data on the hard drive and removes any programs or drivers installed after you received your computer-including data files-are permanently deleted from the hard drive. Use Dell Factory Image Restore only if System Restore did not resolve your operating system. If possible...
..., music files, and so on the computer. 2. If possible, back up all data on the hard drive and removes any programs or drivers installed after you received your computer-including data files-are permanently deleted from the hard drive. Use Dell Factory Image Restore only if System Restore did not resolve your operating system. If possible...
Setup Guide
Page 85
lost removable media that you back up any data on the hard drive(s) and on any other storage device in the product. Include a copy of the Diagnostics Checklist (see "Diagnostic Checklist" on page 87. 2. For the telephone number ...) if the return is not responsible for any error messages reported by Dell Diagnostics (see "Contacting Dell" on page 86), indicating the tests that belong with your return. 1. Dell is for repair or credit, as CDs and media cards. Call Dell to Dell, ensure that may be included with the item(s) being returned, whether for...
lost removable media that you back up any data on the hard drive(s) and on any other storage device in the product. Include a copy of the Diagnostics Checklist (see "Diagnostic Checklist" on page 87. 2. For the telephone number ...) if the return is not responsible for any error messages reported by Dell Diagnostics (see "Contacting Dell" on page 86), indicating the tests that belong with your return. 1. Dell is for repair or credit, as CDs and media cards. Call Dell to Dell, ensure that may be included with the item(s) being returned, whether for...

Service Manual
Page 4
Replacing the Mini-Card(s 23 6 Optical Drive 25 Removing the Optical Drive 25 Replacing the Optical Drive 26 7 Palm-Rest Assembly 29 Removing the Palm-Rest Assembly 29 Replacing the Palm-Rest Assembly 32 8 Power-Button Board 35 Removing the Power-Button Board 35 Replacing the Power-Button Board 36 9 Coin-Cell Battery 37 Removing the Coin-Cell Battery 37 Replacing the Coin-Cell Battery 38 10 Hard Drive 39 Removing the Hard Drive 39 Replacing the Hard Drive 41 4 Contents
Replacing the Mini-Card(s 23 6 Optical Drive 25 Removing the Optical Drive 25 Replacing the Optical Drive 26 7 Palm-Rest Assembly 29 Removing the Palm-Rest Assembly 29 Replacing the Palm-Rest Assembly 32 8 Power-Button Board 35 Removing the Power-Button Board 35 Replacing the Power-Button Board 36 9 Coin-Cell Battery 37 Removing the Coin-Cell Battery 37 Replacing the Coin-Cell Battery 38 10 Hard Drive 39 Removing the Hard Drive 39 Replacing the Hard Drive 41 4 Contents
Service Manual
Page 39
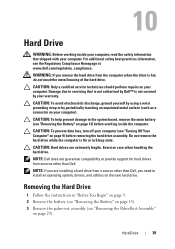
... at www.dell.com/regulatory_compliance. Hard Drive 39 CAUTION: Hard drives are installing a hard drive from the computer when the drive is On or in "Before You Begin" on page 9. 2 Remove the battery (see "Removing the Battery" on page 13). 3 Remove the palm-rest assembly (see "Removing the Battery" on your computer. WARNING: If you remove the hard drive from a source other than Dell, you are...
... at www.dell.com/regulatory_compliance. Hard Drive 39 CAUTION: Hard drives are installing a hard drive from the computer when the drive is On or in "Before You Begin" on page 9. 2 Remove the battery (see "Removing the Battery" on page 13). 3 Remove the palm-rest assembly (see "Removing the Battery" on your computer. WARNING: If you remove the hard drive from a source other than Dell, you are...

Service Manual
Page 40
4 Remove the four screws that secure the hard-drive assembly to the computer base. 5 Slide the hard-drive assembly to the side to disconnect it from the system board connector. 6 Lift the hard-drive assembly out of the hard-drive bay. 2 1 1 hard-drive assembly 2 screws (4) 7 Remove the four screws that secure the hard-drive bracket to the hard drive. 8 Lift the hard-drive bracket off the hard drive. 40 Hard Drive
4 Remove the four screws that secure the hard-drive assembly to the computer base. 5 Slide the hard-drive assembly to the side to disconnect it from the system board connector. 6 Lift the hard-drive assembly out of the hard-drive bay. 2 1 1 hard-drive assembly 2 screws (4) 7 Remove the four screws that secure the hard-drive bracket to the hard drive. 8 Lift the hard-drive bracket off the hard drive. 40 Hard Drive

Service Manual
Page 41
... for storing or shipping the hard drive. 3 Slide the hard drive into the hard-drive bracket. 4 Replace the four screws that shipped with your computer). Hard Drive 41 Replacing the Hard Drive 1 Follow the instructions in the hard-drive bay. 6 Slide the hard-drive assembly to connect it to the hard drive. 5 Place the hard-drive assembly in "Before You Begin" on page 9. 2 Remove the new hard drive from its packaging.
... for storing or shipping the hard drive. 3 Slide the hard drive into the hard-drive bracket. 4 Replace the four screws that shipped with your computer). Hard Drive 41 Replacing the Hard Drive 1 Follow the instructions in the hard-drive bay. 6 Slide the hard-drive assembly to connect it to the hard drive. 5 Place the hard-drive assembly in "Before You Begin" on page 9. 2 Remove the new hard drive from its packaging.


