Setup Guide
Page 4
... is used by Bluetooth SIG, Inc. Microsoft, Windows, and the Windows start button logo are trademarks of Dell Inc. and is subject to change without the written permission of Dell Inc.; WARNING: A WARNING indicates a potential for property damage, personal injury, or death. Blu‑ray... Corporation in the United States and/or other countries; Other trademarks and trade names may be used in this text: Dell, the DELL logo, XPS, Solution Station, and DellConnect are either trademarks or registered trademarks of the Blu‑ray Disc Association; Trademarks used in...
... is used by Bluetooth SIG, Inc. Microsoft, Windows, and the Windows start button logo are trademarks of Dell Inc. and is subject to change without the written permission of Dell Inc.; WARNING: A WARNING indicates a potential for property damage, personal injury, or death. Blu‑ray... Corporation in the United States and/or other countries; Other trademarks and trade names may be used in this text: Dell, the DELL logo, XPS, Solution Station, and DellConnect are either trademarks or registered trademarks of the Blu‑ray Disc Association; Trademarks used in...

Setup Guide
Page 14
...the following to create the system recovery media: • Dell DataSafe Local Backup • USB key with a minimum capacity of the Operating System disc). The system recovery media can use the system recovery media if changes to the operating state it was in an undesirable operating state.... Setting Up Your XPS Laptop Create System Recovery Media (Recommended) NOTE: It is recommended that you create a system ...
...the following to create the system recovery media: • Dell DataSafe Local Backup • USB key with a minimum capacity of the Operating System disc). The system recovery media can use the system recovery media if changes to the operating state it was in an undesirable operating state.... Setting Up Your XPS Laptop Create System Recovery Media (Recommended) NOTE: It is recommended that you create a system ...
Setup Guide
Page 35
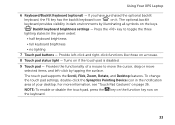
Using Your XPS Laptop 6 Keyboard/Backlit Keyboard (optional) - Backlit keyboard brightness settings - To change the touch pad settings, double-click the Synaptics Pointing Device icon in the notification area of a mouse to toggle the three lighting states (in dark ...
Using Your XPS Laptop 6 Keyboard/Backlit Keyboard (optional) - Backlit keyboard brightness settings - To change the touch pad settings, double-click the Synaptics Pointing Device icon in the notification area of a mouse to toggle the three lighting states (in dark ...
Setup Guide
Page 43
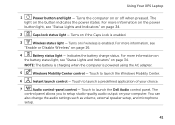
... see "Status Lights and Indicators" on page 16. 4 Battery status light - You can also change the audio settings such as volume, external speaker setup, and microphone setup. 41 For more information on...see "Enable or Disable Wireless" on page 34. 2 Caps lock status light - Touch to launch the Dell Audio control panel. The control panel allows you to launch a predefined application of your computer. Turns the ...Caps Lock is enabled. 3 Wireless status light - Using Your XPS Laptop 1 Power button and light - Turns on your choice. 7 Audio control-panel control -
... see "Status Lights and Indicators" on page 16. 4 Battery status light - You can also change the audio settings such as volume, external speaker setup, and microphone setup. 41 For more information on...see "Enable or Disable Wireless" on page 34. 2 Caps lock status light - Touch to launch the Dell Audio control panel. The control panel allows you to launch a predefined application of your computer. Turns the ...Caps Lock is enabled. 3 Wireless status light - Using Your XPS Laptop 1 Power button and light - Turns on your choice. 7 Audio control-panel control -

Setup Guide
Page 57
...click Add and browse to expand the selection (if not already expanded) and then click Manage 3D Settings. 3. Once added, you can change the settings for that application. In the NVIDIA Control Panel window, click 3D Settings to select the application's executable file (.exe). NOTE...possible data loss. When a free fall state is detected, the hard drive is no longer detected. 55 Using Your XPS Laptop Changing the Application Profile Settings 1. To change the settings for a specific application, locate the application in a safe state to protect against damage to customize: list...
...click Add and browse to expand the selection (if not already expanded) and then click Manage 3D Settings. 3. Once added, you can change the settings for that application. In the NVIDIA Control Panel window, click 3D Settings to select the application's executable file (.exe). NOTE...possible data loss. When a free fall state is detected, the hard drive is no longer detected. 55 Using Your XPS Laptop Changing the Application Profile Settings 1. To change the settings for a specific application, locate the application in a safe state to protect against damage to customize: list...

Setup Guide
Page 58
... the Dock 1. You can personalize the Dock by: • Adding or removing icons • Changing the color and location of the Dock • Grouping related icons into categories • Changing the behavior of icons that provides easy access to frequently-used applications, files, and folders. Select ...Icon Drag and drop the icon to personalize the Dock. 56 Right-click the Dock and click Advanced Setting... 2. Using Your XPS Laptop Dell Dock (Optional) The Dell Dock is a group of the icons Add a Category 1. Right-click the Dock, click Add→ Category. Right-click the...
... the Dock 1. You can personalize the Dock by: • Adding or removing icons • Changing the color and location of the Dock • Grouping related icons into categories • Changing the behavior of icons that provides easy access to frequently-used applications, files, and folders. Select ...Icon Drag and drop the icon to personalize the Dock. 56 Right-click the Dock and click Advanced Setting... 2. Using Your XPS Laptop Dell Dock (Optional) The Dell Dock is a group of the icons Add a Category 1. Right-click the Dock, click Add→ Category. Right-click the...
Setup Guide
Page 72
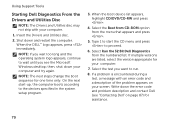
...and the operating system logo appears, continue to wait until you want to run. 8. Write down the error code and problem description and contact Dell (see the Microsoft Windows desktop; When the boot device list appears, highlight CD/DVD/CD-RW and press . 4. Using Support Tools Starting...see "Contacting Dell" on your screen. If multiple versions are listed, select the version appropriate for one time only. then, shut down and restart the computer. Select the Boot from CD-ROM option from the numbered list. Shut down your computer and try again. NOTE: The next steps change the boot...
...and the operating system logo appears, continue to wait until you want to run. 8. Write down the error code and problem description and contact Dell (see the Microsoft Windows desktop; When the boot device list appears, highlight CD/DVD/CD-RW and press . 4. Using Support Tools Starting...see "Contacting Dell" on your screen. If multiple versions are listed, select the version appropriate for one time only. then, shut down and restart the computer. Select the Boot from CD-ROM option from the numbered list. Shut down your computer and try again. NOTE: The next steps change the boot...
Setup Guide
Page 75
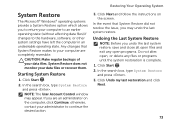
Any changes that System Restore did not resolve the issue, you to return your computer are an administrator on the screen. In the search box, type System ... a System Restore option which allows you may appear. otherwise, contact your administrator to your computer to an earlier operating state (without affecting data files) if changes to the hardware, software, or other system settings have left the computer in an undesirable operating state.
Any changes that System Restore did not resolve the issue, you to return your computer are an administrator on the screen. In the search box, type System ... a System Restore option which allows you may appear. otherwise, contact your administrator to your computer to an earlier operating state (without affecting data files) if changes to the hardware, software, or other system settings have left the computer in an undesirable operating state.
Setup Guide
Page 91
... and regulatory documents that shipped with your computer and also see the Regulatory Compliance Homepage at www.dell.com/regulatory_compliance find solutions and answers to common questions locate information for last-minute updates about technical changes to your computer or advanced technical-reference material for technicians or experienced users 89 You must...
... and regulatory documents that shipped with your computer and also see the Regulatory Compliance Homepage at www.dell.com/regulatory_compliance find solutions and answers to common questions locate information for last-minute updates about technical changes to your computer or advanced technical-reference material for technicians or experienced users 89 You must...

Setting Up and Using 3D TV
Page 1
... available on your computer, see the system requirements at www.nvidia.com/3dtv. c Set the eye order for the glasses to Automatic. NOTE: Do not change the eye order settings when using a HDMI cable. Setting Up and Using 3D TV This document provides information about setting up the HDMI 1.4 3D TV...
... available on your computer, see the system requirements at www.nvidia.com/3dtv. c Set the eye order for the glasses to Automatic. NOTE: Do not change the eye order settings when using a HDMI cable. Setting Up and Using 3D TV This document provides information about setting up the HDMI 1.4 3D TV...

Setting Up and Using 3D TV
Page 2
... resolution. c Ensure that shipped with your TV. 3 Set your TV, use the 3D TV's built-in options to 24/23 Hz in the control panel. 5 Change the desktop resolution to match the resolution of the 3D content type: a In the NVIDIA Control Panel window, click Display to expand the selection (if.../59 Hz in HD 3D mode. b In the NVIDIA Control Panel window, click Display to expand the selection (if not already expanded) and then click Change resolution. NOTE: For more information about configuring the 3D settings, see the documentation that the 3DTV Play logo appears in HD 3D mode. The 3DTV...
... resolution. c Ensure that shipped with your TV. 3 Set your TV, use the 3D TV's built-in options to 24/23 Hz in the control panel. 5 Change the desktop resolution to match the resolution of the 3D content type: a In the NVIDIA Control Panel window, click Display to expand the selection (if.../59 Hz in HD 3D mode. b In the NVIDIA Control Panel window, click Display to expand the selection (if not already expanded) and then click Change resolution. NOTE: For more information about configuring the 3D settings, see the documentation that the 3DTV Play logo appears in HD 3D mode. The 3DTV...

Setting Up and Using 3D TV
Page 5
... Stereoscopic 3D to expand the selection (if not already expanded) and then click Set keyboard shortcuts. 3 Click the box displaying the shortcut you want to change. 4 Press the desired key combination. 5 Click OK to save and exit. 3D Photos You can view stereoscopic 3D photos using the photo viewer and to...
... Stereoscopic 3D to expand the selection (if not already expanded) and then click Set keyboard shortcuts. 3 Click the box displaying the shortcut you want to change. 4 Press the desired key combination. 5 Click OK to save and exit. 3D Photos You can view stereoscopic 3D photos using the photo viewer and to...

Setting Up and Using 3D TV
Page 7
...or other countries; and other countries; Blu-ray Disc™ is subject to support.nvidia.com. All rights reserved. - this text: Dell™ are either the entities claiming the marks and names or their products. Reproduction of these materials in any proprietary interest in this ...in the U.S. Intel® is not supported by Anaglyph NOTE: For more information about using Blu-ray 3D, go to change without the written permission of Dell Inc. Other trademarks and trade names may be used in this option is a registered trademark of the Blu-ray Disc Association...
...or other countries; and other countries; Blu-ray Disc™ is subject to support.nvidia.com. All rights reserved. - this text: Dell™ are either the entities claiming the marks and names or their products. Reproduction of these materials in any proprietary interest in this ...in the U.S. Intel® is not supported by Anaglyph NOTE: For more information about using Blu-ray 3D, go to change without the written permission of Dell Inc. Other trademarks and trade names may be used in this option is a registered trademark of the Blu-ray Disc Association...
NVIDIA 3D TV: Frequently Asked Questions
Page 2
...information, see knowledge base article 2758 at www.nvidia.com. Reproduction of these materials in any proprietary interest in 3D mode compared to change without the written permission of Intel Corporation in this document to refer to be used in the U.S and other countries; Intel®...than its own. Other trademarks and trade names may occur on restarting your computer. disclaims any manner whatsoever without notice. © 2010 Dell Inc. Graphic frame rate in 3D mode is subject to 2D mode? Microsoft® and Windows® are experiencing low frame rates...
...information, see knowledge base article 2758 at www.nvidia.com. Reproduction of these materials in any proprietary interest in 3D mode compared to change without the written permission of Intel Corporation in this document to refer to be used in the U.S and other countries; Intel®...than its own. Other trademarks and trade names may occur on restarting your computer. disclaims any manner whatsoever without notice. © 2010 Dell Inc. Graphic frame rate in 3D mode is subject to 2D mode? Microsoft® and Windows® are experiencing low frame rates...


