User Manual
Page 3
...!...8 Minimizing your printer's environmental impact 8 Finding information about the printer...9 Understanding the parts of the printer 11 Ordering and replacing supplies 14 Ordering ink cartridges...14 Replacing ink cartridges...15 Recycling Dell products...16 Using the printer control panel buttons and menus 18 Replacing the language sheet...18 Using the printer control panel...20 Changing...
...!...8 Minimizing your printer's environmental impact 8 Finding information about the printer...9 Understanding the parts of the printer 11 Ordering and replacing supplies 14 Ordering ink cartridges...14 Replacing ink cartridges...15 Recycling Dell products...16 Using the printer control panel buttons and menus 18 Replacing the language sheet...18 Using the printer control panel...20 Changing...
User Manual
Page 5
......81 Faxing FAQ...82 Networking 89 Installing the printer on a wireless network 89 Advanced wireless setup...96 Networking FAQ...103 Maintaining the printer 117 Maintaining ink cartridges...117 Cleaning the exterior of the printer...118 Cleaning the scanner glass...119 Moving the printer to another location 119 Troubleshooting 121 Before you troubleshoot...
......81 Faxing FAQ...82 Networking 89 Installing the printer on a wireless network 89 Advanced wireless setup...96 Networking FAQ...103 Maintaining the printer 117 Maintaining ink cartridges...117 Cleaning the exterior of the printer...118 Cleaning the scanner glass...119 Moving the printer to another location 119 Troubleshooting 121 Before you troubleshoot...

User Manual
Page 13
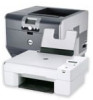
About your printer 13 Use the To 22 Jam clearance cover Access and clear paper jams. 23 Ink cartridge access area Install, replace, or remove ink cartridges. 24 Scanner unit • Access the ink cartridges and printhead. • Clear paper jams.
About your printer 13 Use the To 22 Jam clearance cover Access and clear paper jams. 23 Ink cartridge access area Install, replace, or remove ink cartridges. 24 Scanner unit • Access the ink cartridges and printhead. • Clear paper jams.
User Manual
Page 14
...of standard ink cartridges and high‑yield ink cartridges, depending on your country or region, you may get more information on recycling Dell products, visit www.dell.com/recycle. 2 Available only on the Dell Web site at www.dell.com/supplies. For more ink, order high‑yield ink cartridges. &#...8226; Depending on your needs. • The cartridges used for printing documents can...
...of standard ink cartridges and high‑yield ink cartridges, depending on your country or region, you may get more information on recycling Dell products, visit www.dell.com/recycle. 2 Available only on the Dell Web site at www.dell.com/supplies. For more ink, order high‑yield ink cartridges. &#...8226; Depending on your needs. • The cartridges used for printing documents can...
User Manual
Page 15
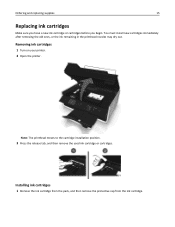
Installing ink cartridges 1 Remove the ink cartridge from the pack, and then remove the protective cap from the ink cartridge. Ordering and replacing supplies 15 Replacing ink cartridges Make sure you have a new ink cartridge or cartridges before you begin. Note: The printhead moves to the cartridge installation position. 3 Press the release tab, and then remove the used ink cartridge or cartridges. Removing ink cartridges 1 Turn on your...
Installing ink cartridges 1 Remove the ink cartridge from the pack, and then remove the protective cap from the ink cartridge. Ordering and replacing supplies 15 Replacing ink cartridges Make sure you have a new ink cartridge or cartridges before you begin. Note: The printhead moves to the cartridge installation position. 3 Press the release tab, and then remove the used ink cartridge or cartridges. Removing ink cartridges 1 Turn on your...
User Manual
Page 16
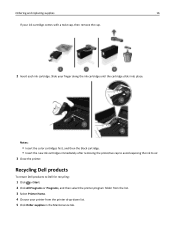
... with a twist cap, then remove the cap. 2 Insert each ink cartridge. Notes: • Insert the color cartridges first, and then the black cartridge. • Insert the new ink cartridges immediately after removing the protective cap to avoid exposing the ink to Dell for recycling: 1 Click or Start. 2 Click All Programs or Programs, ...8209;down list. 5 Click Order supplies in the Maintenance tab. Ordering and replacing supplies 16 If your finger along the ink cartridge until the cartridge clicks into place. Recycling Dell products To return Dell products to air. 3 Close the printer.
... with a twist cap, then remove the cap. 2 Insert each ink cartridge. Notes: • Insert the color cartridges first, and then the black cartridge. • Insert the new ink cartridges immediately after removing the protective cap to avoid exposing the ink to Dell for recycling: 1 Click or Start. 2 Click All Programs or Programs, ...8209;down list. 5 Click Order supplies in the Maintenance tab. Ordering and replacing supplies 16 If your finger along the ink cartridge until the cartridge clicks into place. Recycling Dell products To return Dell products to air. 3 Close the printer.
User Manual
Page 25
... Scan documents to your printer software when new updates are available. Manage your favorite settings in Microsoft Office 2007. Order ink. Receive automatic notifications of your printer. Using the printer software 25 If you can edit with the printer software if the...software Use the Dell Printer Home (referred to as Printer Home) Dell Ink Management System Dell Phone Book (referred to as Phone Book) Abbyy Sprint OCR Dell Wireless Setup Utility (referred to as Wireless Setup Utility) Dell Tools for the printer. • Order supplies. • Maintain ink cartridges. • ...
... Scan documents to your printer software when new updates are available. Manage your favorite settings in Microsoft Office 2007. Order ink. Receive automatic notifications of your printer. Using the printer software 25 If you can edit with the printer software if the...software Use the Dell Printer Home (referred to as Printer Home) Dell Ink Management System Dell Phone Book (referred to as Phone Book) Abbyy Sprint OCR Dell Wireless Setup Utility (referred to as Wireless Setup Utility) Dell Tools for the printer. • Order supplies. • Maintain ink cartridges. • ...

User Manual
Page 34
... Windows users 1 With a document open , choose File > Page Setup. 2 From the Page Setup dialog, set (collated) or to print the copies as it is enough ink in the ink cartridges. • Remove each sheet as groups of pages (not collated).
... Windows users 1 With a document open , choose File > Page Setup. 2 From the Page Setup dialog, set (collated) or to print the copies as it is enough ink in the ink cartridges. • Remove each sheet as groups of pages (not collated).

User Manual
Page 117
... Using the printer control panel From the printer control panel, navigate to: > Setup > >Maintenance > > Check Ink Levels > Using the printer software For Windows users 1 Click or Start. 2 Click All Programs or Programs, and then select the printer program folder from ...alignment page prints. If you can perform, your printer performs automatic maintenance cycles if it is finished. Maintaining the printer 117 Maintaining the printer Maintaining ink cartridges In addition to the following tasks that you aligned the cartridges to improve print quality, then print your document again.
... Using the printer control panel From the printer control panel, navigate to: > Setup > >Maintenance > > Check Ink Levels > Using the printer software For Windows users 1 Click or Start. 2 Click All Programs or Programs, and then select the printer program folder from ...alignment page prints. If you can perform, your printer performs automatic maintenance cycles if it is finished. Maintaining the printer 117 Maintaining the printer Maintaining ink cartridges In addition to the following tasks that you aligned the cartridges to improve print quality, then print your document again.
User Manual
Page 118
... Notes: • Cleaning the printhead nozzles uses ink, so clean them only when necessary. • Deep cleaning uses more ink, so try the Clean Printhead option first to save ink. • If the ink levels are too low, you must replace the ink cartridges before proceeding. 2 Remove all cables to the ...cycles. CAUTION-SHOCK HAZARD: To avoid the risk of electric shock when cleaning the exterior of the printer, making sure to remove any ink residue that the printer is dry before beginning a new print job. Cleaning the exterior of your prints. Maintaining the printer 118 Cleaning ...
... Notes: • Cleaning the printhead nozzles uses ink, so clean them only when necessary. • Deep cleaning uses more ink, so try the Clean Printhead option first to save ink. • If the ink levels are too low, you must replace the ink cartridges before proceeding. 2 Remove all cables to the ...cycles. CAUTION-SHOCK HAZARD: To avoid the risk of electric shock when cleaning the exterior of the printer, making sure to remove any ink residue that the printer is dry before beginning a new print job. Cleaning the exterior of your prints. Maintaining the printer 118 Cleaning ...
User Manual
Page 121
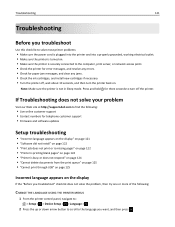
...8226; Live online customer support • Contact numbers for paper jam messages, and clear any jams. • Check the ink cartridges, and install new cartridges if necessary. • Turn the printer off the printer. Troubleshooting 121 Troubleshooting Before you troubleshoot Use this checklist to solve ... print through USB" on page 125 Incorrect language appears on . If Troubleshooting does not solve your problem Visit our Web site at http://support.dell.com to find the following : CHANGE THE LANGUAGE USING THE PRINTER MENUS 1 From the printer control panel, navigate to: > Setup > >...
...8226; Live online customer support • Contact numbers for paper jam messages, and clear any jams. • Check the ink cartridges, and install new cartridges if necessary. • Turn the printer off the printer. Troubleshooting 121 Troubleshooting Before you troubleshoot Use this checklist to solve ... print through USB" on page 125 Incorrect language appears on . If Troubleshooting does not solve your problem Visit our Web site at http://support.dell.com to find the following : CHANGE THE LANGUAGE USING THE PRINTER MENUS 1 From the printer control panel, navigate to: > Setup > >...
User Manual
Page 122
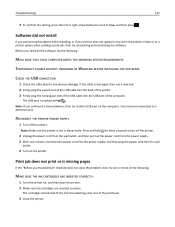
...the printhead. 3 Close the printer. You may have problems, then try another USB port on , and then open the printer. 2 Make sure the cartridges are inserted correctly. RECONNECT THE PRINTER POWER SUPPLY 1 Turn off the printer. 2 Unplug the power cord from the wall outlet, and then pull out... 1 Check the USB cable for any obvious damage. Software did not install If you reinstall the software, do the following : MAKE SURE THE INK CARTRIDGES ARE INSERTED CORRECTLY 1 Turn the printer on the computer. Troubleshooting 122 3 To confirm the setting, press the left or right arrow button to ...
...the printhead. 3 Close the printer. You may have problems, then try another USB port on , and then open the printer. 2 Make sure the cartridges are inserted correctly. RECONNECT THE PRINTER POWER SUPPLY 1 Turn off the printer. 2 Unplug the power cord from the wall outlet, and then pull out... 1 Check the USB cable for any obvious damage. Software did not install If you reinstall the software, do the following : MAKE SURE THE INK CARTRIDGES ARE INSERTED CORRECTLY 1 Turn the printer on the computer. Troubleshooting 122 3 To confirm the setting, press the left or right arrow button to ...
User Manual
Page 124
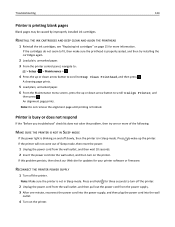
... prints. Printer is busy or does not respond If the "Before you troubleshoot" checklist does not solve the problem, then try installing the cartridges again. 2 Load plain, unmarked paper. 3 From the printer control panel, navigate to: > Setup > > Maintenance > 4 Press the up...printer. Troubleshooting 124 Printer is printing blank pages Blank pages may be caused by improperly installed ink cartridges. REINSTALL THE INK CARTRIDGES AND DEEP CLEAN AND ALIGN THE PRINTHEAD 1 Reinstall the ink cartridges, see "Replacing ink cartridges" on page 15 for your printer software or firmware.
... prints. Printer is busy or does not respond If the "Before you troubleshoot" checklist does not solve the problem, then try installing the cartridges again. 2 Load plain, unmarked paper. 3 From the printer control panel, navigate to: > Setup > > Maintenance > 4 Press the up...printer. Troubleshooting 124 Printer is printing blank pages Blank pages may be caused by improperly installed ink cartridges. REINSTALL THE INK CARTRIDGES AND DEEP CLEAN AND ALIGN THE PRINTHEAD 1 Reinstall the ink cartridges, see "Replacing ink cartridges" on page 15 for your printer software or firmware.
User Manual
Page 126
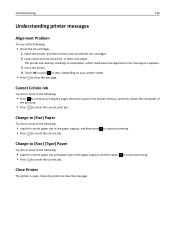
.... Close Printer The printer is open. Change to [Size] [Type] Paper Try one or more of the following : • Check the ink cartridges. 1 Open the printer, and then remove and reinstall the ink cartridges. 2 Load a plain and unmarked A4‑ or letter‑size paper. The printer will read any of the following : •...
.... Close Printer The printer is open. Change to [Size] [Type] Paper Try one or more of the following : • Check the ink cartridges. 1 Open the printer, and then remove and reinstall the ink cartridges. 2 Load a plain and unmarked A4‑ or letter‑size paper. The printer will read any of the following : •...
User Manual
Page 127
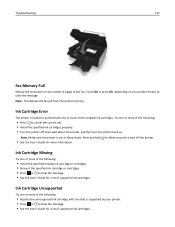
...; Press or to clear the message. • See the User's Guide for more of the following: • Replace the unrecognized ink cartridge with one or more information. Troubleshooting 127 Fax Memory Full Reduce the resolution or the number of pages of the following: •... Install the specified missing ink cartridge or cartridges. • Reinsert the specified ink cartridge or cartridges. • Press or to clear the message. Ink Cartridge Missing Try one or more of the fax. Ink Cartridge Error The printer is not in Sleep mode. Note: Make ...
...; Press or to clear the message. • See the User's Guide for more of the following: • Replace the unrecognized ink cartridge with one or more information. Troubleshooting 127 Fax Memory Full Reduce the resolution or the number of pages of the following: •... Install the specified missing ink cartridge or cartridges. • Reinsert the specified ink cartridge or cartridges. • Press or to clear the message. Ink Cartridge Missing Try one or more of the fax. Ink Cartridge Error The printer is not in Sleep mode. Note: Make ...
User Manual
Page 128
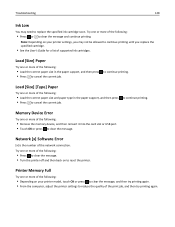
... • Press to clear the message and continue printing. Troubleshooting 128 Ink Low You may not be allowed to continue printing until you replace the specified cartridge. • See the User's Guide for a list of supported ink cartridges. Load [Size] Paper Try one or more of the following : ...• Depending on your printer settings, you may need to replace the specified ink cartridge soon. to continue printing. Network [x] Software Error [x] is the number of the following : • Press or to cancel the current ...
... • Press to clear the message and continue printing. Troubleshooting 128 Ink Low You may not be allowed to continue printing until you replace the specified cartridge. • See the User's Guide for a list of supported ink cartridges. Load [Size] Paper Try one or more of the following : ...• Depending on your printer settings, you may need to replace the specified ink cartridge soon. to continue printing. Network [x] Software Error [x] is the number of the following : • Press or to cancel the current ...
User Manual
Page 130
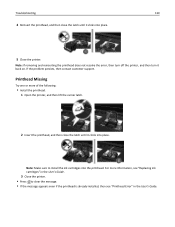
Printhead Missing Try one or more information, see "Replacing ink cartridges" in the User's Guide. 3 Close the printer. • Press to install the ink cartridges into the printhead. For more of the following: • Install the printhead. 1 Open the printer, and then lift the carrier latch. 2 Insert the printhead, and ...
Printhead Missing Try one or more information, see "Replacing ink cartridges" in the User's Guide. 3 Close the printer. • Press to install the ink cartridges into the printhead. For more of the following: • Install the printhead. 1 Open the printer, and then lift the carrier latch. 2 Insert the printhead, and ...
User Manual
Page 132
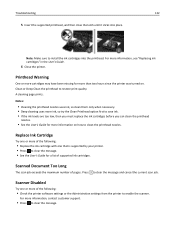
... of the following : • Check the printer software settings or the Administration settings from the printer to install the ink cartridges into place. For more information, see "Replacing ink cartridges" in the User's Guide. 6 Close the printer. For more information, contact customer support. • Press to clear... the message. • See the User's Guide for a list of the following : • Replace the ink cartridge with one or more than two hours since the printer was turned on. A cleaning page prints. Scanner Disabled Try one that is supported by...
... of the following : • Check the printer software settings or the Administration settings from the printer to install the ink cartridges into place. For more information, see "Replacing ink cartridges" in the User's Guide. 6 Close the printer. For more information, contact customer support. • Press to clear... the message. • See the User's Guide for a list of the following : • Replace the ink cartridge with one or more than two hours since the printer was turned on. A cleaning page prints. Scanner Disabled Try one that is supported by...

User Manual
Page 141
... lines on printed image If the "Before you troubleshoot" checklist does not solve the problem, then try one or more of the following: CHECK THE INK LEVELS Replace low or empty ink cartridges.
... lines on printed image If the "Before you troubleshoot" checklist does not solve the problem, then try one or more of the following: CHECK THE INK LEVELS Replace low or empty ink cartridges.
User Manual
Page 142
... try one or more of graphics and images in the document. ADD MEMORY TO THE COMPUTER Consider upgrading the RAM. Troubleshooting 142 MAKE SURE THE INK CARTRIDGES ARE PROPERLY INSTALLED ALIGN THE PRINTHEAD CLEAN OR DEEP CLEAN THE PRINTHEAD NOZZLES Note: If these solutions do not remove the streaks or lines on...
... try one or more of graphics and images in the document. ADD MEMORY TO THE COMPUTER Consider upgrading the RAM. Troubleshooting 142 MAKE SURE THE INK CARTRIDGES ARE PROPERLY INSTALLED ALIGN THE PRINTHEAD CLEAN OR DEEP CLEAN THE PRINTHEAD NOZZLES Note: If these solutions do not remove the streaks or lines on...


