
User's Guide
Page 49
... your operating system documentation. About RAID Configurations This section provides an overview of uses, Dell offers RAID level 0, RAID level 1, or RAID level 5 on page 290). RAID levels do not represent a hierarchy. To determine if your Dell Precision computer. A RAID level 5 configuration provides for hyperthreading under the Performance tab (see your computer can only create a RAID level 0 configuration using two or...
... your operating system documentation. About RAID Configurations This section provides an overview of uses, Dell offers RAID level 0, RAID level 1, or RAID level 5 on page 290). RAID levels do not represent a hierarchy. To determine if your Dell Precision computer. A RAID level 5 configuration provides for hyperthreading under the Performance tab (see your computer can only create a RAID level 0 configuration using two or...

User's Guide
Page 50
... block. All drives must be the same type of drive; The drives should also be used as "data striping" to create a large virtual drive. serial ATA RAID configured for the RAID configuration (see "Creating a Spare Hard Drive" on page 60). If you have 240 GB on the other drive is also inaccessible. Therefore, ensure...
... block. All drives must be the same type of drive; The drives should also be used as "data striping" to create a large virtual drive. serial ATA RAID configured for the RAID configuration (see "Creating a Spare Hard Drive" on page 60). If you have 240 GB on the other drive is also inaccessible. Therefore, ensure...

User's Guide
Page 52
... 4 parity data for block 5 half of data block 6 hard drive 3 Because data is striped across the RAID configuration, as it is in a RAID 0 configuration, it can serve as either data-storing or parity drives. The amount of storage space available to... three 120-GB RAID level 5 drives is 240-GB on the same drive. However, not all of the parity data... fails, that drive can be quickly accessed. Also, because of three drives is required to create a RAID level 5 configuration. 52 Advanced Features
... 4 parity data for block 5 half of data block 6 hard drive 3 Because data is striped across the RAID configuration, as it is in a RAID 0 configuration, it can serve as either data-storing or parity drives. The amount of storage space available to... three 120-GB RAID level 5 drives is 240-GB on the same drive. However, not all of the parity data... fails, that drive can be quickly accessed. Also, because of three drives is required to create a RAID level 5 configuration. 52 Advanced Features
User's Guide
Page 54
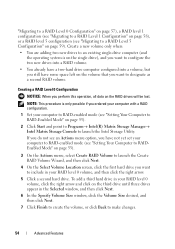
...page 53). 3 On the Actions menu, select Create RAID Volume to launch the Create RAID Volume Wizard, and then click Next. 4 On the Select Volume Location screen, click the first hard drive you ordered your computer with a RAID configuration. 1 Set your RAID level 0 volume, and then click the right ...perform this operation, all data on the third drive until three drives appear in your computer to RAID-enabled mode (see "Migrating to a RAID Level 5 Configuration" on page 59). Creating a RAID Level 0 Configuration NOTICE: When you want to include in the Selected window, and then click Next...
...page 53). 3 On the Actions menu, select Create RAID Volume to launch the Create RAID Volume Wizard, and then click Next. 4 On the Select Volume Location screen, click the first hard drive you ordered your computer with a RAID configuration. 1 Set your RAID level 0 volume, and then click the right ...perform this operation, all data on the third drive until three drives appear in your computer to RAID-enabled mode (see "Migrating to a RAID Level 5 Configuration" on page 59). Creating a RAID Level 0 Configuration NOTICE: When you want to include in the Selected window, and then click Next...
User's Guide
Page 55
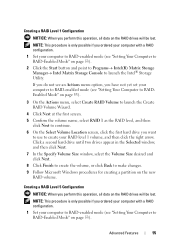
... 53). 3 On the Actions menu, select Create RAID Volume to launch the Create RAID Volume Wizard. 4 Click Next at the first screen. 5 Confirm the volume name, select RAID 1 as the RAID level, and then click Next to make changes. 9 Follow Microsoft Windows procedures for creating a partition on the new RAID volume. Creating a RAID Level 1 Configuration NOTICE: When you perform this...
... 53). 3 On the Actions menu, select Create RAID Volume to launch the Create RAID Volume Wizard. 4 Click Next at the first screen. 5 Confirm the volume name, select RAID 1 as the RAID level, and then click Next to make changes. 9 Follow Microsoft Windows procedures for creating a partition on the new RAID volume. Creating a RAID Level 1 Configuration NOTICE: When you perform this...
User's Guide
Page 56
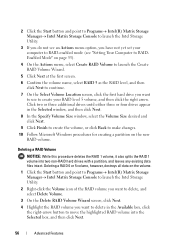
...-arrow button to make changes. 10 Follow Microsoft Windows procedures for creating a partition on page 53). 4 On the Actions menu, select Create RAID Volume to launch the Create RAID Volume Wizard. 5 Click Next at the first screen. 6 Confirm the volume name, select RAID 5 as the RAID level, and then click Next to continue. 7 On the Select Volume...
...-arrow button to make changes. 10 Follow Microsoft Windows procedures for creating a partition on page 53). 4 On the Actions menu, select Create RAID Volume to launch the Create RAID Volume Wizard. 5 Click Next at the first screen. 6 Confirm the volume name, select RAID 5 as the RAID level, and then click Next to continue. 7 On the Select Volume...
User's Guide
Page 57
... if you have not yet set your computer to RAID-enabled mode (see "Setting Your Computer to RAID-Enabled Mode" on page 53). 3 On the Actions menu, select Create RAID Volume From Existing Hard Drive to RAID 0 migration possible Not possible 3-drive RAID 0 2-drive RAID 1 3-drive RAID 5 2- Advanced Features 57 If you do not see "Setting Your Computer...
... if you have not yet set your computer to RAID-enabled mode (see "Setting Your Computer to RAID-Enabled Mode" on page 53). 3 On the Actions menu, select Create RAID Volume From Existing Hard Drive to RAID 0 migration possible Not possible 3-drive RAID 0 2-drive RAID 1 3-drive RAID 5 2- Advanced Features 57 If you do not see "Setting Your Computer...

User's Guide
Page 58
...size closest to the size of the average file you want to use your computer to RAID-enabled mode (see "Setting Your Computer to RAIDEnabled Mode" on page 53). 3 On the Actions menu, click Create RAID Volume From Existing Hard Drive to launch the Migration Wizard. 4 Click Next on the ...first Migration Wizard screen. 5 Enter a RAID volume name or accept the default. 6 From the drop-down box, and then click Next....
...size closest to the size of the average file you want to use your computer to RAID-enabled mode (see "Setting Your Computer to RAIDEnabled Mode" on page 53). 3 On the Actions menu, click Create RAID Volume From Existing Hard Drive to launch the Migration Wizard. 4 Click Next on the ...first Migration Wizard screen. 5 Enter a RAID volume name or accept the default. 6 From the drop-down box, and then click Next....
User's Guide
Page 59
... Hard Drive screen, double-click the hard drive from which you want to use your computer to RAID-enabled mode (see "Setting Your Computer to RAIDEnabled Mode" on page 53). 3 On the Actions menu, click Create RAID Volume From Existing Hard Drive to launch the Intel Storage Utility. Advanced Features 59 You can... screen, select the volume size you have not yet set your computer normally during migration process. If you do not see "Setting Your Computer to RAID-Enabled Mode" on the member drive will be the hard drive containing the data or operating system files that you want to...
... Hard Drive screen, double-click the hard drive from which you want to use your computer to RAID-enabled mode (see "Setting Your Computer to RAIDEnabled Mode" on page 53). 3 On the Actions menu, click Create RAID Volume From Existing Hard Drive to launch the Intel Storage Utility. Advanced Features 59 You can... screen, select the volume size you have not yet set your computer normally during migration process. If you do not see "Setting Your Computer to RAID-Enabled Mode" on the member drive will be the hard drive containing the data or operating system files that you want to...

User's Guide
Page 60
... click Next. Otherwise, the spare hard drive will be able to Non-RAID Rebuilding a Degraded RAID Level 1 or 5 Configuration If your computer normally during migration process. To mark a drive as Spare. Creating a Spare Hard Drive NOTICE: A spare hard drive must be created with a RAID level 1 configuration. To remove spare marking from a spare hard drive: 1 Right...
... click Next. Otherwise, the spare hard drive will be able to Non-RAID Rebuilding a Degraded RAID Level 1 or 5 Configuration If your computer normally during migration process. To mark a drive as Spare. Creating a Spare Hard Drive NOTICE: A spare hard drive must be created with a RAID level 1 configuration. To remove spare marking from a spare hard drive: 1 Right...
User's Guide
Page 61
... 1 or 5 volume, and click Rebuild to this Disk. 3 You can use the following procedure. Back up - Advanced Features 61 Creating a RAID Level 0 Configuration NOTICE: You will lose any data on your configuration, and then press . and down -arrow keys to make up your hard ...drives when you want to keep before continuing. and down -arrow keys and spacebar to select the two or three drives that you create a RAID configuration using the following procedure to migrate an existing storage configuration to select RAID0(Stripe), and press . 6 If more than two hard drives ...
... 1 or 5 volume, and click Rebuild to this Disk. 3 You can use the following procedure. Back up - Advanced Features 61 Creating a RAID Level 0 Configuration NOTICE: You will lose any data on your configuration, and then press . and down -arrow keys to make up your hard ...drives when you want to keep before continuing. and down -arrow keys and spacebar to select the two or three drives that you create a RAID configuration using the following procedure to migrate an existing storage configuration to select RAID0(Stripe), and press . 6 If more than two hard drives ...

User's Guide
Page 62
... If you do not know the average file size, choose 128 KB as your hard drives when you create a RAID configuration using the following procedure. and down -arrow keys to highlight Create RAID Volume and press . 4 Enter a RAID volume name or accept the default and press . 5 Use the up - and down -arrow keys ...for the volume, and press . Back up data that you want to use to make up your computer to RAID-enabled mode (see "Reinstalling Windows XP or Windows Vista" on page 149.) Creating a RAID Level 1 Configuration NOTICE: You will lose any data on your strip size. 7 Press the up- Select ...
... If you do not know the average file size, choose 128 KB as your hard drives when you create a RAID configuration using the following procedure. and down -arrow keys to highlight Create RAID Volume and press . 4 Enter a RAID volume name or accept the default and press . 5 Use the up - and down -arrow keys ...for the volume, and press . Back up data that you want to use to make up your computer to RAID-enabled mode (see "Reinstalling Windows XP or Windows Vista" on page 149.) Creating a RAID Level 1 Configuration NOTICE: You will lose any data on your strip size. 7 Press the up- Select ...

User's Guide
Page 63
...when you want to use to make up - and down-arrow keys to create the RAID volume. 10 Confirm that you create a RAID configuration using the following procedure. The default value is the maximum available size. 8 Press to create the volume. 9 Press to confirm that you want to select RAID5(Parity...and press . 12 Install the operating system (see "Reinstalling Windows XP or Windows Vista" on page 149.) Creating a RAID Level 5 Configuration NOTICE: You will lose any data on the main Intel RAID Option ROM utility screen. 11 Use the up - and down -arrow keys to select Exit, and press ....
...when you want to use to make up - and down-arrow keys to create the RAID volume. 10 Confirm that you create a RAID configuration using the following procedure. The default value is the maximum available size. 8 Press to create the volume. 9 Press to confirm that you want to select RAID5(Parity...and press . 12 Install the operating system (see "Reinstalling Windows XP or Windows Vista" on page 149.) Creating a RAID Level 5 Configuration NOTICE: You will lose any data on the main Intel RAID Option ROM utility screen. 11 Use the up - and down -arrow keys to select Exit, and press ....

User's Guide
Page 309
...that allows networked computers that establishes standards for program instructions and data. POST - Diagnostics programs, loaded automatically by the number of RAID include RAID 0, RAID 1, RAID 5, RAID 10, and RAID 50. A computer chip that have an operating system to automatically configure devices. personal system/2 - PXE - RAM - random-... tests on a physically write-protected floppy disk, CD, or DVD. If no problems are arranged in RAM is referred to create an image. The organization that do not have not yet been documented. Plug-and-Play - read -only status if: &#...
...that allows networked computers that establishes standards for program instructions and data. POST - Diagnostics programs, loaded automatically by the number of RAID include RAID 0, RAID 1, RAID 5, RAID 10, and RAID 50. A computer chip that have an operating system to automatically configure devices. personal system/2 - PXE - RAM - random-... tests on a physically write-protected floppy disk, CD, or DVD. If no problems are arranged in RAM is referred to create an image. The organization that do not have not yet been documented. Plug-and-Play - read -only status if: &#...


