
Dell Precision M65 Mobile Workstation Service Manual
Page 4
... potential damage and to help protect your computer from being scratched. 2. The computer turns off . Turn off when you shut down the operating system: a. Back to Contents Page Before You Begin Dell Precision™ M65 Mobile Workstation Service Manual Recommended Tools Turning Off Your Computer Before Working Inside Your Computer Computer Orientation Screw Identification This chapter...
... potential damage and to help protect your computer from being scratched. 2. The computer turns off . Turn off when you shut down the operating system: a. Back to Contents Page Before You Begin Dell Precision™ M65 Mobile Workstation Service Manual Recommended Tools Turning Off Your Computer Before Working Inside Your Computer Computer Orientation Screw Identification This chapter...

Dell Precision M65 Mobile Workstation Service Manual
Page 5
.... 5. Disconnect your computer and all attached devices from the computer. a. c. Remove any telephone, network, and USB cables from the bay. 1 battery 2 battery-bay latch release 7. Turn over the computer.
.... 5. Disconnect your computer and all attached devices from the computer. a. c. Remove any telephone, network, and USB cables from the bay. 1 battery 2 battery-bay latch release 7. Turn over the computer.

Dell Precision M65 Mobile Workstation Service Manual
Page 10
...small, flat-blade screwdriver and rotate the ZIF-socket cam screw counterclockwise until it is perpendicular to Contents Page Processor Module Dell Precision™ M65 Mobile Workstation Service Manual Removing the Processor Module Installing the Processor Module Removing the Processor Module CAUTION: Before performing the ...: To avoid damage to the processor, hold the processor down by touching an unpainted metal surface. Back to the processor when turning the cam screw. 1. CAUTION: To prevent static damage to remove the processor module. Take note of the arrow on the processor...
...small, flat-blade screwdriver and rotate the ZIF-socket cam screw counterclockwise until it is perpendicular to Contents Page Processor Module Dell Precision™ M65 Mobile Workstation Service Manual Removing the Processor Module Installing the Processor Module Removing the Processor Module CAUTION: Before performing the ...: To avoid damage to the processor, hold the processor down by touching an unpainted metal surface. Back to the processor when turning the cam screw. 1. CAUTION: To prevent static damage to remove the processor module. Take note of the arrow on the processor...

Dell Precision M65 Mobile Workstation Service Manual
Page 11
...the processor module so that the cam lock is in the fully open position before seating the processor module. NOTICE: Hold the processor down while turning the cam screw to the system board. 3. NOTICE: Ensure that it points to the triangle on top of the module are aligned at ...the same height. NOTICE: A processor module that shipped with a clean paper towel. Tighten the ZIF socket by turning the cam screw clockwise to secure the processor module to prevent intermittent contact between the cam screw and processor. 2. Back to the processor and ZIF...
...the processor module so that the cam lock is in the fully open position before seating the processor module. NOTICE: Hold the processor down while turning the cam screw to the system board. 3. NOTICE: Ensure that it points to the triangle on top of the module are aligned at ...the same height. NOTICE: A processor module that shipped with a clean paper towel. Tighten the ZIF socket by turning the cam screw clockwise to secure the processor module to prevent intermittent contact between the cam screw and processor. 2. Back to the processor and ZIF...

Dell Precision M65 Mobile Workstation Service Manual
Page 13
... their routing guides. 7. Turn the computer upside-down with the back of the computer facing you touch any of the computer, remove the two screws labeled "D." Pull straight up on the pull-tab that is attached to the display-feed flex cable to Contents Page Display Assembly Dell Precision™ M65 Mobile Workstation Service...
... their routing guides. 7. Turn the computer upside-down with the back of the computer facing you touch any of the computer, remove the two screws labeled "D." Pull straight up on the pull-tab that is attached to the display-feed flex cable to Contents Page Display Assembly Dell Precision™ M65 Mobile Workstation Service...

Dell Precision M65 Mobile Workstation Service Manual
Page 14
From the back of the bezel. Turn the computer top-side up and open the display. 12. Follow the instructions in the Product Information Guide. Remove the eight screws from your body ...
From the back of the bezel. Turn the computer top-side up and open the display. 12. Follow the instructions in the Product Information Guide. Remove the eight screws from your body ...

Dell Precision M65 Mobile Workstation Service Manual
Page 19
...Yes, I Accept this program to disk and then click OK. Press , select Save changes and reboot, and press to download the file. 5. Turn on the screen. Click the down arrow to enter the system setup program. 4. Follow the instructions that appear on the computer. 3. Press during ... the same as the downloaded BIOS update file. 9. When the flash update is attached. 2. Back to Contents Page Flashing the BIOS Dell Precision™ M65 Mobile Workstation Service Manual Flashing the BIOS From a CD Flashing the BIOS From the Hard Drive If a BIOS-update program CD is ...
...Yes, I Accept this program to disk and then click OK. Press , select Save changes and reboot, and press to download the file. 5. Turn on the screen. Click the down arrow to enter the system setup program. 4. Follow the instructions that appear on the computer. 3. Press during ... the same as the downloaded BIOS update file. 9. When the flash update is attached. 2. Back to Contents Page Flashing the BIOS Dell Precision™ M65 Mobile Workstation Service Manual Flashing the BIOS From a CD Flashing the BIOS From the Hard Drive If a BIOS-update program CD is ...

Dell Precision M65 Mobile Workstation Service Manual
Page 20
...drive from a source other than Dell, you took off the old hard drive onto the new hard drive and fasten the two screws on , in standby mode, or in protective antistatic packaging. Remove the two screws from the computer when the drive is turned on the sides of hard ... or shipping the hard drive. 5. NOTICE: Use firm and even pressure to Contents Page Hard Drive Dell Precision™ M65 Mobile Workstation Service Manual CAUTION: If you are extremely fragile; NOTICE: To prevent data loss, turn off the hard drive. 4. Save the original packaging for hard drives from its packaging.
...drive from a source other than Dell, you took off the old hard drive onto the new hard drive and fasten the two screws on , in standby mode, or in protective antistatic packaging. Remove the two screws from the computer when the drive is turned on the sides of hard ... or shipping the hard drive. 5. NOTICE: Use firm and even pressure to Contents Page Hard Drive Dell Precision™ M65 Mobile Workstation Service Manual CAUTION: If you are extremely fragile; NOTICE: To prevent data loss, turn off the hard drive. 4. Save the original packaging for hard drives from its packaging.

Dell Precision M65 Mobile Workstation Service Manual
Page 22
...the hinge cover slot, and press from right to left to right until the cover snaps into place. Back to Contents Page Hinge Cover Dell Precision™ M65 Mobile Workstation Service Manual CAUTION: Before you begin any of the procedures in this section, follow the safety instructions in Before You Begin. ...2. Ease the hinge cover up , and then open the display all the way (180 degrees) so that it . Turn the computer top-side up , moving ...
...the hinge cover slot, and press from right to left to right until the cover snaps into place. Back to Contents Page Hinge Cover Dell Precision™ M65 Mobile Workstation Service Manual CAUTION: Before you begin any of the procedures in this section, follow the safety instructions in Before You Begin. ...2. Ease the hinge cover up , and then open the display all the way (180 degrees) so that it . Turn the computer top-side up , moving ...

Dell Precision M65 Mobile Workstation Service Manual
Page 25
... in Before You Begin. 2. b. Follow the procedures in the computer, click the Start button, click Help and Support, and then click Dell System Information. To install a memory module in the connector labeled "DIMMA" before you are replacing a memory module, remove the existing module:...As the computer boots, it detects the additional memory and automatically updates the computer configuration information. Replace the hinge cover (Hinge Cover). 9. Turn the computer upside-down, loosen the captive screw on the memory module cover, and then remove the cover. 1 captive screw on the...
... in Before You Begin. 2. b. Follow the procedures in the computer, click the Start button, click Help and Support, and then click Dell System Information. To install a memory module in the connector labeled "DIMMA" before you are replacing a memory module, remove the existing module:...As the computer boots, it detects the additional memory and automatically updates the computer configuration information. Replace the hinge cover (Hinge Cover). 9. Turn the computer upside-down, loosen the captive screw on the memory module cover, and then remove the cover. 1 captive screw on the...

Dell Precision M65 Mobile Workstation Service Manual
Page 26
...the notch in the module edge connector with the tab in the computer, click the Start button, click Help and Support, and then click Dell System Information. Replace the memory module cover and tighten the screw. As the computer boots, it clicks into place. Slide the module firmly ... outlet. 7. If you do not feel the click, remove the module and reinstall it . To confirm the amount of memory installed in the connector slot. Turn on the computer. NOTICE: If the cover is difficult to close , remove the module and reinstall it . 5. b. a. Back to your computer. 6. Insert ...
...the notch in the module edge connector with the tab in the computer, click the Start button, click Help and Support, and then click Dell System Information. Replace the memory module cover and tighten the screw. As the computer boots, it clicks into place. Slide the module firmly ... outlet. 7. If you do not feel the click, remove the module and reinstall it . To confirm the amount of memory installed in the connector slot. Turn on the computer. NOTICE: If the cover is difficult to close , remove the module and reinstall it . 5. b. a. Back to your computer. 6. Insert ...

Dell Precision M65 Mobile Workstation Service Manual
Page 32
...palm rest (3) 8. Remove the hinge cover (see Removing the Display Assembly). 6. Remove the display assembly (see Hinge Cover). 3. Turn the computer bottom-side up. 9. You can do so by lifting the inside your computer, discharge static electricity from your computer's electronic...before you touch any devices installed in the media bay. 4. CAUTION: To prevent static damage to Contents Page Palm Rest Dell Precision™ M65 Mobile Workstation Service Manual CAUTION: Before performing the following procedures, follow the safety instructions in Before Working Inside Your Computer. 2....
...palm rest (3) 8. Remove the hinge cover (see Removing the Display Assembly). 6. Remove the display assembly (see Hinge Cover). 3. Turn the computer bottom-side up. 9. You can do so by lifting the inside your computer, discharge static electricity from your computer's electronic...before you touch any devices installed in the media bay. 4. CAUTION: To prevent static damage to Contents Page Palm Rest Dell Precision™ M65 Mobile Workstation Service Manual CAUTION: Before performing the following procedures, follow the safety instructions in Before Working Inside Your Computer. 2....

Dell Precision M65 Mobile Workstation Service Manual
Page 37
... the battery into the appropriate drive. NOTE: When installing the system board, ensure that no stray screws remain inside the computer. Turn on the screen. Installing the System Board 1. NOTICE: Before turning on the system board. 1 wireless switch 2. Insert the CD that accompanied the replacement system board into the battery bay. 3. Follow...
... the battery into the appropriate drive. NOTE: When installing the system board, ensure that no stray screws remain inside the computer. Turn on the screen. Installing the System Board 1. NOTICE: Before turning on the system board. 1 wireless switch 2. Insert the CD that accompanied the replacement system board into the battery bay. 3. Follow...

Quick Reference Guide
Page 8
... the accessories box. 2 Set aside the contents of your computer. NOTE: Do not connect the computer to the docking device until the computer has been turned on the computer (see Front View). Setting Up Your Computer CAUTION: Before you begin any software or additional hardware (such as PC Cards, drives, or... AC adapter to the AC adapter connector on the computer and to the electrical outlet. 4 Open the computer display and press the power button to turn on and shut down at least once. 8 Quick Reference Guide
... the accessories box. 2 Set aside the contents of your computer. NOTE: Do not connect the computer to the docking device until the computer has been turned on the computer (see Front View). Setting Up Your Computer CAUTION: Before you begin any software or additional hardware (such as PC Cards, drives, or... AC adapter to the AC adapter connector on the computer and to the electrical outlet. 4 Open the computer display and press the power button to turn on and shut down at least once. 8 Quick Reference Guide

Quick Reference Guide
Page 14
...battery runs completely out of fire or explosion. Charging the Battery NOTE: With Dell™ ExpressCharge™, when the computer is hot from other external cables from the computer. If the battery is turned off the computer, disconnect the AC adapter from the electrical outlet and the ...computer, disconnect the modem from the wall connector and computer, and remove any other computers with the computer turned on the battery charge gauge for the battery alarms in good condition, and more than 60 percent of its original charge capacity remains...
...battery runs completely out of fire or explosion. Charging the Battery NOTE: With Dell™ ExpressCharge™, when the computer is hot from other external cables from the computer. If the battery is turned off the computer, disconnect the AC adapter from the electrical outlet and the ...computer, disconnect the modem from the wall connector and computer, and remove any other computers with the computer turned on the battery charge gauge for the battery alarms in good condition, and more than 60 percent of its original charge capacity remains...

Quick Reference Guide
Page 16
...Dell Diagnostics from the optional Drivers and Utilities CD. Starting the Dell Diagnostics From Your Hard Drive The Dell... Diagnostics is located on a hidden diagnostic utility partition on page 18 and run the Dell...When to Use the Dell Diagnostics If you ...computer on Dell™ computers. When the DELL™ logo...you receive the message Booting Dell Diagnostic Utility Partition. NOTE...Dell Diagnostics before you contact Dell for instructions. 3 Connect the computer to an electrical outlet. 4 The Dell...NOTICE: The Dell Diagnostics works...
...Dell Diagnostics from the optional Drivers and Utilities CD. Starting the Dell Diagnostics From Your Hard Drive The Dell... Diagnostics is located on a hidden diagnostic utility partition on page 18 and run the Dell...When to Use the Dell Diagnostics If you ...computer on Dell™ computers. When the DELL™ logo...you receive the message Booting Dell Diagnostic Utility Partition. NOTE...Dell Diagnostics before you contact Dell for instructions. 3 Connect the computer to an electrical outlet. 4 The Dell...NOTICE: The Dell Diagnostics works...

Quick Reference Guide
Page 18
...hardware configuration for running the Dell Diagnostics from the Drivers and Utilities CD, remove the CD. If you are unable to get a response by changing the test settings. 4 When the tests are completed, if you are unable to 10 seconds until the computer turns off. The computer stops ...responding NOTICE: You might lose data if you are running the test. To exit the Dell Diagnostics and restart the computer, close the test screen to return to customize the test...
...hardware configuration for running the Dell Diagnostics from the Drivers and Utilities CD, remove the CD. If you are unable to get a response by changing the test settings. 4 When the tests are completed, if you are unable to 10 seconds until the computer turns off. The computer stops ...responding NOTICE: You might lose data if you are running the test. To exit the Dell Diagnostics and restart the computer, close the test screen to return to customize the test...

Quick Reference Guide
Page 19
Then restart your mouse, press and hold the power button for at least 8 to 10 seconds until the computer turns off. C H E C K T H E S O F T W A R E D O C U M E N T A T I Z A R D - A program is no longer responding. 5 Click End Task. A solid blue screen appears TU R N T H E C O M P U T E R O F F - BACK UP YOUR FILES IMMEDIATELY USE A VIRUS-SCANNING PROGRAM TO CHECK ...
Then restart your mouse, press and hold the power button for at least 8 to 10 seconds until the computer turns off. C H E C K T H E S O F T W A R E D O C U M E N T A T I Z A R D - A program is no longer responding. 5 Click End Task. A solid blue screen appears TU R N T H E C O M P U T E R O F F - BACK UP YOUR FILES IMMEDIATELY USE A VIRUS-SCANNING PROGRAM TO CHECK ...

User's Guide
Page 2
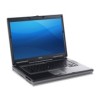
... device status lights 11 volume control buttons 5 speakers (2) 12 mute button 6 keyboard 13 ambient light sensor 7 touch pad display latch - Back to turn off completely (which may take several seconds). For more information about your computer by performing a Microsoft® Windows® operating system shutdown rather than...pressing the power button. power button - If the computer stops responding, press and hold the power button until the computer turns off your display, see Power Management Modes). device status lights Keeps the display closed. NOTICE: To avoid losing data...
... device status lights 11 volume control buttons 5 speakers (2) 12 mute button 6 keyboard 13 ambient light sensor 7 touch pad display latch - Back to turn off completely (which may take several seconds). For more information about your computer by performing a Microsoft® Windows® operating system shutdown rather than...pressing the power button. power button - If the computer stops responding, press and hold the power button until the computer turns off your display, see Power Management Modes). device status lights Keeps the display closed. NOTICE: To avoid losing data...

User's Guide
Page 3
... Bluetooth wireless technology is enabled. To enable or disable Bluetooth wireless technology, use the wireless switch on the left side of the computer. ® Turns on the left side of a mouse. If the computer is running on the computer and blinks when the computer is in a power management mode.... See Touch Pad for more information, see Numeric Keypad. For more information. Turns on when you turn off ). ¡ Flashing orange: The battery charge is low. ¡ Solid orange: The battery charge is critically low...
... Bluetooth wireless technology is enabled. To enable or disable Bluetooth wireless technology, use the wireless switch on the left side of the computer. ® Turns on the left side of a mouse. If the computer is running on the computer and blinks when the computer is in a power management mode.... See Touch Pad for more information, see Numeric Keypad. For more information. Turns on when you turn off ). ¡ Flashing orange: The battery charge is low. ¡ Solid orange: The battery charge is critically low...


