Information Update
Page 6
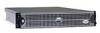
... 10/100-Mbps. See Figure A-4 in your data to identify expansion card slots and buses. When the operating system loads and the correct drivers are using an integrated NIC for this purpose, you must use the NIC 1 connector. It is recommended that bus. however, the bus...1-4 Information Update WOL is supported on only one Ethernet port in the system, which does not include the system management port. www.dell.com | support.dell.com Expansion Card Installation Guidelines • Do not install full-length expansion cards in slot 1. • You can install expansion cards ...
... 10/100-Mbps. See Figure A-4 in your data to identify expansion card slots and buses. When the operating system loads and the correct drivers are using an integrated NIC for this purpose, you must use the NIC 1 connector. It is recommended that bus. however, the bus...1-4 Information Update WOL is supported on only one Ethernet port in the system, which does not include the system management port. www.dell.com | support.dell.com Expansion Card Installation Guidelines • Do not install full-length expansion cards in slot 1. • You can install expansion cards ...

Rack Installation Guide
Page 25
... following tools and supplies to install the system in a two-post open-frame relay rack: • #2 Phillips screwdriver • 11/32-inch wrench or nut driver (if changing to a flush-mount configuration) • Masking tape or felt-tip pen to mark the mounting holes Rack Kit Contents The two-post rack...
... following tools and supplies to install the system in a two-post open-frame relay rack: • #2 Phillips screwdriver • 11/32-inch wrench or nut driver (if changing to a flush-mount configuration) • Masking tape or felt-tip pen to mark the mounting holes Rack Kit Contents The two-post rack...

Rack Installation Guide
Page 30
... it 180 degrees, and reinstall it on the opposite slide assembly. 2 Using a #2 Phillips screwdriver and an 11/32-inch wrench or nut driver, remove two 12-24 x 0.5-inch pan-head Phillips screws, two nuts, and two shoulder washers from one slide assembly onto the threaded studs on... joined bracket becomes the new extended back bracket. 1-24 Rack Installation Guide To prepare the slide assemblies for center-mount installation. www.dell.com | support.dell.com Flush-Mount Installation The two-post rack kit is shipped with the brackets configured for flush-mount installation in step 2 (see ...
... it 180 degrees, and reinstall it on the opposite slide assembly. 2 Using a #2 Phillips screwdriver and an 11/32-inch wrench or nut driver, remove two 12-24 x 0.5-inch pan-head Phillips screws, two nuts, and two shoulder washers from one slide assembly onto the threaded studs on... joined bracket becomes the new extended back bracket. 1-24 Rack Installation Guide To prepare the slide assemblies for center-mount installation. www.dell.com | support.dell.com Flush-Mount Installation The two-post rack kit is shipped with the brackets configured for flush-mount installation in step 2 (see ...

Rack Installation Guide
Page 31
... assembly (see Figure 1-17). 9 Perform steps 7 and 8 to install the right slide assembly in the rack. 10 Use an 11/32-inch wrench or nut driver to fully tighten the nuts on the mounting brackets on both slide assemblies that you tightened with your fingers. 11 Install the stiffening bracket between...
... assembly (see Figure 1-17). 9 Perform steps 7 and 8 to install the right slide assembly in the rack. 10 Use an 11/32-inch wrench or nut driver to fully tighten the nuts on the mounting brackets on both slide assemblies that you tightened with your fingers. 11 Install the stiffening bracket between...

2-Post Rack Installation
Page 7
... personal injury to yourself and to install a system in a two-post, open -frame relay rack: • #2 Phillips screwdriver • 11/32-inch wrench or nut driver (if changing to a flush-mount configuration) • Masking tape or felt-tip pen to be pulled out of slide assemblies (two-post) • One stiffening...
... personal injury to yourself and to install a system in a two-post, open -frame relay rack: • #2 Phillips screwdriver • 11/32-inch wrench or nut driver (if changing to a flush-mount configuration) • Masking tape or felt-tip pen to be pulled out of slide assemblies (two-post) • One stiffening...

2-Post Rack Installation
Page 13
... mounting bracket, rotate it 180 degrees, and reinstall it on the opposite slide assembly. 2 Using a #2 Phillips screwdriver and an 11/32-inch wrench or nut driver, remove two 12-24 x 0.5-inch pan-head Phillips screws, two nuts, and two shoulder washers from each front center bracket (see Figure 1-5). 3 Remove the front...
... mounting bracket, rotate it 180 degrees, and reinstall it on the opposite slide assembly. 2 Using a #2 Phillips screwdriver and an 11/32-inch wrench or nut driver, remove two 12-24 x 0.5-inch pan-head Phillips screws, two nuts, and two shoulder washers from each front center bracket (see Figure 1-5). 3 Remove the front...

2-Post Rack Installation
Page 14
... Figure 1-6). If the vertical rack is 3 inches wide, use the holes located 3 inches in the rack. 10 Use an 11/32-inch wrench or nut driver to install the right slide assembly in front of the holes at the location you tightened with your fingers. 11 Install the stiffening bracket between... slide assemblies that you marked, adjust the extended back bracket tightly against the vertical two-post rack and secure it with two 12-24 x 0.5- www.dell.com | support.dell.com Figure 1-5.
... Figure 1-6). If the vertical rack is 3 inches wide, use the holes located 3 inches in the rack. 10 Use an 11/32-inch wrench or nut driver to install the right slide assembly in front of the holes at the location you tightened with your fingers. 11 Install the stiffening bracket between... slide assemblies that you marked, adjust the extended back bracket tightly against the vertical two-post rack and secure it with two 12-24 x 0.5- www.dell.com | support.dell.com Figure 1-5.


