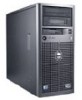
Dell PowerEdge Systems Microprocessor Upgrade Guide
Page 4
... - Microprocessor Upgrade 1-1 In addition, you should use a wrist grounding strap for upgrading the Intel® Pentium® II or III microprocessors with either Intel Pentium II or Pentium III microprocessors in the following Dell PowerEdge systems: PowerEdge 1300 PowerEdge 2300 PowerEdge 4300 PowerEdge 4350 Installing one or more microprocessors in the following activities: Verifying the basic input/output system (BIOS) revision and...
Dell PowerEdge Systems Microprocessor Upgrade Guide
Page 5
... and the number of microprocessors you are installing has a 500-megahertz (MHz) Pentium III primary microprocessor, the secondary microprocessor must be a 500-MHz Pentium III microprocessor. 1-2 Dell PowerEdge Systems - Before you start to work , periodically touch an unpainted metal surface on the cable itself. Also, disconnect any connector pins. Some cables have one ...
Dell PowerEdge Systems Microprocessor Upgrade Guide
Page 7
After the system completes the boot routine, follow the instructions on the screen to Pentium II or Pentium III microprocessors in this document. 1-4 Dell PowerEdge Systems - After the BIOS has been successfully installed message appears on the screen, remove the BIOS diskette from the... 2. The latest version of the BIOS is also available online at 450 MHz and faster. See "Removing the Microprocessors", found later in the PowerEdge 1300, perform the following steps: a. Insert the BIOS diskette provided in the upgrade kit into the diskette drive and reboot the system. 2. Reboot ...
Dell PowerEdge Systems Microprocessor Upgrade Guide
Page 8
... place. support.dell.com Dell PowerEdge Systems - b. By default, the serial numbers of a PowerEdge 1300 system, the chassis intrusion detector causes the following message to be displayed at the next system start-up: ALERT! Microprocessor Upgrade 1-5 If the upgrade kit comes with a new cooling shroud, you remove and replace the cover of Pentium III microprocessors are not...
Dell PowerEdge Systems Microprocessor Upgrade Guide
Page 9
... plate is operating correctly. Removing the covers. e. Replacing the system board mounting plate or tray. Run the Dell Diagnostics to Pentium II or Pentium III microprocessors in your computer Installation and Troubleshooting Guide for specific instructions, if needed. 1-6 Dell PowerEdge Systems - Removing the front bezel. Disconnecting power and peripheral cables. Microprocessor Upgrade NOTES: If you do...
Dell PowerEdge Systems Microprocessor Upgrade Guide
Page 11
...Pentium III microprocessors in this document. 6. If you must be replaced. Microprocessor Upgrade Slide the system board and mounting plate assembly forward about 6.3 mm (0.25 inch) toward the front (left edge of the chassis. i. j. Remove the microprocessor. See "Removing and Replacing the Cooling Shroud", found later in the PowerEdge...the System", found later in reverse order. 4. To upgrade to replace the system board mounting tray. 1-8 Dell PowerEdge Systems - See "Removing the Microprocessors", found later in this document. 7. Install the upgrade microprocessor. h. ...
Dell PowerEdge Systems Microprocessor Upgrade Guide
Page 14
c. b. Removing the cooling fan shroud. inner card-guide brackets (6) thumbscrew To upgrade to Pentium II or Pentium III microprocessors in the PowerEdge 4350, perform the following steps: a. Removing the covers. d. Disconnecting power and peripheral cables. Microprocessor Upgrade 1-11 Removing the front bezel. support.dell.com Dell PowerEdge Systems - See your system Installation and Troubleshooting Guide for specific instructions, if needed. Access the system board, which involves the following steps: 1.
Dell PowerEdge Systems Microprocessor Upgrade Guide
Page 20
... board. Repeat steps 1 and 2 for engaging a threaded stud on the system board, as shown in Figure 1-8. 3. For Pentium II microprocessors, set the speed jumper to fully seat the microprocessor. You must use up to 25 lb of force to the...microprocessor into place. For Pentium III microprocessors, you do not need to install a terminator card. Upgrade microprocessors have a heat sink with a notch for your second upgrade microprocessor or to change the jumper settings on PowerEdge 2300 systems only threaded stud support.dell.com Dell PowerEdge Systems - Microprocessor Upgrade...
Dell PowerEdge Systems Microprocessor Upgrade Guide
Page 22
...in "Using the System Setup Program" in your computer and peripherals to PowerEdge 2300, 4300, and 4350 systems. For PowerEdge 1300 systems, see step 7 under "Installing Upgrade Microprocessors in the PowerEdge 1300", found earlier in this document. 1. NOTE: If a setup password ... detects the presence of Pentium III microprocessors are not displayed. Run the Dell Diagnostics to Not Detected. See your User's Guide and your network administrator for additional information on resetting the chassis intrusion detector. 3. support.dell.com Dell PowerEdge Systems - The following steps...