Dell PowerEdge Systems Microprocessor Upgrade Guide
Page 3
...1-3 Updating the BIOS 1-4 Saving RCU Configuration Settings 1-4 Installing Upgrade Microprocessors in the PowerEdge 1300 1-4 Installing Upgrade Microprocessors in the PowerEdge 2300 1-6 Installing Upgrade Microprocessors in the PowerEdge 4300 1-8 Installing Upgrade Microprocessors in the PowerEdge 4350 1-11 Removing...Shroud 1-15 Replacing the Cooling Shroud 1-16 Installing the Upgrade Microprocessor 1-16 Installing a New Cooling Shroud in the PowerEdge 1300 and 2300 1-18 Reassembling and Checking the System 1-19 Figure 1-1. Figure 1-8. Figure 1-3. Figure 1-7. Figure 1-9. ...
...1-3 Updating the BIOS 1-4 Saving RCU Configuration Settings 1-4 Installing Upgrade Microprocessors in the PowerEdge 1300 1-4 Installing Upgrade Microprocessors in the PowerEdge 2300 1-6 Installing Upgrade Microprocessors in the PowerEdge 4300 1-8 Installing Upgrade Microprocessors in the PowerEdge 4350 1-11 Removing...Shroud 1-15 Replacing the Cooling Shroud 1-16 Installing the Upgrade Microprocessor 1-16 Installing a New Cooling Shroud in the PowerEdge 1300 and 2300 1-18 Reassembling and Checking the System 1-19 Figure 1-1. Figure 1-8. Figure 1-3. Figure 1-7. Figure 1-9. ...
Dell PowerEdge Systems Microprocessor Upgrade Guide
Page 4
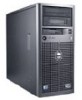
...; II or III microprocessors with either Intel Pentium II or Pentium III microprocessors in the following Dell PowerEdge systems: PowerEdge 1300 PowerEdge 2300 PowerEdge 4300 PowerEdge 4350 Installing one or more microprocessors in the following activities: Verifying the basic input/output system (BIOS) revision and saving the current configuration data Accessing the system board (see your system's Installation...
...; II or III microprocessors with either Intel Pentium II or Pentium III microprocessors in the following Dell PowerEdge systems: PowerEdge 1300 PowerEdge 2300 PowerEdge 4300 PowerEdge 4350 Installing one or more microprocessors in the following activities: Verifying the basic input/output system (BIOS) revision and saving the current configuration data Accessing the system board (see your system's Installation...
Dell PowerEdge Systems Microprocessor Upgrade Guide
Page 5
... same type and have one or more new Pentium II or Pentium III microprocessor(s), diskettes containing the Resource Configuration Utility (RCU), BIOS, embedded server management (ESM) firmware, and diagnostics. Each kit will vary, depending on a card. Ground yourself by its strain...installing has a 500-megahertz (MHz) Pentium III primary microprocessor, the secondary microprocessor must be a 500-MHz Pentium III microprocessor. 1-2 Dell PowerEdge Systems - Turn off your computer and devices from the computer. if you start to avoid bending any telephone or telecommunication lines from...
... same type and have one or more new Pentium II or Pentium III microprocessor(s), diskettes containing the Resource Configuration Utility (RCU), BIOS, embedded server management (ESM) firmware, and diagnostics. Each kit will vary, depending on a card. Ground yourself by its strain...installing has a 500-megahertz (MHz) Pentium III primary microprocessor, the secondary microprocessor must be a 500-MHz Pentium III microprocessor. 1-2 Dell PowerEdge Systems - Turn off your computer and devices from the computer. if you start to avoid bending any telephone or telecommunication lines from...
Dell PowerEdge Systems Microprocessor Upgrade Guide
Page 6
... 1. After the system completes the boot routine, follow the instructions on that diskette by performing the following steps. Reboot the system. 3. support.dell.com Dell PowerEdge Systems - Microprocessor Upgrade 1-3 View the system configuration screens in the System Setup program and make a record of the ESM firmware is included with... Guide for information). Before shutting down your system, perform these preliminary steps: Record the system configuration Update the ESM firmware Update the BIOS (if necessary) Use the RCU diskette (provided in the kit) to reboot the system.
... 1. After the system completes the boot routine, follow the instructions on that diskette by performing the following steps. Reboot the system. 3. support.dell.com Dell PowerEdge Systems - Microprocessor Upgrade 1-3 View the system configuration screens in the System Setup program and make a record of the ESM firmware is included with... Guide for information). Before shutting down your system, perform these preliminary steps: Record the system configuration Update the ESM firmware Update the BIOS (if necessary) Use the RCU diskette (provided in the kit) to reboot the system.
Dell PowerEdge Systems Microprocessor Upgrade Guide
Page 7
... from the diskette drive and follow the instructions on the screen. 4. The latest version of the BIOS is also available online at 450 MHz and faster. Rotating the power supply. After the system completes the boot routine, ... at http://support.dell.com. 1. Insert the BIOS diskette provided in this document. 1-4 Dell PowerEdge Systems - c. See your BIOS with the version contained on the screen to Pentium II or Pentium III microprocessors in the PowerEdge 1300, perform the following steps. If a BIOS diskette is available online at http://support.dell.com. The latest...
... from the diskette drive and follow the instructions on the screen. 4. The latest version of the BIOS is also available online at 450 MHz and faster. Rotating the power supply. After the system completes the boot routine, ... at http://support.dell.com. 1. Insert the BIOS diskette provided in this document. 1-4 Dell PowerEdge Systems - c. See your BIOS with the version contained on the screen to Pentium II or Pentium III microprocessors in the PowerEdge 1300, perform the following steps. If a BIOS diskette is available online at http://support.dell.com. The latest...


