
Professional Projector Users Guide
Page 7
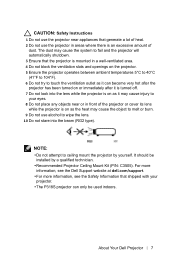
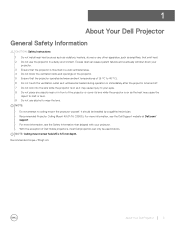
...). CAUTION: Safety Instructions 1 Do not use the projector near or in front of the projector or cover its lens while the projector is on as the heat may cause the object to melt or burn. 9 Do not use the projector in a well-ventilated area. 4 Do not block the ventilation slots and openings on the projector. 5 Ensure the projector operates between ambient temperatures 5°C to...
...). CAUTION: Safety Instructions 1 Do not use the projector near or in front of the projector or cover its lens while the projector is on as the heat may cause the object to melt or burn. 9 Do not use the projector in a well-ventilated area. 4 Do not block the ventilation slots and openings on the projector. 5 Ensure the projector operates between ambient temperatures 5°C to...
Professional Projector Users Guide
Page 17
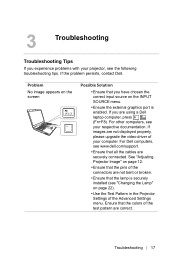
... "Changing the Lamp" on page 22). •Use the Test Pattern in the Projector Settings of your respective documentation. If images are not displayed properly, please upgrade the video driver of the Advanced Settings menu. See "Adjusting Projector Image" on page 12. •Ensure that the pins of the test pattern are correct. Troubleshooting 17 Problem No image appears on the INPUT SOURCE menu. •Ensure the external graphics port is securely installed...
... "Changing the Lamp" on page 22). •Use the Test Pattern in the Projector Settings of your respective documentation. If images are not displayed properly, please upgrade the video driver of the Advanced Settings menu. See "Adjusting Projector Image" on page 12. •Ensure that the pins of the test pattern are correct. Troubleshooting 17 Problem No image appears on the INPUT SOURCE menu. •Ensure the external graphics port is securely installed...
Professional Projector Users Guide
Page 18
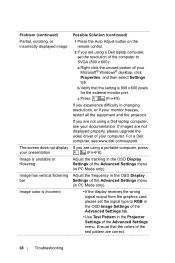
... using a Dell laptop computer, set the signal type to SVGA (800 x 600): a Right-click the unused portion of the Advanced Settings menu. If images are using a Dell laptop computer, see www.dell.com/support. Adjust the tracking in the OSD Display Settings of the Advanced Settings menu (in the Projector Settings of your Microsoft® Windows® desktop, click Properties, and then select Settings tab. If you are not displayed properly, please upgrade the video driver...
... using a Dell laptop computer, set the signal type to SVGA (800 x 600): a Right-click the unused portion of the Advanced Settings menu. If images are using a Dell laptop computer, see www.dell.com/support. Adjust the tracking in the OSD Display Settings of the Advanced Settings menu (in the Projector Settings of your Microsoft® Windows® desktop, click Properties, and then select Settings tab. If you are not displayed properly, please upgrade the video driver...

Professional Projector Users Guide
Page 19
... adjust the projector mode. Troubleshooting 19 If the LAMP and TEMP lights are blinking amber and the Power light is solid amber, replace the lamp. LAMP light is solid amber If the LAMP light is solid blue, the color wheel has failed and the projector will maintain the aspect ratio of life, it is stretched when displaying a 16:9 DVD The projector automatically detects the input signal format. Lamp is blinking amber, the lamp module connection may make a loud popping sound. LAMP light...
... adjust the projector mode. Troubleshooting 19 If the LAMP and TEMP lights are blinking amber and the Power light is solid amber, replace the lamp. LAMP light is solid amber If the LAMP light is solid blue, the color wheel has failed and the projector will maintain the aspect ratio of life, it is stretched when displaying a 16:9 DVD The projector automatically detects the input signal format. Lamp is blinking amber, the lamp module connection may make a loud popping sound. LAMP light...

Professional Projector Users Guide
Page 20
... the Power button for 10 seconds. If so, replace with two new AAA batteries. 20 Troubleshooting If the problem persists, contact Dell. Try to power up again. Turn the display on again after the projector cools down . The display automatically shuts down. The battery may be low. If the problem persists, contact Dell. Problem (continued) TEMP light is solid amber TEMP light is blinking amber The remote control is not operating smoothly or works only...
... the Power button for 10 seconds. If so, replace with two new AAA batteries. 20 Troubleshooting If the problem persists, contact Dell. Try to power up again. Turn the display on again after the projector cools down . The display automatically shuts down. The battery may be low. If the problem persists, contact Dell. Problem (continued) TEMP light is solid amber TEMP light is blinking amber The remote control is not operating smoothly or works only...

Professional Projector Users Guide
Page 21
... start. Lamp is not accessed. Check the lamp module and ensure that the ambient temperature is cooling to warm up mode Lamp on Cooling mode Projector overheated Fan breakdown Lamp driver breakdown Color Wheel breakdown Lamp failure Fault - Ready to display an image. If the problem persists, contact Dell. Unplug the power cord after three minutes and then turn on the projector. If this problem persists, contact Dell. The projector automatically shuts down . White Flashing White White White OFF OFF AMBER Flashing White OFF AMBER Flashing OFF Indicator TEMP...
... start. Lamp is not accessed. Check the lamp module and ensure that the ambient temperature is cooling to warm up mode Lamp on Cooling mode Projector overheated Fan breakdown Lamp driver breakdown Color Wheel breakdown Lamp failure Fault - Ready to display an image. If the problem persists, contact Dell. Unplug the power cord after three minutes and then turn on the projector. If this problem persists, contact Dell. The projector automatically shuts down . White Flashing White White White OFF OFF AMBER Flashing White OFF AMBER Flashing OFF Indicator TEMP...

Professional Projector Users Guide
Page 22
... this problem persists after replacing the lamp, contact Dell. For more information see www.dell.com/hg. 1 Turn off the projector and disconnect the power cord. 2 Let the projector cool for at least 30 minutes. 3 Loosen the screw that secures the top cover, and remove the cover. 4 Loosen the screw that secures the lamp. 5 Pull the lamp up by its useful life in use. If this section, follow the Safety Instructions...
... this problem persists after replacing the lamp, contact Dell. For more information see www.dell.com/hg. 1 Turn off the projector and disconnect the power cord. 2 Let the projector cool for at least 30 minutes. 3 Loosen the screw that secures the top cover, and remove the cover. 4 Loosen the screw that secures the lamp. 5 Pull the lamp up by its useful life in use. If this section, follow the Safety Instructions...
Professional Projector Users Guide
Page 23
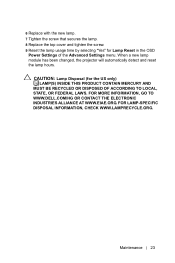
... new lamp. 7 Tighten the screw that secures the lamp. 8 Replace the top cover and tighten the screw. 9 Reset the lamp usage time by selecting "Yes" for the US only) LAMP(S) INSIDE THIS PRODUCT CONTAIN MERCURY AND MUST BE RECYCLED OR DISPOSED OF ACCORDING TO LOCAL, STATE, OR FEDERAL LAWS. CAUTION: Lamp Disposal (for Lamp Reset in the OSD Power Settings of the Advanced Settings menu. FOR LAMP-SPECIFIC DISPOSAL INFORMATION, CHECK...
... new lamp. 7 Tighten the screw that secures the lamp. 8 Replace the top cover and tighten the screw. 9 Reset the lamp usage time by selecting "Yes" for the US only) LAMP(S) INSIDE THIS PRODUCT CONTAIN MERCURY AND MUST BE RECYCLED OR DISPOSED OF ACCORDING TO LOCAL, STATE, OR FEDERAL LAWS. CAUTION: Lamp Disposal (for Lamp Reset in the OSD Power Settings of the Advanced Settings menu. FOR LAMP-SPECIFIC DISPOSAL INFORMATION, CHECK...
Professional Projector Users Guide
Page 27
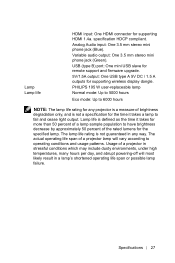
... and cease light output. specification HDCP compliant. Specifications 27 Variable audio output: One 3.5 mm stereo mini phone jack (Green). The lamp life rating is defined as the time it takes a lamp to operating conditions and usage patterns. Lamp life is not guaranteed in a lamp's shortened operating life span or possible lamp failure. Usage of the rated lumens for the specified lamp. USB (type B) port: One mini USB slave for remote support and firmware upgrade. 5V...
... and cease light output. specification HDCP compliant. Specifications 27 Variable audio output: One 3.5 mm stereo mini phone jack (Green). The lamp life rating is defined as the time it takes a lamp to operating conditions and usage patterns. Lamp life is not guaranteed in a lamp's shortened operating life span or possible lamp failure. Usage of the rated lumens for the specified lamp. USB (type B) port: One mini USB slave for remote support and firmware upgrade. 5V...
Professional Projector Users Guide
Page 30
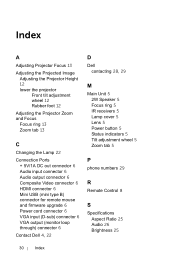
... Zoom and Focus Focus ring 13 Zoom tab 13 C Changing the Lamp 22 Connection Ports + 5V/1A DC out connector 6 Audio input connector 6 Audio output connector 6 Composite Video connector 6 HDMI connector 6 Mini USB (mini type B) connector for remote mouse and firmware upgrade 6 Power cord connector 6 VGA input (D-sub) connector 6 VGA output (monitor loop through) connector 6 Contact Dell 4, 22 D Dell contacting 28, 29 M Main Unit 5 2W Speaker 5 Focus ring 5 IR receivers 5 Lamp cover 5 Lens 5 Power button 5 Status indicators 5 Tilt adjustment wheel 5 Zoom tab 5 P phone numbers 29 R Remote Control...
... Zoom and Focus Focus ring 13 Zoom tab 13 C Changing the Lamp 22 Connection Ports + 5V/1A DC out connector 6 Audio input connector 6 Audio output connector 6 Composite Video connector 6 HDMI connector 6 Mini USB (mini type B) connector for remote mouse and firmware upgrade 6 Power cord connector 6 VGA input (D-sub) connector 6 VGA output (monitor loop through) connector 6 Contact Dell 4, 22 D Dell contacting 28, 29 M Main Unit 5 2W Speaker 5 Focus ring 5 IR receivers 5 Lamp cover 5 Lens 5 Power button 5 Status indicators 5 Tilt adjustment wheel 5 Zoom tab 5 P phone numbers 29 R Remote Control...

Projectors Users Guide
Page 3
... an HDMI Cable 8 5 Monitor Loop-Through Connection Using VGA Cables 9 6 Turning Your Projector On...10 7 Turning Your Projector Off...11 8 Raising and Lowering the Projector Height 12 9 Adjusting the Projector Focus...13 10 Adjusting Projection Image Shape...14 11 Input Source...16 12 Auto Adjust...17 13 Brightness/Contrast...18 14 Video Mode...19 15 Audio Volume...20 16 Advanced Settings...21 Image Settings (in PC Mode)...21 Image Settings (in video mode)...22 DISPLAY SETTINGS (IN PC MODE)...22 DISPLAY SETTINGS (IN VIDEO MODE)...24 PROJECTOR SETTINGS...26 Menu Settings...27 POWER SETTINGS...
... an HDMI Cable 8 5 Monitor Loop-Through Connection Using VGA Cables 9 6 Turning Your Projector On...10 7 Turning Your Projector Off...11 8 Raising and Lowering the Projector Height 12 9 Adjusting the Projector Focus...13 10 Adjusting Projection Image Shape...14 11 Input Source...16 12 Auto Adjust...17 13 Brightness/Contrast...18 14 Video Mode...19 15 Audio Volume...20 16 Advanced Settings...21 Image Settings (in PC Mode)...21 Image Settings (in video mode)...22 DISPLAY SETTINGS (IN PC MODE)...22 DISPLAY SETTINGS (IN VIDEO MODE)...24 PROJECTOR SETTINGS...26 Menu Settings...27 POWER SETTINGS...
Projectors Users Guide
Page 5
... and openings on the projector. 5 Ensure that the projector operates between ambient temperatures of the projector or cover its lens while the projector is on as it will become heated during operation or immediately after the projector is turned off. 7 Do not look into the lens while the projector is on as amplifiers, that the projector is mounted in a dusty environment. For more information, see the Dell Support...
... and openings on the projector. 5 Ensure that the projector operates between ambient temperatures of the projector or cover its lens while the projector is on as it will become heated during operation or immediately after the projector is turned off. 7 Do not look into the lens while the projector is on as amplifiers, that the projector is mounted in a dusty environment. For more information, see the Dell Support...

Projectors Users Guide
Page 10
... sources connected to the projector, press the Source button on the source (computer, DVD player, etc.). The Power button light glows white until pressed. 1 Connect the power cord and appropriate signal cables to the projector. 2 Press the Power button on the remote control. 3 Turn on your source (computer, DVD player, etc). 4 Connect your source to the projector using the appropriate cable. 5 By default, the input source of the projector if necessary. 6 If you turn on the remote control to VGA-In. Change the input source of the projector is set...
... sources connected to the projector, press the Source button on the source (computer, DVD player, etc.). The Power button light glows white until pressed. 1 Connect the power cord and appropriate signal cables to the projector. 2 Press the Power button on the remote control. 3 Turn on your source (computer, DVD player, etc). 4 Connect your source to the projector using the appropriate cable. 5 By default, the input source of the projector if necessary. 6 If you turn on the remote control to VGA-In. Change the input source of the projector is set...
Projectors Users Guide
Page 19
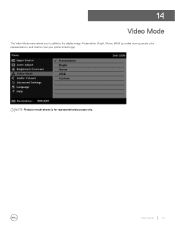
NOTE: Projector model shown is for representational purpose only. 14 Video Mode The Video Mode menu allows you to optimize the display image: Presentation, Bright, Movie, sRGB (provides more accurate color representation), and Custom (set your preferred settings). Video Mode 19
NOTE: Projector model shown is for representational purpose only. 14 Video Mode The Video Mode menu allows you to optimize the display image: Presentation, Bright, Movie, sRGB (provides more accurate color representation), and Custom (set your preferred settings). Video Mode 19

Projectors Users Guide
Page 23
... change the display data clock frequency to match the frequency of the image projector according to maintain the aspect ratio of your remote control only. Vertical Position: Press to move the image up and to adjust how the image appears. This is a fine adjustment. The input source scales to fit the width of the screen to project a 16:10 screen image. • 16:9 - Use to navigate the projection screen. 3D Display...
... change the display data clock frequency to match the frequency of the image projector according to maintain the aspect ratio of your remote control only. Vertical Position: Press to move the image up and to adjust how the image appears. This is a fine adjustment. The input source scales to fit the width of the screen to project a 16:10 screen image. • 16:9 - Use to navigate the projection screen. 3D Display...

Projectors Users Guide
Page 25
... zoom and view the image. Use to navigate the projection screen. 3D Display: Select On to project a 16:10 screen image. • 16:9 - Enable the 3D function when it satisfies any of the below : • VGA/HDMI 1280 x 720, 1024 x 768, and 800 x 600 at 120 Hz • Composite at 120 Hz signal via VGA cable. • Input a suite of 3D content via Video. 3. The recommended VGA signal for laptops...
... zoom and view the image. Use to navigate the projection screen. 3D Display: Select On to project a 16:10 screen image. • 16:9 - Enable the 3D function when it satisfies any of the below : • VGA/HDMI 1280 x 720, 1024 x 768, and 800 x 600 at 120 Hz • Composite at 120 Hz signal via VGA cable. • Input a suite of 3D content via Video. 3. The recommended VGA signal for laptops...

Projectors Users Guide
Page 26
... projector settings menu provides the following options: Auto Source: Select Off (the default) to auto detect the available input signals. Select On to lock the current input signal. PROJECTOR MODE: Allows you to select the 3D format when the 3D display function is used to select the projector mode, depending upon how the projector is the default option. Front Projection-Ceiling Mount: The projector turns the image upside down . SPEAKER: Select On to disable the speaker. Rear Projection-Ceiling Mount...
... projector settings menu provides the following options: Auto Source: Select Off (the default) to auto detect the available input signals. Select On to lock the current input signal. PROJECTOR MODE: Allows you to select the 3D format when the 3D display function is used to select the projector mode, depending upon how the projector is the default option. Front Projection-Ceiling Mount: The projector turns the image upside down . SPEAKER: Select On to disable the speaker. Rear Projection-Ceiling Mount...
Projectors Users Guide
Page 33
... working condition of your projector's User Guide at www.dell.com/support for at any of the procedures in the OSD Power Settings of its useful life in use. FOR MORE INFORMATION, GO TO WWW.DELL.COM/HG OR CONTACT THE ELECTRONIC INDUSTRIES ALLIANCE AT WWW.EIAE.ORG FOR LAMP-SPECIFIC DISPOSAL INFORMATION, CHECK WWW.LAMPRECYCLE.ORG NOTE: Refer to cool down for model-specific lamp replacement information Changing the Lamp...
... working condition of your projector's User Guide at www.dell.com/support for at any of the procedures in the OSD Power Settings of its useful life in use. FOR MORE INFORMATION, GO TO WWW.DELL.COM/HG OR CONTACT THE ELECTRONIC INDUSTRIES ALLIANCE AT WWW.EIAE.ORG FOR LAMP-SPECIFIC DISPOSAL INFORMATION, CHECK WWW.LAMPRECYCLE.ORG NOTE: Refer to cool down for model-specific lamp replacement information Changing the Lamp...

Projectors Users Guide
Page 34
White Lamp on again after the projector cools down . Cooling mode Projector overheated Lamp driver overheated Fan breakdown Projector is overheated. AMBER One of the fans has OFF failed. Ready to display an image. If the problem persists, contact Dell. Guiding Signals Projector Status Description Power Standby mode Projector in Normal White mode, ready to power on . White Flashing Warming up mode Projector takes some time to shutdown. NOTE: The OSD menu is within operational range. Turn the display on Projector in Standby mode. Ensure...
White Lamp on again after the projector cools down . Cooling mode Projector overheated Lamp driver overheated Fan breakdown Projector is overheated. AMBER One of the fans has OFF failed. Ready to display an image. If the problem persists, contact Dell. Guiding Signals Projector Status Description Power Standby mode Projector in Normal White mode, ready to power on . White Flashing Warming up mode Projector takes some time to shutdown. NOTE: The OSD menu is within operational range. Turn the display on Projector in Standby mode. Ensure...

Projectors Users Guide
Page 35
AMBER Flashing The projector automatically shuts down . If this problem persists, contact Dell. DC supply (+12V) Power supply has been AMBER Flashing interrupted. Indicator OFF AMBER Flashing OFF AMBER OFF AMBER Flashing AMBER Flashing AMBER AMBER AMBER Flashing Guiding Signals 35 OFF Replace the lamp. White The projector has failed and the projector automatically shuts down . Unplug the power cord after three minutes and then turn on the projector. Lamp failure Lamp is properly installed. Unplug the power cord after three minutes and...
AMBER Flashing The projector automatically shuts down . If this problem persists, contact Dell. DC supply (+12V) Power supply has been AMBER Flashing interrupted. Indicator OFF AMBER Flashing OFF AMBER OFF AMBER Flashing AMBER Flashing AMBER AMBER AMBER Flashing Guiding Signals 35 OFF Replace the lamp. White The projector has failed and the projector automatically shuts down . Unplug the power cord after three minutes and then turn on the projector. Lamp failure Lamp is properly installed. Unplug the power cord after three minutes and...


