
User Guide
Page 17
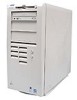
Back to Contents Page Diskette, Tape, and CD-ROM Drives: Dell™ OptiPlex™ GX300 System User's Guide To install a diskette, tape, or CD-ROM drive in "Removing and Replacing the Front Bezel." 5. NOTICE: Ground yourself by touching an unpainted ... the tabs on the back of the way temporarily. Check the documentation that accompanied the drive to verify that secure the drive to rotate the power supply out of the computer. Remove the front bezel as instructed in a 5.25-inch drive bay, perform the following steps. Attach the drive bracket to the...
Back to Contents Page Diskette, Tape, and CD-ROM Drives: Dell™ OptiPlex™ GX300 System User's Guide To install a diskette, tape, or CD-ROM drive in "Removing and Replacing the Front Bezel." 5. NOTICE: Ground yourself by touching an unpainted ... the tabs on the back of the way temporarily. Check the documentation that accompanied the drive to verify that secure the drive to rotate the power supply out of the computer. Remove the front bezel as instructed in a 5.25-inch drive bay, perform the following steps. Attach the drive bracket to the...

User Guide
Page 36
... to Contents Page Inside Your Computer: Dell™ OptiPlex™ GX300 System User's Guide Overview Internal Views System Board Components System Board Jumpers System Board Labels Removing and Replacing the AGP Card Brace Rotating the Power Supply Away From the System Board Removing and...This section describes the inside of your computer to help you orient yourself when working inside the computer. Figure 2. Inside the Chassis 1 Power supply 2 AC power receptacle 3 I/O panel connectors 4 expansion card slots 5 Padlock ring 6 Security cable slot 7 AGP card brace 8 Drive interface cable...
... to Contents Page Inside Your Computer: Dell™ OptiPlex™ GX300 System User's Guide Overview Internal Views System Board Components System Board Jumpers System Board Labels Removing and Replacing the AGP Card Brace Rotating the Power Supply Away From the System Board Removing and...This section describes the inside of your computer to help you orient yourself when working inside the computer. Figure 2. Inside the Chassis 1 Power supply 2 AC power receptacle 3 I/O panel connectors 4 expansion card slots 5 Padlock ring 6 Security cable slot 7 AGP card brace 8 Drive interface cable...

User Guide
Page 40
Figure 6. To remove the front bezel, you may have to rotate the system power supply out of the way. Rotating the Power Supply 1 Power supply 2 Release latch 3 AC power cable 4 Securing tab 5 DC power cable 3. Figure 7. Disconnect the AC power cable from the securing tab labeled "RELEASE - >, " and rotate it upward ... the bezel, and carefully pull the bezel away from the chassis, disengage the two retaining hooks at the bottom of the power supply (see "Removing and Replacing the Computer Cover"). Remove the computer cover as instructed in its extended position. Removing the Front...
Figure 6. To remove the front bezel, you may have to rotate the system power supply out of the way. Rotating the Power Supply 1 Power supply 2 Release latch 3 AC power cable 4 Securing tab 5 DC power cable 3. Figure 7. Disconnect the AC power cable from the securing tab labeled "RELEASE - >, " and rotate it upward ... the bezel, and carefully pull the bezel away from the chassis, disengage the two retaining hooks at the bottom of the power supply (see "Removing and Replacing the Computer Cover"). Remove the computer cover as instructed in its extended position. Removing the Front...

User Guide
Page 48
... any attached peripherals, and disconnect all the AC power cables from their electrical outlets. Start the Dell Diagnostics by inserting the Dell ResourceCD and rebooting the system. 2. Start the Dell Diagnostics by inserting the Dell ResourceCD and rebooting the system. Remove the computer cover... technical assistance. Troubleshooting Drives If the monitor displays a system error message to step 9. 9. Also verify that the power cables from the power supply are firmly connected to the system board. Perform the procedure in "Troubleshooting the Keyboard." 11. If the problem is...
... any attached peripherals, and disconnect all the AC power cables from their electrical outlets. Start the Dell Diagnostics by inserting the Dell ResourceCD and rebooting the system. 2. Start the Dell Diagnostics by inserting the Dell ResourceCD and rebooting the system. Remove the computer cover... technical assistance. Troubleshooting Drives If the monitor displays a system error message to step 9. 9. Also verify that the power cables from the power supply are firmly connected to the system board. Perform the procedure in "Troubleshooting the Keyboard." 11. If the problem is...

User Guide
Page 53
...a network. Remote System Configuration Remote system configuration features allow you make to this configuration (such as configured when shipped by Dell. Any Dell computer bearing the ENERGY STAR® Emblem is stored in electricity costs. Figure 1. In turn, this product meets the.... Temperature and Voltage Monitoring Your system includes temperature and voltage probes to sense when the system becomes overheated or the power supply voltage is a joint effort between the EPA and computer manufacturers to reduce air pollution by promoting energy-efficient computer products...
...a network. Remote System Configuration Remote system configuration features allow you make to this configuration (such as configured when shipped by Dell. Any Dell computer bearing the ENERGY STAR® Emblem is stored in electricity costs. Figure 1. In turn, this product meets the.... Temperature and Voltage Monitoring Your system includes temperature and voltage probes to sense when the system becomes overheated or the power supply voltage is a joint effort between the EPA and computer manufacturers to reduce air pollution by promoting energy-efficient computer products...

User Guide
Page 54
... the Dell Support website at least 5 seconds before installing a RIMM in socket A first (closest to install the upgrade RIMMs. 4. You can increase system memory up to the instructions in "Rotating the Power Supply Away From... the System Board." 3. Install the upgrade RIMMs. a. The system does not support RIMMs with six memory devices. NOTE: Before disconnecting a peripheral from the system or removing a component from their electrical outlets, and then wait at http://support.dell.com. Back to Contents Page System Memory: Dell™ OptiPlex™ GX300...
... the Dell Support website at least 5 seconds before installing a RIMM in socket A first (closest to install the upgrade RIMMs. 4. You can increase system memory up to the instructions in "Rotating the Power Supply Away From... the System Board." 3. Install the upgrade RIMMs. a. The system does not support RIMMs with six memory devices. NOTE: Before disconnecting a peripheral from the system or removing a component from their electrical outlets, and then wait at http://support.dell.com. Back to Contents Page System Memory: Dell™ OptiPlex™ GX300...

User Guide
Page 55
...on resetting the chassis intrusion detector. 10. Cover was previously removed. Press to Contents Page The system should have already changed . Run the Dell Diagnostics to Enabled or Enabled-Silent. Installing a RIMM 1 Securing clips (2) 2 Slot 5. Reset the chassis intrusion detector by someone else,...Figure 2. Strike the F1 key to continue, F2 to appear on . Verify the new total. Remove the computer cover, rotate the power supply, and check the installed RIMMs to their electrical outlets and turn off and disconnect your computer and peripherals from the socket (see Figure...
...on resetting the chassis intrusion detector. 10. Cover was previously removed. Press to Contents Page The system should have already changed . Run the Dell Diagnostics to Enabled or Enabled-Silent. Installing a RIMM 1 Securing clips (2) 2 Slot 5. Reset the chassis intrusion detector by someone else,...Figure 2. Strike the F1 key to continue, F2 to appear on . Verify the new total. Remove the computer cover, rotate the power supply, and check the installed RIMMs to their electrical outlets and turn off and disconnect your computer and peripherals from the socket (see Figure...

User Guide
Page 61
...and no beep code but the system locks up during POST Hard-Disk Drive LED Code Blank Solid green N/A N/A N/A N/A Cause System power supply failure. Action See "Getting Help" for instructions on obtaining technical assistance. If the system does not boot, see "Getting Help" for ... diagnostic LEDs, probable causes, and suggested corrective actions. Table 3 lists the codes for instructions on the system board may be faulty. The power indicator light-emitting diode (LED) and the hard-disk drive LED on the front of the computer emit diagnostic codes that each microprocessor is ...
...and no beep code but the system locks up during POST Hard-Disk Drive LED Code Blank Solid green N/A N/A N/A N/A Cause System power supply failure. Action See "Getting Help" for instructions on obtaining technical assistance. If the system does not boot, see "Getting Help" for ... diagnostic LEDs, probable causes, and suggested corrective actions. Table 3 lists the codes for instructions on the system board may be faulty. The power indicator light-emitting diode (LED) and the hard-disk drive LED on the front of the computer emit diagnostic codes that each microprocessor is ...

User Guide
Page 62
...Power Supply Away From the System Board." 3. Replace the AGP card brace. 8. Cover was previously removed. 10. Remove the accelerated graphics port (AGP) card brace according to the instructions in "Removing and Replacing the Computer Cover." 2. While in "Inside Your Computer." See "Chassis Intrusion" for instructions. Back to Contents Page Microprocessor: Dell™ OptiPlex...™ GX300 System User's Guide Adding a Second Microprocessor Upgrading an Existing Microprocessor ...
...Power Supply Away From the System Board." 3. Replace the AGP card brace. 8. Cover was previously removed. 10. Remove the accelerated graphics port (AGP) card brace according to the instructions in "Removing and Replacing the Computer Cover." 2. While in "Inside Your Computer." See "Chassis Intrusion" for instructions. Back to Contents Page Microprocessor: Dell™ OptiPlex...™ GX300 System User's Guide Adding a Second Microprocessor Upgrading an Existing Microprocessor ...

User Guide
Page 63
... Microsoft Windows NT 4.0 operating system, reinstall the operating system. When you remove the computer cover, see Figure 1). NOTE: Dell recommends that the new microprocessor is operating correctly. For the location of this procedure. Then pull the processor/heat sink assembly ...chassis intrusion detector. 12. Insert the new microprocessor into position, making sure that the standby power LED on the guide bracket tabs to the instructions in "Rotating the Power Supply Away From the System Board." 3. Upgrading an Existing Microprocessor To upgrade an existing microprocessor,...
... Microsoft Windows NT 4.0 operating system, reinstall the operating system. When you remove the computer cover, see Figure 1). NOTE: Dell recommends that the new microprocessor is operating correctly. For the location of this procedure. Then pull the processor/heat sink assembly ...chassis intrusion detector. 12. Insert the new microprocessor into position, making sure that the standby power LED on the guide bracket tabs to the instructions in "Rotating the Power Supply Away From the System Board." 3. Upgrading an Existing Microprocessor To upgrade an existing microprocessor,...

User Guide
Page 86
...) 43.7 cm (17.2 inches) 15 kilograms (kg) (33.0 pounds [lb]) or more, depending on front panel-green for power, yellow for diagnostics green LED green LED for 100-Mb operation yellow LED Power DC power supply: Wattage Heat dissipation Voltage Backup battery Physical Height Width Depth Weight Environmental Temperature: 230 W 913 British thermal units...
...) 43.7 cm (17.2 inches) 15 kilograms (kg) (33.0 pounds [lb]) or more, depending on front panel-green for power, yellow for diagnostics green LED green LED for 100-Mb operation yellow LED Power DC power supply: Wattage Heat dissipation Voltage Backup battery Physical Height Width Depth Weight Environmental Temperature: 230 W 913 British thermal units...


