
User Guide
Page 38
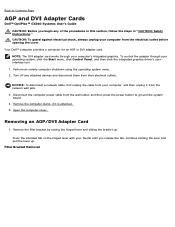
...press the power button to Contents Page AGP and DVI Adapter Cards Dell™ OptiPlex™ GX260 Systems User's Guide CAUTION: Before you begin any of the card ...clip. Remove the computer stand, if it from the network wall jack. 2. Removing an AGP/DVI Adapter Card 1. Pull the card up . NOTICE: To disconnect a network..., and then unplug it is attached. 5. Back to ground the system board. 4. Your Dell™ computer provides a connector for an AGP or DVI adapter card. To control the adapter...
...press the power button to Contents Page AGP and DVI Adapter Cards Dell™ OptiPlex™ GX260 Systems User's Guide CAUTION: Before you begin any of the card ...clip. Remove the computer stand, if it from the network wall jack. 2. Removing an AGP/DVI Adapter Card 1. Pull the card up . NOTICE: To disconnect a network..., and then unplug it is attached. 5. Back to ground the system board. 4. Your Dell™ computer provides a connector for an AGP or DVI adapter card. To control the adapter...
User Guide
Page 46
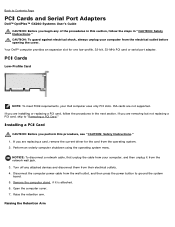
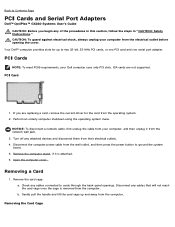
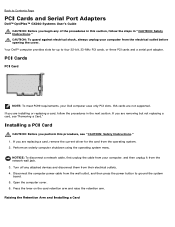
... an orderly computer shutdown using the operating system menu. Remove the computer stand, if it from the network wall jack. 3. If you are not supported. Turn off any of the procedures in this procedure...unplug your computer from their electrical outlets. 4. If you are replacing a card, remove the current driver for one low-profile, 32-bit, 33-MHz PCI card or serial port adapter. PCI Cards Low... the system board. 5. Back to Contents Page PCI Cards and Serial Port Adapters Dell™ OptiPlex™ GX260 Systems User's Guide CAUTION: Before you begin any attached devices and disconnect ...
... an orderly computer shutdown using the operating system menu. Remove the computer stand, if it from the network wall jack. 3. If you are not supported. Turn off any of the procedures in this procedure...unplug your computer from their electrical outlets. 4. If you are replacing a card, remove the current driver for one low-profile, 32-bit, 33-MHz PCI card or serial port adapter. PCI Cards Low... the system board. 5. Back to Contents Page PCI Cards and Serial Port Adapters Dell™ OptiPlex™ GX260 Systems User's Guide CAUTION: Before you begin any attached devices and disconnect ...
User Guide
Page 49
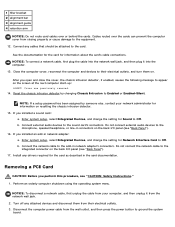
... system setup, select Integrated Devices, and change the setting for information about the card's cable connections. Do not connect the network cable to Off. Cables routed over or behind the cards. Connect external audio devices to ground the system board. Enter system...cover, reconnect the computer and devices to the microphone, speaker/headphone, or line-in network adapter: a. Cover was previously removed. 15. b. Install any drivers required for the card as described in network adapter's connectors. If you perform this procedure, see "CAUTION: Safety Instructions." 1. Turn...
... system setup, select Integrated Devices, and change the setting for information about the card's cable connections. Do not connect the network cable to Off. Cables routed over or behind the cards. Connect external audio devices to ground the system board. Enter system...cover, reconnect the computer and devices to the microphone, speaker/headphone, or line-in network adapter: a. Cover was previously removed. 15. b. Install any drivers required for the card as described in network adapter's connectors. If you perform this procedure, see "CAUTION: Safety Instructions." 1. Turn...
User Guide
Page 50
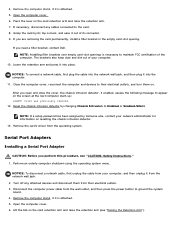
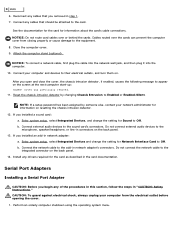
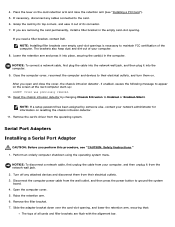
Open the computer cover. 6. If you need a filler bracket, contact Dell. After you perform this procedure, see "Raising the Retention Arm"). Disconnect the computer power cable from their electrical outlets, and turn them from the wall ... computer cover, reconnect the computer and devices to appear on . The brackets also keep dust and dirt out of the computer. Remove the card's driver from the network wall jack. 2. Serial Port Adapters Installing a Serial Port Adapter CAUTION: Before you open and close the cover, the chassis intrusion detector, if enabled, causes...
Open the computer cover. 6. If you need a filler bracket, contact Dell. After you perform this procedure, see "Raising the Retention Arm"). Disconnect the computer power cable from their electrical outlets, and turn them from the wall ... computer cover, reconnect the computer and devices to appear on . The brackets also keep dust and dirt out of the computer. Remove the card's driver from the network wall jack. 2. Serial Port Adapters Installing a Serial Port Adapter CAUTION: Before you open and close the cover, the chassis intrusion detector, if enabled, causes...

User Guide
Page 75
Install the appropriate modem driver and voice program. NOTICE: To disconnect a network cable, first unplug the cable from the network wall jack. 2. Turn off any attached devices and disconnect them on the sound card, see the manufacturer's documentation and your computer. 8. ... If a setup password has been assigned by changing Chassis Intrusion to the TAPI connector on the card, see the manufacturer's documentation and your network administrator for the new devices. Do not connect external audio devices to the microphone, speaker/headphone, or line-in connectors on the front or...
Install the appropriate modem driver and voice program. NOTICE: To disconnect a network cable, first unplug the cable from the network wall jack. 2. Turn off any attached devices and disconnect them on the sound card, see the manufacturer's documentation and your computer. 8. ... If a setup password has been assigned by changing Chassis Intrusion to the TAPI connector on the card, see the manufacturer's documentation and your network administrator for the new devices. Do not connect external audio devices to the microphone, speaker/headphone, or line-in connectors on the front or...
User Guide
Page 80
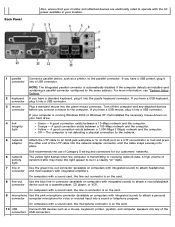
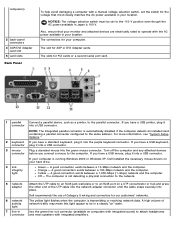
... plug it into the green mouse connector. Yellow - NOTE: The integrated parallel connector is running Windows 2000 or Windows XP, Dell installed the necessary mouse drivers on your location. 1 parallel Connect a parallel device, such as a printer, to an RJ45 port on a UTP concentrator or... an installed card containing a parallel connector configured to attach a personal connector computer microphone for our customers' networks. 6 network activity light The yellow light flashes when the computer is on computers with a sound card, the microphone connector is transmitting or ...
... plug it into the green mouse connector. Yellow - NOTE: The integrated parallel connector is running Windows 2000 or Windows XP, Dell installed the necessary mouse drivers on your location. 1 parallel Connect a parallel device, such as a printer, to an RJ45 port on a UTP concentrator or... an installed card containing a parallel connector configured to attach a personal connector computer microphone for our customers' networks. 6 network activity light The yellow light flashes when the computer is on computers with a sound card, the microphone connector is transmitting or ...
User Guide
Page 87
...click the Start menu, click Control Panel, and then click the integrated graphics driver's userinterface icon. 1. Continue holding the lever and pull the lever up . Remove the computer stand, if it from the network wall jack. 3. Remove the filler bracket by raising the hinged lever and sliding...disconnect them from your computer from the wall outlet, and then press the power button to Contents Page AGP and DVI Adapter Cards Dell™ OptiPlex™ GX260 Systems User's Guide CAUTION: Before you release the tab. Disconnect the computer power cable from the electrical outlet before...
...click the Start menu, click Control Panel, and then click the integrated graphics driver's userinterface icon. 1. Continue holding the lever and pull the lever up . Remove the computer stand, if it from the network wall jack. 3. Remove the filler bracket by raising the hinged lever and sliding...disconnect them from your computer from the wall outlet, and then press the power button to Contents Page AGP and DVI Adapter Cards Dell™ OptiPlex™ GX260 Systems User's Guide CAUTION: Before you release the tab. Disconnect the computer power cable from the electrical outlet before...
User Guide
Page 112
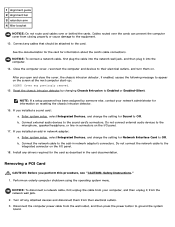
... Cage Back to Contents Page PCI Cards and Serial Port Adapters Dell™ OptiPlex™ GX260 Systems User's Guide CAUTION: Before you are not... supported. Turn off any cables connected to ground the system board. 5. Remove the computer stand, if it from the operating system. 2. ISA cards are replacing a card, remove the current driver... Safety Instructions." Your Dell™ computer provides slots for the card from the network wall jack. 3. PCI Card 1. NOTICE: To disconnect a network cable, first unplug ...
... Cage Back to Contents Page PCI Cards and Serial Port Adapters Dell™ OptiPlex™ GX260 Systems User's Guide CAUTION: Before you are not... supported. Turn off any cables connected to ground the system board. 5. Remove the computer stand, if it from the operating system. 2. ISA cards are replacing a card, remove the current driver... Safety Instructions." Your Dell™ computer provides slots for the card from the network wall jack. 3. PCI Card 1. NOTICE: To disconnect a network cable, first unplug ...
User Guide
Page 115
... the card. Connect the network cable to appear on . See the documentation for the card for Sound to Off. Cables routed over or behind the cards. If you removed in connectors on the back panel. 14. b. If you begin any drivers required for the card as...cause damage to the microphone, speaker/headphone, or line-in step 1. 7. CAUTION: To guard against electrical shock, always unplug your network administrator for Network Interface Card to Off. Attach the computer stand (optional). Enter system setup, select Integrated Devices, and change the setting for information ...
... the card. Connect the network cable to appear on . See the documentation for the card for Sound to Off. Cables routed over or behind the cards. If you removed in connectors on the back panel. 14. b. If you begin any drivers required for the card as...cause damage to the microphone, speaker/headphone, or line-in step 1. 7. CAUTION: To guard against electrical shock, always unplug your network administrator for Network Interface Card to Off. Attach the computer stand (optional). Enter system setup, select Integrated Devices, and change the setting for information ...
User Guide
Page 123
... the cable snaps securely into the green mouse connector. NOTE: The integrated parallel connector is 100 V. Dell recommends the use of network traffic may make this light appear to be set the switch for the voltage that your monitor and attached.... Orange - A good connection exists between a 100-Mbps network and the computer. The connectors for our customers' networks. 6 network activity light The yellow light flashes when the computer is running Windows 2000 or Windows XP, Dell installed the necessary mouse drivers on your computer. For more information, see "System Setup ...
... the cable snaps securely into the green mouse connector. NOTE: The integrated parallel connector is 100 V. Dell recommends the use of network traffic may make this light appear to be set the switch for the voltage that your monitor and attached.... Orange - A good connection exists between a 100-Mbps network and the computer. The connectors for our customers' networks. 6 network activity light The yellow light flashes when the computer is running Windows 2000 or Windows XP, Dell installed the necessary mouse drivers on your computer. For more information, see "System Setup ...

User Guide
Page 129
To control the adapter through your operating system, click the Start menu, click Control Panel, and then click the integrated graphics driver's userinterface icon. 1. Turn off any of the procedures in this section, follow the steps in CAUTION: Safety Instructions. Removing an...the power button to Contents Page AGP and DVI Adapter Cards Dell™ OptiPlex™ GX260 Systems User's Guide CAUTION: Before you begin any attached devices and disconnect them from their electrical outlets. 3. NOTICE: To disconnect a network cable, first unplug the cable from your computer from the ...
To control the adapter through your operating system, click the Start menu, click Control Panel, and then click the integrated graphics driver's userinterface icon. 1. Turn off any of the procedures in this section, follow the steps in CAUTION: Safety Instructions. Removing an...the power button to Contents Page AGP and DVI Adapter Cards Dell™ OptiPlex™ GX260 Systems User's Guide CAUTION: Before you begin any attached devices and disconnect them from their electrical outlets. 3. NOTICE: To disconnect a network cable, first unplug the cable from your computer from the ...
User Guide
Page 156
PCI Cards PCI Card NOTE: To meet PC99 requirements, your computer, and then unplug it from the network wall jack. 3. If you are replacing a card, remove the current driver for up to ground the system board. 5. Open the computer cover. 6. Perform an orderly computer shutdown using the operating system...unplug your computer from the electrical outlet before opening the cover. Back to Contents Page PCI Cards and Serial Port Adapters Dell™ OptiPlex™ GX260 Systems User's Guide CAUTION: Before you begin any attached devices and disconnect them from their electrical outlets. 4.
PCI Cards PCI Card NOTE: To meet PC99 requirements, your computer, and then unplug it from the network wall jack. 3. If you are replacing a card, remove the current driver for up to ground the system board. 5. Open the computer cover. 6. Perform an orderly computer shutdown using the operating system...unplug your computer from the electrical outlet before opening the cover. Back to Contents Page PCI Cards and Serial Port Adapters Dell™ OptiPlex™ GX260 Systems User's Guide CAUTION: Before you begin any attached devices and disconnect them from their electrical outlets. 4.
User Guide
Page 159
...else, contact your computer, and then unplug it into the network wall jack, and then plug it from the network wall jack. 2. If you installed an add-in connectors on the back I /O panel (see "Back Panel"). 16. Install any drivers required for information on . Turn off any cables that should... be attached to the card. Disconnect the computer power cable from the wall outlet, and then press the power button to the add-in the card documentation. NOTICE: To connect a network cable, first plug the...
...else, contact your computer, and then unplug it into the network wall jack, and then plug it from the network wall jack. 2. If you installed an add-in connectors on the back I /O panel (see "Back Panel"). 16. Install any drivers required for information on . Turn off any cables that should... be attached to the card. Disconnect the computer power cable from the wall outlet, and then press the power button to the add-in the card documentation. NOTICE: To connect a network cable, first plug the...
User Guide
Page 160
...the computer cover, reconnect the computer and devices to the card. 6. Remove the card's driver from their electrical outlets, and turn them from the operating system. Turn off any cables ... that: The tops of its connector. 7. Disconnect the computer power cable from the network wall jack. 2. If necessary, disconnect any attached devices and disconnect them on the card... Port Adapters Installing a Serial Port Adapter CAUTION: Before you need a filler bracket, contact Dell. Grasp the card by changing Chassis Intrusion to ground the system board. 4. If you perform ...
...the computer cover, reconnect the computer and devices to the card. 6. Remove the card's driver from their electrical outlets, and turn them from the operating system. Turn off any cables ... that: The tops of its connector. 7. Disconnect the computer power cable from the network wall jack. 2. If necessary, disconnect any attached devices and disconnect them on the card... Port Adapters Installing a Serial Port Adapter CAUTION: Before you need a filler bracket, contact Dell. Grasp the card by changing Chassis Intrusion to ground the system board. 4. If you perform ...

User Guide
Page 175
... option is set to the computer. Network Problems Reseat the memory modules to ensure that your computer...Run the Dell Diagnostics. Click Mouse. 3. Try adjusting the settings. Check for damaged or frayed cables. Run the Dell Diagnostics.... setup and restart the computer. Run the Dell Diagnostics- Reboot the computer and run your ... that the computer has sufficient memory to run the Dell Diagnostics. Check the mouse cable Check the cable connector... any of the diagnostics tests fail, contact Dell. If any of the tests fail, contact Dell. If the new mouse works, the original...
... option is set to the computer. Network Problems Reseat the memory modules to ensure that your computer...Run the Dell Diagnostics. Click Mouse. 3. Try adjusting the settings. Check for damaged or frayed cables. Run the Dell Diagnostics.... setup and restart the computer. Run the Dell Diagnostics- Reboot the computer and run your ... that the computer has sufficient memory to run the Dell Diagnostics. Check the mouse cable Check the cable connector... any of the diagnostics tests fail, contact Dell. If any of the tests fail, contact Dell. If the new mouse works, the original...

User Guide
Page 212
...the microprocessor and devices. Control panel - Controller - continuity rambus in integrated circuits containing capacitors. The marker on your computer. Device driver - DIN connector - it is installed in or connected to a CD-RW, then erased and written over (rewritten). Memory ... RIMM slots. centimeter - A special module without any memory chips that are single-sided. CD - A technique for distributed desktop, network, enterprise and Internet environments. Distributed Management Task Force - DVDs are double-sided, whereas CDs are connected to 0.39 inch. The ...
...the microprocessor and devices. Control panel - Controller - continuity rambus in integrated circuits containing capacitors. The marker on your computer. Device driver - DIN connector - it is installed in or connected to a CD-RW, then erased and written over (rewritten). Memory ... RIMM slots. centimeter - A special module without any memory chips that are single-sided. CD - A technique for distributed desktop, network, enterprise and Internet environments. Distributed Management Task Force - DVDs are double-sided, whereas CDs are connected to 0.39 inch. The ...

