
User's Guide
Page 5
3 Installing Upgrades Computer Cover 64 Opening the Computer Cover 64 Closing the Computer Cover 67 Expansion Cards 68 Installing an Expansion Card 69 Removing an Expansion Card ...
3 Installing Upgrades Computer Cover 64 Opening the Computer Cover 64 Closing the Computer Cover 67 Expansion Cards 68 Installing an Expansion Card 69 Removing an Expansion Card ...
User's Guide
Page 66
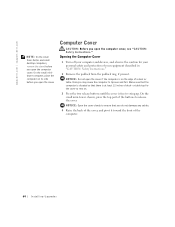
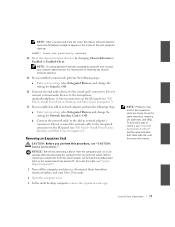
Doing so may cause the computer to ensure that there is free to swing up. www.dell.com | support.dell.com NOTE: On the small form-factor and small desktop computers, remove the stand before you do not damage any cables. 4 Raise the back of ...the cover, and pivot it toward the front of the computer. 64 Installing Upgrades Make sure that the computer is situated so that you open...
Doing so may cause the computer to ensure that there is free to swing up. www.dell.com | support.dell.com NOTE: On the small form-factor and small desktop computers, remove the stand before you do not damage any cables. 4 Raise the back of ...the cover, and pivot it toward the front of the computer. 64 Installing Upgrades Make sure that the computer is situated so that you open...

User's Guide
Page 67
Small Form-Factor Computer 1 3 2 1 security cable slot 2 padlock ring 3 release buttons (one on each side) Small Desktop Computer Installing Upgrades 65
Small Form-Factor Computer 1 3 2 1 security cable slot 2 padlock ring 3 release buttons (one on each side) Small Desktop Computer Installing Upgrades 65

User's Guide
Page 68
www.dell.com | support.dell.com 1 3 2 1 security cable slot 2 padlock ring 3 release buttons (one on each side) Small Mini-Tower Computer 66 Installing Upgrades
www.dell.com | support.dell.com 1 3 2 1 security cable slot 2 padlock ring 3 release buttons (one on each side) Small Mini-Tower Computer 66 Installing Upgrades

User's Guide
Page 69
Fold cables out of the way so that they will prevent the cover from closing properly. 2 Check to secure your work. Installing Upgrades 67 Make sure cables are using a padlock to see that no tools or extra parts are left inside the computer. 3 Close the cover by pivoting ...
Fold cables out of the way so that they will prevent the cover from closing properly. 2 Check to secure your work. Installing Upgrades 67 Make sure cables are using a padlock to see that no tools or extra parts are left inside the computer. 3 Close the cover by pivoting ...
User's Guide
Page 70
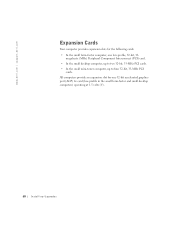
..., one 32-bit accelerated graphics port (AGP) 4x card (low-profile in the small form-factor and small desktop computers) operating at 1.5 volts (V). 68 Installing Upgrades www.dell.com | support.dell.com Expansion Cards Your computer provides expansion slots for one low-profile, 32-bit, 33-
..., one 32-bit accelerated graphics port (AGP) 4x card (low-profile in the small form-factor and small desktop computers) operating at 1.5 volts (V). 68 Installing Upgrades www.dell.com | support.dell.com Expansion Cards Your computer provides expansion slots for one low-profile, 32-bit, 33-

User's Guide
Page 71
Installing an Expansion Card CAUTION: Before you perform this procedure, see "CAUTION: Safety Instructions." IndustryStandard Architecture (ISA) expansion cards are not supported. Installing Upgrades 69 NOTE: To meet PC99 requirements, your Dell computer uses only PCI expansion slots. Expansion Card Types 1 2 3 1 AGP 4x card 2 low-profile 32-bit PCI card 3 32-bit PCI card NOTICE: Before disconnecting a device from the computer or removing a component from the system board, verify that the standby power light on the system board has turned off.
Installing an Expansion Card CAUTION: Before you perform this procedure, see "CAUTION: Safety Instructions." IndustryStandard Architecture (ISA) expansion cards are not supported. Installing Upgrades 69 NOTE: To meet PC99 requirements, your Dell computer uses only PCI expansion slots. Expansion Card Types 1 2 3 1 AGP 4x card 2 low-profile 32-bit PCI card 3 32-bit PCI card NOTICE: Before disconnecting a device from the computer or removing a component from the system board, verify that the standby power light on the system board has turned off.
User's Guide
Page 72
www.dell.com | support.dell.com NOTICE: Before disconnecting a device from the computer, wait 10 to 20 seconds after disconnecting the computer from their electrical outlets, and wait 10 to 20 seconds. 3 Open the computer cover. 4 If you have a small desktop computer, remove the expansion-card cage. 70 Installing Upgrades To locate this light...
www.dell.com | support.dell.com NOTICE: Before disconnecting a device from the computer, wait 10 to 20 seconds after disconnecting the computer from their electrical outlets, and wait 10 to 20 seconds. 3 Open the computer cover. 4 If you have a small desktop computer, remove the expansion-card cage. 70 Installing Upgrades To locate this light...

User's Guide
Page 73
Small Form-Factor Computer 1 2 3 4 5 1 card-edge connector 2 expansion card 3 hinged lever 4 retention arm 5 expansion-card connector Installing Upgrades 71 5 Press the lever on the expansion card retention arm and raise the retention arm.
Small Form-Factor Computer 1 2 3 4 5 1 card-edge connector 2 expansion card 3 hinged lever 4 retention arm 5 expansion-card connector Installing Upgrades 71 5 Press the lever on the expansion card retention arm and raise the retention arm.

User's Guide
Page 75
NOTE: The AGP expansion slot only supports 1.5-V cards. Installing Upgrades 73 Small Mini-Tower Computer 5 4 1 2 3 1 expansion card 2 card-edge connector 3 expansion-card connector 4 retention arm 5 lever 6 If you are installing a new expansion card, remove the ...
NOTE: The AGP expansion slot only supports 1.5-V cards. Installing Upgrades 73 Small Mini-Tower Computer 5 4 1 2 3 1 expansion card 2 card-edge connector 3 expansion-card connector 4 retention arm 5 lever 6 If you are installing a new expansion card, remove the ...

User's Guide
Page 76
... sure that the card is full-length, insert the end of the card into the expansion-card connector on the system board. 74 Installing Upgrades To locate this light, see "System Board Components." 9 Place the expansion card on the system board is off. If the expansion card ...computer from its connector on configuring the card, making internal connections, or otherwise customizing it for information on the system board. www.dell.com | support.dell.com See the documentation that came with the expansion card for your computer. Insert the card firmly into the expansion-card guide ...
... sure that the card is full-length, insert the end of the card into the expansion-card connector on the system board. 74 Installing Upgrades To locate this light, see "System Board Components." 9 Place the expansion card on the system board is off. If the expansion card ...computer from its connector on configuring the card, making internal connections, or otherwise customizing it for information on the system board. www.dell.com | support.dell.com See the documentation that came with the expansion card for your computer. Insert the card firmly into the expansion-card guide ...

User's Guide
Page 77
Press the arm into place, securing the expansion card(s) in the top of all expansion cards and filler brackets are flush with the alignment bar. • Notch in the computer. Installing Upgrades 75 Expansion-Card Connection 4 3 2 1 1 bracket within slot 2 bracket caught outside of slot 3 fully seated card 4 not fully seated card 10 Before lowering the retention arm, make sure of the following: • Tops of the card or filler bracket fits around the alignment guide.
Press the arm into place, securing the expansion card(s) in the top of all expansion cards and filler brackets are flush with the alignment bar. • Notch in the computer. Installing Upgrades 75 Expansion-Card Connection 4 3 2 1 1 bracket within slot 2 bracket caught outside of slot 3 fully seated card 4 not fully seated card 10 Before lowering the retention arm, make sure of the following: • Tops of the card or filler bracket fits around the alignment guide.

User's Guide
Page 78
... cover from closing properly or cause damage to the equipment. 13 Close the computer cover, reconnect the computer and devices to the card. www.dell.com | support.dell.com Retention Arm Closure 4 3 2 1 1 filler bracket 2 alignment guide 3 alignment bar 4 retention arm 11 If you have a small desktop computer, replace the expansion-card cage...
... cover from closing properly or cause damage to the equipment. 13 Close the computer cover, reconnect the computer and devices to the card. www.dell.com | support.dell.com Retention Arm Closure 4 3 2 1 1 filler bracket 2 alignment guide 3 alignment bar 4 retention arm 11 If you have a small desktop computer, replace the expansion-card cage...
User's Guide
Page 79
... Interface Card to Off. Do not connect the network cable to the integrated connector on the screen at the next computer start-up: ALERT! Installing Upgrades 77 Removing an Expansion Card CAUTION: Before you perform this type of conflict, see "Interrupt Assignment Conflicts" and the documentation that the standby power light...
... Interface Card to Off. Do not connect the network cable to the integrated connector on the screen at the next computer start-up: ALERT! Installing Upgrades 77 Removing an Expansion Card CAUTION: Before you perform this type of conflict, see "Interrupt Assignment Conflicts" and the documentation that the standby power light...

User's Guide
Page 80
...expansion card(s) in the computer. 9 If you are removing the card permanently, install a filler bracket in the empty card-slot opening. www.dell.com | support.dell.com 4 Press the lever on the retention arm and raise the retention arm (see "I /O panel (see the illustration for your computer in... of the computer. If you open and close the cover, the chassis intrusion detector causes the following message to On. 78 Installing Upgrades Cover was previously removed. 11 Reset the chassis intrusion detector by someone else, contact your network administrator for information on the screen at...
...expansion card(s) in the computer. 9 If you are removing the card permanently, install a filler bracket in the empty card-slot opening. www.dell.com | support.dell.com 4 Press the lever on the retention arm and raise the retention arm (see "I /O panel (see the illustration for your computer in... of the computer. If you open and close the cover, the chassis intrusion detector causes the following message to On. 78 Installing Upgrades Cover was previously removed. 11 Reset the chassis intrusion detector by someone else, contact your network administrator for information on the screen at...

User's Guide
Page 81
... up . AGP Slot Filler Bracket Removal-Small Form-Factor Computer 1 NOTE: The small formfactor and small desktop computers support lowprofile AGP cards. 1 hinged lever Installing Upgrades 79
... up . AGP Slot Filler Bracket Removal-Small Form-Factor Computer 1 NOTE: The small formfactor and small desktop computers support lowprofile AGP cards. 1 hinged lever Installing Upgrades 79

User's Guide
Page 83
Installing Upgrades 81 AGP Slot Filler Bracket Removal-Small Mini-Tower Computer 1 1 hinged lever 3 Press the AGP card clip lever toward PCI slot 1. 4 Slide the AGP card into place.
Installing Upgrades 81 AGP Slot Filler Bracket Removal-Small Mini-Tower Computer 1 1 hinged lever 3 Press the AGP card clip lever toward PCI slot 1. 4 Slide the AGP card into place.

User's Guide
Page 84
Removing an AGP Card 1 Raise the hinged lever on the back panel. 7 Close the computer cover. www.dell.com | support.dell.com AGP Card Installation 6 1 5 4 3 2 1 AGP card 2 system board 3 AGP card clip 4 AGP card clip tab 5 AGP card clip lever 6 AGP card notch 5 Release the AGP .... 2 On the AGP card clip, press the lever toward PCI slot 1. 3 Pull the AGP card up and out of the AGP card clip. 82 Installing Upgrades
Removing an AGP Card 1 Raise the hinged lever on the back panel. 7 Close the computer cover. www.dell.com | support.dell.com AGP Card Installation 6 1 5 4 3 2 1 AGP card 2 system board 3 AGP card clip 4 AGP card clip tab 5 AGP card clip lever 6 AGP card notch 5 Release the AGP .... 2 On the AGP card clip, press the lever toward PCI slot 1. 3 Pull the AGP card up and out of the AGP card clip. 82 Installing Upgrades

User's Guide
Page 85
Installing Upgrades 83 Disconnect any cables connected to expansion cards through the backpanel openings. Expansion-Card Cage (Small Desktop Computer Only) Removing the Expansion-Card Cage CAUTION: Before you perform this procedure, see "CAUTION: Safety Instructions." 1 Open the computer cover. 2 Check any cables that do not reach the expansion-card cage once it is removed from the computer. 3 Gently pull on the handle and lift the expansion-card cage up and away from the computer.
Installing Upgrades 83 Disconnect any cables connected to expansion cards through the backpanel openings. Expansion-Card Cage (Small Desktop Computer Only) Removing the Expansion-Card Cage CAUTION: Before you perform this procedure, see "CAUTION: Safety Instructions." 1 Open the computer cover. 2 Check any cables that do not reach the expansion-card cage once it is removed from the computer. 3 Gently pull on the handle and lift the expansion-card cage up and away from the computer.

User's Guide
Page 86
www.dell.com | support.dell.com Expansion-Card Cage Removal 1 1 expansion-card cage Replacing the Expansion-Card Cage 1 Align the slots in the side of the expansion-card cage with the tabs on the side of the computer, and slide the expansion-card cage down into place. 84 Installing Upgrades
www.dell.com | support.dell.com Expansion-Card Cage Removal 1 1 expansion-card cage Replacing the Expansion-Card Cage 1 Align the slots in the side of the expansion-card cage with the tabs on the side of the computer, and slide the expansion-card cage down into place. 84 Installing Upgrades


