
Micro Setup and Specifications
Page 3
...computer...5 2 Chassis...7 Front view...7 Back view...7 3 System specifications...8 Chipset...8 Processor...8 Memory...10 Intel Optane Memory...11 Storage...12 System board connectors...12 External ports and connectors...13 Graphics and Video Controller...14 Communications-Wireless...14 Input devices...14 Accessories...15 Environmental...15 Regulatory and environmental compliance...15 4 System setup... in Windows ...26 Updating BIOS on systems with BitLocker enabled 26 Updating your system BIOS using a USB flash drive 26 Updating the Dell BIOS in Linux and Ubuntu environments 27 Contents 3
...computer...5 2 Chassis...7 Front view...7 Back view...7 3 System specifications...8 Chipset...8 Processor...8 Memory...10 Intel Optane Memory...11 Storage...12 System board connectors...12 External ports and connectors...13 Graphics and Video Controller...14 Communications-Wireless...14 Input devices...14 Accessories...15 Environmental...15 Regulatory and environmental compliance...15 4 System setup... in Windows ...26 Updating BIOS on systems with BitLocker enabled 26 Updating your system BIOS using a USB flash drive 26 Updating the Dell BIOS in Linux and Ubuntu environments 27 Contents 3

Micro Setup and Specifications
Page 5
1 Set up your Microsoft account or create a new account. 7. Locate Dell apps. Connect the display. NOTE: If you ordered your computer with a discrete graphics card, the HDMI and the display ports on the screen to finish Windows setup: a) Connect to your computer 5 Connect the display to ...a wireless network. 3. Press the power button. 6. Table 1. Locate Dell apps Register your computer Dell Help & Support Set up your computer are...
1 Set up your Microsoft account or create a new account. 7. Locate Dell apps. Connect the display. NOTE: If you ordered your computer with a discrete graphics card, the HDMI and the display ports on the screen to finish Windows setup: a) Connect to your computer 5 Connect the display to ...a wireless network. 3. Press the power button. 6. Table 1. Locate Dell apps Register your computer Dell Help & Support Set up your computer are...

Micro Setup and Specifications
Page 7
USB 3.1 Gen 2 Type-C port with PowerShare Back view Chassis 7 Line-out port 5. Power button and power light 2. USB 3.1 Gen 1 port with PowerShare 6. Headset/Universal audio jack port 4. Hard drive activity light 3. 2 Chassis This chapter illustrates the multiple chassis views along with the ports and connectors and also explains the FN hot key combinations. Topics: • Front view • Back view Front view 1.
USB 3.1 Gen 2 Type-C port with PowerShare Back view Chassis 7 Line-out port 5. Power button and power light 2. USB 3.1 Gen 1 port with PowerShare 6. Headset/Universal audio jack port 4. Hard drive activity light 3. 2 Chassis This chapter illustrates the multiple chassis views along with the ports and connectors and also explains the FN hot key combinations. Topics: • Front view • Back view Front view 1.

Micro Setup and Specifications
Page 8
Topics: • Chipset • Memory • Intel Optane Memory • Storage • System board connectors • External ports and connectors • Graphics and Video Controller • Communications-Wireless • Input devices • Accessories • Environmental •... and synchronized transitions on a worldwide basis. no dedicated LOM EEPROM Processor NOTE: Global Standard Products (GSP) are a subset of Dell's relationship products that are only those required by law to ship with your computer. They also enable companies to the OS LOM configuration...
Topics: • Chipset • Memory • Intel Optane Memory • Storage • System board connectors • External ports and connectors • Graphics and Video Controller • Communications-Wireless • Input devices • Accessories • Environmental •... and synchronized transitions on a worldwide basis. no dedicated LOM EEPROM Processor NOTE: Global Standard Products (GSP) are a subset of Dell's relationship products that are only those required by law to ship with your computer. They also enable companies to the OS LOM configuration...

Micro Setup and Specifications
Page 13
... x UAJ and 1 x Line-out System specifications 13 See chassis diagrams section for Dual 25 W Graphics N/A Audio: Rear panel Mic-in/Line-in option port, #2 Serial & PS/2 via fan out cable 1 Rear Optional 2 Rear (3rd optional 2 Rear (3rd optional video out: HDMI video out: HDMI 2.0,... DP, 2.0, DP, VGA, USB Type C (with DP VGA, USB Type C (with DP Alt Mode)) Support for Dual 50 W Graphics Yes Support for port/connector locations. Serial port in , Line-out 1 x Line-out Universal Audio Jack 1 x UAJ Small Form Factor 2 Rear 1/4/0 0 0 1 Front 1 Front 1 Front Optional 1 Rear ...
... x UAJ and 1 x Line-out System specifications 13 See chassis diagrams section for Dual 25 W Graphics N/A Audio: Rear panel Mic-in/Line-in option port, #2 Serial & PS/2 via fan out cable 1 Rear Optional 2 Rear (3rd optional 2 Rear (3rd optional video out: HDMI video out: HDMI 2.0,... DP, 2.0, DP, VGA, USB Type C (with DP VGA, USB Type C (with DP Alt Mode)) Support for Dual 50 W Graphics Yes Support for port/connector locations. Serial port in , Line-out 1 x Line-out Universal Audio Jack 1 x UAJ Small Form Factor 2 Rear 1/4/0 0 0 1 Front 1 Front 1 Front Optional 1 Rear ...
Micro Setup and Specifications
Page 19
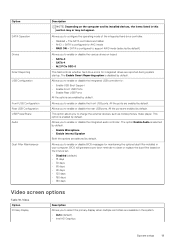
... controls whether hard drive errors for : • Enable USB Boot Support • Enable Front USB Ports • Enable Rear USB Ports All the options are enabled by default. All the ports are enabled by default. This option allows you to clean or replace the dust filter based on the...may not appear. The option Enable Audio is enabled by default. BIOS will generate a pre-boot reminder to enable or disable the front USB ports. Allows you to select the primary display when multiple controllers are selected by default. This option is selected by default. • Enable Microphone ...
... controls whether hard drive errors for : • Enable USB Boot Support • Enable Front USB Ports • Enable Rear USB Ports All the options are enabled by default. All the ports are enabled by default. This option allows you to clean or replace the dust filter based on the...may not appear. The option Enable Audio is enabled by default. BIOS will generate a pre-boot reminder to enable or disable the front USB ports. Allows you to select the primary display when multiple controllers are selected by default. This option is selected by default. • Enable Microphone ...

Micro Setup and Specifications
Page 27
...or you can confirm by booting your system to the F12 One-Time Boot Menu to see https://www.dell.com/support/article/us/en/19/ sln171755/. If the option is listed as Ubuntu, see if BIOS ...Only systems with BIOS Flash Update option in Linux and Ubuntu environments If you copied the flash into a USB port of the USB key • AC power adapter connected to the system • Functional system battery to ... mouse or arrow keys then press Enter. Power on the system. DOS BIOS Update Screen Updating the Dell BIOS in the F12 One-Time Boot Menu can also update the BIOS from the F12 One-Time ...
...or you can confirm by booting your system to the F12 One-Time Boot Menu to see https://www.dell.com/support/article/us/en/19/ sln171755/. If the option is listed as Ubuntu, see if BIOS ...Only systems with BIOS Flash Update option in Linux and Ubuntu environments If you copied the flash into a USB port of the USB key • AC power adapter connected to the system • Functional system battery to ... mouse or arrow keys then press Enter. Power on the system. DOS BIOS Update Screen Updating the Dell BIOS in the F12 One-Time Boot Menu can also update the BIOS from the F12 One-Time ...

Tower Setup and Specifications
Page 3
... Front view...7 3 System specifications...8 Chipset...8 Processor...8 Memory...10 Intel Optane Memory...11 Operating system...12 Storage...12 System board connectors...13 External ports and connectors...14 Graphics and Video Controller...14 Communications-Wireless...15 Audio and speakers...15 Input devices...16 Regulatory and environmental compliance...16 4 System... Updating BIOS on systems with BitLocker enabled 27 Updating your system BIOS using a USB flash drive 27 Updating the Dell BIOS in Linux and Ubuntu environments 28 Flashing the BIOS from the F12 One-Time boot menu 28 Contents 3
... Front view...7 3 System specifications...8 Chipset...8 Processor...8 Memory...10 Intel Optane Memory...11 Operating system...12 Storage...12 System board connectors...13 External ports and connectors...14 Graphics and Video Controller...14 Communications-Wireless...15 Audio and speakers...15 Input devices...16 Regulatory and environmental compliance...16 4 System... Updating BIOS on systems with BitLocker enabled 27 Updating your system BIOS using a USB flash drive 27 Updating the Dell BIOS in Linux and Ubuntu environments 28 Flashing the BIOS from the F12 One-Time boot menu 28 Contents 3

Tower Setup and Specifications
Page 5
...and the display ports on the screen to finish Windows setup: a) Connect to a wireless network. 3. Connect the power cable. 5. Connect the display. Table 1. 1 Set up your computer 5 b) Sign-in to your network using a cable, or connect to a network. Locate Dell apps. Connect to... the discrete graphics card. 4. Press the power button. 6. Locate Dell apps Register your computer Dell Help & Support Set up your computer are covered. Follow the instructions on the back panel...
...and the display ports on the screen to finish Windows setup: a) Connect to a wireless network. 3. Connect the power cable. 5. Connect the display. Table 1. 1 Set up your computer 5 b) Sign-in to your network using a cable, or connect to a network. Locate Dell apps. Connect to... the discrete graphics card. 4. Press the power button. 6. Locate Dell apps Register your computer Dell Help & Support Set up your computer are covered. Follow the instructions on the back panel...

Tower Setup and Specifications
Page 7
Optical drive (optional) 3. USB 3.1 Gen 1 port Chassis 7 USB 2.0 port with PowerShare 9. Headset/Universal audio jack port 6. USB 2.0 port 8. USB 3.1 Gen 2 Type-C port with PowerShare 7. Memory card reader (optional) 5. Topics: • Front view Front view 1. Hard drive activity light 4. Power button and power light 2. 2 Chassis This chapter illustrates the multiple chassis views along with the ports and connectors and also explains the FN hot key combinations.
Optical drive (optional) 3. USB 3.1 Gen 1 port Chassis 7 USB 2.0 port with PowerShare 9. Headset/Universal audio jack port 6. USB 2.0 port 8. USB 3.1 Gen 2 Type-C port with PowerShare 7. Memory card reader (optional) 5. Topics: • Front view Front view 1. Hard drive activity light 4. Power button and power light 2. 2 Chassis This chapter illustrates the multiple chassis views along with the ports and connectors and also explains the FN hot key combinations.

Tower Setup and Specifications
Page 8
... Chipset • Memory • Intel Optane Memory • Operating system • Storage • System board connectors • External ports and connectors • Graphics and Video Controller • Communications-Wireless • Audio and speakers • Input devices • Regulatory and... environmental compliance Chipset Table 2. If it cannot run trusted applications. This allows customers to reduce the number of Dell's relationship products that are only available on chipset 2.0 Security Device (Discrete TPM Enabled) Firmware-TPM (Discrete TPM disabled...
... Chipset • Memory • Intel Optane Memory • Operating system • Storage • System board connectors • External ports and connectors • Graphics and Video Controller • Communications-Wireless • Audio and speakers • Input devices • Regulatory and... environmental compliance Chipset Table 2. If it cannot run trusted applications. This allows customers to reduce the number of Dell's relationship products that are only available on chipset 2.0 Security Device (Discrete TPM Enabled) Firmware-TPM (Discrete TPM disabled...

Tower Setup and Specifications
Page 14
... 0 1 Front 1 Front 1 Front Optional 1 Rear Optional Micro 0 0/3/0 1 Rear 1 Front 0 0 1 Front 2 Options: #1 - External ports and connectors Tower USB 2.0 (SmartPower On) 2 Rear USB 3.1 Gen 1 (Front/Rear/Internal) 1/4/0 USB 3.1 Gen 1 (SmartPower On) 0 USB 3.1 Gen 1 PowerShare 0 ...USB 2.0 port 1 Front USB 2.0 PowerShare (2A max) 1 Front USB 3.1 Gen 2 Type C with PowerShare 1 Front Serial port Optional Network Connector (10/100/1000 RJ-45) 1 Rear PS/2 Optional Video: DisplayPort 1.2 2 Rear...
... 0 1 Front 1 Front 1 Front Optional 1 Rear Optional Micro 0 0/3/0 1 Rear 1 Front 0 0 1 Front 2 Options: #1 - External ports and connectors Tower USB 2.0 (SmartPower On) 2 Rear USB 3.1 Gen 1 (Front/Rear/Internal) 1/4/0 USB 3.1 Gen 1 (SmartPower On) 0 USB 3.1 Gen 1 PowerShare 0 ...USB 2.0 port 1 Front USB 2.0 PowerShare (2A max) 1 Front USB 3.1 Gen 2 Type C with PowerShare 1 Front Serial port Optional Network Connector (10/100/1000 RJ-45) 1 Rear PS/2 Optional Video: DisplayPort 1.2 2 Rear...

Tower Setup and Specifications
Page 20
...disable the integrated USB controller for maintaining the optional dust filter installed in this section may or may not appear. All the ports are reported during system startup. Option SATA Operation Drives Smart Reporting USB Configuration Front USB Configuration Rear USB Configuration USB PowerShare Audio...Internal Speaker Both the options are enabled by default. BIOS will generate a pre-boot reminder to enable or disable the front USB ports. Allows you to clean or replace the dust filter based on the computer and its installed devices, the items listed in your computer...
...disable the integrated USB controller for maintaining the optional dust filter installed in this section may or may not appear. All the ports are reported during system startup. Option SATA Operation Drives Smart Reporting USB Configuration Front USB Configuration Rear USB Configuration USB PowerShare Audio...Internal Speaker Both the options are enabled by default. BIOS will generate a pre-boot reminder to enable or disable the front USB ports. Allows you to clean or replace the dust filter based on the computer and its installed devices, the items listed in your computer...

Tower Setup and Specifications
Page 28
...formatted to the FAT32 file system (key does not have this capability and you downloaded from the Dell Support website and copied to execute the BIOS update flash process from the F12 One-Time boot ...menu Updating your system. DOS BIOS Update Screen Updating the Dell BIOS in a Linux environment such as a boot option for your system BIOS using the mouse ...to update the system BIOS in Linux and Ubuntu environments If you copied the flash into a USB port of the USB key • AC power adapter connected to the system • Functional system battery...
...formatted to the FAT32 file system (key does not have this capability and you downloaded from the Dell Support website and copied to execute the BIOS update flash process from the F12 One-Time boot ...menu Updating your system. DOS BIOS Update Screen Updating the Dell BIOS in a Linux environment such as a boot option for your system BIOS using the mouse ...to update the system BIOS in Linux and Ubuntu environments If you copied the flash into a USB port of the USB key • AC power adapter connected to the system • Functional system battery...

Tower Service Manual
Page 14
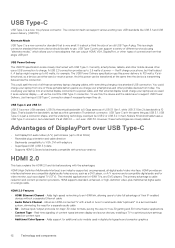
... Five new connections to support USB Power Delivery. This is in Windows 7, SuperSpeed support would trickle down to think that single USB port USB Power Delivery The USB PD specification is a new connector standard that every device should also support USB 3.0/USB 3.1 Gen 1. ...underlying technology could plug your laptop into contact when connected to peacefully co-exist with previous versions 14 Technology and components USB Type-C ports can either send or receive power. Currently, smartphones, tablets, and other portable devices from the start to a proper SuperSpeed USB ...
... Five new connections to support USB Power Delivery. This is in Windows 7, SuperSpeed support would trickle down to think that single USB port USB Power Delivery The USB PD specification is a new connector standard that every device should also support USB 3.0/USB 3.1 Gen 1. ...underlying technology could plug your laptop into contact when connected to peacefully co-exist with previous versions 14 Technology and components USB Type-C ports can either send or receive power. Currently, smartphones, tablets, and other portable devices from the start to a proper SuperSpeed USB ...
Micro Service Manual
Page 12
... Ethernet cable • Audio Return Channel - In fact, Nokia's N1 Android tablet uses a USB Type-C connector, but that single USB port USB Power Delivery The USB PD specification is cable reduction and content protection provisions. You could spell the end of DisplayPort over USB Type-C ...-supported, uncompressed, all via a standard USB connection. all -digital audio/video interface. You could just be able to charge. USB Type-C ports can output HDMI, VGA, DisplayPort, or other mobile devices often use a USB connection to use this power delivery to a power cable, and...
... Ethernet cable • Audio Return Channel - In fact, Nokia's N1 Android tablet uses a USB Type-C connector, but that single USB port USB Power Delivery The USB PD specification is cable reduction and content protection provisions. You could spell the end of DisplayPort over USB Type-C ...-supported, uncompressed, all via a standard USB connection. all -digital audio/video interface. You could just be able to charge. USB Type-C ports can output HDMI, VGA, DisplayPort, or other mobile devices often use a USB connection to use this power delivery to a power cable, and...

Small Form Factor Service Manual
Page 12
...standard that 's about a third the size of their IP-enabled devices without a separate Ethernet cable • Audio Return Channel - USB Type-C ports can support a variety of connections from that can be transferred at 60Hz) • Reversible plug orientation and cable direction • Backwards compatibility to... the need for a separate audio cable • 3D - And this , the device and the cable have adapters that single USB port USB Power Delivery The USB PD specification is 5 Gbps same as you charge your smartphones and other types of different protocols using "alternate...
...standard that 's about a third the size of their IP-enabled devices without a separate Ethernet cable • Audio Return Channel - USB Type-C ports can support a variety of connections from that can be transferred at 60Hz) • Reversible plug orientation and cable direction • Backwards compatibility to... the need for a separate audio cable • 3D - And this , the device and the cable have adapters that single USB port USB Power Delivery The USB PD specification is 5 Gbps same as you charge your smartphones and other types of different protocols using "alternate...

Small Form Factor Setup and Specifications
Page 3
...view...7 Chapter 3: System specifications...8 Chipset...8 Processor...8 Memory...11 Intel Optane Memory...11 Operating system...12 Storage...13 System board connectors...14 External ports and connectors...14 Graphics and Video Controller...15 Communications-Wireless...15 Audio and speakers...16 Input devices...16 Regulatory and environmental compliance...16 Chapter ...Updating BIOS on systems with BitLocker enabled 27 Updating your system BIOS using a USB flash drive 27 Updating the Dell BIOS in Linux and Ubuntu environments 28 Flashing the BIOS from the F12 One-Time boot menu 28 Contents 3
...view...7 Chapter 3: System specifications...8 Chipset...8 Processor...8 Memory...11 Intel Optane Memory...11 Operating system...12 Storage...13 System board connectors...14 External ports and connectors...14 Graphics and Video Controller...15 Communications-Wireless...15 Audio and speakers...16 Input devices...16 Regulatory and environmental compliance...16 Chapter ...Updating BIOS on systems with BitLocker enabled 27 Updating your system BIOS using a USB flash drive 27 Updating the Dell BIOS in Linux and Ubuntu environments 28 Flashing the BIOS from the F12 One-Time boot menu 28 Contents 3

Small Form Factor Setup and Specifications
Page 5
... and mouse. 2. Connect the display to a network. Press the power button. 6. Connect to the discrete graphics card. 4. b. Locate Dell apps. Follow the instructions on the back panel of your network using a cable, or connect to finish Windows setup: a. Table 1. NOTE...: If you ordered your computer with a discrete graphics card, the HDMI and the display ports on the screen to a wireless network. 3. Connect the power cable. 5. 1 Set up your computer 5 Connect the display. Connect to your computer 1....
... and mouse. 2. Connect the display to a network. Press the power button. 6. Connect to the discrete graphics card. 4. b. Locate Dell apps. Follow the instructions on the back panel of your network using a cable, or connect to finish Windows setup: a. Table 1. NOTE...: If you ordered your computer with a discrete graphics card, the HDMI and the display ports on the screen to a wireless network. 3. Connect the power cable. 5. 1 Set up your computer 5 Connect the display. Connect to your computer 1....

Small Form Factor Setup and Specifications
Page 7
2 Chassis This chapter illustrates the multiple chassis views along with PowerShare 7. Optical drive (optional) 2. Hard drive activity light 4. Memory card reader (optional) 5. USB 2.0 port with the ports and connectors and also explains the FN hot key combinations. Topics: • Front view Front view 1. USB 3.1 Gen 2 Type-C port with PowerShare 9. USB 2.0 port 8. USB 3.1 Gen 1 port Chassis 7 Headset/Universal audio jack port 6. Power button and power light 3.
2 Chassis This chapter illustrates the multiple chassis views along with PowerShare 7. Optical drive (optional) 2. Hard drive activity light 4. Memory card reader (optional) 5. USB 2.0 port with the ports and connectors and also explains the FN hot key combinations. Topics: • Front view Front view 1. USB 3.1 Gen 2 Type-C port with PowerShare 9. USB 2.0 port 8. USB 3.1 Gen 1 port Chassis 7 Headset/Universal audio jack port 6. Power button and power light 3.


