OptiPlex 360 Computer - Dell
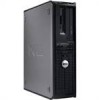
OptiPlex 360 Computer
Related Manual Pages


Related Videos

Dell Optiplex 360
Duration: 39:13
Total Views: 687
Duration: 39:13
Total Views: 687
Rabljen ra?unalnik Dell Optiplex 360 Desktop
Duration: :37
Total Views: 404
Duration: :37
Total Views: 404
Dell optiplex 360 HDD upgrade.
Duration: 6:55
Total Views: 86
Duration: 6:55
Total Views: 86
Dell Optiplex 360
Duration: :32
Total Views: 48
Duration: :32
Total Views: 48
Dell Optiplex 360 Review
Duration: 7:44
Total Views: 79
Duration: 7:44
Total Views: 79