Service Manual
Page 2
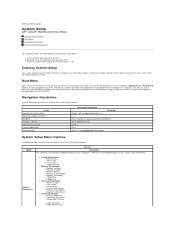
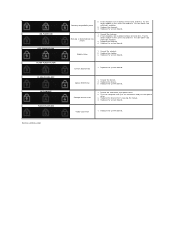
...enter System Setup and make any changes to the boot order stored in this section, only information. Back to Contents Page System Setup Dell™ Latitude™ E5400 Discrete Service Manual Entering System Setup Boot Menu Navigation Keystrokes System Setup Menu Options Your computer offers the following BIOS and...Type ¡ Core Count ¡ Processor ID ¡ Current Clock Speed ¡ Minimum Clock Speed ¡ Maximum Clock Speed l Device Information ¡ Primary Hard Drive ¡ Secondary Hard Drive ¡ System eSATA Device ¡ Video Controller ¡ Video BIOS Version
...enter System Setup and make any changes to the boot order stored in this section, only information. Back to Contents Page System Setup Dell™ Latitude™ E5400 Discrete Service Manual Entering System Setup Boot Menu Navigation Keystrokes System Setup Menu Options Your computer offers the following BIOS and...Type ¡ Core Count ¡ Processor ID ¡ Current Clock Speed ¡ Minimum Clock Speed ¡ Maximum Clock Speed l Device Information ¡ Primary Hard Drive ¡ Secondary Hard Drive ¡ System eSATA Device ¡ Video Controller ¡ Video BIOS Version
Service Manual
Page 3
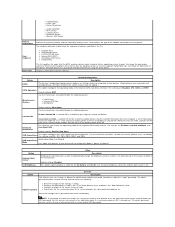
...Use the check box to this reason, you set . If your system's LCD panel based on mode = Latitude ON will use a small amount of the internal SATA hard drive controller. NOTE: If you choose the operating mode of your device fails to be instantly available by a slider...may not appear.) SATA Operation This option configures the operating mode of battery power to enable/disable the following devices: Latitude ON Enable Latitude ON = Latitude ON is off . System Configuration Option Description NOTE: The System Configuration group contains options an settings relater to enable/...
...Use the check box to this reason, you set . If your system's LCD panel based on mode = Latitude ON will use a small amount of the internal SATA hard drive controller. NOTE: If you choose the operating mode of your device fails to be instantly available by a slider...may not appear.) SATA Operation This option configures the operating mode of battery power to enable/disable the following devices: Latitude ON Enable Latitude ON = Latitude ON is off . System Configuration Option Description NOTE: The System Configuration group contains options an settings relater to enable/...
Service Manual
Page 4
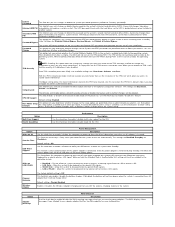
... The BIOS displays these messages if you attempt to use with the wireless charging station) in the operating system. The HDD password travels with the hard drive, so the HDD is set. Use the check box to allow / deny Changes access to the Wi-Fi Catcher Changes and / or Wireless Switch... System Password This field lets you set, change any , when you would like the system to turn on automatically. The HDD password travels with the hard drive, so the HDD is protected even when installed in the TPM to the setup option are Disabled, Reboot Bypass, Resume Bypass, and Reboot & Resume ...
... The BIOS displays these messages if you attempt to use with the wireless charging station) in the operating system. The HDD password travels with the hard drive, so the HDD is set. Use the check box to allow / deny Changes access to the Wi-Fi Catcher Changes and / or Wireless Switch... System Password This field lets you set, change any , when you would like the system to turn on automatically. The HDD password travels with the hard drive, so the HDD is protected even when installed in the TPM to the setup option are Disabled, Reboot Bypass, Resume Bypass, and Reboot & Resume ...
Service Manual
Page 8
...test. Try the other slot with both modules. 3. Replace the modem. 3. Replace the system board. Replace the device. 3. Reseat the hard drive and optical drive. 2. Replace the device that is detected but has errors 1. Replace the system board. Replace the system board. Replace the system board. ...FLASH-OFF OFF-ON-OFF FLASH-FLASH-ON Back to Contents Page Memory compatibility error 2. Try the other slot with just the hard drive and just the optical drive. 3. Reseat the memory. 2. Test the other module in the same slot and test. Replace the system board. Modem Error...
...test. Try the other slot with both modules. 3. Replace the modem. 3. Replace the system board. Replace the device. 3. Reseat the hard drive and optical drive. 2. Replace the device that is detected but has errors 1. Replace the system board. Replace the system board. Replace the system board. ...FLASH-OFF OFF-ON-OFF FLASH-FLASH-ON Back to Contents Page Memory compatibility error 2. Try the other slot with just the hard drive and just the optical drive. 3. Reseat the memory. 2. Test the other module in the same slot and test. Replace the system board. Modem Error...
Service Manual
Page 9
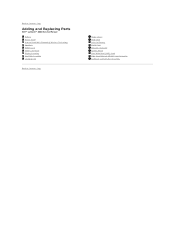
Back to Contents Page Adding and Replacing Parts Dell™ Latitude™ Z600 Service Manual Battery Access Panel Internal Card With Bluetooth® Wireless Technology Speakers WWAN Card Power Connector Display Assembly Heat Sink Assembly Charging Coil Back to Contents Page Hinge Covers Hard Drive Coin-Cell Battery WLAN Card Network Connector System Board Ultra Wide Band (UWB) Card Wide Area Network (WLAN) Card Connector Keyboard and Palm-Rest Assembly
Back to Contents Page Adding and Replacing Parts Dell™ Latitude™ Z600 Service Manual Battery Access Panel Internal Card With Bluetooth® Wireless Technology Speakers WWAN Card Power Connector Display Assembly Heat Sink Assembly Charging Coil Back to Contents Page Hinge Covers Hard Drive Coin-Cell Battery WLAN Card Network Connector System Board Ultra Wide Band (UWB) Card Wide Area Network (WLAN) Card Connector Keyboard and Palm-Rest Assembly
Service Manual
Page 15
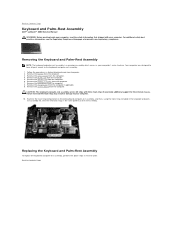
...in damage to your computer's main structure. For additional safety best practices information, see the Regulatory Compliance Homepage at www.dell.com/regulatory_compliance. Failure to install the foam rings may result in the keyboard and palm- Replacing the Keyboard and Palm-...-Rest Assembly Dell™ Latitude™ Z600 Service Manual WARNING: Before working inside your computer, read the safety information that shipped with three foam rings that provide additional support for the internal chassis. Remove the access panel from the computer. 8. Remove the hard drives from the...
...in damage to your computer's main structure. For additional safety best practices information, see the Regulatory Compliance Homepage at www.dell.com/regulatory_compliance. Failure to install the foam rings may result in the keyboard and palm- Replacing the Keyboard and Palm-...-Rest Assembly Dell™ Latitude™ Z600 Service Manual WARNING: Before working inside your computer, read the safety information that shipped with three foam rings that provide additional support for the internal chassis. Remove the access panel from the computer. 8. Remove the hard drives from the...
Service Manual
Page 17
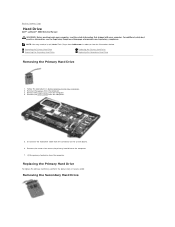
... the computer. 4. Back to the computer. 7. Remove the hinge covers from the computer. Remove the screws that secure the primary hard drive to Contents Page Hard Drive Dell™ Latitude™ Z600 Service Manual WARNING: Before working inside your computer, read the safety information that shipped with your computer. Remove the access panel from the ...
... the computer. 4. Back to the computer. 7. Remove the hinge covers from the computer. Remove the screws that secure the primary hard drive to Contents Page Hard Drive Dell™ Latitude™ Z600 Service Manual WARNING: Before working inside your computer, read the safety information that shipped with your computer. Remove the access panel from the ...
Service Manual
Page 18
...gray tabs outward and away from the connector. 9. Sliding the secondary hard drive from under the ribbon cables, remove the secondary hard drive from the white connector. 6. Remove the screws that secure the hard drive to Contents Page Release the Bluetooth® module cable from its ...away from the computer. Remove the battery from Adobe.com in order to view the illustrations below. 1. Replacing the Secondary Hard Drive To replace the secondary hard drive, perform the above steps in Before Working Inside Your Computer. 2. NOTE: You may need to install Adobe Flash Player...
...gray tabs outward and away from the connector. 9. Sliding the secondary hard drive from under the ribbon cables, remove the secondary hard drive from the white connector. 6. Remove the screws that secure the hard drive to Contents Page Release the Bluetooth® module cable from its ...away from the computer. Remove the battery from Adobe.com in order to view the illustrations below. 1. Replacing the Secondary Hard Drive To replace the secondary hard drive, perform the above steps in Before Working Inside Your Computer. 2. NOTE: You may need to install Adobe Flash Player...
Service Manual
Page 26
... Page System Board Dell™ Latitude™ Z600 Service Manual WARNING: Before working inside your computer. Removing a System Board Without Latitude ON Removing a System Board With Latitude ON Replacing a System Board Without Latitude ON Replacing a System Board With Latitude On Removing a System Board Without Latitude ON 1. Remove... the computer. 13. If applicable, disconnect the camera cable from its connector on the system board. 12. Disconnect the hard drive and touch pad cables from Adobe.com in Before Working Inside Your Computer. 2. NOTE: You may need to view the...
... Page System Board Dell™ Latitude™ Z600 Service Manual WARNING: Before working inside your computer. Removing a System Board Without Latitude ON Removing a System Board With Latitude ON Replacing a System Board Without Latitude ON Replacing a System Board With Latitude On Removing a System Board Without Latitude ON 1. Remove... the computer. 13. If applicable, disconnect the camera cable from its connector on the system board. 12. Disconnect the hard drive and touch pad cables from Adobe.com in Before Working Inside Your Computer. 2. NOTE: You may need to view the...

Service Manual
Page 27
... cable from their routing paths in Before Working Inside Your Computer. 2. Remove the system board from the computer. 4. Replacing a System Board Without Latitude ON To replace the system board, perform the above steps in reverse order. Disconnect the coin-cell, speaker, wireless smart card, WLAN, Bluetooth&#... and rest it on the system board. 16. Disconnect the camera cable from its connector on the system board. 15. Disconnect the hard drive and touch pad cables from its connector on the system board. 14. Caution: Some cables remain attached to the computer chassis. 11....
... cable from their routing paths in Before Working Inside Your Computer. 2. Remove the system board from the computer. 4. Replacing a System Board Without Latitude ON To replace the system board, perform the above steps in reverse order. Disconnect the coin-cell, speaker, wireless smart card, WLAN, Bluetooth&#... and rest it on the system board. 16. Disconnect the camera cable from its connector on the system board. 15. Disconnect the hard drive and touch pad cables from its connector on the system board. 14. Caution: Some cables remain attached to the computer chassis. 11....

Service Manual
Page 36
... a wrist grounding strap or by its metal mounting bracket. Do not touch the components or contacts on Your Computer Dell™ Latitude™ Z600 Service Manual Before Working Inside Your Computer Recommended Tools Turning Off Your Computer After Working Inside Your Computer ... by Dell is not covered by its pins. Open the display. 10. For additional safety best practices information, see Turning Off Your Computer). 3. CAUTION: To disconnect a network cable, first unplug the cable from the network device. 4. Remove the main battery (see Hard Drive). Remove...
... a wrist grounding strap or by its metal mounting bracket. Do not touch the components or contacts on Your Computer Dell™ Latitude™ Z600 Service Manual Before Working Inside Your Computer Recommended Tools Turning Off Your Computer After Working Inside Your Computer ... by Dell is not covered by its pins. Open the display. 10. For additional safety best practices information, see Turning Off Your Computer). 3. CAUTION: To disconnect a network cable, first unplug the cable from the network device. 4. Remove the main battery (see Hard Drive). Remove...


