
Service Manual
Page 8
CAUTION: A CAUTION indicates either potential damage to hardware or loss of data and provides instructions for how to avoid the problem. x NOTE: A NOTE provides helpful information about using the Dell diagnostics to test portable computers, and the online System User's Guide for information about system setup and ... cautions, and notes, and they are used as follows: WARNING: A WARNING indicates the potential for bodily harm and provides instructions for how to information provided in this manual, Dell provides the Reference and Troubleshooting Guide for troubleshooting procedures and...
CAUTION: A CAUTION indicates either potential damage to hardware or loss of data and provides instructions for how to avoid the problem. x NOTE: A NOTE provides helpful information about using the Dell diagnostics to test portable computers, and the online System User's Guide for information about system setup and ... cautions, and notes, and they are used as follows: WARNING: A WARNING indicates the potential for bodily harm and provides instructions for how to information provided in this manual, Dell provides the Reference and Troubleshooting Guide for troubleshooting procedures and...

Service Manual
Page 23
Dell recommends that can help you diagnose a com- Ask the user to step 3. Can the user duplicate the problem? Proceed to back up any data on the hard-disk drive if the system's condition permits. Yes. Instruct the user in the proper procedure, or direct him or her to describe the problem and...
Dell recommends that can help you diagnose a com- Ask the user to step 3. Can the user duplicate the problem? Proceed to back up any data on the hard-disk drive if the system's condition permits. Yes. Instruct the user in the proper procedure, or direct him or her to describe the problem and...

Service Manual
Page 24
components, as instructed in the following : • The AC adapter's AC power cable is connected to the AC adapter and the power source. • The AC adapter's DC ... damage. 4. Turn off or is already turned off any key to return the computer to cool, the battery stops charging before it reaches full capacity. 2-2 Dell Latitude XPi CD Service Manual If the computer is blinking approximately every 8 seconds - CAUTION: Before you proceed with the visual inspection, ensure that condition: • Power/suspend indicator...
components, as instructed in the following : • The AC adapter's AC power cable is connected to the AC adapter and the power source. • The AC adapter's DC ... damage. 4. Turn off or is already turned off any key to return the computer to cool, the battery stops charging before it reaches full capacity. 2-2 Dell Latitude XPi CD Service Manual If the computer is blinking approximately every 8 seconds - CAUTION: Before you proceed with the visual inspection, ensure that condition: • Power/suspend indicator...

Service Manual
Page 25
... obvious physical damage, and then reinsert the battery assembly into its compartment. 7. Remove the hard-disk drive, verify that it is properly attached to the instructions in the docu- Remove any installed PC Cards from battery power, remove the main battery assembly, verify that they are free of any obvious physical...
... obvious physical damage, and then reinsert the battery assembly into its compartment. 7. Remove the hard-disk drive, verify that it is properly attached to the instructions in the docu- Remove any installed PC Cards from battery power, remove the main battery assembly, verify that they are free of any obvious physical...

Service Manual
Page 26
...message displays, go to light during the boot routine. For instructions, see "Before You Start Testing" in response to data being transferred to the next procedure, "Observing the Boot Routine." Proceed to Table 3-2. 2-4 Dell Latitude XPi CD Service Manual These indicators light in Chapter 4 of the ...After you perform a visual inspection as appropriate. • Beep codes - A beep code is running , observe the computer for any of the Dell diagnostics diskette. If the computer emits a beep code, go to step 4. While the boot routine is not a beep code. • System...
...message displays, go to light during the boot routine. For instructions, see "Before You Start Testing" in response to data being transferred to the next procedure, "Observing the Boot Routine." Proceed to Table 3-2. 2-4 Dell Latitude XPi CD Service Manual These indicators light in Chapter 4 of the ...After you perform a visual inspection as appropriate. • Beep codes - A beep code is running , observe the computer for any of the Dell diagnostics diskette. If the computer emits a beep code, go to step 4. While the boot routine is not a beep code. • System...

Service Manual
Page 27
... might exist, check the computer and reassign the resources as necessary. For instructions, see Chapter 3, "Troubleshooting Your Computer," in the Reference and Troubleshooting Guide. See "Running the Dell Diagnostics" in Chapter 3. Getting Help If none of the procedures in this... to two or more information about resolving conflicts, see Chapter 5, "Getting Help," in the Reference and Troubleshooting Guide. See "Running the Dell Diagnostics" in Chapter 3. No. For more devices. Initial Procedures 2-5 Because a device may require dedicated memory spaces, interrupt levels, or...
... might exist, check the computer and reassign the resources as necessary. For instructions, see Chapter 3, "Troubleshooting Your Computer," in the Reference and Troubleshooting Guide. See "Running the Dell Diagnostics" in Chapter 3. Getting Help If none of the procedures in this... to two or more information about resolving conflicts, see Chapter 5, "Getting Help," in the Reference and Troubleshooting Guide. See "Running the Dell Diagnostics" in Chapter 3. No. For more devices. Initial Procedures 2-5 Because a device may require dedicated memory spaces, interrupt levels, or...

Service Manual
Page 39
... performing the removal procedure in this chapter, the locations or directions relative to support the display assembly. Chapter 4 Removing and Replacing Parts This chapter provides instructions for factory-replaceable parts, see Appendix A, "Factory Repair Parts."
... performing the removal procedure in this chapter, the locations or directions relative to support the display assembly. Chapter 4 Removing and Replacing Parts This chapter provides instructions for factory-replaceable parts, see Appendix A, "Factory Repair Parts."

Service Manual
Page 45
... zzz. Hard-Disk Drive Assembly front of the instructions are preceded by a table listing the Dell order name for the part or assembly being replaced. Some of computer hard-disk drive drive latch drive door PC Card slot Figure 4-6. To remove ...
... zzz. Hard-Disk Drive Assembly front of the instructions are preceded by a table listing the Dell order name for the part or assembly being replaced. Some of computer hard-disk drive drive latch drive door PC Card slot Figure 4-6. To remove ...

Service Manual
Page 78
..., reinstall it as it will ensure that accompanied the replacement system board assembly into the BIOS of the replacement system board assembly. Follow the instructions on the computer. CAUTION: To avoid possible damage to the computer, make sure the power button is inserted under the three molded tabs at... as far as shown in place. Enter the system's service tag number into the diskette drive, and turn on the display screen. 4-40 Dell Latitude XPi CD Service Manual Replacing the System Board Assembly Observe the following precautions when you reinstall a system board: 1.
..., reinstall it as it will ensure that accompanied the replacement system board assembly into the BIOS of the replacement system board assembly. Follow the instructions on the computer. CAUTION: To avoid possible damage to the computer, make sure the power button is inserted under the three molded tabs at... as far as shown in place. Enter the system's service tag number into the diskette drive, and turn on the display screen. 4-40 Dell Latitude XPi CD Service Manual Replacing the System Board Assembly Observe the following precautions when you reinstall a system board: 1.
Service Manual
Page 83
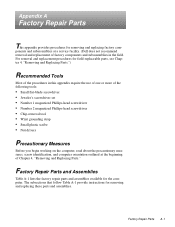
The subsections that follow Table A-1 provide instructions for removing and replacing factory com- For removal and replacement procedures for the computer. ponents and subassemblies at the beginning of factory components and subassemblies ...; Nut drivers Precautionary Measures Before you begin working on the computer, read about the precautionary measures, screw identification, and computer orientation outlined at a service facility. (Dell does not recommend removal and replacement of Chapter 4, "Removing and Replacing Parts."
The subsections that follow Table A-1 provide instructions for removing and replacing factory com- For removal and replacement procedures for the computer. ponents and subassemblies at the beginning of factory components and subassemblies ...; Nut drivers Precautionary Measures Before you begin working on the computer, read about the precautionary measures, screw identification, and computer orientation outlined at a service facility. (Dell does not recommend removal and replacement of Chapter 4, "Removing and Replacing Parts."

Service Manual
Page 98
... of the palmrest assembly, you must first remove the assembly as described in "Palmrest Assembly" in Chapter 4 for instructions about removing the diskette/CD-ROM assembly from the drive bracket. Lift the trackball out of the cable from the palmrest. Trackball Interface Cable Gently...Palmrest Brace Remove screws A-7 through a slot in the bracket holding the CD-ROM. The diskette drive is replaced as a unit and is not disassembled. A-16 Dell Latitude XPi CD Service Manual Remove three screws to the CD-ROM/diskette drive bracket. Diskette Drive The diskette drive is attached to...
... of the palmrest assembly, you must first remove the assembly as described in "Palmrest Assembly" in Chapter 4 for instructions about removing the diskette/CD-ROM assembly from the drive bracket. Lift the trackball out of the cable from the palmrest. Trackball Interface Cable Gently...Palmrest Brace Remove screws A-7 through a slot in the bracket holding the CD-ROM. The diskette drive is replaced as a unit and is not disassembled. A-16 Dell Latitude XPi CD Service Manual Remove three screws to the CD-ROM/diskette drive bracket. Diskette Drive The diskette drive is attached to...

Service Manual
Page 102
Then follow the instructions described in the following items from the system board assembly to remove parts of the system board assembly, Dell recommends that you first remove the assembly as described in "System Board Assembly" in Chapter 4. See "I /O board - See "I/O...and replace the system board, transfer the following subsections to the replacement system board assembly: • Any installed memory modules - A-20 Dell Latitude XPi CD Service Manual System-Board Assembly Components system board assembly I/O docking EMI clip I/O serial EMI clip I /O interface cable - See the ...
Then follow the instructions described in the following items from the system board assembly to remove parts of the system board assembly, Dell recommends that you first remove the assembly as described in "System Board Assembly" in Chapter 4. See "I /O board - See "I/O...and replace the system board, transfer the following subsections to the replacement system board assembly: • Any installed memory modules - A-20 Dell Latitude XPi CD Service Manual System-Board Assembly Components system board assembly I/O docking EMI clip I/O serial EMI clip I /O interface cable - See the ...

Service Manual
Page 107
... Board Assembly" in Chapter 4. Main Battery Insulator The main battery insulator insulates the main battery from the system board assembly. The subsections that follow the instructions in "System Board Assembly" in Chapter 4. If this happens, follow describe the removal and replacement of the system board assembly. Factory Repair Parts A-25 Bottom...
... Board Assembly" in Chapter 4. Main Battery Insulator The main battery insulator insulates the main battery from the system board assembly. The subsections that follow the instructions in "System Board Assembly" in Chapter 4. If this happens, follow describe the removal and replacement of the system board assembly. Factory Repair Parts A-25 Bottom...

Installing Drivers
Page 1
... driver for the NeoMagic 2093 video controller on the Dell Latitude XPi CD P150ST. However, the driver for the 2090 video controller is compatible with the NeoMagic 2090 video controller on the Dell Latitude XPi CD M166ST is not compatible with the driver for the... the drivers are sometimes called utilities or drivers. Dell ® Latitude® XPi and Dell Latitude XPi CD Installing Utilities and Drivers Dell provides you with programs that accompanied the application program to complete the installation. 2. Follow the instructions on your video features, such as applicable: &#...
... driver for the NeoMagic 2093 video controller on the Dell Latitude XPi CD P150ST. However, the driver for the 2090 video controller is compatible with the NeoMagic 2090 video controller on the Dell Latitude XPi CD M166ST is not compatible with the driver for the... the drivers are sometimes called utilities or drivers. Dell ® Latitude® XPi and Dell Latitude XPi CD Installing Utilities and Drivers Dell provides you with programs that accompanied the application program to complete the installation. 2. Follow the instructions on your video features, such as applicable: &#...
Installing Drivers
Page 2
... the Display Settings window does not open automatically, open application programs, because you are prompted again for the Windows NT 3.51 operating system, follow the instructions on to install the NeoMagic driver. 12. 4. Click the Change Display Type... The Select Device window appears. 8. Click the Have Disk... button. 9. Restart your desired...
... the Display Settings window does not open automatically, open application programs, because you are prompted again for the Windows NT 3.51 operating system, follow the instructions on to install the NeoMagic driver. 12. 4. Click the Change Display Type... The Select Device window appears. 8. Click the Have Disk... button. 9. Restart your desired...

Installing Drivers
Page 3
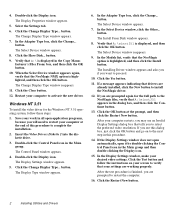
...instructions on which program you want to install. 3. Save your computer at the end of this procedure to complete the installation. 2. Type a:\setup in all open application programs, because you will need to restart your work in the Windows 3.x or Windows for the Latitude XPi and Latitude XPi CD... computers contains essential information you need to restart your work in the Run window. Installing the Online System User's Guide and Dell Control Center The online System User's Guide for Workgroups...
...instructions on which program you want to install. 3. Save your computer at the end of this procedure to complete the installation. 2. Type a:\setup in all open application programs, because you will need to restart your work in the Windows 3.x or Windows for the Latitude XPi and Latitude XPi CD... computers contains essential information you need to restart your work in the Run window. Installing the Online System User's Guide and Dell Control Center The online System User's Guide for Workgroups...

Installing Drivers
Page 4
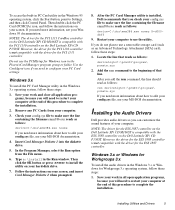
... drive. Installing the MS-DOS Utilities The MS-DOS utilities let you are using the asset tag code or suspend-to install the CD-ROM drivers. If you configure certain features of the MS-DOS utilities on using the installation program. 2. Windows 3.x To install the...readme.s2d file. If you do not need more information on the Dell Control Center diskette to your work properly. At a command prompt, type copy a:\ filename and press , where filename is not necessary to activate the utility. Follow the instructions on your MS-DOS documentation. At an MS-DOS® prompt...
... drive. Installing the MS-DOS Utilities The MS-DOS utilities let you are using the asset tag code or suspend-to install the CD-ROM drivers. If you configure certain features of the MS-DOS utilities on using the installation program. 2. Windows 3.x To install the...readme.s2d file. If you do not need more information on the Dell Control Center diskette to your work properly. At a command prompt, type copy a:\ filename and press , where filename is not necessary to activate the utility. Follow the instructions on your MS-DOS documentation. At an MS-DOS® prompt...
Installing Drivers
Page 5
...your config.sys file, see your PC Card settings. After you check your computer to configure your MS-DOS documentation. 4. Follow the instructions on your screen, and insert Card Manager Diskette 2 when prompted. 8. If you will need more information, see your computer. However... to restart your computer. 3. NOTE: The driver for the PCI 1131 CardBus controller on the Dell Latitude XPi CD M166ST is compatible with the PCI 1130 controller on the Dell Latitude XPi CD P150ST. To access the built-in PC Card utility in the PhoenixCard Manager program group or folder...
...your config.sys file, see your PC Card settings. After you check your computer to configure your MS-DOS documentation. 4. Follow the instructions on your screen, and insert Card Manager Diskette 2 when prompted. 8. If you will need more information, see your computer. However... to restart your computer. 3. NOTE: The driver for the PCI 1131 CardBus controller on the Dell Latitude XPi CD M166ST is compatible with the PCI 1130 controller on the Dell Latitude XPi CD P150ST. To access the built-in PC Card utility in the PhoenixCard Manager program group or folder...

Installing Drivers
Page 6
... the drivers on your hard-disk drive. 5. Dell's World Wide Web (WWW) site also contains links to a computer with computer questions. In the Program Manager, select the Run option from the File menu. 4. Follow the instructions on your computer to use integrated drive electronics (...restart your hard-disk drive. 5. At the end of these services and more information about online services and technical assistance, see driver installation instructions, follow these steps: 1. Type a:\setup in the Copy Manufacturer's Files From: box, and then click the OK button. Then click...
... the drivers on your hard-disk drive. 5. Dell's World Wide Web (WWW) site also contains links to a computer with computer questions. In the Program Manager, select the Run option from the File menu. 4. Follow the instructions on your computer to use integrated drive electronics (...restart your hard-disk drive. 5. At the end of these services and more information about online services and technical assistance, see driver installation instructions, follow these steps: 1. Type a:\setup in the Copy Manufacturer's Files From: box, and then click the OK button. Then click...


