
Dell Owners Manual
Page 3
... the Keyboard...16 Installing the Keyboard...17 Removing the Base Cover...18 Installing the Base Cover...18 Removing the Optical Drive...18 Installing the Optical Drive...19 Removing the Hard Drive...20 Installing the Hard Drive...20 Removing the Memory Module...21 Installing the Memory Module...21 Removing the WLAN Card...22 Installing the WLAN Card...
... the Keyboard...16 Installing the Keyboard...17 Removing the Base Cover...18 Installing the Base Cover...18 Removing the Optical Drive...18 Installing the Optical Drive...19 Removing the Hard Drive...20 Installing the Hard Drive...20 Removing the Memory Module...21 Installing the Memory Module...21 Removing the WLAN Card...22 Installing the WLAN Card...

Dell Owners Manual
Page 10
Front 1. ExpressCard cage 5. I /O board (right) Removing the Battery 1. system fan 4. b) Push and remove the battery from the computer. 10 memory module 4. power connector 2. speakers 6. system board 8. coin-cell battery 3. I /O board (left) 3. Follow the procedures in Before Working Inside Your Computer. 2. hard drive with isolation cap 2. Inside view - status-light board 7. Perform the following steps: a) Slide the battery release latches into the unlock position. WLAN card Figure 2. optical drive 5. 1.
Front 1. ExpressCard cage 5. I /O board (right) Removing the Battery 1. system fan 4. b) Push and remove the battery from the computer. 10 memory module 4. power connector 2. speakers 6. system board 8. coin-cell battery 3. I /O board (left) 3. Follow the procedures in Before Working Inside Your Computer. 2. hard drive with isolation cap 2. Inside view - status-light board 7. Perform the following steps: a) Slide the battery release latches into the unlock position. WLAN card Figure 2. optical drive 5. 1.

Dell Owners Manual
Page 20
Remove the hard-drive isolation cap from its connectors. 4. Follow the procedures in place. Removing the Hard Drive 1. Remove: a) battery b) base cover 3. Installing the Hard Drive 1. Perform the following steps: a) Remove the screws that secure the hard-drive bracket in Before Working Inside Your Computer. 2. Engage the hard-drive isolation cap to remove from the hard drive. b) Slide and pull the hard drive to the hard drive. 20
Remove the hard-drive isolation cap from its connectors. 4. Follow the procedures in place. Removing the Hard Drive 1. Remove: a) battery b) base cover 3. Installing the Hard Drive 1. Perform the following steps: a) Remove the screws that secure the hard-drive bracket in Before Working Inside Your Computer. 2. Engage the hard-drive isolation cap to remove from the hard drive. b) Slide and pull the hard drive to the hard drive. 20

Dell Owners Manual
Page 21
.... 3. Install: a) base cover b) battery 5. Remove: a) battery b) base cover 3. Press the clips to secure the memory module to secure the hard-drive bracket in place. 4. Install: a) base cover b) battery 21 Follow the procedures in Before Working Inside Your Computer. 2. Insert the memory into the memory...Removing the Memory Module 1. Lift up the memory module and remove it from the memory module until it pops up. 4. Place the hard-drive bracket on its connector. 3. Follow the procedures in After Working Inside Your Computer. Pry the retention clips away from the computer. ...
.... 3. Install: a) base cover b) battery 5. Remove: a) battery b) base cover 3. Press the clips to secure the memory module to secure the hard-drive bracket in place. 4. Install: a) base cover b) battery 21 Follow the procedures in Before Working Inside Your Computer. 2. Insert the memory into the memory...Removing the Memory Module 1. Lift up the memory module and remove it from the memory module until it pops up. 4. Place the hard-drive bracket on its connector. 3. Follow the procedures in After Working Inside Your Computer. Pry the retention clips away from the computer. ...

Dell Owners Manual
Page 24
Place the display hinge on the computer. 2. Removing the Palmrest 1. Follow the procedures in After Working Inside Your Computer. Follow the procedures in Before Working Inside Your Computer. 2. Remove: a) SD card b) battery c) base cover d) keyboard trim e) keyboard f) memory g) optical drive h) hard drive i) display hinge 3. Remove the screws at the front and back of the computer. 24 Installing the Display Hinge 1. Install: a) keyboard b) keyboard trim c) base cover d) battery 4. Tighten the screws to secure the display hinge at the bottom of the computer. 3.
Place the display hinge on the computer. 2. Removing the Palmrest 1. Follow the procedures in After Working Inside Your Computer. Follow the procedures in Before Working Inside Your Computer. 2. Remove: a) SD card b) battery c) base cover d) keyboard trim e) keyboard f) memory g) optical drive h) hard drive i) display hinge 3. Remove the screws at the front and back of the computer. 24 Installing the Display Hinge 1. Install: a) keyboard b) keyboard trim c) base cover d) battery 4. Tighten the screws to secure the display hinge at the bottom of the computer. 3.

Dell Owners Manual
Page 26
Removing the Display Assembly 1. Install: a) display hinge b) hard drive c) optical drive d) memory e) keyboard f) keyboard trim g) base cover h) battery i) SD card 5. Follow the procedures in After Working Inside Your Computer. Follow the procedures in Before Working Inside ...
Removing the Display Assembly 1. Install: a) display hinge b) hard drive c) optical drive d) memory e) keyboard f) keyboard trim g) base cover h) battery i) SD card 5. Follow the procedures in After Working Inside Your Computer. Follow the procedures in Before Working Inside ...

Dell Owners Manual
Page 29
... System Fan 1. Install: a) palmrest b) display hinge c) keyboard d) keyboard trim e) base cover f) battery g) SD card 4. Remove: a) SD card b) battery c) base cover d) keyboard trim e) keyboard f) memory g) optical drive h) hard drive i) display hinge j) palmrest 29 b) Lift and remove the ExpressCard cage from the computer. Perform the following steps: a) Remove the screws that secure the ExpressCard cage...
... System Fan 1. Install: a) palmrest b) display hinge c) keyboard d) keyboard trim e) base cover f) battery g) SD card 4. Remove: a) SD card b) battery c) base cover d) keyboard trim e) keyboard f) memory g) optical drive h) hard drive i) display hinge j) palmrest 29 b) Lift and remove the ExpressCard cage from the computer. Perform the following steps: a) Remove the screws that secure the ExpressCard cage...

Dell Owners Manual
Page 30
Disconnect: a) system-fan cable b) I /O board cable to secure the system fan on the computer. 2. Place the system fan on the computer. 5. Connect the system-fan cable to remove from the computer. 3. Remove the screws that secure the system fan and lift the system fan to the system board. 3. Installing the System Fan 1. Connect the I /O board cable 4. Install: a) palmrest b) display hinge c) memory d) hard drive e) optical drive 30 Tighten the screws to its connector. 4.
Disconnect: a) system-fan cable b) I /O board cable to secure the system fan on the computer. 2. Place the system fan on the computer. 5. Connect the system-fan cable to remove from the computer. 3. Remove the screws that secure the system fan and lift the system fan to the system board. 3. Installing the System Fan 1. Connect the I /O board cable 4. Install: a) palmrest b) display hinge c) memory d) hard drive e) optical drive 30 Tighten the screws to its connector. 4.

Dell Owners Manual
Page 31
Flip the computer and disconnect: a) power cable b) status-light board cable c) I/O board cable 31 f) keyboard g) keyboard trim h) base cover i) battery j) SD card 6. Follow the procedures in Before Working Inside Your Computer. 2. Remove: a) SD card b) battery c) base cover d) keyboard trim e) keyboard f) memory g) optical drive h) hard drive i) WLAN card j) display hinge k) palmrest l) system fan m) ExpressCard cage 3. Disconnect: a) coin-cell battery cable b) speaker cable 4. Follow the procedures in After Working Inside Your Computer. Removing the System Board 1.
Flip the computer and disconnect: a) power cable b) status-light board cable c) I/O board cable 31 f) keyboard g) keyboard trim h) base cover i) battery j) SD card 6. Follow the procedures in Before Working Inside Your Computer. 2. Remove: a) SD card b) battery c) base cover d) keyboard trim e) keyboard f) memory g) optical drive h) hard drive i) WLAN card j) display hinge k) palmrest l) system fan m) ExpressCard cage 3. Disconnect: a) coin-cell battery cable b) speaker cable 4. Follow the procedures in After Working Inside Your Computer. Removing the System Board 1.

Dell Owners Manual
Page 33
.... 33 Connect the following cables: a) I/O board cable b) power-connector cable c) status-light board cable 4. Install: a) ExpressCard cage b) system fan c) palmrest d) display hinge e) WLAN card f) hard drive g) optical drive h) memory i) keyboard j) keyboard trim k) base cover l) battery m) SD card 6. Turn over the computer and connect the coin-cell battery cable and speaker cable to the...
.... 33 Connect the following cables: a) I/O board cable b) power-connector cable c) status-light board cable 4. Install: a) ExpressCard cage b) system fan c) palmrest d) display hinge e) WLAN card f) hard drive g) optical drive h) memory i) keyboard j) keyboard trim k) base cover l) battery m) SD card 6. Turn over the computer and connect the coin-cell battery cable and speaker cable to the...

Dell Owners Manual
Page 34
... heatsink from the computer. Place the heatsink on the system board. 2. Removing the Heatsink 1. Remove: a) SD card b) battery c) base cover d) keyboard trim e) keyboard f) memory g) optical drive h) hard drive i) WLAN card j) display hinge k) palmrest l) system fan m) ExpressCard cage n) system board 3. Perform the following steps: a) Remove the screws that secure the heatsink in Before Working...
... heatsink from the computer. Place the heatsink on the system board. 2. Removing the Heatsink 1. Remove: a) SD card b) battery c) base cover d) keyboard trim e) keyboard f) memory g) optical drive h) hard drive i) WLAN card j) display hinge k) palmrest l) system fan m) ExpressCard cage n) system board 3. Perform the following steps: a) Remove the screws that secure the heatsink in Before Working...

Dell Owners Manual
Page 35
... and remove from the computer. 35 Remove: a) SD card b) battery c) base cover d) keyboard trim e) keyboard f) memory g) optical drive h) hard drive i) WLAN card j) display hinge k) palmrest l) system fan m) ExpressCard cage n) system board 3. Follow the procedures in After Working Inside...the I /O Board (Left) 1. Follow the procedures in Before Working Inside Your Computer. 2. d) palmrest e) display hinge f) WLAN card g) hard drive h) optical drive i) memory j) keyboard k) keyboard trim l) base cover m) battery n) SD card 4. Perform the following steps: a) Remove the screw that secures...
... and remove from the computer. 35 Remove: a) SD card b) battery c) base cover d) keyboard trim e) keyboard f) memory g) optical drive h) hard drive i) WLAN card j) display hinge k) palmrest l) system fan m) ExpressCard cage n) system board 3. Follow the procedures in After Working Inside...the I /O Board (Left) 1. Follow the procedures in Before Working Inside Your Computer. 2. d) palmrest e) display hinge f) WLAN card g) hard drive h) optical drive i) memory j) keyboard k) keyboard trim l) base cover m) battery n) SD card 4. Perform the following steps: a) Remove the screw that secures...

Dell Owners Manual
Page 36
...I /O board on the computer. Install: a) system board b) ExpressCard cage c) system fan d) palmrest e) display hinge f) WLAN card g) hard drive h) optical drive i) memory j) keyboard k) keyboard trim l) base cover m) battery n) SD card 4. Tighten the screw to the computer. 3. Follow the procedures...I /O board on the computer. 2. Remove: a) SD card b) battery c) base cover d) keyboard trim e) keyboard f) memory g) optical drive h) hard drive i) WLAN card j) display hinge k) palmrest l) system fan m) ExpressCard cage n) system board 3. Follow the procedures in After Working Inside Your ...
...I /O board on the computer. Install: a) system board b) ExpressCard cage c) system fan d) palmrest e) display hinge f) WLAN card g) hard drive h) optical drive i) memory j) keyboard k) keyboard trim l) base cover m) battery n) SD card 4. Tighten the screw to the computer. 3. Follow the procedures...I /O board on the computer. 2. Remove: a) SD card b) battery c) base cover d) keyboard trim e) keyboard f) memory g) optical drive h) hard drive i) WLAN card j) display hinge k) palmrest l) system fan m) ExpressCard cage n) system board 3. Follow the procedures in After Working Inside Your ...

Dell Owners Manual
Page 37
... the computer. 3. Install: a) system board b) ExpressCard cage c) system fan d) palmrest e) display hinge f) WLAN card g) hard drive h) optical drive i) memory j) keyboard k) keyboard trim l) base cover m) battery n) SD card 4. Remove: a) SD card b) battery c) base cover d) keyboard trim e) keyboard f) memory g) hard drive h) optical drive i) WLAN card 37 Tighten the screws to secure the I /O Board (Right) 1. Follow the procedures in...
... the computer. 3. Install: a) system board b) ExpressCard cage c) system fan d) palmrest e) display hinge f) WLAN card g) hard drive h) optical drive i) memory j) keyboard k) keyboard trim l) base cover m) battery n) SD card 4. Remove: a) SD card b) battery c) base cover d) keyboard trim e) keyboard f) memory g) hard drive h) optical drive i) WLAN card 37 Tighten the screws to secure the I /O Board (Right) 1. Follow the procedures in...

Dell Owners Manual
Page 38
... from the computer. b) Lift and remove the power connector from the routing channels. Install: a) system board b) system fan c) ExpressCard cage d) palmrest e) display hinge f) WLAN card g) hard drive h) optical drive i) memory j) keyboard k) keyboard trim l) base cover m) battery n) SD card 4. j) display hinge k) palmrest l) ExpressCard cage m) system fan n) system board 3. Follow the procedures in After Working...
... from the computer. b) Lift and remove the power connector from the routing channels. Install: a) system board b) system fan c) ExpressCard cage d) palmrest e) display hinge f) WLAN card g) hard drive h) optical drive i) memory j) keyboard k) keyboard trim l) base cover m) battery n) SD card 4. j) display hinge k) palmrest l) ExpressCard cage m) system fan n) system board 3. Follow the procedures in After Working...

Dell Owners Manual
Page 39
... secure the speakers to the routing channels. 3. Install: a) system board b) ExpressCard cage c) system fan d) palmrest e) display hinge f) WLAN card g) hard drive h) optical drive i) memory 39 Perform the following steps: a) Remove the speaker cable from the computer. Place the speakers on the computer. 2. Installing the Speakers 1. ... the screws that secure the speakers from the computer. Secure the speaker cable to the computer. 4. e) keyboard f) memory g) optical drive h) hard drive i) WLAN card j) display hinge k) palmrest l) system fan m) ExpressCard cage n) system board 3.
... secure the speakers to the routing channels. 3. Install: a) system board b) ExpressCard cage c) system fan d) palmrest e) display hinge f) WLAN card g) hard drive h) optical drive i) memory 39 Perform the following steps: a) Remove the speaker cable from the computer. Place the speakers on the computer. 2. Installing the Speakers 1. ... the screws that secure the speakers from the computer. Secure the speaker cable to the computer. 4. e) keyboard f) memory g) optical drive h) hard drive i) WLAN card j) display hinge k) palmrest l) system fan m) ExpressCard cage n) system board 3.

Dell Owners Manual
Page 40
.... Tighten the screw to its place on its connector. 3. Removing the Status-Light Board 1. Remove: a) SD card b) battery c) base cover d) keyboard trim e) keyboard f) memory g) optical drive h) hard drive i) WLAN card j) display hinge k) palmrest l) system fan m) ExpressCard cage n) system board o) speakers 3.
.... Tighten the screw to its place on its connector. 3. Removing the Status-Light Board 1. Remove: a) SD card b) battery c) base cover d) keyboard trim e) keyboard f) memory g) optical drive h) hard drive i) WLAN card j) display hinge k) palmrest l) system fan m) ExpressCard cage n) system board o) speakers 3.

Dell Owners Manual
Page 41
Install: a) speakers b) system board c) system fan d) ExpressCard cage e) palmrest f) display hinge g) WLAN card h) hard drive i) optical drive j) memory k) keyboard l) keyboard trim m) base cover n) battery o) SD card 6. 5. Follow the procedures in After Working Inside Your Computer. 41
Install: a) speakers b) system board c) system fan d) ExpressCard cage e) palmrest f) display hinge g) WLAN card h) hard drive i) optical drive j) memory k) keyboard l) keyboard trim m) base cover n) battery o) SD card 6. 5. Follow the procedures in After Working Inside Your Computer. 41

Dell Owners Manual
Page 43
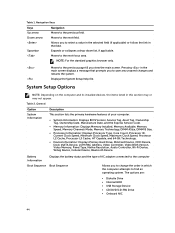
...the system. 43 Navigation Keys The following table displays the system setup navigation keys. During the Power-on Self Test (POST), when the Dell logo appears, you can boot from including the diagnostic option. 3 System Setup System Setup enables you to manage your computer security Boot ...order and boot directly to access the System Setup screen. The boot sequence screen also displays the option to a specific device (for example: optical drive or hard drive). From the System Setup, you can: • Change the NVRAM settings after you can : • Access System Setup by pressing key &#...
...the system. 43 Navigation Keys The following table displays the system setup navigation keys. During the Power-on Self Test (POST), when the Dell logo appears, you can boot from including the diagnostic option. 3 System Setup System Setup enables you to manage your computer security Boot ...order and boot directly to access the System Setup screen. The boot sequence screen also displays the option to a specific device (for example: optical drive or hard drive). From the System Setup, you can: • Change the NVRAM settings after you can : • Access System Setup by pressing key &#...
Dell Owners Manual
Page 44
... Clock Speed, Maximum Clock Speed, Processor L2 Cache, Processor L3 Cache, HT Capable, and 64-Bit Technology. • Device Information: Displays Primary Hard Drive, MiniCard Device, ODD Device, Dock eSATA Device, LOM MAC Address, Video Controller, Video BIOS Version, Video Memory, Panel Type, Native Resolution, Audio... you to save any unsaved changes and restarts the system. The options are: • Diskette Drive • Internal HDD • USB Storage Device • CD/DVD/CD-RW Drive • Onboard NIC 44 NOTE: For the standard graphics browser only. Allows you to the previous...
... Clock Speed, Maximum Clock Speed, Processor L2 Cache, Processor L3 Cache, HT Capable, and 64-Bit Technology. • Device Information: Displays Primary Hard Drive, MiniCard Device, ODD Device, Dock eSATA Device, LOM MAC Address, Video Controller, Video BIOS Version, Video Memory, Panel Type, Native Resolution, Audio... you to save any unsaved changes and restarts the system. The options are: • Diskette Drive • Internal HDD • USB Storage Device • CD/DVD/CD-RW Drive • Onboard NIC 44 NOTE: For the standard graphics browser only. Allows you to the previous...


