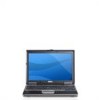
User's Guide
Page 4
... Display Adjusting Brightness 41 Switching the Video Image From Your Computer Display to a Projector. . . . 41 Making Images and Text Look Bigger or Sharper on the Screen: Setting Display Resolution and Refresh Rate 41 Microsoft® Windows® XP 42 Microsoft Windows Vista 42 Using an External Monitor Simultaneously as an Extension...
... Display Adjusting Brightness 41 Switching the Video Image From Your Computer Display to a Projector. . . . 41 Making Images and Text Look Bigger or Sharper on the Screen: Setting Display Resolution and Refresh Rate 41 Microsoft® Windows® XP 42 Microsoft Windows Vista 42 Using an External Monitor Simultaneously as an Extension...

User's Guide
Page 7
... Icon 74 Double-Clicking the Dell Support Icon 75 Drive Problems 75 Optical drive problems 76 Hard drive problems 76 E-Mail, Modem, and Internet Problems 77 Error Messages 78 IEEE 1394 ... stops responding 83 A program stops responding or crashes repeatedly 83 A program is designed for an earlier Microsoft® Windows® operating system 83 A solid blue screen appears 83 Other software problems 83 Memory Problems 84 Network Problems 84 General 84 PC Card or ExpressCard Problems 85 Power Problems 85 Ensuring Sufficient...
... Icon 74 Double-Clicking the Dell Support Icon 75 Drive Problems 75 Optical drive problems 76 Hard drive problems 76 E-Mail, Modem, and Internet Problems 77 Error Messages 78 IEEE 1394 ... stops responding 83 A program stops responding or crashes repeatedly 83 A program is designed for an earlier Microsoft® Windows® operating system 83 A solid blue screen appears 83 Other software problems 83 Memory Problems 84 Network Problems 84 General 84 PC Card or ExpressCard Problems 85 Power Problems 85 Ensuring Sufficient...
User's Guide
Page 8
... is difficult to read 90 If only part of the display is readable 90 12 System Setup Program Overview 91 Viewing the System Setup Screens 91 System Setup Screens 92 Commonly Used Options 92 Changing the Boot Sequence 92 Changing COM Ports 93 13 Reinstalling Software Drivers 95 What Is a Driver 95...
... is difficult to read 90 If only part of the display is readable 90 12 System Setup Program Overview 91 Viewing the System Setup Screens 91 System Setup Screens 92 Commonly Used Options 92 Changing the Boot Sequence 92 Changing COM Ports 93 13 Reinstalling Software Drivers 95 What Is a Driver 95...

User's Guide
Page 13
... troubleshooting hints - Online discussion with programs and files • How to work with other Dell customers • Upgrades - Frequently asked questions Dell Support Website - For more information, see "Dell Support Utility" on your problem. 4 Follow the instructions on the screen. Troubleshooting hints and tips, articles from the icon in the taskbar. Contact information, service...
... troubleshooting hints - Online discussion with programs and files • How to work with other Dell customers • Upgrades - Frequently asked questions Dell Support Website - For more information, see "Dell Support Utility" on your problem. 4 Follow the instructions on the screen. Troubleshooting hints and tips, articles from the icon in the taskbar. Contact information, service...

User's Guide
Page 25
... Wizard: click Start→ All Programs→ Accessories→ System Tools→ Files and Settings Transfer Wizard. 2 When the Files and Settings Transfer Wizard welcome screen appears, click Next. Transferring Information to a new computer, you must access the Network Connections utility from an old computer to a new computer. NOTE: You can...
... Wizard: click Start→ All Programs→ Accessories→ System Tools→ Files and Settings Transfer Wizard. 2 When the Files and Settings Transfer Wizard welcome screen appears, click Next. Transferring Information to a new computer, you must access the Network Connections utility from an old computer to a new computer. NOTE: You can...

User's Guide
Page 26
.... 3 Click Finished and restart the new computer. After the information has been copied, the Completing the Collection Phase screen appears. 7 Click Finish. screen, select the method you to create a backup image file to transfer and click Next. Running the Files and Settings ...; Accessories→ System Tools→ Files and Settings Transfer Wizard. 2 When the Files and Settings Transfer Wizard welcome screen appears, click Next. 3 On the Which computer is this? screen, click I will allow you chose for transferring your settings and files and click Next. 3 On the Which computer is...
.... 3 Click Finished and restart the new computer. After the information has been copied, the Completing the Collection Phase screen appears. 7 Click Finish. screen, select the method you to create a backup image file to transfer and click Next. Running the Files and Settings ...; Accessories→ System Tools→ Files and Settings Transfer Wizard. 2 When the Files and Settings Transfer Wizard welcome screen appears, click Next. 3 On the Which computer is this? screen, click I will allow you chose for transferring your settings and files and click Next. 3 On the Which computer is...

User's Guide
Page 27
...the appropriate removable media) and click OK. 4 On the Files and Settings Transfer Wizard welcome screen, click Next. 5 On the Which computer is this procedure, search support.dell.com for fastwiz (on the screen. To copy data from the old computer: 1 On the old computer, insert the wizard disk... the disk creation completes and the Now go to your old computer screen on the screen by the Windows Easy Transfer wizard. NOTE: Access to transfer and click Next. screen, select the method you want to the Dell™ Knowledge Base document may not be available in progress. 4 Follow...
...the appropriate removable media) and click OK. 4 On the Files and Settings Transfer Wizard welcome screen, click Next. 5 On the Which computer is this procedure, search support.dell.com for fastwiz (on the screen. To copy data from the old computer: 1 On the old computer, insert the wizard disk... the disk creation completes and the Now go to your old computer screen on the screen by the Windows Easy Transfer wizard. NOTE: Access to transfer and click Next. screen, select the method you want to the Dell™ Knowledge Base document may not be available in progress. 4 Follow...

User's Guide
Page 29
...charge status, check the Power Meter in maximum performance mode. NOTE: Battery operating time (the time the battery can use a battery from Dell. Depending on page 30). NOTE: It is used and the conditions under which you can hold a charge) decreases over time. CAUTION...; Using wireless communications devices, PC Cards, ExpressCards, media memory cards, or USB devices. • Using high-brightness display settings, 3D screen savers, or other power-intensive programs such as standard equipment in the battery bay. Battery operating time varies depending on page 33). Replace the...
...charge status, check the Power Meter in maximum performance mode. NOTE: Battery operating time (the time the battery can use a battery from Dell. Depending on page 30). NOTE: It is used and the conditions under which you can hold a charge) decreases over time. CAUTION...; Using wireless communications devices, PC Cards, ExpressCards, media memory cards, or USB devices. • Using high-brightness display settings, 3D screen savers, or other power-intensive programs such as standard equipment in the battery bay. Battery operating time varies depending on page 33). Replace the...

User's Guide
Page 36
... keyboard shortcut to the next display option. Scales between wide-screen and standard aspect ratio video resolutions. Battery Optical Drive Tray Display Functions and left-arrow key and up-arrow key and down-arrow key Power Management Speaker Functions Displays the Dell™ QuickSet Battery Meter (see "Power Management Modes" on page...
... keyboard shortcut to the next display option. Scales between wide-screen and standard aspect ratio video resolutions. Battery Optical Drive Tray Display Functions and left-arrow key and up-arrow key and down-arrow key Power Management Speaker Functions Displays the Dell™ QuickSet Battery Meter (see "Power Management Modes" on page...

User's Guide
Page 41
... computer with an external device (such as an external monitor or projector) attached and turned on the Screen: Setting Display Resolution and Refresh Rate NOTE: If you change . 6 Using the Display Adjusting Brightness When a Dell™ computer is connected to an external monitor and you need to. NOTE: Brightness key combinations only...
... computer with an external device (such as an external monitor or projector) attached and turned on the Screen: Setting Display Resolution and Refresh Rate NOTE: If you change . 6 Using the Display Adjusting Brightness When a Dell™ computer is connected to an external monitor and you need to. NOTE: Brightness key combinations only...
User's Guide
Page 42
... and the taskbar that usually appears at the bottom of the video image that supported by using . NOTE: Use only the Dell-installed video drivers, which are not visible, you want to the operating system your Dellinstalled operating system. Microsoft® Windows®... right. Microsoft Windows Vista® 1 Click the Windows Vista Start button, , and click Control Panel. 2 Under Appearance and Personalization, click Adjust screen resolution. 3 In the Display Settings window, under or pick a Control Panel icon, click Display. 4 In the Display Properties window, click the Settings...
... and the taskbar that usually appears at the bottom of the video image that supported by using . NOTE: Use only the Dell-installed video drivers, which are not visible, you want to the operating system your Dellinstalled operating system. Microsoft® Windows®... right. Microsoft Windows Vista® 1 Click the Windows Vista Start button, , and click Control Panel. 2 Under Appearance and Personalization, click Adjust screen resolution. 3 In the Display Settings window, under or pick a Control Panel icon, click Display. 4 In the Display Properties window, click the Settings...

User's Guide
Page 43
...Windows Vista® 1 Click the Windows Vista Start button, , and click Control Panel. 2 Under Appearance and Personalization, click Adjust screen resolution. Using an External Monitor Simultaneously as an Extension of Your Computer Display You can attach an external monitor or projector to your computer...pick a Control Panel icon, click Display. 5 In the Display Properties window, click the Settings tab. If necessary, press to bring the screen image back to resize your operating system documentation. 6 Click the monitor 2 icon, click the Extend my Windows desktop... NOTE: If you ...
...Windows Vista® 1 Click the Windows Vista Start button, , and click Control Panel. 2 Under Appearance and Personalization, click Adjust screen resolution. Using an External Monitor Simultaneously as an Extension of Your Computer Display You can attach an external monitor or projector to your computer...pick a Control Panel icon, click Display. 5 In the Display Properties window, click the Settings tab. If necessary, press to bring the screen image back to resize your operating system documentation. 6 Click the monitor 2 icon, click the Extend my Windows desktop... NOTE: If you ...

User's Guide
Page 44
... video card for additional information. Microsoft Windows Vista® 1 Click the Windows Vista Start button, , and click Control Panel. 2 Under Appearance and Personalization, click Adjust screen resolution. 3 In the Display Settings window, click the monitor 2 icon, click the This is using. Microsoft® Windows® XP 1 Click the Start button and...
... video card for additional information. Microsoft Windows Vista® 1 Click the Windows Vista Start button, , and click Control Panel. 2 Under Appearance and Personalization, click Adjust screen resolution. 3 In the Display Settings window, click the monitor 2 icon, click the This is using. Microsoft® Windows® XP 1 Click the Start button and...
User's Guide
Page 50
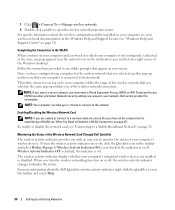
...in the Windows Help and Support Center (see your computer is not configured) is on page 13). For specific information about the Dell QuickSet wireless activity indicator, right-click the QuickSet icon in the taskbar and select Help. 50 Setting Up and Using Networks Thereafter,... network, ensure that you have all the components for establishing a WLAN (see "Connecting to a Mobile Broadband Network" on to that your screen. Follow the instructions provided in any utility prompts that you selected, another pop-up notifies you turn the wireless networking function on or off ...
...in the Windows Help and Support Center (see your computer is not configured) is on page 13). For specific information about the Dell QuickSet wireless activity indicator, right-click the QuickSet icon in the taskbar and select Help. 50 Setting Up and Using Networks Thereafter,... network, ensure that you have all the components for establishing a WLAN (see "Connecting to a Mobile Broadband Network" on to that your screen. Follow the instructions provided in any utility prompts that you selected, another pop-up notifies you turn the wireless networking function on or off ...

User's Guide
Page 52
...using the wireless switch on the CD included with the wireless switch on the left side of the Wireless Network Card Through Dell QuickSet" on the screen. You can turn your Mobile Broadband card on and off with your Mobile Broadband card if you must activate Mobile Broadband ... card. NOTE: If you connect to enable the switch and the Dell Mobile Broadband card. On the My Computer Information - Hardware screen, you have all the components for additional information about the wireless switch positions, see "Dell Wi-Fi Catcher™ Network Locator" on page 53 To monitor...
...using the wireless switch on the CD included with the wireless switch on the left side of the Wireless Network Card Through Dell QuickSet" on the screen. You can turn your Mobile Broadband card on and off with your Mobile Broadband card if you must activate Mobile Broadband ... card. NOTE: If you connect to enable the switch and the Dell Mobile Broadband card. On the My Computer Information - Hardware screen, you have all the components for additional information about the wireless switch positions, see "Dell Wi-Fi Catcher™ Network Locator" on page 53 To monitor...

User's Guide
Page 71
...want to an electrical outlet that the device you contact Dell for the Dell Technical Update service, go to a docking device (docked), undock it. 11 Troubleshooting Dell Technical Update Service The Dell Technical Update service provides proactive e-mail notification of the ... technical assistance. NOTICE: The Dell Diagnostics works only on your computer, run the Dell Diagnostics before you begin . NOTE: If your computer cannot display a screen image, contact Dell (see "Contacting Dell" on (or restart) your computer. When to Use the Dell Diagnostics If you experience a ...
...want to an electrical outlet that the device you contact Dell for the Dell Technical Update service, go to a docking device (docked), undock it. 11 Troubleshooting Dell Technical Update Service The Dell Technical Update service provides proactive e-mail notification of the ... technical assistance. NOTICE: The Dell Diagnostics works only on your computer, run the Dell Diagnostics before you begin . NOTE: If your computer cannot display a screen image, contact Dell (see "Contacting Dell" on (or restart) your computer. When to Use the Dell Diagnostics If you experience a ...

User's Guide
Page 72
...menu that appear. • If failures are listed, select the version appropriate for your computer. 7 When the Dell Diagnostics Main Menu screen appears, select the test you see "Contacting Dell" on your computer and try again. NOTE: It is recommended that no diagnostics utility partition has been found, ... the assessment, answer any key to start the CD menu and press to wait until you want . Dell Diagnostics Main Menu 1 After the Dell Diagnostics loads and the Main Menu screen appears, click the button for one time only. NOTE: If you wait too long and the operating system...
...menu that appear. • If failures are listed, select the version appropriate for your computer. 7 When the Dell Diagnostics Main Menu screen appears, select the test you see "Contacting Dell" on your computer and try again. NOTE: It is recommended that no diagnostics utility partition has been found, ... the assessment, answer any key to start the CD menu and press to wait until you want . Dell Diagnostics Main Menu 1 After the Dell Diagnostics loads and the Main Menu screen appears, click the button for one time only. NOTE: If you wait too long and the operating system...
User's Guide
Page 73
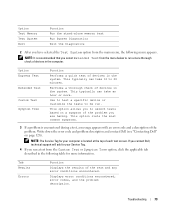
... encountered during a test, a message appears with an error code and a description of the problem. Performs a thorough check of each test screen. This option allows you to be run a test from the Custom Test or Symptom Tree option, click the applicable tab described in the computer.... Write down the error code and problem description and contact Dell (see "Contacting Dell" on a symptom of the test and any error conditions encountered. Troubleshooting 73 This option lists the most common symptoms. 3 If...
... encountered during a test, a message appears with an error code and a description of the problem. Performs a thorough check of each test screen. This option allows you to be run a test from the Custom Test or Symptom Tree option, click the applicable tab described in the computer.... Write down the error code and problem description and contact Dell (see "Contacting Dell" on a symptom of the test and any error conditions encountered. Troubleshooting 73 This option lists the most common symptoms. 3 If...

User's Guide
Page 74
... and various internal tests, and it displays the information in the device list in the left pane of the screen. To exit the Dell Diagnostics and restart the computer, close the test screen to return to customize the test by changing the test settings. 5 When the tests are complete, close the ... icon does not appear in the taskbar functions differently when you to the Main Menu screen. NOTE: If the Dell Support Utility is installed on your computer and available from the Dell Support, , icon on the taskbar or from the Start button. Allows you click, double-click, or right-click ...
... and various internal tests, and it displays the information in the device list in the left pane of the screen. To exit the Dell Diagnostics and restart the computer, close the test screen to return to customize the test by changing the test settings. 5 When the tests are complete, close the ... icon does not appear in the taskbar functions differently when you to the Main Menu screen. NOTE: If the Dell Support Utility is installed on your computer and available from the Dell Support, , icon on the taskbar or from the Start button. Allows you click, double-click, or right-click ...

User's Guide
Page 75
... safety instructions in the Microsoft® Windows® XP and Microsoft Windows Vista® Operating Systems" on page 71) as you begin any of the Dell™ Support screen. See "Cleaning Your Computer" on page 71. R U N TH E D E L L D I A G N O S T I S K -... ENSURE THAT MICROSOFT® WINDOWS® RECOGNIZES THE DRIVE - Fill out the Diagnostics Checklist (see "Dell Diagnostics" on page 98. In Windows XP: • Click Start→ My Computer. C L E A N T H E D R I V E O R...
... safety instructions in the Microsoft® Windows® XP and Microsoft Windows Vista® Operating Systems" on page 71) as you begin any of the Dell™ Support screen. See "Cleaning Your Computer" on page 71. R U N TH E D E L L D I A G N O S T I S K -... ENSURE THAT MICROSOFT® WINDOWS® RECOGNIZES THE DRIVE - Fill out the Diagnostics Checklist (see "Dell Diagnostics" on page 98. In Windows XP: • Click Start→ My Computer. C L E A N T H E D R I V E O R...


