
Owners Manual
Page 9
Boot Sequence 131 Clearing Forgotten Passwords 132 Clearing CMOS Passwords 134 31 Flashing the BIOS 137 Contents 9
Boot Sequence 131 Clearing Forgotten Passwords 132 Clearing CMOS Passwords 134 31 Flashing the BIOS 137 Contents 9
Owners Manual
Page 33
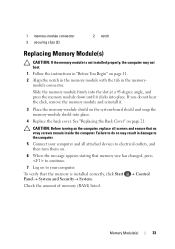
... cover. See "Replacing the Back Cover" on the system-board shield and snap the memory-module shield into place. If you do so may not boot. 1 Follow the instructions in "Before You Begin" on page 11. 2 Align the notch in the memory module with the tab in damage to the computer...
... cover. See "Replacing the Back Cover" on the system-board shield and snap the memory-module shield into place. If you do so may not boot. 1 Follow the instructions in "Before You Begin" on page 11. 2 Align the notch in the memory module with the tab in damage to the computer...
Owners Manual
Page 127
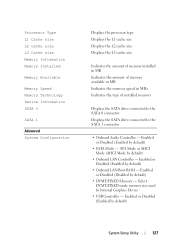
... - ATA Mode or AHCI Mode (AHCI Mode by default) • DVMT/FIXED Memory - Select DVMT/FIXED mode memory size used by default) • Onboard LAN Boot ROM - Enabled or Disabled (Enabled by Internal Graphics Device • USB Controller - Enabled or Disabled (Enabled by default) • SATA Mode - Processor Type L1 Cache...
... - ATA Mode or AHCI Mode (AHCI Mode by default) • DVMT/FIXED Memory - Select DVMT/FIXED mode memory size used by default) • Onboard LAN Boot ROM - Enabled or Disabled (Enabled by Internal Graphics Device • USB Controller - Enabled or Disabled (Enabled by default) • SATA Mode - Processor Type L1 Cache...
Owners Manual
Page 129
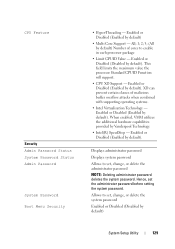
...(R) SpeedStep - When enabled, VMM utilizes the additional hardware capabilities provided by default). CPU Feature Security Admin Password Status System Password Status Admin Password System Password Boot Menu Security • Hyper-Threading - Enabled or Disabled (Enabled by default) System Setup Utility 129 Hence, set the administrator password before setting the system password...
...(R) SpeedStep - When enabled, VMM utilizes the additional hardware capabilities provided by default). CPU Feature Security Admin Password Status System Password Status Admin Password System Password Boot Menu Security • Hyper-Threading - Enabled or Disabled (Enabled by default) System Setup Utility 129 Hence, set the administrator password before setting the system password...

Owners Manual
Page 130
...Drive; Disabled (CD/DVD/CD-RW Drive by default) Specifies the boot sequence from the available devices Diskette Drive; USB Storage Device; Hard Drive; Disabled (Diskette Drive by default) Specifies the boot sequence from the available devices Diskette Drive; Network; Network; Network;...from the available devices Diskette Drive; CD/DVD/CD-RW Drive; Hard Drive; HDD protection Boot 1st Boot Priority 2nd Boot Priority 3rd Boot Priority 4th Boot Priority 5th Boot Priority Exit Exit Options 130 System Setup Utility Enabled or Disabled (Disabled by default) Provides ...
...Drive; Disabled (CD/DVD/CD-RW Drive by default) Specifies the boot sequence from the available devices Diskette Drive; USB Storage Device; Hard Drive; Disabled (Diskette Drive by default) Specifies the boot sequence from the available devices Diskette Drive; Network; Network; Network;...from the available devices Diskette Drive; CD/DVD/CD-RW Drive; Hard Drive; HDD protection Boot 1st Boot Priority 2nd Boot Priority 3rd Boot Priority 4th Boot Priority 5th Boot Priority Exit Exit Options 130 System Setup Utility Enabled or Disabled (Disabled by default) Provides ...
Owners Manual
Page 131
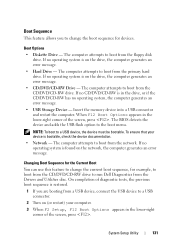
... - On completion of the screen, press . Boot Sequence This feature allows you are booting from the Drivers and Utilities disc. Changing Boot Sequence for the Current Boot You can use this feature to change the boot sequence for example, to boot from the CD/DVD/CD-RW drive to run Dell Diagnostics from a USB device, connect the...
... - On completion of the screen, press . Boot Sequence This feature allows you are booting from the Drivers and Utilities disc. Changing Boot Sequence for the Current Boot You can use this feature to change the boot sequence for example, to boot from the CD/DVD/CD-RW drive to run Dell Diagnostics from a USB device, connect the...
Owners Manual
Page 132
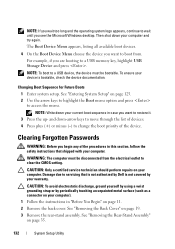
... discharge, ground yourself by using a wrist grounding strap or by periodically touching an unpainted metal surface (such as a connector on your current boot sequence in case you want to a USB memory key, highlight USB Storage Device and press . See "Entering System Setup" on your computer... 2 Remove the back cover. Damage due to clear the CMOS setting. To ensure your device is not covered by Dell is bootable, check the device documentation. Changing Boot Sequence for Future Boots 1 Enter system setup. Then shut down -arrow keys to move through the list of devices. 4 Press plus ...
... discharge, ground yourself by using a wrist grounding strap or by periodically touching an unpainted metal surface (such as a connector on your current boot sequence in case you want to a USB memory key, highlight USB Storage Device and press . See "Entering System Setup" on your computer... 2 Remove the back cover. Damage due to clear the CMOS setting. To ensure your device is not covered by Dell is bootable, check the device documentation. Changing Boot Sequence for Future Boots 1 Enter system setup. Then shut down -arrow keys to move through the list of devices. 4 Press plus ...


