Me and My Dell
Page 10
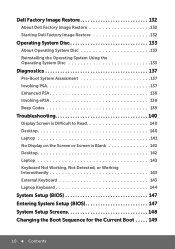
... Restore 132 About Dell Factory Image Restore 132 Starting Dell Factory Image Restore 132 Operating System Disc 133 About Operating System Disc 133 Reinstalling the Operating System Using the Operating System Disc 133 Diagnostics 137 ... to Read 140 Desktop 140 Laptop 141 No Display on the Screen or Screen is Blank 142 Desktop 142 Laptop 143 Keyboard Not Working, Not Detected, or Working Intermittently 143 External Keyboard 143 Laptop Keyboard 144 System Setup (BIOS 147 Entering System Setup (BIOS 147 System Setup Screens 148 Changing the Boot Sequence for the...
... Restore 132 About Dell Factory Image Restore 132 Starting Dell Factory Image Restore 132 Operating System Disc 133 About Operating System Disc 133 Reinstalling the Operating System Using the Operating System Disc 133 Diagnostics 137 ... to Read 140 Desktop 140 Laptop 141 No Display on the Screen or Screen is Blank 142 Desktop 142 Laptop 143 Keyboard Not Working, Not Detected, or Working Intermittently 143 External Keyboard 143 Laptop Keyboard 144 System Setup (BIOS 147 Entering System Setup (BIOS 147 System Setup Screens 148 Changing the Boot Sequence for the...
Me and My Dell
Page 30
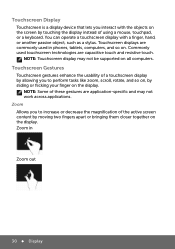
... touchscreen technologies are application-specific and may not be supported on . NOTE: Touchscreen display may not work across applications. Zoom in phones, tablets, computers, and so on all computers. NOTE: Some of using a mouse, touchpad, or a keyboard. Touchscreen Gestures Touchscreen gestures enhance the usability of a touchscreen display by allowing you to increase...
... touchscreen technologies are application-specific and may not be supported on . NOTE: Touchscreen display may not work across applications. Zoom in phones, tablets, computers, and so on all computers. NOTE: Some of using a mouse, touchpad, or a keyboard. Touchscreen Gestures Touchscreen gestures enhance the usability of a touchscreen display by allowing you to increase...
Me and My Dell
Page 143
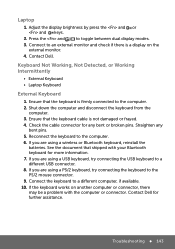
Shut down the computer and disconnect the keyboard from the computer. 3. Connect the keyboard to the PS/2 mouse connector. 9. If the keyboard works on the external monitor. 4. Laptop 1. Check the cable connector for any bent pins. 5. Contact Dell for more information. 7. Keyboard Not Working, Not Detected, or Working Intermittently • External Keyboard • Laptop Keyboard External Keyboard 1. See the document that shipped...
Shut down the computer and disconnect the keyboard from the computer. 3. Connect the keyboard to the PS/2 mouse connector. 9. If the keyboard works on the external monitor. 4. Laptop 1. Check the cable connector for any bent pins. 5. Contact Dell for more information. 7. Keyboard Not Working, Not Detected, or Working Intermittently • External Keyboard • Laptop Keyboard External Keyboard 1. See the document that shipped...
Me and My Dell
Page 144
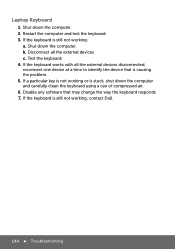
Restart the computer and test the keyboard. 3. If the keyboard works with all the external devices. If the keyboard is still not working : a. Shut down the computer and carefully clean the keyboard using a can of compressed air. 6. If the keyboard is still not working , contact Dell. 144 Troubleshooting Laptop Keyboard 1. c. Disable any software that is stuck, shut down the computer...
Restart the computer and test the keyboard. 3. If the keyboard works with all the external devices. If the keyboard is still not working : a. Shut down the computer and carefully clean the keyboard using a can of compressed air. 6. If the keyboard is still not working , contact Dell. 144 Troubleshooting Laptop Keyboard 1. c. Disable any software that is stuck, shut down the computer...
Me and My Dell
Page 147
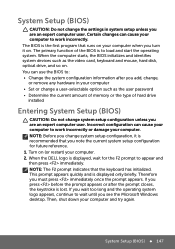
... setup unless you are an expert computer user. You can use the BIOS to work incorrectly. Incorrect configuration can cause your computer and try again. Turn on (or restart) your computer. When the DELL logo is lost. This prompt appears quickly and is to appear and then press ... Setup (BIOS) CAUTION: Do not change the settings in your computer • Set or change a user-selectable option such as the video card, keyboard and mouse, hard disk, optical drive, and so on. Certain changes can cause your computer to : • Change the system configuration information after ...
... setup unless you are an expert computer user. You can use the BIOS to work incorrectly. Incorrect configuration can cause your computer and try again. Turn on (or restart) your computer. When the DELL logo is lost. This prompt appears quickly and is to appear and then press ... Setup (BIOS) CAUTION: Do not change the settings in your computer • Set or change a user-selectable option such as the video card, keyboard and mouse, hard disk, optical drive, and so on. Certain changes can cause your computer to : • Change the system configuration information after ...
Me and My Dell
Page 160
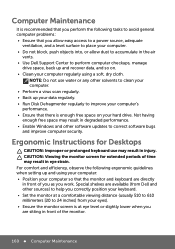
Computer Maintenance It is recommended that you work. NOTE: Do not use may result in eye strain. Not having enough free space may result in injury. Ergonomic Instructions for extended periods of time may result in the air vents. • Use Dell Support Center to correct software bugs and ...push objects into, or allow dust to accumulate in degraded performance. • Enable Windows and other sources) to help you correctly position your keyboard. • Set the monitor at eye level or slightly lower when you are directly in front of you as you perform the following ergonomic...
Computer Maintenance It is recommended that you work. NOTE: Do not use may result in eye strain. Not having enough free space may result in injury. Ergonomic Instructions for extended periods of time may result in the air vents. • Use Dell Support Center to correct software bugs and ...push objects into, or allow dust to accumulate in degraded performance. • Enable Windows and other sources) to help you correctly position your keyboard. • Set the monitor at eye level or slightly lower when you are directly in front of you as you perform the following ergonomic...
Me and My Dell
Page 161
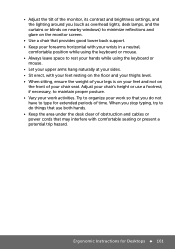
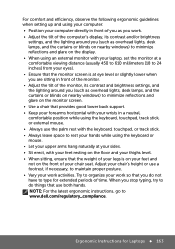
... support. • Keep your forearms horizontal with your wrists in a neutral, comfortable position while using the keyboard or mouse. • Always leave space to rest your hands while using the keyboard or mouse. • Let your upper arms hang naturally at your sides. • Sit erect, with... comfortable seating or present a potential trip hazard. Try to organize your work activities. • Adjust the tilt of the monitor, its...
... support. • Keep your forearms horizontal with your wrists in a neutral, comfortable position while using the keyboard or mouse. • Always leave space to rest your hands while using the keyboard or mouse. • Let your upper arms hang naturally at your sides. • Sit erect, with... comfortable seating or present a potential trip hazard. Try to organize your work activities. • Adjust the tilt of the monitor, its...
Me and My Dell
Page 163
... the monitor screen is on your feet and not on the front of your chair seat. NOTE: For the latest ergonomic instructions, go to www.dell.com/regulatory_compliance. When you (such as overhead lights, desk lamps, and the curtains or blinds on nearby windows) to minimize reflections and glare on the... track stick. • Always leave space to rest your hands while using the keyboard or mouse. • Let your upper arms hang naturally at eye level or slightly lower when you are sitting in front of you as you work activities. Adjust your chair's height or use both hands. For comfort and...
... the monitor screen is on your feet and not on the front of your chair seat. NOTE: For the latest ergonomic instructions, go to www.dell.com/regulatory_compliance. When you (such as overhead lights, desk lamps, and the curtains or blinds on nearby windows) to minimize reflections and glare on the... track stick. • Always leave space to rest your hands while using the keyboard or mouse. • Let your upper arms hang naturally at eye level or slightly lower when you are sitting in front of you as you work activities. Adjust your chair's height or use both hands. For comfort and...

Owner's Manual
Page 3
Contents Before You Begin 9 Turn Off Your Computer and Connected Devices . . . . . 9 Safety Instructions 10 Recommended Tools 10 After Working Inside Your Computer 11 Removing the Battery 12 Procedure 12 Replacing the Battery 13 Procedure 13 Removing the Optical Drive 14 Prerequisites 14 Procedure 14 Replacing the Optical Drive 16 Procedure 16 Postrequisites 16 Removing the Keyboard 17 Prerequisites 17 Procedure 17 Replacing the Keyboard 19 Procedure 19 Postrequisites 19 Removing the Base Cover 20 Prerequisites 20 Procedure 20 Contents | 3
Contents Before You Begin 9 Turn Off Your Computer and Connected Devices . . . . . 9 Safety Instructions 10 Recommended Tools 10 After Working Inside Your Computer 11 Removing the Battery 12 Procedure 12 Replacing the Battery 13 Procedure 13 Removing the Optical Drive 14 Prerequisites 14 Procedure 14 Replacing the Optical Drive 16 Procedure 16 Postrequisites 16 Removing the Keyboard 17 Prerequisites 17 Procedure 17 Replacing the Keyboard 19 Procedure 19 Postrequisites 19 Removing the Base Cover 20 Prerequisites 20 Procedure 20 Contents | 3
Owner's Manual
Page 17
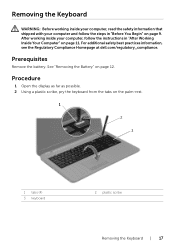
...keyboard from the tabs on page 12. After working inside your computer and follow the instructions in "Before You Begin" on page 9. See "Removing the Battery" on the palm-rest. 1 2 3 1 tabs (4) 3 keyboard 2 plastic scribe Removing the Keyboard | 17 Removing the Keyboard WARNING: Before working... inside your computer, read the safety information that shipped with your computer, follow the steps in "After Working Inside Your Computer" on page 11. For...
...keyboard from the tabs on page 12. After working inside your computer and follow the instructions in "Before You Begin" on page 9. See "Removing the Battery" on the palm-rest. 1 2 3 1 tabs (4) 3 keyboard 2 plastic scribe Removing the Keyboard | 17 Removing the Keyboard WARNING: Before working... inside your computer, read the safety information that shipped with your computer, follow the steps in "After Working Inside Your Computer" on page 11. For...

Owner's Manual
Page 19
... Keyboard WARNING: Before working inside your computer, read the safety information that secure the keyboard to secure the cable. 2 Slide the tabs at dell.com/regulatory_compliance. Procedure 1 Slide the keyboard cable into the slots on the palm-rest and place the keyboard on the palm-rest. 3 Gently press around the edges of the keyboard to secure the keyboard...
... Keyboard WARNING: Before working inside your computer, read the safety information that secure the keyboard to secure the cable. 2 Slide the tabs at dell.com/regulatory_compliance. Procedure 1 Slide the keyboard cable into the slots on the palm-rest and place the keyboard on the palm-rest. 3 Gently press around the edges of the keyboard to secure the keyboard...

Owner's Manual
Page 30
... (12) 30 | Removing the Palm-Rest Procedure 1 Remove the screws that shipped with your computer, follow the steps in "After Working Inside Your Computer" on page 20. 3 Remove the keyboard. For additional safety best practices information, see the Regulatory Compliance Homepage at dell.com/regulatory_compliance. See "Removing the Base Cover" on page 11.
... (12) 30 | Removing the Palm-Rest Procedure 1 Remove the screws that shipped with your computer, follow the steps in "After Working Inside Your Computer" on page 20. 3 Remove the keyboard. For additional safety best practices information, see the Regulatory Compliance Homepage at dell.com/regulatory_compliance. See "Removing the Base Cover" on page 11.
Owner's Manual
Page 33
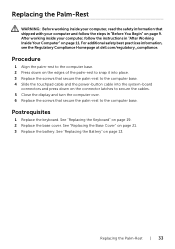
...cables. 5 Close the display and turn the computer over. 6 Replace the screws that shipped with your computer, follow the steps in "After Working Inside Your Computer" on page 19. 2 Replace the base cover. See "Replacing the Base Cover" on page 13. See "Replacing the Battery..." on page 21. 3 Replace the battery. For additional safety best practices information, see the Regulatory Compliance Homepage at dell.com/regulatory_compliance. Postrequisites 1 Replace the keyboard. Procedure 1 Align the palm-rest to the computer base. 2 Press down on the edges of the palm-rest to ...
...cables. 5 Close the display and turn the computer over. 6 Replace the screws that shipped with your computer, follow the steps in "After Working Inside Your Computer" on page 19. 2 Replace the base cover. See "Replacing the Base Cover" on page 13. See "Replacing the Battery..." on page 21. 3 Replace the battery. For additional safety best practices information, see the Regulatory Compliance Homepage at dell.com/regulatory_compliance. Postrequisites 1 Replace the keyboard. Procedure 1 Align the palm-rest to the computer base. 2 Press down on the edges of the palm-rest to ...

Owner's Manual
Page 34
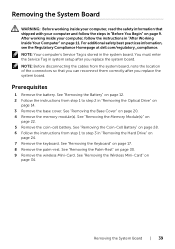
...11. See "Removing the Base Cover" on page 30. See "Removing the Keyboard" on page 12. 2 Remove the base cover. For additional safety best practices information, see the Regulatory Compliance Homepage at dell.com/regulatory_compliance. See "Removing the Battery" on page 17. 4 Remove the... palm-rest. Removing the Wireless Mini-Card WARNING: Before working inside your computer, read the safety information that secures the ...
...11. See "Removing the Base Cover" on page 30. See "Removing the Keyboard" on page 12. 2 Remove the base cover. For additional safety best practices information, see the Regulatory Compliance Homepage at dell.com/regulatory_compliance. See "Removing the Battery" on page 17. 4 Remove the... palm-rest. Removing the Wireless Mini-Card WARNING: Before working inside your computer, read the safety information that secures the ...

Owner's Manual
Page 36
... following table provides the antenna cable color schemes for the wireless mini-card supported by your computer, follow the steps in "After Working Inside Your Computer" on page 9. Procedure CAUTION: To avoid damage to the wireless mini-card, ensure that no cables are placed... 21. 4 Replace the battery. See "Replacing the Base Cover" on page 33. 2 Replace the keyboard. Connectors on the mini-card connector. 2 Insert the wireless mini-card at dell.com/regulatory_compliance. For additional safety best practices information, see the Regulatory Compliance Homepage at a 45-degree angle...
... following table provides the antenna cable color schemes for the wireless mini-card supported by your computer, follow the steps in "After Working Inside Your Computer" on page 9. Procedure CAUTION: To avoid damage to the wireless mini-card, ensure that no cables are placed... 21. 4 Replace the battery. See "Replacing the Base Cover" on page 33. 2 Replace the keyboard. Connectors on the mini-card connector. 2 Insert the wireless mini-card at dell.com/regulatory_compliance. For additional safety best practices information, see the Regulatory Compliance Homepage at a 45-degree angle...

Owner's Manual
Page 37
... 30. See "Removing the Base Cover" on page 17. 4 Remove the palm-rest. For additional safety best practices information, see the Regulatory Compliance Homepage at dell.com/regulatory_compliance. Procedure 1 Remove the screw that shipped with its cable off the computer base. 1 23 4 5 1 connector latch 3 I/O board cable 5 I/O board 2 pull-tab 4 ... from the system board. 3 Peel the I/O board cable from the computer base. 4 Lift the I/O board along with your computer, follow the steps in "After Working Inside Your Computer" on page 9. See "Removing the Keyboard" on page 20. 3 Remove the...
... 30. See "Removing the Base Cover" on page 17. 4 Remove the palm-rest. For additional safety best practices information, see the Regulatory Compliance Homepage at dell.com/regulatory_compliance. Procedure 1 Remove the screw that shipped with its cable off the computer base. 1 23 4 5 1 connector latch 3 I/O board cable 5 I/O board 2 pull-tab 4 ... from the system board. 3 Peel the I/O board cable from the computer base. 4 Lift the I/O board along with your computer, follow the steps in "After Working Inside Your Computer" on page 9. See "Removing the Keyboard" on page 20. 3 Remove the...

Owner's Manual
Page 38
... page 33. 2 Replace the keyboard. See "Replacing the Palm-Rest" on page 19. 3 Replace the base cover. Procedure 1 Use the alignment posts on the computer base to place the I/O board in position. 2 Replace the screw that shipped with your computer and follow the instructions in "After Working Inside Your Computer" on page... the I/O-board-cable connector and press down on page 21. 4 Replace the battery. For additional safety best practices information, see the Regulatory Compliance Homepage at dell.com/regulatory_compliance.
... page 33. 2 Replace the keyboard. See "Replacing the Palm-Rest" on page 19. 3 Replace the base cover. Procedure 1 Use the alignment posts on the computer base to place the I/O board in position. 2 Replace the screw that shipped with your computer and follow the instructions in "After Working Inside Your Computer" on page... the I/O-board-cable connector and press down on page 21. 4 Replace the battery. For additional safety best practices information, see the Regulatory Compliance Homepage at dell.com/regulatory_compliance.
Owner's Manual
Page 39
...Removing the Optical Drive" on page 11. See "Removing the Wireless Mini-Card" on page 24. 7 Remove the keyboard. NOTE: Your computer's Service Tag is stored in "After Working Inside Your Computer" on page 14. 3 Remove the base cover. See "Removing the Base Cover" on page 17... practices information, see the Regulatory Compliance Homepage at dell.com/regulatory_compliance. You must enter the Service Tag in "Before You Begin" on page 9. See "Removing the Keyboard" on page 20. 4 Remove the memory module(s). After working inside your computer, follow the steps in system setup...
...Removing the Optical Drive" on page 11. See "Removing the Wireless Mini-Card" on page 24. 7 Remove the keyboard. NOTE: Your computer's Service Tag is stored in "After Working Inside Your Computer" on page 14. 3 Remove the base cover. See "Removing the Base Cover" on page 17... practices information, see the Regulatory Compliance Homepage at dell.com/regulatory_compliance. You must enter the Service Tag in "Before You Begin" on page 9. See "Removing the Keyboard" on page 20. 4 Remove the memory module(s). After working inside your computer, follow the steps in system setup...

Owner's Manual
Page 45
... from step 3 to step 3 in "Removing the Hard Drive" on page 20. 5 Remove the keyboard. For additional safety best practices information, see the Regulatory Compliance Homepage at dell.com/regulatory_compliance. See "Removing the Base Cover" on page 24. 4 Remove the base cover. See .... Removing the Fan WARNING: Before working inside your computer, read the safety information that shipped with your computer, follow the steps in "Before You Begin" on page 9. After working inside your computer and follow the instructions in "After Working Inside Your Computer" on page 11...
... from step 3 to step 3 in "Removing the Hard Drive" on page 20. 5 Remove the keyboard. For additional safety best practices information, see the Regulatory Compliance Homepage at dell.com/regulatory_compliance. See "Removing the Base Cover" on page 24. 4 Remove the base cover. See .... Removing the Fan WARNING: Before working inside your computer, read the safety information that shipped with your computer, follow the steps in "Before You Begin" on page 9. After working inside your computer and follow the instructions in "After Working Inside Your Computer" on page 11...

Owner's Manual
Page 47
... the Battery" on page 33. 3 Replace the keyboard. Postrequisites 1 Follow the instructions from step 3 to step 5 in "Replacing the Hard Drive" on page 19. 4 Replace the base cover. For additional safety best practices information, see the Regulatory Compliance Homepage at dell.com/regulatory_compliance. See "Replacing the Palm-Rest" on.... 2 Connect the fan cable to step 10 in "Replacing the System Board" on page 43. 2 Replace the palm-rest. After working inside your computer and follow the instructions in "After Working Inside Your Computer" on page 11. Replacing the Fan | 47
... the Battery" on page 33. 3 Replace the keyboard. Postrequisites 1 Follow the instructions from step 3 to step 5 in "Replacing the Hard Drive" on page 19. 4 Replace the base cover. For additional safety best practices information, see the Regulatory Compliance Homepage at dell.com/regulatory_compliance. See "Replacing the Palm-Rest" on.... 2 Connect the fan cable to step 10 in "Replacing the System Board" on page 43. 2 Replace the palm-rest. After working inside your computer and follow the instructions in "After Working Inside Your Computer" on page 11. Replacing the Fan | 47


