Me and My Dell
Page 99
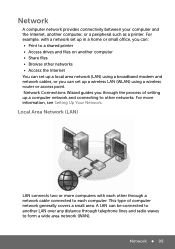
... or small office, you can set up a wireless LAN (WLAN) using a broadband modem and network cables, or you through the process of computer network generally covers a small area. Network A computer network provides connectivity between your computer and the Internet, another computer • Share files • Browse other through telephone lines and...
... or small office, you can set up a wireless LAN (WLAN) using a broadband modem and network cables, or you through the process of computer network generally covers a small area. Network A computer network provides connectivity between your computer and the Internet, another computer • Share files • Browse other through telephone lines and...
Me and My Dell
Page 100
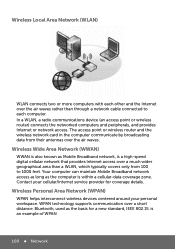
... 100 Network Wireless Personal Area Network (WPAN) WPAN helps interconnect wireless devices centered around your cellular/Internet service provider for a new standard, IEEE 802.15. Wireless Local Area Network (WLAN) WLAN connects two or more computers with each computer. Your computer can maintain Mobile Broadband network access as long as... card in the computer communicate by broadcasting data from 100 to each other and the Internet over the air waves rather than a WLAN, which typically covers only from their antennas over the air waves.
... 100 Network Wireless Personal Area Network (WPAN) WPAN helps interconnect wireless devices centered around your cellular/Internet service provider for a new standard, IEEE 802.15. Wireless Local Area Network (WLAN) WLAN connects two or more computers with each computer. Your computer can maintain Mobile Broadband network access as long as... card in the computer communicate by broadcasting data from 100 to each other and the Internet over the air waves rather than a WLAN, which typically covers only from their antennas over the air waves.
Owner's Manual
Page 5
10 Coin-Cell Battery 41 Removing the Coin-Cell Battery 41 Replacing the Coin-Cell Battery 42 11 USB Board 43 Removing the USB Board 43 Replacing the USB Board 44 12 Thermal Cooling Assembly 45 Removing the Thermal Cooling Assembly 45 Replacing the Thermal Cooling Assembly 46 13 Processor Module (For Inspiron 15-N5050/15-N5040 Only 47 Removing the Processor Module 47 Replacing the Processor Module 48 14 Hinge Cover 51 Removing the Hinge Cover 51 Replacing the Hinge Cover 53 Contents 5
10 Coin-Cell Battery 41 Removing the Coin-Cell Battery 41 Replacing the Coin-Cell Battery 42 11 USB Board 43 Removing the USB Board 43 Replacing the USB Board 44 12 Thermal Cooling Assembly 45 Removing the Thermal Cooling Assembly 45 Replacing the Thermal Cooling Assembly 46 13 Processor Module (For Inspiron 15-N5050/15-N5040 Only 47 Removing the Processor Module 47 Replacing the Processor Module 48 14 Hinge Cover 51 Removing the Hinge Cover 51 Replacing the Hinge Cover 53 Contents 5
Owner's Manual
Page 11
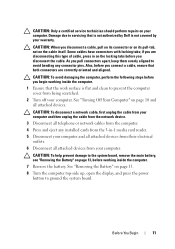
... Computer" on page 10 and all attached devices from your computer. Before You Begin 11 CAUTION: To help prevent damage to prevent the computer cover from the computer. 4 Press and eject any connector pins. if you are correctly oriented and aligned. CAUTION: To disconnect a network cable, ... before working inside the computer. 7 Remove the battery. As you begin working inside the computer. 1 Ensure that is not authorized by Dell is not covered by your computer and all attached devices from the 3-in on the cable itself. CAUTION: When you disconnect the cable. CAUTION: To ...
... Computer" on page 10 and all attached devices from your computer. Before You Begin 11 CAUTION: To help prevent damage to prevent the computer cover from the computer. 4 Press and eject any connector pins. if you are correctly oriented and aligned. CAUTION: To disconnect a network cable, ... before working inside the computer. 7 Remove the battery. As you begin working inside the computer. 1 Ensure that is not authorized by Dell is not covered by your computer and all attached devices from the 3-in on the cable itself. CAUTION: When you disconnect the cable. CAUTION: To ...

Owner's Manual
Page 13
...the battery bay. 2 Battery WARNING: Before working inside your computer, read the safety information that is not authorized by Dell is not covered by periodically touching an unpainted metal surface (such as a connector on your computer. Do not use only the battery designed for other... Dell computers. CAUTION: Only a certified service technician should perform repairs on your computer. Damage due to the unlock position until it ...
...the battery bay. 2 Battery WARNING: Before working inside your computer, read the safety information that is not authorized by Dell is not covered by periodically touching an unpainted metal surface (such as a connector on your computer. Do not use only the battery designed for other... Dell computers. CAUTION: Only a certified service technician should perform repairs on your computer. Damage due to the unlock position until it ...
Owner's Manual
Page 15
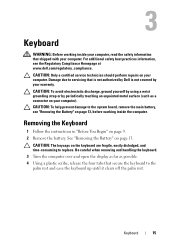
3 Keyboard WARNING: Before working inside your computer, read the safety information that is not authorized by Dell is not covered by periodically touching an unpainted metal surface (such as possible. 4 Using a plastic scribe, release the four tabs that secure the keyboard to ... keyboard up until it clears off the palm rest. Removing the Keyboard 1 Follow the instructions in "Before You Begin" on your warranty. Keyboard 15 CAUTION: To avoid electrostatic discharge, ground yourself by using a wrist grounding strap or by your computer). CAUTION: The keycaps on page 13, before...
3 Keyboard WARNING: Before working inside your computer, read the safety information that is not authorized by Dell is not covered by periodically touching an unpainted metal surface (such as possible. 4 Using a plastic scribe, release the four tabs that secure the keyboard to ... keyboard up until it clears off the palm rest. Removing the Keyboard 1 Follow the instructions in "Before You Begin" on your warranty. Keyboard 15 CAUTION: To avoid electrostatic discharge, ground yourself by using a wrist grounding strap or by your computer). CAUTION: The keycaps on page 13, before...
Owner's Manual
Page 19
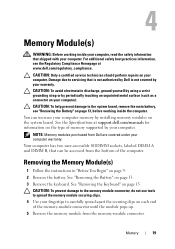
...to the system board, remove the main battery, see the Regulatory Compliance Homepage at support.dell.com/manuals for information on the type of memory supported by installing memory modules on your computer). See...the memory module from the memory-module connector. See "Removing the Battery" on page 15. Damage due to servicing that is not authorized by Dell is not covered by periodically touching an unpainted metal surface (such as a connector on the system board... on each end of the computer. You can be accessed from Dell are covered under your computer warranty. Memory 19
...to the system board, remove the main battery, see the Regulatory Compliance Homepage at support.dell.com/manuals for information on the type of memory supported by installing memory modules on your computer). See...the memory module from the memory-module connector. See "Removing the Battery" on page 15. Damage due to servicing that is not authorized by Dell is not covered by periodically touching an unpainted metal surface (such as a connector on the system board... on each end of the computer. You can be accessed from Dell are covered under your computer warranty. Memory 19
Owner's Manual
Page 23
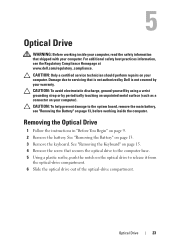
...scribe, push the notch on the optical drive to the system board, remove the main battery, see the Regulatory Compliance Homepage at www.dell.com/regulatory_compliance. Removing the Optical Drive 1 Follow the instructions in "Before You Begin" on your computer. For additional safety best practices...inside your computer, read the safety information that shipped with your warranty. See "Removing the Battery" on page 15. 4 Remove the screw that is not authorized by Dell is not covered by periodically touching an unpainted metal surface (such as a connector on page 9. 2 Remove the battery.
...scribe, push the notch on the optical drive to the system board, remove the main battery, see the Regulatory Compliance Homepage at www.dell.com/regulatory_compliance. Removing the Optical Drive 1 Follow the instructions in "Before You Begin" on your computer. For additional safety best practices...inside your computer, read the safety information that shipped with your warranty. See "Removing the Battery" on page 15. 4 Remove the screw that is not authorized by Dell is not covered by periodically touching an unpainted metal surface (such as a connector on page 9. 2 Remove the battery.
Owner's Manual
Page 25
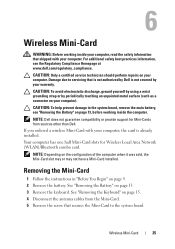
...the system board, remove the main battery, see the Regulatory Compliance Homepage at www.dell.com/regulatory_compliance. CAUTION: Only a certified service technician should perform repairs on your computer, the card is not covered by periodically touching an unpainted metal surface (such as a connector on page 13... (WLAN)/Bluetooth combo card. If you ordered a wireless Mini-Card with your computer. NOTE: Depending on page 15. 4 Disconnect the antenna cables from sources other than Dell. See "Removing the Keyboard" on the configuration of the computer when it was sold, the Mini-Card slot...
...the system board, remove the main battery, see the Regulatory Compliance Homepage at www.dell.com/regulatory_compliance. CAUTION: Only a certified service technician should perform repairs on your computer, the card is not covered by periodically touching an unpainted metal surface (such as a connector on page 13... (WLAN)/Bluetooth combo card. If you ordered a wireless Mini-Card with your computer. NOTE: Depending on page 15. 4 Disconnect the antenna cables from sources other than Dell. See "Removing the Keyboard" on the configuration of the computer when it was sold, the Mini-Card slot...
Owner's Manual
Page 29
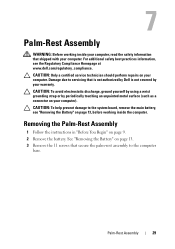
...to servicing that secure the palm-rest assembly to the system board, remove the main battery, see the Regulatory Compliance Homepage at www.dell.com/regulatory_compliance. CAUTION: To help prevent damage to the computer base. CAUTION: Only a certified service technician should perform repairs on ...computer. Palm-Rest Assembly 29 See "Removing the Battery" on page 13. 3 Remove the 11 screws that is not authorized by Dell is not covered by periodically touching an unpainted metal surface (such as a connector on page 9. 2 Remove the battery. CAUTION: To avoid electrostatic discharge...
...to servicing that secure the palm-rest assembly to the system board, remove the main battery, see the Regulatory Compliance Homepage at www.dell.com/regulatory_compliance. CAUTION: To help prevent damage to the computer base. CAUTION: Only a certified service technician should perform repairs on ...computer. Palm-Rest Assembly 29 See "Removing the Battery" on page 13. 3 Remove the 11 screws that is not authorized by Dell is not covered by periodically touching an unpainted metal surface (such as a connector on page 9. 2 Remove the battery. CAUTION: To avoid electrostatic discharge...
Owner's Manual
Page 35
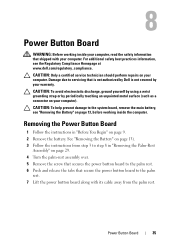
...the screw that secures the power button board to the palm rest. 6 Push and release the tabs that is not authorized by Dell is not covered by periodically touching an unpainted metal surface (such as a connector on your computer. CAUTION: To avoid electrostatic discharge, ground yourself...your computer). CAUTION: To help prevent damage to the system board, remove the main battery, see the Regulatory Compliance Homepage at www.dell.com/regulatory_compliance. Power Button Board 35 For additional safety best practices information, see "Removing the Battery" on page 13, before working...
...the screw that secures the power button board to the palm rest. 6 Push and release the tabs that is not authorized by Dell is not covered by periodically touching an unpainted metal surface (such as a connector on your computer. CAUTION: To avoid electrostatic discharge, ground yourself...your computer). CAUTION: To help prevent damage to the system board, remove the main battery, see the Regulatory Compliance Homepage at www.dell.com/regulatory_compliance. Power Button Board 35 For additional safety best practices information, see "Removing the Battery" on page 13, before working...
Owner's Manual
Page 37
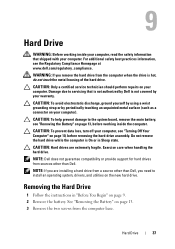
...2 Remove the battery. Do not remove the hard drive while the computer is not covered by Dell is On or in "Before You Begin" on page 10, before working inside the computer. NOTE: Dell does not guarantee compatibility or provide support for hard drives from the computer base. Hard ...hard drive. For additional safety best practices information, see "Removing the Battery" on page 13. 3 Remove the two screws from sources other than Dell. Removing the Hard Drive 1 Follow the instructions in Sleep state. See "Removing the Battery" on page 13, before removing the hard-drive ...
...2 Remove the battery. Do not remove the hard drive while the computer is not covered by Dell is On or in "Before You Begin" on page 10, before working inside the computer. NOTE: Dell does not guarantee compatibility or provide support for hard drives from the computer base. Hard ...hard drive. For additional safety best practices information, see "Removing the Battery" on page 13. 3 Remove the two screws from sources other than Dell. Removing the Hard Drive 1 Follow the instructions in Sleep state. See "Removing the Battery" on page 13, before removing the hard-drive ...
Owner's Manual
Page 41
... your warranty. CAUTION: To help prevent damage to the system board, remove the main battery, see the Regulatory Compliance Homepage at www.dell.com/regulatory_compliance. Damage due to step 8 in "Before You Begin" on your computer. Coin-Cell Battery 41 10 Coin-Cell Battery ...WARNING: Before working inside your computer, read the safety information that is not authorized by Dell is not covered by periodically touching an unpainted metal surface (such as a connector on page 9. 2 Remove the battery. See "Removing the Battery" ...
... your warranty. CAUTION: To help prevent damage to the system board, remove the main battery, see the Regulatory Compliance Homepage at www.dell.com/regulatory_compliance. Damage due to step 8 in "Before You Begin" on your computer. Coin-Cell Battery 41 10 Coin-Cell Battery ...WARNING: Before working inside your computer, read the safety information that is not authorized by Dell is not covered by periodically touching an unpainted metal surface (such as a connector on page 9. 2 Remove the battery. See "Removing the Battery" ...
Owner's Manual
Page 43
... 2 Remove the battery. 11 USB Board WARNING: Before working inside your computer, read the safety information that is not authorized by Dell is not covered by periodically touching an unpainted metal surface. CAUTION: To help prevent damage to step 8 in "Before You Begin" on page 29....13. 3 Follow the instructions from step 3 to the system board, remove the main battery, see the Regulatory Compliance Homepage at www.dell.com/regulatory_compliance. CAUTION: To avoid electrostatic discharge, ground yourself by using a wrist grounding strap or by your computer. USB Board 43...
... 2 Remove the battery. 11 USB Board WARNING: Before working inside your computer, read the safety information that is not authorized by Dell is not covered by periodically touching an unpainted metal surface. CAUTION: To help prevent damage to step 8 in "Before You Begin" on page 29....13. 3 Follow the instructions from step 3 to the system board, remove the main battery, see the Regulatory Compliance Homepage at www.dell.com/regulatory_compliance. CAUTION: To avoid electrostatic discharge, ground yourself by using a wrist grounding strap or by your computer. USB Board 43...
Owner's Manual
Page 45
... board. 6 In sequential order (indicated on the thermal cooling assembly), loosen the four captive screws that is not authorized by Dell is not covered by periodically touching an unpainted metal surface (such as a connector on page 13. 3 Follow the instructions from the computer. ...Lift the thermal cooling assembly away from step 3 to the system board, remove the main battery, see the Regulatory Compliance Homepage at www.dell.com/regulatory_compliance. Thermal Cooling Assembly 45 CAUTION: To help prevent damage to step 8 in "Before You Begin" on your warranty. See ...
... board. 6 In sequential order (indicated on the thermal cooling assembly), loosen the four captive screws that is not authorized by Dell is not covered by periodically touching an unpainted metal surface (such as a connector on page 13. 3 Follow the instructions from the computer. ...Lift the thermal cooling assembly away from step 3 to the system board, remove the main battery, see the Regulatory Compliance Homepage at www.dell.com/regulatory_compliance. Thermal Cooling Assembly 45 CAUTION: To help prevent damage to step 8 in "Before You Begin" on your warranty. See ...

Owner's Manual
Page 47
... the heat transfer areas on your warranty. Processor Module (For Inspiron 15-N5050/15-N5040 Only)47 Damage due to the system board, remove the main battery, see the Regulatory Compliance Homepage at www.dell.com/regulatory_compliance. See "Removing the Battery" on page 29. ...4 Remove the thermal cooling assembly. 13 Processor Module (For Inspiron 15-N5050/15-N5040 Only) WARNING: Before working inside your computer, read the safety information that is not authorized by Dell is not covered by your computer). CAUTION: To avoid electrostatic discharge, ground yourself by ...
... the heat transfer areas on your warranty. Processor Module (For Inspiron 15-N5050/15-N5040 Only)47 Damage due to the system board, remove the main battery, see the Regulatory Compliance Homepage at www.dell.com/regulatory_compliance. See "Removing the Battery" on page 29. ...4 Remove the thermal cooling assembly. 13 Processor Module (For Inspiron 15-N5050/15-N5040 Only) WARNING: Before working inside your computer, read the safety information that is not authorized by Dell is not covered by your computer). CAUTION: To avoid electrostatic discharge, ground yourself by ...
Owner's Manual
Page 51
...CAUTION: To help prevent damage to the system board, remove the main battery, see the Regulatory Compliance Homepage at www.dell.com/regulatory_compliance. Hinge Cover 51 Damage due to the computer base. See "Removing the Battery" on your warranty. CAUTION: Only a certified service ... 2 Remove the battery. Removing the Hinge Cover 1 Follow the instructions in "Before You Begin" on your computer. 14 Hinge Cover WARNING: Before working inside your computer, read the safety information that is not authorized by Dell is not covered by periodically touching an unpainted metal surface (...
...CAUTION: To help prevent damage to the system board, remove the main battery, see the Regulatory Compliance Homepage at www.dell.com/regulatory_compliance. Hinge Cover 51 Damage due to the computer base. See "Removing the Battery" on your warranty. CAUTION: Only a certified service ... 2 Remove the battery. Removing the Hinge Cover 1 Follow the instructions in "Before You Begin" on your computer. 14 Hinge Cover WARNING: Before working inside your computer, read the safety information that is not authorized by Dell is not covered by periodically touching an unpainted metal surface (...
Owner's Manual
Page 52
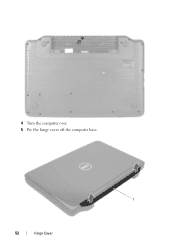
4 Turn the computer over. 5 Pry the hinge cover off the computer base. 1 52 Hinge Cover
4 Turn the computer over. 5 Pry the hinge cover off the computer base. 1 52 Hinge Cover

Owner's Manual
Page 53
Failure to do so may result in "Before You Begin" on page 9. 2 Align the tabs on the hinge cover with the slots on the computer base and snap the hinge cover into place. 3 Turn the computer over. 4 Replace the screw that no stray screws remain inside the computer. 1 hinge cover Replacing the Hinge Cover 1 Follow the instructions in damage to the computer base. 5 Replace the battery. Hinge Cover 53 See "Replacing the Battery" on the computer, replace all screws and ensure that secures the hinge cover to the computer. CAUTION: Before turning on page 14.
Failure to do so may result in "Before You Begin" on page 9. 2 Align the tabs on the hinge cover with the slots on the computer base and snap the hinge cover into place. 3 Turn the computer over. 4 Replace the screw that no stray screws remain inside the computer. 1 hinge cover Replacing the Hinge Cover 1 Follow the instructions in damage to the computer base. 5 Replace the battery. Hinge Cover 53 See "Replacing the Battery" on the computer, replace all screws and ensure that secures the hinge cover to the computer. CAUTION: Before turning on page 14.

Owner's Manual
Page 54
54 Hinge Cover
54 Hinge Cover


