Service Manual
Page 7
Removing the power-adapter port 72 Prerequisites...72 Procedure...72 Replacing the power-adapter port 74 Procedure...74 Post-requisites 74 Removing the system board 75 Prerequisites...75 Procedure...75 Replacing the system board 79 Procedure...79 Post-requisites 79 Entering the Service Tag in the BIOS setup program 80 Removing the palm rest and keyboard assembly 81 Prerequisites...81 Procedure...81 Replacing the palm rest and keyboard assembly 83 Procedure...
Removing the power-adapter port 72 Prerequisites...72 Procedure...72 Replacing the power-adapter port 74 Procedure...74 Post-requisites 74 Removing the system board 75 Prerequisites...75 Procedure...75 Replacing the system board 79 Procedure...79 Post-requisites 79 Entering the Service Tag in the BIOS setup program 80 Removing the palm rest and keyboard assembly 81 Prerequisites...81 Procedure...81 Replacing the palm rest and keyboard assembly 83 Procedure...
Service Manual
Page 9
Flashing the BIOS 100 Technology and components 101 Audio...101 Downloading the audio driver 101 Identifying the audio controller 101 Changing the audio settings 102 Camera...102 Identifying the webcam in device manager 102 Starting the camera application 102 Getting the Dell Webcam Central 103 Display...104 Adjusting the brightness 104 Changing the screen resolution 104 Rotating the display 105 Cleaning the display 106 HDMI...106 Connecting to external display devices 106 Graphics...108 Downloading the graphics driver 108 Identifying the display adapter 108 Changing the display...
Flashing the BIOS 100 Technology and components 101 Audio...101 Downloading the audio driver 101 Identifying the audio controller 101 Changing the audio settings 102 Camera...102 Identifying the webcam in device manager 102 Starting the camera application 102 Getting the Dell Webcam Central 103 Display...104 Adjusting the brightness 104 Changing the screen resolution 104 Rotating the display 105 Cleaning the display 106 HDMI...106 Connecting to external display devices 106 Graphics...108 Downloading the graphics driver 108 Identifying the display adapter 108 Changing the display...
Service Manual
Page 27
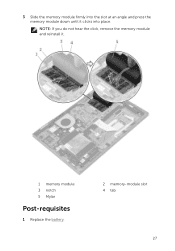
3 Slide the memory module firmly into place. NOTE: If you do not hear the click, remove the memory module and reinstall it clicks into the slot at an angle and press the memory module down until it . 1 memory module 3 notch 5 Mylar Post-requisites 1 Replace the battery. 2 memory-module slot 4 tab 27
3 Slide the memory module firmly into place. NOTE: If you do not hear the click, remove the memory module and reinstall it clicks into the slot at an angle and press the memory module down until it . 1 memory module 3 notch 5 Mylar Post-requisites 1 Replace the battery. 2 memory-module slot 4 tab 27
Service Manual
Page 33
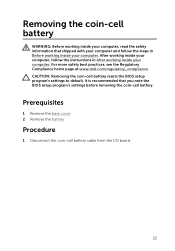
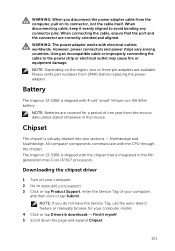
... battery resets the BIOS setup program's settings to default. Removing the coin-cell battery WARNING: Before working inside your computer, read the safety information that you note the BIOS setup program's settings before removing the coin-cell battery. Prerequisites 1 Remove the base cover. 2 Remove the battery. For more safety best practices, see the Regulatory Compliance home page at www.dell.com/regulatory_compliance. Procedure 1 Disconnect the coin-cell battery cable from the I/O board...
... battery resets the BIOS setup program's settings to default. Removing the coin-cell battery WARNING: Before working inside your computer, read the safety information that you note the BIOS setup program's settings before removing the coin-cell battery. Prerequisites 1 Remove the base cover. 2 Remove the battery. For more safety best practices, see the Regulatory Compliance home page at www.dell.com/regulatory_compliance. Procedure 1 Disconnect the coin-cell battery cable from the I/O board...
Service Manual
Page 75
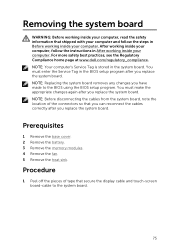
... must make the appropriate changes again after you replace the system board. Prerequisites 1 Remove the base cover. 2 Remove the battery. 3 Remove the memory modules. 4 Remove the fan. 5 Remove the heat sink. For more safety best practices, see the Regulatory Compliance home page at www.dell.com/regulatory_compliance. NOTE: Before disconnecting the cables from the system board, note the location of tape that secure the display cable and touch-screen board-cable to the BIOS using the BIOS setup...
... must make the appropriate changes again after you replace the system board. Prerequisites 1 Remove the base cover. 2 Remove the battery. 3 Remove the memory modules. 4 Remove the fan. 5 Remove the heat sink. For more safety best practices, see the Regulatory Compliance home page at www.dell.com/regulatory_compliance. NOTE: Before disconnecting the cables from the system board, note the location of tape that secure the display cable and touch-screen board-cable to the BIOS using the BIOS setup...

Service Manual
Page 81
Prerequisites 1 Remove the base cover. 2 Remove the battery. 3 Remove the memory modules. 4 Remove the coin-cell battery. 5 Remove the hard drive. 6 Remove the wireless card. 7 Remove the keyboard daughter-board. 8 Remove the touch pad. 9 Remove the fan. 10 Remove the heat sink. 11 Remove the I/O board. 12 Remove the power and volume-buttons board. 13 Remove the status-light board. 14 Remove the speakers. 15 Remove the display assembly. 16 Remove the power-adapter port. 17 Remove the system board. After working inside your computer, follow the steps in Before working inside your computer....
Prerequisites 1 Remove the base cover. 2 Remove the battery. 3 Remove the memory modules. 4 Remove the coin-cell battery. 5 Remove the hard drive. 6 Remove the wireless card. 7 Remove the keyboard daughter-board. 8 Remove the touch pad. 9 Remove the fan. 10 Remove the heat sink. 11 Remove the I/O board. 12 Remove the power and volume-buttons board. 13 Remove the status-light board. 14 Remove the speakers. 15 Remove the display assembly. 16 Remove the power-adapter port. 17 Remove the system board. After working inside your computer, follow the steps in Before working inside your computer....
Service Manual
Page 101
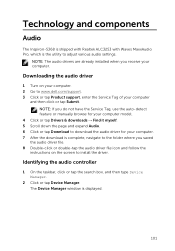
... audio driver file icon and follow the instructions on your computer. 2 Go to install the driver. Downloading the audio driver 1 Turn on the screen to www.dell.com/support. 3 Click or tap Product support, enter the Service Tag of your computer. NOTE: If you do not have the Service Tag, use the auto-detect feature or manually browse for your computer model. 4 Click or tap Drivers & downloads → Find it myself. 5 Scroll...
... audio driver file icon and follow the instructions on your computer. 2 Go to install the driver. Downloading the audio driver 1 Turn on the screen to www.dell.com/support. 3 Click or tap Product support, enter the Service Tag of your computer. NOTE: If you do not have the Service Tag, use the auto-detect feature or manually browse for your computer model. 4 Click or tap Drivers & downloads → Find it myself. 5 Scroll...
Service Manual
Page 106
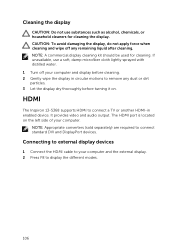
NOTE: A commercial display cleaning kit should be used for cleaning the display. It provides video and audio output. NOTE: Appropriate converters (sold separately) are required to display the different modes. 106 Connecting to external display devices 1 Connect the HDMI cable to remove any remaining liquid after cleaning. HDMI The Inspiron 13-5368 supports HDMI to connect a TV or another HDMI-in circular motions to your computer and display before turning it on the left side of...
NOTE: A commercial display cleaning kit should be used for cleaning the display. It provides video and audio output. NOTE: Appropriate converters (sold separately) are required to display the different modes. 106 Connecting to external display devices 1 Connect the HDMI cable to remove any remaining liquid after cleaning. HDMI The Inspiron 13-5368 supports HDMI to connect a TV or another HDMI-in circular motions to your computer and display before turning it on the left side of...
Service Manual
Page 108
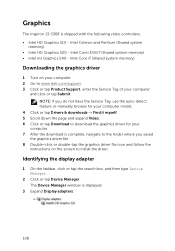
... and follow the instructions on your computer. 2 Go to install the driver. Identifying the display adapter 1 On the taskbar, click or tap the search box, and then type Device Manager. 2 Click or tap Device Manager. Graphics The Inspiron 13-5368 is displayed. 3 Expand Display adapters. 108 Intel Core i7 (Shared system memory) Downloading the graphics driver 1 Turn on the screen to www.dell.com/support. 3 Click or tap Product Support, enter the Service Tag of your...
... and follow the instructions on your computer. 2 Go to install the driver. Identifying the display adapter 1 On the taskbar, click or tap the search box, and then type Device Manager. 2 Click or tap Device Manager. Graphics The Inspiron 13-5368 is displayed. 3 Expand Display adapters. 108 Intel Core i7 (Shared system memory) Downloading the graphics driver 1 Turn on the screen to www.dell.com/support. 3 Click or tap Product Support, enter the Service Tag of your...
Service Manual
Page 110
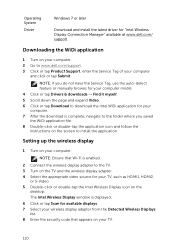
... the instructions on the screen to install the application. The Intel Wireless Display window is displayed. 6 Click or tap Scan for available displays. 7 Select your wireless display adapter from the Detected Wireless Displays list. 8 Enter the security code that Wi-Fi is complete, navigate to the folder where you do not have the Service Tag, use the auto-detect feature or manually browse for your computer model. 4 Click or tap Drivers & downloads...
... the instructions on the screen to install the application. The Intel Wireless Display window is displayed. 6 Click or tap Scan for available displays. 7 Select your wireless display adapter from the Detected Wireless Displays list. 8 Enter the security code that Wi-Fi is complete, navigate to the folder where you do not have the Service Tag, use the auto-detect feature or manually browse for your computer model. 4 Click or tap Drivers & downloads...
Service Manual
Page 111
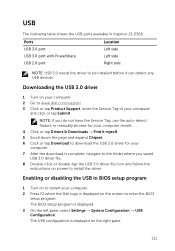
... instructions on the right pane. 111 NOTE: If you do not have the Service Tag, use the auto-detect feature or manually browse for your computer model. 4 Click or tap Drivers & Downloads → Find it can detect any USB devices. The USB configuration is displayed. 3 On the left pane, select Settings → System Configuration → USB Configuration. The BIOS setup program is displayed on screen to be installed before it myself. 5 Scroll...
... instructions on the right pane. 111 NOTE: If you do not have the Service Tag, use the auto-detect feature or manually browse for your computer model. 4 Click or tap Drivers & Downloads → Find it can detect any USB devices. The USB configuration is displayed. 3 On the left pane, select Settings → System Configuration → USB Configuration. The BIOS setup program is displayed on screen to be installed before it myself. 5 Scroll...
Service Manual
Page 112
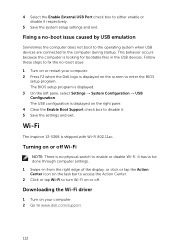
.... 4 Clear the Enable Boot Support check box to disable it respectively. 5 Save the system setup settings and exit. It has to be done through computer settings. 1 Swipe-in the USB devices. Wi-Fi The Inspiron 13-5368 is no -boot issue caused by USB emulation Sometimes the computer does not boot to the operating system when USB devices are connected to the computer during startup. Fixing a no physical switch to enable or disable Wi-Fi. Turning...
.... 4 Clear the Enable Boot Support check box to disable it respectively. 5 Save the system setup settings and exit. It has to be done through computer settings. 1 Swipe-in the USB devices. Wi-Fi The Inspiron 13-5368 is no -boot issue caused by USB emulation Sometimes the computer does not boot to the operating system when USB devices are connected to the computer during startup. Fixing a no physical switch to enable or disable Wi-Fi. Turning...
Service Manual
Page 113
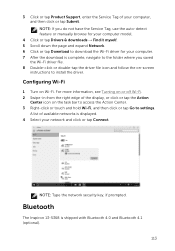
... to install the driver. 3 Click or tap Product Support, enter the Service Tag of available networks is displayed. 4 Select your network and click or tap Connect. Bluetooth The Inspiron 13-5368 is complete, navigate to the folder where you saved the Wi-Fi driver file. 8 Double-click or double-tap the driver file icon and follow the on-screen instructions to settings. A list of your computer. 7 After the download is...
... to install the driver. 3 Click or tap Product Support, enter the Service Tag of available networks is displayed. 4 Select your network and click or tap Connect. Bluetooth The Inspiron 13-5368 is complete, navigate to the folder where you saved the Wi-Fi driver file. 8 Double-click or double-tap the driver file icon and follow the on-screen instructions to settings. A list of your computer. 7 After the download is...
Service Manual
Page 116
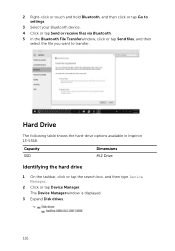
... via Bluetooth. 5 In the Bluetooth File Transferwindow, click or tap Send files, and then select the file you want to transfer. Hard Drive The following table shows the hard-drive options available in Inspiron 13-5368. The Device Managerwindow is displayed. 3 Expand Disk drives. 116 Capacity SSD Dimensions M.2 Drive Identifying the hard drive 1 On the taskbar, click or tap the search box, and then type Device Manager. 2 Click or tap Device Manager.
... via Bluetooth. 5 In the Bluetooth File Transferwindow, click or tap Send files, and then select the file you want to transfer. Hard Drive The following table shows the hard-drive options available in Inspiron 13-5368. The Device Managerwindow is displayed. 3 Expand Disk drives. 116 Capacity SSD Dimensions M.2 Drive Identifying the hard drive 1 On the taskbar, click or tap the search box, and then type Device Manager. 2 Click or tap Device Manager.
Service Manual
Page 117
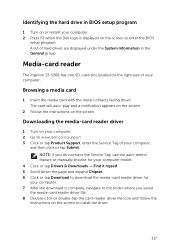
... of hard drives are displayed under the System Information in BIOS setup program 1 Turn on or restart your computer. 2 Press F2 when the Dell logo is complete, navigate to the folder where you do not have the Service Tag, use the auto-detect feature or manually browse for your computer. 7 After the download is displayed on the screen to download the media-card reader driver for your computer model...
... of hard drives are displayed under the System Information in BIOS setup program 1 Turn on or restart your computer. 2 Press F2 when the Dell logo is complete, navigate to the folder where you do not have the Service Tag, use the auto-detect feature or manually browse for your computer. 7 After the download is displayed on the screen to download the media-card reader driver for your computer model...
Service Manual
Page 118
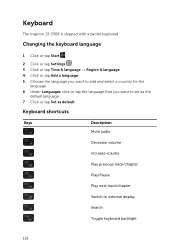
Keyboard shortcuts Keys Description Mute audio Decrease volume Increase volume Play previous track/chapter Play/Pause Play next track/chapter Switch to set as the default language. 7 Click or tap Set as default. Keyboard The Inspiron 13-5368 is shipped with a backlit keyboard. Changing the keyboard language 1 Click or tap Start . 2 Click or tap Settings . 3 Click or tap Time & language → Region & language. 4 Click or tap Add a language. 5 Choose the...
Keyboard shortcuts Keys Description Mute audio Decrease volume Increase volume Play previous track/chapter Play/Pause Play next track/chapter Switch to set as the default language. 7 Click or tap Set as default. Keyboard The Inspiron 13-5368 is shipped with a backlit keyboard. Changing the keyboard language 1 Click or tap Start . 2 Click or tap Settings . 3 Click or tap Time & language → Region & language. 4 Click or tap Add a language. 5 Choose the...
Service Manual
Page 121
... your computer model. 4 Click or tap Drivers & downloads → Find it evenly aligned to the power strip or electrical outlet may cause fire or equipment damage. Please verify part numbers from SPMD before replacing the power adapter. NOTE: Batteries are correctly oriented and aligned. The Inspiron 13-5368 is shipped with 4-cell "smart" lithium-ion (56 WHr) battery. Using an incompatible cable or improperly connecting the cable to...
... your computer model. 4 Click or tap Drivers & downloads → Find it evenly aligned to the power strip or electrical outlet may cause fire or equipment damage. Please verify part numbers from SPMD before replacing the power adapter. NOTE: Batteries are correctly oriented and aligned. The Inspiron 13-5368 is shipped with 4-cell "smart" lithium-ion (56 WHr) battery. Using an incompatible cable or improperly connecting the cable to...
Service Manual
Page 123
... system memory in BIOS setup program 1 Turn on the screen to highlight the Diagnostics menu option and press Enter. 4 Follow the instructions on the right pane. Turn off your computer. 2 Press F2 when the Dell logo is displayed on the screen to access the boot menu. 3 Use the arrow keys to enter the BIOS setup program. 3 On the left pane, select Settings → General → System Information. Processors The Inspiron 13-5368 is displayed on the screen...
... system memory in BIOS setup program 1 Turn on the screen to highlight the Diagnostics menu option and press Enter. 4 Follow the instructions on the right pane. Turn off your computer. 2 Press F2 when the Dell logo is displayed on the screen to access the boot menu. 3 Use the arrow keys to enter the BIOS setup program. 3 On the left pane, select Settings → General → System Information. Processors The Inspiron 13-5368 is displayed on the screen...
Service Manual
Page 131
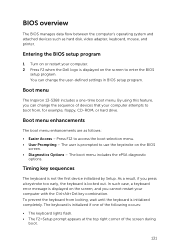
Boot menu enhancements The boot menu enhancements are as hard disk, video adapter, keyboard, mouse, and printer. You can change the user-defined settings in BIOS setup program. Press F12 to boot from locking, wait until the keyboard is displayed on the BIOS screen. • Diagnostics Options - Timing key sequences The keyboard is prompted to use the keystroke on the screen to enter the BIOS setup program. The user is not the first device initialized by Setup. The keyboard is locked out. BIOS overview The BIOS manages data...
Boot menu enhancements The boot menu enhancements are as hard disk, video adapter, keyboard, mouse, and printer. You can change the user-defined settings in BIOS setup program. Press F12 to boot from locking, wait until the keyboard is displayed on the BIOS screen. • Diagnostics Options - Timing key sequences The keyboard is prompted to use the keystroke on the screen to enter the BIOS setup program. The user is not the first device initialized by Setup. The keyboard is locked out. BIOS overview The BIOS manages data...
Service Manual
Page 132
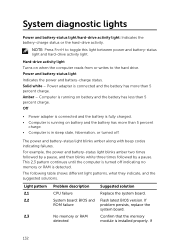
...; Power adapter is connected and the battery is fully charged. • Computer is in sleep state, hibernation, or turned off indicating no memory or RAM is installed properly. Power and battery-status light Indicates the power and battery-charge status. Light pattern 2,1 2,2 2,3 Problem description CPU failure System board: BIOS and ROM failure No memory or RAM detected Suggested solution Replace the system board. If problem persists, replace the system board. If 132 System diagnostic lights Power and battery-status light/hard-drive activity light: Indicates the battery-charge...
...; Power adapter is connected and the battery is fully charged. • Computer is in sleep state, hibernation, or turned off indicating no memory or RAM is installed properly. Power and battery-status light Indicates the power and battery-charge status. Light pattern 2,1 2,2 2,3 Problem description CPU failure System board: BIOS and ROM failure No memory or RAM detected Suggested solution Replace the system board. If problem persists, replace the system board. If 132 System diagnostic lights Power and battery-status light/hard-drive activity light: Indicates the battery-charge...


