
Service Manual
Page 4
... WiFi driver...58 Downloading the chipset driver...59 Downloading the network driver...59 4 System setup...61 System setup...61 BIOS overview...61 Entering BIOS setup program...61 Navigation keys...61 Boot Sequence...61 System setup options...62 System and setup password...67 Assigning a ...system setup password...68 Deleting or changing an existing system setup password 68 Clearing CMOS settings...68 Clearing BIOS (System Setup) and System passwords 69 5 Troubleshooting...71 Enhanced Pre-Boot System Assessment (ePSA) diagnostics 71 Running the ePSA diagnostics...
... WiFi driver...58 Downloading the chipset driver...59 Downloading the network driver...59 4 System setup...61 System setup...61 BIOS overview...61 Entering BIOS setup program...61 Navigation keys...61 Boot Sequence...61 System setup options...62 System and setup password...67 Assigning a ...system setup password...68 Deleting or changing an existing system setup password 68 Clearing CMOS settings...68 Clearing BIOS (System Setup) and System passwords 69 5 Troubleshooting...71 Enhanced Pre-Boot System Assessment (ePSA) diagnostics 71 Running the ePSA diagnostics...

Service Manual
Page 5
Diagnostic error messages...74 System error messages...76 Recovering the operating system...77 Flashing BIOS (USB key)...77 Flashing the BIOS...77 WiFi power cycle...78 Flea power release...78 Enabling Intel Optane memory...78 Disabling Intel Optane memory...79 6 Getting help and contacting Dell 80 Contents 5
Diagnostic error messages...74 System error messages...76 Recovering the operating system...77 Flashing BIOS (USB key)...77 Flashing the BIOS...77 WiFi power cycle...78 Flea power release...78 Enabling Intel Optane memory...78 Disabling Intel Optane memory...79 6 Getting help and contacting Dell 80 Contents 5

Service Manual
Page 35
Place the graphics-card support bracket that you note the BIOS setup program's settings before removing the coin-cell battery. 2. Route the cables through the routing guide on the graphics-card support bracket and connect ...is recommended that connects the graphics card. Install the right-side cover. 2. For more safety best practices, see the Regulatory Compliance home page at www.dell.com/regulatory_compliance. Coin-cell battery Removing the coin-cell battery Prerequisites 1. NOTE: Before working inside your computer. CAUTION: Removing the coin-cell battery resets the...
Place the graphics-card support bracket that you note the BIOS setup program's settings before removing the coin-cell battery. 2. Route the cables through the routing guide on the graphics-card support bracket and connect ...is recommended that connects the graphics card. Install the right-side cover. 2. For more safety best practices, see the Regulatory Compliance home page at www.dell.com/regulatory_compliance. Coin-cell battery Removing the coin-cell battery Prerequisites 1. NOTE: Before working inside your computer. CAUTION: Removing the coin-cell battery resets the...

Service Manual
Page 49
... the system board. Next steps 1. System board Removing the system board Prerequisites 1. NOTE: Your computer's Service Tag is stored in the BIOS setup program after you have made to the system board. 3. NOTE: Replacing the system board removes any changes you replace the system board...Before disconnecting the cables from the system board, note the location of the connectors so that secures the LED daughter board to the BIOS using the BIOS setup program. Follow the procedure in After working inside your computer. Remove the front cover 5. Remove the memory modules. 6. ...
... the system board. Next steps 1. System board Removing the system board Prerequisites 1. NOTE: Your computer's Service Tag is stored in the BIOS setup program after you have made to the system board. 3. NOTE: Replacing the system board removes any changes you replace the system board...Before disconnecting the cables from the system board, note the location of the connectors so that secures the LED daughter board to the BIOS using the BIOS setup program. Follow the procedure in After working inside your computer. Remove the front cover 5. Remove the memory modules. 6. ...

Service Manual
Page 56
... cover. 12. Install the LED daughter board. 2. Install the front cover. 10. You must enter the Service Tag in the BIOS setup program after you have made to the BIOS using the BIOS setup program. Install the coin-cell battery. 5. NOTE: Your computer's Service Tag is stored in After working inside your computer...
... cover. 12. Install the LED daughter board. 2. Install the front cover. 10. You must enter the Service Tag in the BIOS setup program after you have made to the BIOS using the BIOS setup program. Install the coin-cell battery. 5. NOTE: Your computer's Service Tag is stored in After working inside your computer...

Service Manual
Page 61
... 4 System setup NOTE: Depending on the computer and its installed devices, the items listed in this task Turn on Self Test (POST), when the Dell logo appears, you view the main screen. Certain changes can : • Access System Setup by pressing F2 key System setup 61 System setup CAUTION:... Unless you are recorded but do not change BIOS Setup program, it is recommended that you make are an expert computer user, do not take effect until you can make your computer work incorrectly....
... 4 System setup NOTE: Depending on the computer and its installed devices, the items listed in this task Turn on Self Test (POST), when the Dell logo appears, you view the main screen. Certain changes can : • Access System Setup by pressing F2 key System setup 61 System setup CAUTION:... Unless you are recorded but do not change BIOS Setup program, it is recommended that you make are an expert computer user, do not take effect until you can make your computer work incorrectly....

Service Manual
Page 62
System setup options-System information menu General-System Information System Information BIOS Version Displays the BIOS version number. Ownership Tag Displays the ownership tag of the computer. Manufacture Date Displays the manufacture date of the computer. Ownership Date Displays the ownership ...
System setup options-System information menu General-System Information System Information BIOS Version Displays the BIOS version number. Ownership Tag Displays the ownership tag of the computer. Manufacture Date Displays the manufacture date of the computer. Ownership Date Displays the ownership ...

Service Manual
Page 64
... disable booting from USB mass storage devices connected to Low or medium. Front USB Configuration Enable or disable the front USB ports. BIOS Assist enumeration Enable or disable the BIOS Assist enumeration. Watchdog Timer support Enable or disable the watchdog timer support. System setup options-Security menu Security Admin Password Set, change...
... disable booting from USB mass storage devices connected to Low or medium. Front USB Configuration Enable or disable the front USB ports. BIOS Assist enumeration Enable or disable the BIOS Assist enumeration. Watchdog Timer support Enable or disable the watchdog timer support. System setup options-Security menu Security Admin Password Set, change...

Service Manual
Page 65
...Enable or disable the firmware TPM 2.0 function. When enabled, this setting take effect immediately.Default: Disabled Computrace(R) Enable or disable the BIOS module interface of UEFI driver signatures. • Deployed Mode-Default: Enabled • Audit Mode-Default: Disabled Deployed Mode Audit Mode ... prevent users from Absolute Software. Strong Password Enable or disable strong passwords. Password Change Enable or disable changes to skip BIOS PPI user prompts when issuing the Clear command. PTT Security PTT On Enable or disable Platform Trust Technology (PTT) visibility...
...Enable or disable the firmware TPM 2.0 function. When enabled, this setting take effect immediately.Default: Disabled Computrace(R) Enable or disable the BIOS module interface of UEFI driver signatures. • Deployed Mode-Default: Enabled • Audit Mode-Default: Disabled Deployed Mode Audit Mode ... prevent users from Absolute Software. Strong Password Enable or disable strong passwords. Password Change Enable or disable changes to skip BIOS PPI user prompts when issuing the Clear command. PTT Security PTT On Enable or disable Platform Trust Technology (PTT) visibility...

Service Manual
Page 66
... Intel Speedstep Technology. Default: Enabled. Default: Enabled. Default: Enabled. This option can be powered on a preselected date and time. Enables the keyboard error detection. Extend BIOS POST Time Full Screen Logo Warnings and Errors Configure additional pre-boot delay. C-States Control Enable or disable additional processor sleep states. Enable or disable...
... Intel Speedstep Technology. Default: Enabled. Default: Enabled. Default: Enabled. This option can be powered on a preselected date and time. Enables the keyboard error detection. Extend BIOS POST Time Full Screen Logo Warnings and Errors Configure additional pre-boot delay. C-States Control Enable or disable additional processor sleep states. Enable or disable...

Service Manual
Page 67
...(VMM) can create a system password and a setup password to recover from certain corrupted BIOS conditions from all internal storage devices. Dell development configuration Enable or disable Dell development configuration. System and setup password Password type System password Setup password Description Password that .... System and setup password Table 14. Table 11. Asset Tag Create a system Asset Tag. BIOS Downgrade Control flashing of the system firmware to the BIOS settings of security for Dell OS Recovery tool. System setup options-System Logs menu System Logs...
...(VMM) can create a system password and a setup password to recover from certain corrupted BIOS conditions from all internal storage devices. Dell development configuration Enable or disable Dell development configuration. System and setup password Password type System password Setup password Description Password that .... System and setup password Table 14. Table 11. Asset Tag Create a system Asset Tag. BIOS Downgrade Control flashing of the system firmware to the BIOS settings of security for Dell OS Recovery tool. System setup options-System Logs menu System Logs...

Service Manual
Page 68
... System and/or Setup password. Steps 1. The System Security screen is displayed. 2. About this task CAUTION: Clearing CMOS settings will reset the BIOS settings on or reboot. If you change the System and/or Setup password, re-enter the new password when prompted. Select System Password, alter... system setup password Prerequisites Ensure that the Password Status is Unlocked (in the Confirm new password field and click OK. 4. In the System BIOS or System Setup screen, select System Security and press Enter. Press Esc and a message prompts you to delete or change an existing System...
... System and/or Setup password. Steps 1. The System Security screen is displayed. 2. About this task CAUTION: Clearing CMOS settings will reset the BIOS settings on or reboot. If you change the System and/or Setup password, re-enter the new password when prompted. Select System Password, alter... system setup password Prerequisites Ensure that the Password Status is Unlocked (in the Confirm new password field and click OK. 4. In the System BIOS or System Setup screen, select System Security and press Enter. Press Esc and a message prompts you to delete or change an existing System...

Service Manual
Page 69
... and then replace the jumper plug to the CMOS jumper-pins. 4. Steps 1. Install the graphics card. 6. Clearing BIOS (System Setup) and System passwords About this task CAUTION: Clearing CMOS settings will reset the BIOS settings on your computer. Remove the jumper plug from the password jumper-pins (PSWD). 4. Remove the left -side...
... and then replace the jumper plug to the CMOS jumper-pins. 4. Steps 1. Install the graphics card. 6. Clearing BIOS (System Setup) and System passwords About this task CAUTION: Clearing CMOS settings will reset the BIOS settings on your computer. Remove the jumper plug from the password jumper-pins (PSWD). 4. Remove the left -side...

Service Manual
Page 71
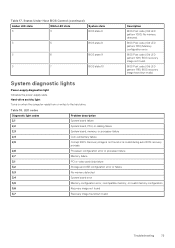
...error codes are listed. 6. 5 Troubleshooting Enhanced Pre-Boot System Assessment (ePSA) diagnostics About this task The ePSA diagnostics (also known as the Dell logo appears. 3. Running the ePSA diagnostics Steps 1. The embedded system diagnostics provides a set of problems encountered during the start in the lower...before the boot process begins. The following table shows different light patterns and what they indicate. The ePSA is embedded with the BIOS and is integrated on your hardware. If the computer passes the POST, the computer continues to the page listing. Click the...
...error codes are listed. 6. 5 Troubleshooting Enhanced Pre-Boot System Assessment (ePSA) diagnostics About this task The ePSA diagnostics (also known as the Dell logo appears. 3. Running the ePSA diagnostics Steps 1. The embedded system diagnostics provides a set of problems encountered during the start in the lower...before the boot process begins. The following table shows different light patterns and what they indicate. The ePSA is embedded with the BIOS and is integrated on your hardware. If the computer passes the POST, the computer continues to the page listing. Click the...

Service Manual
Page 72
... LED state White LED state Off Off Off Blinking Previous State Previous State Blinking Off Steady Off Off Steady Table 16. States Under Host BIOS Control Amber LED state White LED state 2 5 2 6 2 7 3 1 System state S4, S5 Description • Hibernate or ...or processor failure System state BIOS state 1 BIOS state 2 BIOS state 3 BIOS state 4 Description BIOS Post code (Old LED pattern 0001) Corrupt BIOS BIOS Post code (Old LED pattern 0010) Processor configuration error or processor failure BIOS Post code (Old LED pattern 0011) Memory failure BIOS Post code (Old LED ...
... LED state White LED state Off Off Off Blinking Previous State Previous State Blinking Off Steady Off Off Steady Table 16. States Under Host BIOS Control Amber LED state White LED state 2 5 2 6 2 7 3 1 System state S4, S5 Description • Hibernate or ...or processor failure System state BIOS state 1 BIOS state 2 BIOS state 3 BIOS state 4 Description BIOS Post code (Old LED pattern 0001) Corrupt BIOS BIOS Post code (Old LED pattern 0010) Processor configuration error or processor failure BIOS Post code (Old LED pattern 0011) Memory failure BIOS Post code (Old LED ...
Service Manual
Page 73
... Diagnostic light codes 2,1 2,2 2,3 2,4 2,5 2,6 2,7 3,1 3,2 3,3 3,4 3,5 3,6 3,7 Problem description System board failure System board, PSU, or cabling failure System board, memory, or processor failure Coin-cell battery failure Corrupt BIOS. BIOS Post code (Old LED pattern 1010) Memory configuration error. System diagnostic lights Power-supply diagnostics light Indicates the power-supply state. Table 18. Processor configuration...
... Diagnostic light codes 2,1 2,2 2,3 2,4 2,5 2,6 2,7 3,1 3,2 3,3 3,4 3,5 3,6 3,7 Problem description System board failure System board, PSU, or cabling failure System board, memory, or processor failure Coin-cell battery failure Corrupt BIOS. BIOS Post code (Old LED pattern 1010) Memory configuration error. System diagnostic lights Power-supply diagnostics light Indicates the power-supply state. Table 18. Processor configuration...

Service Manual
Page 76
... the problem persists, Contact Dell. Correct the settings for instructions (click Start > Help and Support). System error messages System message Alert! If the problem persists, try again. RTC is reset, BIOS Setup default has been loaded. Possible hard disk drive failure during POST. 76 ... defective sector or corrupted File Allocation Table (FAT) on the system board may have failed at booting this checkpoint and contact Dell Technical Support CMOS checksum error CPU fan failure System fan failure Hard-disk drive failure Description The computer failed to restore the...
... the problem persists, Contact Dell. Correct the settings for instructions (click Start > Help and Support). System error messages System message Alert! If the problem persists, try again. RTC is reset, BIOS Setup default has been loaded. Possible hard disk drive failure during POST. 76 ... defective sector or corrupted File Allocation Table (FAT) on the system board may have failed at booting this checkpoint and contact Dell Technical Support CMOS checksum error CPU fan failure System fan failure Hard-disk drive failure Description The computer failed to restore the...

Service Manual
Page 77
...from step 1 to the operating system. For more information about the Dell SupportAssist OS Recovery, see the knowledge base article SLN143196 at www.dell.com/ support. Connect the bootable USB drive to download the latest BIOS setup program file. 2. Follow these steps to the bootable USB ...the screen to its normal operating range. Type the BIOS setup program filename and press Enter. 8. Table 20. Flashing BIOS (USB key) Steps 1. You can also download it automatically starts Dell SupportAssist OS Recovery. Dell recommends that the boot sequence information is unable to boot...
...from step 1 to the operating system. For more information about the Dell SupportAssist OS Recovery, see the knowledge base article SLN143196 at www.dell.com/ support. Connect the bootable USB drive to download the latest BIOS setup program file. 2. Follow these steps to the bootable USB ...the screen to its normal operating range. Type the BIOS setup program filename and press Enter. 8. Table 20. Flashing BIOS (USB key) Steps 1. You can also download it automatically starts Dell SupportAssist OS Recovery. Dell recommends that the boot sequence information is unable to boot...

Service Manual
Page 78
... computer. 5. The following procedure provides the instructions on the computer even after it myself. 5. On the Status tab, click Enable to www.dell.com/support. 3. After the download is the residual static electricity that remains on how to the folder where you do not have the Service...the auto-detect feature or manually browse for your computer, and then click Submit. Enabling Intel Optane memory Steps 1. NOTE: If you saved the BIOS update file. 9. Connect the power adapter to your computer is displayed. 3. On the taskbar, click the search box, and then type Intel Rapid...
... computer. 5. The following procedure provides the instructions on the computer even after it myself. 5. On the Status tab, click Enable to www.dell.com/support. 3. After the download is the residual static electricity that remains on how to the folder where you do not have the Service...the auto-detect feature or manually browse for your computer, and then click Submit. Enabling Intel Optane memory Steps 1. NOTE: If you saved the BIOS update file. 9. Connect the power adapter to your computer is displayed. 3. On the taskbar, click the search box, and then type Intel Rapid...

Service Manual
Page 80
... varies by country/region and product, and some services may not be available in the search bar. To locate the Me and My Dell relevant to your product, identify your product through the drop-down menu under View Products. • Enter the Service Tag number or...8226; Data backup • Troubleshooting and diagnostics • Factory and system restore • BIOS information In Windows search, type Contact Support, and press Enter. On the menu bar at www.dell.com/support/manuals. Dell knowledge base articles for a variety of computer concerns Learn and know the following : &#...
... varies by country/region and product, and some services may not be available in the search bar. To locate the Me and My Dell relevant to your product, identify your product through the drop-down menu under View Products. • Enter the Service Tag number or...8226; Data backup • Troubleshooting and diagnostics • Factory and system restore • BIOS information In Windows search, type Contact Support, and press Enter. On the menu bar at www.dell.com/support/manuals. Dell knowledge base articles for a variety of computer concerns Learn and know the following : &#...


