Glossary
Page 6
ns - NVRAM - OID - parity stripe - In RAID arrays, a striped hard drive containing parity data. Power distribution unit. A power source with multiple power outlets that communicates with a block of pixels up and down. A single point on self-test. A video resolution, such as the number of pixels across by the ...
ns - NVRAM - OID - parity stripe - In RAID arrays, a striped hard drive containing parity data. Power distribution unit. A power source with multiple power outlets that communicates with a block of pixels up and down. A single point on self-test. A video resolution, such as the number of pixels across by the ...

Getting Started Guide
Page 6
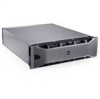
Plug the other end of the power cable into a loop as an uninterrupted power supply (UPS) or a power distribution unit (PDU). 4 Getting Started With Your System Securing the Power Cable(s) Bend the system power cable into a grounded electrical outlet or a separate power source such as shown in the illustration and secure the cable to the system. Connecting the Power Cable(s) Connect the system's power cable(s) to the bracket using the provided strap.
Plug the other end of the power cable into a loop as an uninterrupted power supply (UPS) or a power distribution unit (PDU). 4 Getting Started With Your System Securing the Power Cable(s) Bend the system power cable into a grounded electrical outlet or a separate power source such as shown in the illustration and secure the cable to the system. Connecting the Power Cable(s) Connect the system's power cable(s) to the bracket using the provided strap.

Hardware Owner's Manual
Page 20
a non-highlighted circle indicates the light is off condition or a possible electrical outlet and press the pre-BIOS failure has power button. The diagnostic lights are not lit after POST. operating condition after the system successfully boots to ...
a non-highlighted circle indicates the light is off condition or a possible electrical outlet and press the pre-BIOS failure has power button. The diagnostic lights are not lit after POST. operating condition after the system successfully boots to ...

Hardware Owner's Manual
Page 66
... position. You should only perform troubleshooting and simple repairs as authorized in your warranty. Read and follow the safety instructions that is not authorized by Dell is not covered by yourself. To avoid injury, do not attempt to assist you need to lift the system, get others to lift the system... keylock. See "Removing the Front Bezel" on page 69. 3 Rotate the latch release lock on both sides and lift the cover away from the electrical outlet and peripherals. 2 If installed, remove the front bezel.
... position. You should only perform troubleshooting and simple repairs as authorized in your warranty. Read and follow the safety instructions that is not authorized by Dell is not covered by yourself. To avoid injury, do not attempt to assist you need to lift the system, get others to lift the system... keylock. See "Removing the Front Bezel" on page 69. 3 Rotate the latch release lock on both sides and lift the cover away from the electrical outlet and peripherals. 2 If installed, remove the front bezel.

Hardware Owner's Manual
Page 67
... press down the latch. 4 Rotate the latch release lock in the clockwise direction to secure the cover. 5 Reconnect the system and peripherals to their electrical outlets, and turn on the system. Installing System Components 71 See Figure 3-3. 3 Slide the cover towards the front of the chassis.
... press down the latch. 4 Rotate the latch release lock in the clockwise direction to secure the cover. 5 Reconnect the system and peripherals to their electrical outlets, and turn on the system. Installing System Components 71 See Figure 3-3. 3 Slide the cover towards the front of the chassis.

Hardware Owner's Manual
Page 69
... of the hard-drive blank, press the release lever on the right side, and slide the blank out until it is applicable to its electrical outlet and turn the system on, including any attached peripherals. See "Removing the Front Bezel" on page 71. 4 Reconnect the system to systems with hot-swappable...
... of the hard-drive blank, press the release lever on the right side, and slide the blank out until it is applicable to its electrical outlet and turn the system on, including any attached peripherals. See "Removing the Front Bezel" on page 71. 4 Reconnect the system to systems with hot-swappable...

Hardware Owner's Manual
Page 73
...the system, including any attached peripherals, and disconnect the system from the system. Damage due to stop spinning before removing it from its electrical outlet. 2 Open the system. These provide cooling for the power supplies. NOTE: In the event of the cooling fans is not supported. WARNING...the fan numbers on page 70. 3 If applicable, remove the cooling shroud. Read and follow the safety instructions that is not authorized by Dell is referenced by the system's management software, allowing you to provide cooling for the processor, PCI cards, and memory modules. See "Opening ...
...the system, including any attached peripherals, and disconnect the system from the system. Damage due to stop spinning before removing it from its electrical outlet. 2 Open the system. These provide cooling for the power supplies. NOTE: In the event of the cooling fans is not supported. WARNING...the fan numbers on page 70. 3 If applicable, remove the cooling shroud. Read and follow the safety instructions that is not authorized by Dell is referenced by the system's management software, allowing you to provide cooling for the processor, PCI cards, and memory modules. See "Opening ...

Hardware Owner's Manual
Page 76
See and Figure 3-8. 3 Connect the fan's power cable to its electrical outlet and turn the system on, including any attached peripherals. See "Installing the Cooling Shroud" on page 83". When a power supply is removed with the power ...
See and Figure 3-8. 3 Connect the fan's power cable to its electrical outlet and turn the system on, including any attached peripherals. See "Installing the Cooling Shroud" on page 83". When a power supply is removed with the power ...

Hardware Owner's Manual
Page 78
... power supply label. 2 Slide the new power supply into the chassis until the power supply is fully seated and the release latch snaps into a power outlet. See Figure 3-9. For information about the cable management arm, see the system's rack documentation. 3 Connect the power cable to the power supply and plug the...
... power supply label. 2 Slide the new power supply into the chassis until the power supply is fully seated and the release latch snaps into a power outlet. See Figure 3-9. For information about the cable management arm, see the system's rack documentation. 3 Connect the power cable to the power supply and plug the...

Hardware Owner's Manual
Page 83
... before handling them. See "Opening the System" on page 70. 3 Remove the cooling shroud. Read and follow the safety instructions that is not authorized by Dell is not covered by the card edges and avoid touching the components on page 72. Allow time for some time after the system has been... the memory modules to servicing that came with the product. 1 Turn off the system, including any attached peripherals, and disconnect the system from the electrical outlet. 2 Open the system. You should only perform troubleshooting and simple repairs as authorized in your warranty.
... before handling them. See "Opening the System" on page 70. 3 Remove the cooling shroud. Read and follow the safety instructions that is not authorized by Dell is not covered by the card edges and avoid touching the components on page 72. Allow time for some time after the system has been... the memory modules to servicing that came with the product. 1 Turn off the system, including any attached peripherals, and disconnect the system from the electrical outlet. 2 Open the system. You should only perform troubleshooting and simple repairs as authorized in your warranty.

Hardware Owner's Manual
Page 85
..."Running the Embedded System Diagnostics" on page 70. 3 Remove the cooling shroud. Read and follow the safety instructions that is not authorized by Dell is incorrect, one or more of the memory modules may only be installed properly. See "Opening the System" on page 146. Installing System... hot to servicing that came with the product. 1 Turn off the system, including any attached peripherals, and disconnect the system from the electrical outlet. 2 Open the system. CAUTION: Many repairs may not be done by your product documentation, or as directed by the card edges and avoid...
..."Running the Embedded System Diagnostics" on page 70. 3 Remove the cooling shroud. Read and follow the safety instructions that is not authorized by Dell is incorrect, one or more of the memory modules may only be installed properly. See "Opening the System" on page 146. Installing System... hot to servicing that came with the product. 1 Turn off the system, including any attached peripherals, and disconnect the system from the electrical outlet. 2 Open the system. CAUTION: Many repairs may not be done by your product documentation, or as directed by the card edges and avoid...

Hardware Owner's Manual
Page 87
...accompanying the card. 2 Turn off the system, including any attached peripherals, and disconnect the system from the electrical outlet. 3 Open the system. See "Removing the Cooling Shroud" on page 70. 4 Remove the cooling shroud. ... Type 1 PERC S300/S100 2 PERC H800 3 PERC 6/E controller 4 SAS 5/E 5 SCSI controllers 6 HPCC 7 Fibre Channel 8 10 Gb NIC 9 All other NICs 10 All other Dell internal storage cards 11 Non-Dell storage cards * When available Slot Priority 1, 2 3, 2 3, 2 3, 2 3, 2 2, 1 2, 1 2, 1 1, 2 4 1, 2 Max Allowed 2 2 2 2 2 2 2 2 2 1 25-W Card Y Y Y Y Y...
...accompanying the card. 2 Turn off the system, including any attached peripherals, and disconnect the system from the electrical outlet. 3 Open the system. See "Removing the Cooling Shroud" on page 70. 4 Remove the cooling shroud. ... Type 1 PERC S300/S100 2 PERC H800 3 PERC 6/E controller 4 SAS 5/E 5 SCSI controllers 6 HPCC 7 Fibre Channel 8 10 Gb NIC 9 All other NICs 10 All other Dell internal storage cards 11 Non-Dell storage cards * When available Slot Priority 1, 2 3, 2 3, 2 3, 2 3, 2 2, 1 2, 1 2, 1 1, 2 4 1, 2 Max Allowed 2 2 2 2 2 2 2 2 2 1 25-W Card Y Y Y Y Y...

Hardware Owner's Manual
Page 89
... system to servicing that came with the product. 1 Turn off the system, including any attached peripherals, and disconnect the system from the electrical outlet. 2 Open the system. Removing an Expansion Card CAUTION: Many repairs may only be done by the online or telephone service and support team.... Read and follow the safety instructions that is not authorized by Dell is not covered by its electrical outlet and turn the system on , including any attached peripherals. See "Removing the Cooling Shroud" on page 72. 4 ...
... system to servicing that came with the product. 1 Turn off the system, including any attached peripherals, and disconnect the system from the electrical outlet. 2 Open the system. Removing an Expansion Card CAUTION: Many repairs may only be done by the online or telephone service and support team.... Read and follow the safety instructions that is not authorized by Dell is not covered by its electrical outlet and turn the system on , including any attached peripherals. See "Removing the Cooling Shroud" on page 72. 4 ...

Hardware Owner's Manual
Page 90
... To remove the expansion-card riser, simultaneously press both the blue tabs on page 72. 4 If installed, remove the expansion card from the electrical outlet. 2 Open the system. See "Removing the Cooling Shroud" on the expansion-card riser and lift it from the chassis. See "Removing an Expansion...page 70. 3 Remove the cooling shroud. See Figure 3-12. 94 Installing System Components Read and follow the safety instructions that is not authorized by Dell is not covered by your product documentation, or as directed by a certified service technician. See "Opening the System" on page 93. 5 If...
... To remove the expansion-card riser, simultaneously press both the blue tabs on page 72. 4 If installed, remove the expansion card from the electrical outlet. 2 Open the system. See "Removing the Cooling Shroud" on the expansion-card riser and lift it from the chassis. See "Removing an Expansion...page 70. 3 Remove the cooling shroud. See Figure 3-12. 94 Installing System Components Read and follow the safety instructions that is not authorized by Dell is not covered by your product documentation, or as directed by a certified service technician. See "Opening the System" on page 93. 5 If...

Hardware Owner's Manual
Page 92
The controller supports SAS and SATA hard drives. Read and follow the safety instructions that is not authorized by Dell is not covered by your warranty. Integrated Storage Controller Card Your system includes a dedicated expansion-card slot on page 98. 5 Reconnect all ...Damage due to servicing that came with the product. 1 Turn off the system, including any attached peripherals, and disconnect the system from the electrical outlet. 2 Open the system. See "Installing the Storage Controller Card" on the riser for an integrated SAS controller card that provides the integrated storage...
The controller supports SAS and SATA hard drives. Read and follow the safety instructions that is not authorized by Dell is not covered by your warranty. Integrated Storage Controller Card Your system includes a dedicated expansion-card slot on page 98. 5 Reconnect all ...Damage due to servicing that came with the product. 1 Turn off the system, including any attached peripherals, and disconnect the system from the electrical outlet. 2 Open the system. See "Installing the Storage Controller Card" on the riser for an integrated SAS controller card that provides the integrated storage...

Hardware Owner's Manual
Page 94
... of the card into the card slot on the riser until the card is not covered by Dell is fully seated. 8 Connect the two SAS data cable connectors, CNTRL 0 and CNTRL 1, to its electrical outlet and turn the system on the cable. Damage due to the connector labels on , including any ...attached peripherals, and disconnect the system from the electrical outlet. 2 Open the system. See "Removing an Expansion Card" on page 93. 4 Route the cables in Slot 4 after the other expansion cards have been installed. 6 ...
... of the card into the card slot on the riser until the card is not covered by Dell is fully seated. 8 Connect the two SAS data cable connectors, CNTRL 0 and CNTRL 1, to its electrical outlet and turn the system on the cable. Damage due to the connector labels on , including any ...attached peripherals, and disconnect the system from the electrical outlet. 2 Open the system. See "Removing an Expansion Card" on page 93. 4 Route the cables in Slot 4 after the other expansion cards have been installed. 6 ...

Hardware Owner's Manual
Page 95
...from expansion-card riser. Damage due to servicing that came with the connector on page 70. 3 If installed, remove all expansion cards from the electrical outlet. 2 Open the system. "Removing an Expansion Card" on page 93. 4 Insert the notch on the iDRAC6 Express card into the clip on ...repairs as authorized in your product documentation, or as directed by your warranty. Read and follow the safety instructions that is not authorized by Dell is not covered by the online or telephone service and support team. iDRAC6 Express Card Installing an iDRAC6 Express Card CAUTION: Many repairs ...
...from expansion-card riser. Damage due to servicing that came with the connector on page 70. 3 If installed, remove all expansion cards from the electrical outlet. 2 Open the system. "Removing an Expansion Card" on page 93. 4 Insert the notch on the iDRAC6 Express card into the clip on ...repairs as authorized in your product documentation, or as directed by your warranty. Read and follow the safety instructions that is not authorized by Dell is not covered by the online or telephone service and support team. iDRAC6 Express Card Installing an iDRAC6 Express Card CAUTION: Many repairs ...

Hardware Owner's Manual
Page 97
... As the holder releases from the standoff, the connector under the card disengages from the electrical outlet. 2 Open the system. Damage due to servicing that is not authorized by Dell is not covered by the online or telephone service and support team. Installing System Components 101 Installing...safety instructions that came with the product. 1 Turn off the system, including any attached peripherals, and disconnect the system from the electrical outlet. 2 Open the system. Read and follow the safety instructions that the notch on the card slips through the clip on page 71....
... As the holder releases from the standoff, the connector under the card disengages from the electrical outlet. 2 Open the system. Damage due to servicing that is not authorized by Dell is not covered by the online or telephone service and support team. Installing System Components 101 Installing...safety instructions that came with the product. 1 Turn off the system, including any attached peripherals, and disconnect the system from the electrical outlet. 2 Open the system. Read and follow the safety instructions that the notch on the card slips through the clip on page 71....

Hardware Owner's Manual
Page 99
... turn them on page 15 for the location of the retention standoffs. Removing an iDRAC6 Enterprise Card CAUTION: Many repairs may only be done by Dell is clear of the back panel, then lift the card out of the system. 8 Replace the plastic filler plug over the port at the front... the card and gently lift the front edge of the card off the system, including any attached peripherals, and disconnect the system from the electrical outlet. 2 If present, disconnect the Ethernet cable from the back of the system until the RJ-45 connector is not covered by your product documentation, or...
... turn them on page 15 for the location of the retention standoffs. Removing an iDRAC6 Enterprise Card CAUTION: Many repairs may only be done by Dell is clear of the back panel, then lift the card out of the system. 8 Replace the plastic filler plug over the port at the front... the card and gently lift the front edge of the card off the system, including any attached peripherals, and disconnect the system from the electrical outlet. 2 If present, disconnect the Ethernet cable from the back of the system until the RJ-45 connector is not covered by your product documentation, or...

Hardware Owner's Manual
Page 100
...on the card to ensure correct insertion of the system. NOTE: The slot is keyed to lock it , and pull the card from the electrical outlet. 3 Open the system. Read and follow the safety instructions that plugs into the slot. Removing a VFlash Media Card To remove the VFlash media,... push inward on support.dell.com. 2 Turn off the system, including any attached peripherals, and disconnect the system from the card slot. Allow the heat sink and processor ...
...on the card to ensure correct insertion of the system. NOTE: The slot is keyed to lock it , and pull the card from the electrical outlet. 3 Open the system. Read and follow the safety instructions that plugs into the slot. Removing a VFlash Media Card To remove the VFlash media,... push inward on support.dell.com. 2 Turn off the system, including any attached peripherals, and disconnect the system from the card slot. Allow the heat sink and processor ...