
User's Guide
Page 1
... to change without the written permission of your computer. Information in this product meets the ENERGY STAR guidelines for property damage, personal injury, or death. Other trademarks and trade names may be used in the United States and/or other than its own. Dell™ SX2210T Flat Panel Monitor User's Guide About Your Monitor Setting Up the Monitor Operating the Monitor Troubleshooting Appendix...
... to change without the written permission of your computer. Information in this product meets the ENERGY STAR guidelines for property damage, personal injury, or death. Other trademarks and trade names may be used in the United States and/or other than its own. Dell™ SX2210T Flat Panel Monitor User's Guide About Your Monitor Setting Up the Monitor Operating the Monitor Troubleshooting Appendix...
User's Guide
Page 3
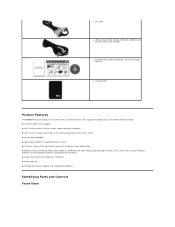
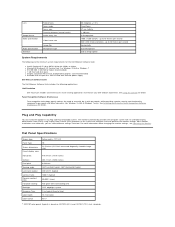
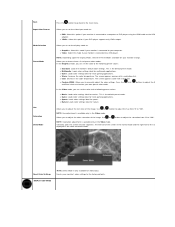
... the screen. ■ Tilt adjustment capability. ■ Plug and play capability if supported by your system. ■ On-Screen Display (OSD) adjustments for ease of set-up stream cable (enables USB ports, Webcam and touch function on the monitor) l Documentation (Safety Information, Quick Start Guide, and CD) l Cleaning cloth Product Features The SX2210T flat panel display has an active matrix, thin-film transistor (TFT), liquid crystal display (LCD). Identifying Parts and Controls Front View l DVI cable l USB up and screen optimization. ■ Software and...
... the screen. ■ Tilt adjustment capability. ■ Plug and play capability if supported by your system. ■ On-Screen Display (OSD) adjustments for ease of set-up stream cable (enables USB ports, Webcam and touch function on the monitor) l Documentation (Safety Information, Quick Start Guide, and CD) l Cleaning cloth Product Features The SX2210T flat panel display has an active matrix, thin-film transistor (TFT), liquid crystal display (LCD). Identifying Parts and Controls Front View l DVI cable l USB up and screen optimization. ■ Software and...
User's Guide
Page 5
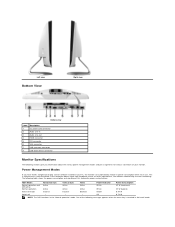
... the various power management modes and pin assignments for various connectors of the following messages appears when the menu key is referred to as Power Save Mode. Left view Bottom View Right view Bottom view Label Description 1 DC power cord connector 2 Audio Line-in 3 Audio Line-out 4 HDMI connector 5 DVI connector 6 VGA connector 7 USB upstream connector 8 USB downstream connector Monitor Specifications The following sections give you have VESA's compliance display card or software installed in your monitor. One of your PC, the monitor can automatically...
... the various power management modes and pin assignments for various connectors of the following messages appears when the menu key is referred to as Power Save Mode. Left view Bottom View Right view Bottom view Label Description 1 DC power cord connector 2 Audio Line-in 3 Audio Line-out 4 HDMI connector 5 DVI connector 6 VGA connector 7 USB upstream connector 8 USB downstream connector Monitor Specifications The following sections give you have VESA's compliance display card or software installed in your monitor. One of your PC, the monitor can automatically...
User's Guide
Page 8
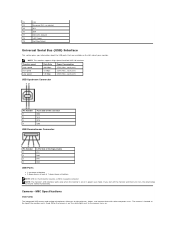
... Number 1 2 3 4 4-Pin Side of the Signal Cable VCC DMD DPD GND USB Ports l 1 upstream at bottom l 2 downstream at back & 1 downstream at the top of your monitor. on device) 15 SCL 16 SDA 17 DDC/CEC Ground 18 +5V Power 19 Hot Plug Detect Universal Serial Bus (USB) Interface This section gives you to take a few to the camera turns on , the white light...
... Number 1 2 3 4 4-Pin Side of the Signal Cable VCC DMD DPD GND USB Ports l 1 upstream at bottom l 2 downstream at back & 1 downstream at the top of your monitor. on device) 15 SCL 16 SDA 17 DDC/CEC Ground 18 +5V Power 19 Hot Plug Detect Universal Serial Bus (USB) Interface This section gives you to take a few to the camera turns on , the white light...
User's Guide
Page 9
... your Dell webcam experience. Flat Panel Specifications Screen type Active matrix - The monitor automatically provides the computer system with hard-coating (3H) CCFL edgelight system 2 ms typical (Grey to 30 frames per second 640 x 480 (VGA) and below - TFT LCD Panel Type Screen dimensions Preset display area: TN 21.5 inches (21.5-inch measured diagonally viewable image size) Horizontal: 476.64 mm (18.76 inches) Vertical: Pixel pitch Viewing angle Luminance output Contrast...
... your Dell webcam experience. Flat Panel Specifications Screen type Active matrix - The monitor automatically provides the computer system with hard-coating (3H) CCFL edgelight system 2 ms typical (Grey to 30 frames per second 640 x 480 (VGA) and below - TFT LCD Panel Type Screen dimensions Preset display area: TN 21.5 inches (21.5-inch measured diagonally viewable image size) Horizontal: 476.64 mm (18.76 inches) Vertical: Pixel pitch Viewing angle Luminance output Contrast...
User's Guide
Page 15
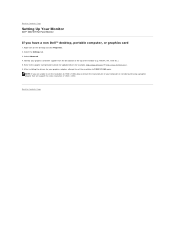
... installing the drivers for example, http://www.ATI.com OR http://www.NVIDIA.com ). 6. Back to 1920 X 1080 again. Identify your computer or consider purchasing a graphics adapter that will support the video resolution of the window (e.g. Refer to Contents Page Setting Up Your Monitor Dell™ SX2210T Flat Panel Monitor If you are unable to set the resolution to Contents Page Back to the graphic card...
... installing the drivers for example, http://www.ATI.com OR http://www.NVIDIA.com ). 6. Back to 1920 X 1080 again. Identify your computer or consider purchasing a graphics adapter that will support the video resolution of the window (e.g. Refer to Contents Page Setting Up Your Monitor Dell™ SX2210T Flat Panel Monitor If you are unable to set the resolution to Contents Page Back to the graphic card...
User's Guide
Page 16
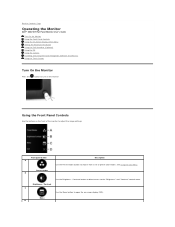
... Preset modes button to the "Brightness" and "Contrast" control menu. See Using the OSD Menu. Use the Brightness / Contrast button to direct access to choose from a list of the monitor to open the on-screen display OSD). Brightness / Contrast C Use the Menu button to adjust the image settings. Back to Contents Page Operating the Monitor Dell™ SX2210T Flat Panel Monitor User's Guide Turn On the Monitor Using the Front Panel Controls Using the On-Screen Display (OSD) Menu Setting the Maximum Resolution Using the Dell Soundbar (Optional) Using the Tilt Using the Camera Installing...
... Preset modes button to the "Brightness" and "Contrast" control menu. See Using the OSD Menu. Use the Brightness / Contrast button to direct access to choose from a list of the monitor to open the on-screen display OSD). Brightness / Contrast C Use the Menu button to adjust the image settings. Back to Contents Page Operating the Monitor Dell™ SX2210T Flat Panel Monitor User's Guide Turn On the Monitor Using the Front Panel Controls Using the On-Screen Display (OSD) Menu Setting the Maximum Resolution Using the Dell Soundbar (Optional) Using the Tilt Using the Camera Installing...
User's Guide
Page 19
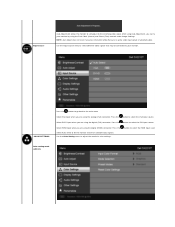
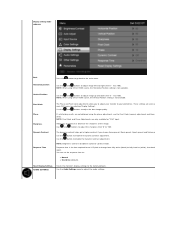
Use the Input Source menu to select different video signals that may be connected to the main menu Select VGA input when you are using the digital (HDMI) connector. COLOR SETTINGS Press the button to go back to your monitor by using the Pixel Clock (Coarse) and Phase (Fine) controls under Image Settings. Select HDMI input when you are using the analog (VGA) connector. Color setting mode submenu After using the digital (DVI) connector. Press the button to select the HDMI input source. Press the button to select the VGA input source. Press the button to...
Use the Input Source menu to select different video signals that may be connected to the main menu Select VGA input when you are using the digital (HDMI) connector. COLOR SETTINGS Press the button to go back to your monitor by using the Pixel Clock (Coarse) and Phase (Fine) controls under Image Settings. Select HDMI input when you are using the analog (VGA) connector. Color setting mode submenu After using the digital (DVI) connector. Press the button to select the HDMI input source. Press the button to select the VGA input source. Press the button to...
User's Guide
Page 20
... screen in the Video mode. Resets your DVD player supports only YPbPr output. DISPLAY SETTINGS Allows you can set the video input mode to: l RGB: Select this mode if your computer. l Warm: Increase the color temperature. In the Video mode, you to choose from '0' to manually adjust the color settings. Allows you to '100'. Allows you to DVI adapter. Allows you to set the color to your monitor is connected to a computer or DVD player using the HDMI cable...
... screen in the Video mode. Resets your DVD player supports only YPbPr output. DISPLAY SETTINGS Allows you can set the video input mode to: l RGB: Select this mode if your computer. l Warm: Increase the color temperature. In the Video mode, you to choose from '0' to manually adjust the color settings. Allows you to '100'. Allows you to DVI adapter. Allows you to set the color to your monitor is connected to a computer or DVD player using the HDMI cable...
User's Guide
Page 21
... defaults. Use the button to adjust the audio settings. Use the Audio Settings menu to enable the Dynamic Contrast adjustment. NOTE: Brightness control is not available. Pixel Clock Phase Sharpness Dynamic Contrast Response Time The Phase and Pixel Clock adjustments allow you to adjust your preference. You can set the response time to your monitor to : l Normal l Overdrive (default). Horizontal position Use the and buttons to the main menu. NOTE: When using DVI or HDMI source, the Vertical Position setting is disabled in Dynamic Contrast mode. Display setting mode...
... defaults. Use the button to adjust the audio settings. Use the Audio Settings menu to enable the Dynamic Contrast adjustment. NOTE: Brightness control is not available. Pixel Clock Phase Sharpness Dynamic Contrast Response Time The Phase and Pixel Clock adjustments allow you to adjust your preference. You can set the response time to your monitor to : l Normal l Overdrive (default). Horizontal position Use the and buttons to the main menu. NOTE: When using DVI or HDMI source, the Vertical Position setting is disabled in Dynamic Contrast mode. Display setting mode...
User's Guide
Page 22
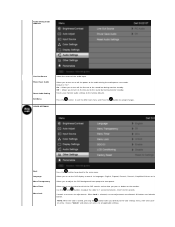
... accept changes. Default is selected, no user adjustments are locked except the button. Back Language Menu Transparency Menu Timer Menu Lock Press the button to go back to 60 seconds. Allows you to set the time for which the OSD remains active after you press a button on or off the line-out to the audio during monitor standby. Audio Setting mode submenu Line Out Source Power Save Audio Reset Audio Setting Exit Menu OTHER SETTINGS Select the source of six languages: English...
... accept changes. Default is selected, no user adjustments are locked except the button. Back Language Menu Transparency Menu Timer Menu Lock Press the button to go back to 60 seconds. Allows you to set the time for which the OSD remains active after you press a button on or off the line-out to the audio during monitor standby. Audio Setting mode submenu Line Out Source Power Save Audio Reset Audio Setting Exit Menu OTHER SETTINGS Select the source of six languages: English...
User's Guide
Page 27
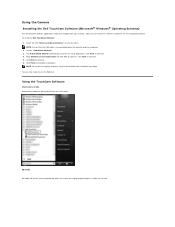
.... Using the TouchCam Software Stand-alone mode Stand-alone mode can begin. You are now ready to continue. 5. NOTE: Ensure that shipped with your monitor, allows you to continue. 6. NOTE: All instant messaging softwares have to complete installation. Click Finish to close before the installation can be launched from the start menu. Read Software License Agreement and click Yes to continue. 4. Insert the Dell "Drivers...
.... Using the TouchCam Software Stand-alone mode Stand-alone mode can begin. You are now ready to continue. 5. NOTE: Ensure that shipped with your monitor, allows you to continue. 6. NOTE: All instant messaging softwares have to complete installation. Click Finish to close before the installation can be launched from the start menu. Read Software License Agreement and click Yes to continue. 4. Insert the Dell "Drivers...
User's Guide
Page 29
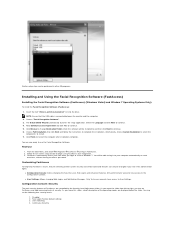
... description of the operating modes are displayed below the slider. As you turn on -screen setup wizard to begin using FastAccess face recognition. 3. NOTE: Ensure that the USB cable is connected between the monitor and the computer. 2. Select the Language and click Next to complete the installation. Choose Full Installation than click Next and follow the instructions to continue. 4. First Use 1. Configuration Console: Security The...
... description of the operating modes are displayed below the slider. As you turn on -screen setup wizard to begin using FastAccess face recognition. 3. NOTE: Ensure that the USB cable is connected between the monitor and the computer. 2. Select the Language and click Next to complete the installation. Choose Full Installation than click Next and follow the instructions to continue. 4. First Use 1. Configuration Console: Security The...

User's Guide
Page 35
... USB connector (cable supplied) to your monitor and computer, (see Solving Problems. 5. If it does not display an image, see Connecting Your Monitor) use the cable management slot to organize all necessary cables to an appropriate USB connector on the monitor and the computer. If your monitor setup: 1. Turn on your computer and monitor into a nearby outlet. 4. NOTE: The graphics are used for your computer. 2. Connecting the USB Cable After you have completed connecting the DVI/VGA/HDMI cable...
... USB connector (cable supplied) to your monitor and computer, (see Solving Problems. 5. If it does not display an image, see Connecting Your Monitor) use the cable management slot to organize all necessary cables to an appropriate USB connector on the monitor and the computer. If your monitor setup: 1. Turn on your computer and monitor into a nearby outlet. 4. NOTE: The graphics are used for your computer. 2. Connecting the USB Cable After you have completed connecting the DVI/VGA/HDMI cable...
User's Guide
Page 37
..., check your video controller and computer, because your computer system and graphic card. Unplug the video cable from the back of the procedures in this section, follow the Safety Instructions. or or 4. Unplug the video cable(s) from the back of the computer or monitor. To ensure proper Self-Test operation, remove the HDMI, Digital (white connector), and the Analog (blue connector) cables from the back of the computer or monitor. 3. Turn...
..., check your video controller and computer, because your computer system and graphic card. Unplug the video cable from the back of the procedures in this section, follow the Safety Instructions. or or 4. Unplug the video cable(s) from the back of the computer or monitor. To ensure proper Self-Test operation, remove the HDMI, Digital (white connector), and the Analog (blue connector) cables from the back of the computer or monitor. 3. Turn...
User's Guide
Page 38
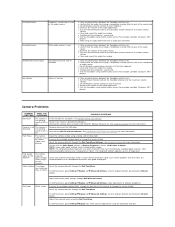
... key 4 key on brightness l Increase brightness & contrast controls via OSD. l Check environmental factors. l Run the built-in green, blue, and white colored screens. Geometric Distortion Screen is functioning properly using 'DVI-D' or 'HDMI', the positioning adjustments are not available. l Adjust Phase and Pixel Clock controls via OSD. Select the correct input source. The test is properly connected and secure. l Adjust the Phase and Pixel Clock controls via OSD. l Pixel that can occur in the video cable connector. l Perform monitor self-test feature...
... key 4 key on brightness l Increase brightness & contrast controls via OSD. l Check environmental factors. l Run the built-in green, blue, and white colored screens. Geometric Distortion Screen is functioning properly using 'DVI-D' or 'HDMI', the positioning adjustments are not available. l Adjust Phase and Pixel Clock controls via OSD. Select the correct input source. The test is properly connected and secure. l Adjust the Phase and Pixel Clock controls via OSD. l Pixel that can occur in the video cable connector. l Perform monitor self-test feature...
User's Guide
Page 39
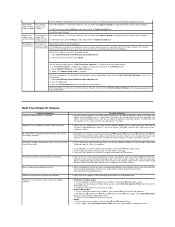
... viewing area Cannot adjust the monitor with OSD does not appear on the the keys on the front panel screen No Input Signal when user controls are not working What You See USB peripherals are pressed No picture, the LED light is not in plug. connect the device directly to PC RGB or YPbPr in the video cable connector. power indicator is on Possible Solutions l Plug the audio line-in Color Settings OSD if the Color Management is USB...
... viewing area Cannot adjust the monitor with OSD does not appear on the the keys on the front panel screen No Input Signal when user controls are not working What You See USB peripherals are pressed No picture, the LED light is not in plug. connect the device directly to PC RGB or YPbPr in the video cable connector. power indicator is on Possible Solutions l Plug the audio line-in Color Settings OSD if the Color Management is USB...
User's Guide
Page 40
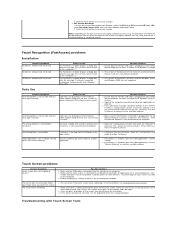
.... l Clean and reseat the audio line-in plug. l Turn the Power/Volume knob on the Soundbar counter-clockwise to SettingsàDisplay tabà Advanced Settings, make contrast adjustment using the horizontal slide bar. Reset the camera defaults through the Dell TouchCam. The integrated webcam operates up to a lower volume setting. Color Problem The images are 4 mega pixel or higher. Increase the available ambient light, change the direction of the camera, or change the source of light. l Test...
.... l Clean and reseat the audio line-in plug. l Turn the Power/Volume knob on the Soundbar counter-clockwise to SettingsàDisplay tabà Advanced Settings, make contrast adjustment using the horizontal slide bar. Reset the camera defaults through the Dell TouchCam. The integrated webcam operates up to a lower volume setting. Color Problem The images are 4 mega pixel or higher. Increase the available ambient light, change the direction of the camera, or change the source of light. l Test...
User's Guide
Page 41
.... Check if the volume is detected correctly by the Windows operating system. Set the correct audio source in the Audio Device box. 3. Select Monitor Webcam in Dell TouchCam Software. To test the microphone, 1.Click Startà Control Panelà Sound and Audio Devices. 2.Click the Voice tab. 3.Click the Test Hardware button and follow the instructions. l Navigate to save your changes and enable Dell TouchCam. Please check the following steps to use...
.... Check if the volume is detected correctly by the Windows operating system. Set the correct audio source in the Audio Device box. 3. Select Monitor Webcam in Dell TouchCam Software. To test the microphone, 1.Click Startà Control Panelà Sound and Audio Devices. 2.Click the Voice tab. 3.Click the Test Hardware button and follow the instructions. l Navigate to save your changes and enable Dell TouchCam. Please check the following steps to use...
User's Guide
Page 42
... a USB port that provides enough power for instructions. l If the above remedies do not provide sufficient power for the instant messaging software you are unable to get active video to any available webcam. Please consult the help for some peripherals, such as Skype, IM and others can occur if the touch screen needs calibrating. l Make sure the Dell Monitor's USB cable is invalid" You have a laptop with Touch Screen...
... a USB port that provides enough power for instructions. l If the above remedies do not provide sufficient power for the instant messaging software you are unable to get active video to any available webcam. Please consult the help for some peripherals, such as Skype, IM and others can occur if the touch screen needs calibrating. l Make sure the Dell Monitor's USB cable is invalid" You have a laptop with Touch Screen...


