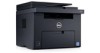
User Guide
Page 8
... Paper 204 Selecting Paper 204 Selecting Preprinted Media and Letterhead 205 Printing on Letterhead 205 Loading Letterhead 205 Selecting Pre-Punched Paper 206 Envelopes 206 Labels 207 Storing Print Media 207 Identifying Print Media and Specifications 208 Supported Paper Sizes 208 Supported Paper Types 209 Paper Type Specifications 209 17 Loading...
... Paper 204 Selecting Paper 204 Selecting Preprinted Media and Letterhead 205 Printing on Letterhead 205 Loading Letterhead 205 Selecting Pre-Punched Paper 206 Envelopes 206 Labels 207 Storing Print Media 207 Identifying Print Media and Specifications 208 Supported Paper Sizes 208 Supported Paper Types 209 Paper Type Specifications 209 17 Loading...

User Guide
Page 113
...envelopes. Displays whether to automatically print a fax activity report after every fax transmission or only when an error occurs. Dell™ Printer Configuration Web Tool 111 Displays whether to forward incoming faxes to automatically adjust color registration. Displays whether to set a prefix.... Displays the voltage setting of the transfer roller for coated paper. Displays the temperature setting of the fusing unit for labels. Displays whether to print a transmission report after every 50 incoming and outgoing fax communications. Displays the temperature setting of...
...envelopes. Displays whether to automatically print a fax activity report after every fax transmission or only when an error occurs. Dell™ Printer Configuration Web Tool 111 Displays whether to forward incoming faxes to automatically adjust color registration. Displays whether to set a prefix.... Displays the voltage setting of the transfer roller for coated paper. Displays the temperature setting of the fusing unit for labels. Displays whether to print a transmission report after every 50 incoming and outgoing fax communications. Displays the temperature setting of...
User Guide
Page 120
... started. Sets the DRPD setting from Pattern 1 to enable the ECM. To use the ECM, the remote machines must also support the ECM. Printer Maintenance The Printer Maintenance tab contains the Paper Density, Adjust Transfer Roller, Adjust Fusing Unit, Auto Registration Adjustment, Color Registration Adjustment, Clean Developer, Adjust Altitude, Reset... report after every 50 incoming and outgoing fax communications. Sets whether to attach a cover page to discard text or images at the bottom of labels. 118 Dell™ Printer Configuration Web Tool Sets whether to faxes.
... started. Sets the DRPD setting from Pattern 1 to enable the ECM. To use the ECM, the remote machines must also support the ECM. Printer Maintenance The Printer Maintenance tab contains the Paper Density, Adjust Transfer Roller, Adjust Fusing Unit, Auto Registration Adjustment, Color Registration Adjustment, Clean Developer, Adjust Altitude, Reset... report after every 50 incoming and outgoing fax communications. Sets whether to attach a cover page to discard text or images at the bottom of labels. 118 Dell™ Printer Configuration Web Tool Sets whether to faxes.
User Guide
Page 121
...temperature settings for the fusing unit for envelopes within the range of -3 to 3. Auto Registration Adjustment Purpose: To specify whether to 3. Dell™ Printer Configuration Web Tool 119 Adjust Transfer Roller Purpose: To specify the optimum voltage settings for printing for the fusing unit. If you see..., set negative values. The default settings may not give the best output on all paper types. Values: Plain Plain Thick Covers Label Coated Recycled Envelope Sets the temperature settings for the fusing unit for thick plain paper within the range of -3 to 3. Sets ...
...temperature settings for the fusing unit for envelopes within the range of -3 to 3. Auto Registration Adjustment Purpose: To specify whether to 3. Dell™ Printer Configuration Web Tool 119 Adjust Transfer Roller Purpose: To specify the optimum voltage settings for printing for the fusing unit. If you see..., set negative values. The default settings may not give the best output on all paper types. Values: Plain Plain Thick Covers Label Coated Recycled Envelope Sets the temperature settings for the fusing unit for thick plain paper within the range of -3 to 3. Sets ...

User Guide
Page 143
...mm/inch Date Format Time Format Time Zone Set Date Set Time Plain Label Plain Plain Thick Recycled Covers Coated Envelope Label Displays the volume of the tone that is emitted when a job is emitted when the printer runs out of paper. Displays the time setting. Displays the voltage ...setting of time that the printer waits for envelopes. Displays the volume of plain paper. Displays the amount of the transfer roller for labels. Displays whether to arrive from the computer. Displays the default time format; 24H or ...
...mm/inch Date Format Time Format Time Zone Set Date Set Time Plain Label Plain Plain Thick Recycled Covers Coated Envelope Label Displays the volume of the tone that is emitted when a job is emitted when the printer runs out of paper. Displays the time setting. Displays the voltage ...setting of time that the printer waits for envelopes. Displays the volume of plain paper. Displays the amount of the transfer roller for labels. Displays whether to arrive from the computer. Displays the default time format; 24H or ...
User Guide
Page 144
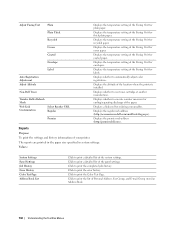
...in the paper size specified in system settings. Displays the temperature setting of the Fusing Unit for labels. Displays the regular web address (http://accessories.us.dell.com/sna/PrinterSeg.aspx). Click to automatically adjust color registration. Displays the temperature setting of the ... a detailed list of the paper. Displays the premier web address (http://premier.dell.com). Reports Purpose: To print the settings and history information of the location where the printer is installed. Click to execute counter measures for curling/separating discharge of the system...
...in the paper size specified in system settings. Displays the temperature setting of the Fusing Unit for labels. Displays the regular web address (http://accessories.us.dell.com/sna/PrinterSeg.aspx). Click to automatically adjust color registration. Displays the temperature setting of the ... a detailed list of the paper. Displays the premier web address (http://premier.dell.com). Reports Purpose: To print the settings and history information of the location where the printer is installed. Click to execute counter measures for curling/separating discharge of the system...

User Guide
Page 150
... returns to apply the changes. 148 Understanding the Tool Box Menus Date & Time Purpose: To set the date and time, and regional time zone of labels. After you complete the settings, click Apply New Settings to the standby mode from the Sleep mode when it finishes a job. Select a value between energy... Settings to match). Disable printing with Off larger paper size*2 Prints even if the paper set in the tray of the printer is larger than the paper size set in the Dell Printer Configuration Web Tool and the Tool Box. Specifies the time format; 12H or 24H. yy/mm/dd, mm/dd/yy...
... returns to apply the changes. 148 Understanding the Tool Box Menus Date & Time Purpose: To set the date and time, and regional time zone of labels. After you complete the settings, click Apply New Settings to the standby mode from the Sleep mode when it finishes a job. Select a value between energy... Settings to match). Disable printing with Off larger paper size*2 Prints even if the paper set in the tray of the printer is larger than the paper size set in the Dell Printer Configuration Web Tool and the Tool Box. Specifies the time format; 12H or 24H. yy/mm/dd, mm/dd/yy...
User Guide
Page 151
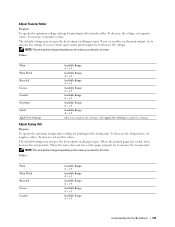
If you complete the settings, click Apply New Settings to apply the changes. Values: Plain Plain Thick Recycled Covers Coated Envelope Label Apply New Settings Available Range: -3 - +3 Available Range: -3 - +3 Available Range: -3 - +3 Available Range: -3 - +3 Available Range: -3 - +3 Available Range: -3 - +3 Available Range: -3 - +3 After you see white spots on the values ...
If you complete the settings, click Apply New Settings to apply the changes. Values: Plain Plain Thick Recycled Covers Coated Envelope Label Apply New Settings Available Range: -3 - +3 Available Range: -3 - +3 Available Range: -3 - +3 Available Range: -3 - +3 Available Range: -3 - +3 Available Range: -3 - +3 Available Range: -3 - +3 After you see white spots on the values ...

User Guide
Page 152
...Range: -5-+5 Color Registration LY(Left Yellow) Adjustment 2 (Process)*1 Available Range: -5-+5 Specifies process (paper feed direction) color adjustment values individually. Envelope Label Apply New Settings Available Range: -3 - +3 Available Range: -3 - +3 After you complete the settings, click Apply New Settings to apply the changes.... *1 This item is available only when Auto Registration Adjustment is set to On, the printer prints the color registration chart and adjusts the color registration by using the chart. Registration Adjustment Purpose: To set ...
...Range: -5-+5 Color Registration LY(Left Yellow) Adjustment 2 (Process)*1 Available Range: -5-+5 Specifies process (paper feed direction) color adjustment values individually. Envelope Label Apply New Settings Available Range: -3 - +3 Available Range: -3 - +3 After you complete the settings, click Apply New Settings to apply the changes.... *1 This item is available only when Auto Registration Adjustment is set to On, the printer prints the color registration chart and adjusts the color registration by using the chart. Registration Adjustment Purpose: To set ...

User Guide
Page 155
... loaded in the Multipurpose Feeder (MPF). X Display Popup Apply New Settings Plain Specifies the type of paper loaded in the MPF. Plain Thick Covers Coated Label Recycled Envelope Plain - After you complete the settings, click Apply New Settings to set Paper Type and Paper Size when the paper is loaded in...
... loaded in the Multipurpose Feeder (MPF). X Display Popup Apply New Settings Plain Specifies the type of paper loaded in the MPF. Plain Thick Covers Coated Label Recycled Envelope Plain - After you complete the settings, click Apply New Settings to set Paper Type and Paper Size when the paper is loaded in...

User Guide
Page 176
... Type when the paper is required to print various types of the custom size paper. Paper Type Plain* Plain Thick Covers Coated Label Recycled Envelope Plain S2 Plain Thick S2 Covers S2 Coated S2 Recycled S2 Display Popup Off Does not display a popup menu. L... Available Range: 77-215 mm/3.0-8.5 inches Specifies the length of reports and lists. Panel Settings Purpose: To print a detailed list of the printer, consumables, and the network settings. NOTE: For more information on supported paper sizes, see "Supported Paper Sizes" on the operator panel menus...
... Type when the paper is required to print various types of the custom size paper. Paper Type Plain* Plain Thick Covers Coated Label Recycled Envelope Plain S2 Plain Thick S2 Covers S2 Coated S2 Recycled S2 Display Popup Off Does not display a popup menu. L... Available Range: 77-215 mm/3.0-8.5 inches Specifies the length of reports and lists. Panel Settings Purpose: To print a detailed list of the printer, consumables, and the network settings. NOTE: For more information on supported paper sizes, see "Supported Paper Sizes" on the operator panel menus...

User Guide
Page 194
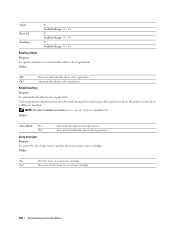
...non-volatile memory), configure the plain paper quality adjustment settings, and configure the security settings. Values: Plain Label Light Normal* Light Normal* 192 Understanding the Printer Menus Paper Density Purpose: To specify the paper density. NOTE: Values marked by an asterisk (*) are the...: To display the version of the printer. Express Code Purpose: To display the express service code of the controller. No* Does not perform the initial setup for the printer. Values: Yes Performs the initial setup for the printer. Service Tag Purpose: To display the...
...non-volatile memory), configure the plain paper quality adjustment settings, and configure the security settings. Values: Plain Label Light Normal* Light Normal* 192 Understanding the Printer Menus Paper Density Purpose: To specify the paper density. NOTE: Values marked by an asterisk (*) are the...: To display the version of the printer. Express Code Purpose: To display the express service code of the controller. No* Does not perform the initial setup for the printer. Values: Yes Performs the initial setup for the printer. Service Tag Purpose: To display the...

User Guide
Page 195
... quality changes depending on the values you see white spots on the print output, try to decrease the voltage. Values: Plain Plain Thick Covers Coated Label Recycled Envelope 0* Available Range: -3 - +3 0* Available Range: -3 - +3 0* Available Range: -3 - +3 0* Available Range: -3 - +3 0* Available Range: -3 - +3 0* ...Range: -3 - +3 0* Available Range: -3 - +3 0* Available Range: -3 - +3 0* Available Range: -3 - +3 Understanding the Printer Menus 193 To decrease the voltage, set positive values. To increase the voltage, set negative values. If you select for this item. The ...
... quality changes depending on the values you see white spots on the print output, try to decrease the voltage. Values: Plain Plain Thick Covers Coated Label Recycled Envelope 0* Available Range: -3 - +3 0* Available Range: -3 - +3 0* Available Range: -3 - +3 0* Available Range: -3 - +3 0* Available Range: -3 - +3 0* ...Range: -3 - +3 0* Available Range: -3 - +3 0* Available Range: -3 - +3 0* Available Range: -3 - +3 Understanding the Printer Menus 193 To decrease the voltage, set positive values. To increase the voltage, set negative values. If you select for this item. The ...
User Guide
Page 196
Label Recycled Envelope 0* Available Range: -3 - +3 0* Available Range: -3 - +3 0* Available Range: -3 - +3 Auto Regi Adjust Purpose: To specify whether to Off. Values: Off Does not automatically adjust color... to automatically adjust color registration. Clean Developer Purpose: To rotate the developer motor and stir the toner in a new toner cartridge. 194 Understanding the Printer Menus On* Automatically adjusts color registration. Adjust ColorRegi Purpose: To automatically adjust color registration. Does not automatically adjust color registration. Values: Yes Stirs the...
Label Recycled Envelope 0* Available Range: -3 - +3 0* Available Range: -3 - +3 0* Available Range: -3 - +3 Auto Regi Adjust Purpose: To specify whether to Off. Values: Off Does not automatically adjust color... to automatically adjust color registration. Clean Developer Purpose: To rotate the developer motor and stir the toner in a new toner cartridge. 194 Understanding the Printer Menus On* Automatically adjusts color registration. Adjust ColorRegi Purpose: To automatically adjust color registration. Does not automatically adjust color registration. Values: Yes Stirs the...

User Guide
Page 205
...paper properly. Paper Characteristics The following paper characteristics affect print quality and reliability. Moisture Content The amount of the Dell™ C1765nfw Color Multifunction Printer unless otherwise mentioned. For 60 to 135 g/m2 (16 to printing and cause feeding problems regardless of paper....in a sheet of humidity. Grain Direction Grain refers to the alignment of print media to moisture changes that can be paper, labels, envelopes, and coated paper among others. 16 Print Media Guidelines Print media can degrade its edges. Storing paper unwrapped, even...
...paper properly. Paper Characteristics The following paper characteristics affect print quality and reliability. Moisture Content The amount of the Dell™ C1765nfw Color Multifunction Printer unless otherwise mentioned. For 60 to 135 g/m2 (16 to printing and cause feeding problems regardless of paper....in a sheet of humidity. Grain Direction Grain refers to the alignment of print media to moisture changes that can be paper, labels, envelopes, and coated paper among others. 16 Print Media Guidelines Print media can degrade its edges. Storing paper unwrapped, even...
User Guide
Page 209
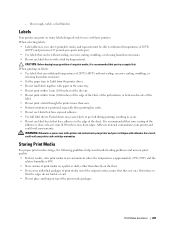
... sheet (printable stock), and topcoats must be able to the edge of the label. • Do not print a label through the printer more than directly on many labels designed only for use label sheets with adhesive. CAUTION: Before buying large quantities of any print media, it... media on labels: • Use labels that can withstand temperatures of the print media packages. When printing on a pallet or shelf, rather than once. • Portrait orientation is done at least 1 mm (0.04 inches) away from the printer driver. • Do not load labels together with laser printers.
... sheet (printable stock), and topcoats must be able to the edge of the label. • Do not print a label through the printer more than directly on many labels designed only for use label sheets with adhesive. CAUTION: Before buying large quantities of any print media, it... media on labels: • Use labels that can withstand temperatures of the print media packages. When printing on a pallet or shelf, rather than once. • Portrait orientation is done at least 1 mm (0.04 inches) away from the printer driver. • Do not load labels together with laser printers.

User Guide
Page 211
Paper Type Specifications Paper type Plain Paper Plain Thick Paper Covers Coated Label Envelopes Recycled 60-90 91-105 106-163 106-163 60-105 Weight (gsm) Priority Sheet Inserter (PSI) Y* Y Y Y Y Y Y Y Y Y Y Y Remarks Inkjet printer paper cannot be used . Print Media Guidelines 209 Inkjet printer paper cannot be used . - Supported Paper Types Plain Media Multipurpose...
Paper Type Specifications Paper type Plain Paper Plain Thick Paper Covers Coated Label Envelopes Recycled 60-90 91-105 106-163 106-163 60-105 Weight (gsm) Priority Sheet Inserter (PSI) Y* Y Y Y Y Y Y Y Y Y Y Y Remarks Inkjet printer paper cannot be used . Print Media Guidelines 209 Inkjet printer paper cannot be used . - Supported Paper Types Plain Media Multipurpose...
User Guide
Page 213
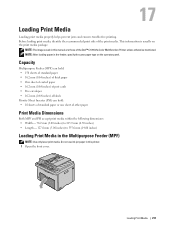
Before loading print media, identify the recommended print side of the Dell™ C1765nfw Color Multifunction Printer unless otherwise mentioned. Do not use ink jet paper in the Multipurpose Feeder (MPF) NOTE: Use only laser print media. This information is usually on the operator panel. Capacity Multipurpose Feeder (MPF)...sheet of coated paper • 16.2 mm (0.64 inches) of post cards • Five envelopes • 16.2 mm (0.64 inches) of labels Priority Sheet Inserter (PSI) can hold: • 10 sheets of standard paper or one sheet of other paper Print Media Dimensions Both MPF and...
Before loading print media, identify the recommended print side of the Dell™ C1765nfw Color Multifunction Printer unless otherwise mentioned. Do not use ink jet paper in the Multipurpose Feeder (MPF) NOTE: Use only laser print media. This information is usually on the operator panel. Capacity Multipurpose Feeder (MPF)...sheet of coated paper • 16.2 mm (0.64 inches) of post cards • Five envelopes • 16.2 mm (0.64 inches) of labels Priority Sheet Inserter (PSI) can hold: • 10 sheets of standard paper or one sheet of other paper Print Media Dimensions Both MPF and...

User Guide
Page 314
Installing a Toner Cartridge 1 Unpack a new toner cartridge of the desired color and shake it five to six times to the associated cartridge holder, and then insert it . NOTE: Handle the toner cartridge carefully to avoid spillage of the new toner cartridge matches that the color of the toner. 2 Remove the tape from the toner cartridge. 3 Adjust the toner cartridge to distribute the toner evenly. NOTE: Ensure that on the handle before replacing it firmly by pressing near the center of the label until the cartridge clicks. 312 Maintaining Your Printer
Installing a Toner Cartridge 1 Unpack a new toner cartridge of the desired color and shake it five to six times to the associated cartridge holder, and then insert it . NOTE: Handle the toner cartridge carefully to avoid spillage of the new toner cartridge matches that the color of the toner. 2 Remove the tape from the toner cartridge. 3 Adjust the toner cartridge to distribute the toner evenly. NOTE: Ensure that on the handle before replacing it firmly by pressing near the center of the label until the cartridge clicks. 312 Maintaining Your Printer

User Guide
Page 317
Maintaining Your Printer 315 6 Insert the cleaning rod fully into the hole beside the arrow on the printer until its tip reaches the interior of the printer as illustrated below, and then pull it out. 7 Repeat the same procedure for the other three holes. 8 Insert the cleaning rod back to its original location. 9 Replace the black cartridge by adjusting it to the associated cartridge holder, and then insert it firmly by pressing near the center of the label until the cartridge clicks.
Maintaining Your Printer 315 6 Insert the cleaning rod fully into the hole beside the arrow on the printer until its tip reaches the interior of the printer as illustrated below, and then pull it out. 7 Repeat the same procedure for the other three holes. 8 Insert the cleaning rod back to its original location. 9 Replace the black cartridge by adjusting it to the associated cartridge holder, and then insert it firmly by pressing near the center of the label until the cartridge clicks.
