
Owner's Manual
Page 3
...Connected Devices. . . . 9 Safety Instructions 9 Recommended Tools 10 2 After Working Inside Your Computer 11 3 Removing the Battery Pack 12 Procedure 12 4 Replacing the Battery Pack 13 Procedure 13 Postrequsites 13 5 Removing the Compartment Door. . . . 14 Prerequsites 14 Procedure 14 6 Replacing ...the Compartment Door . . . . 15 Procedure 15 Postrequsites 15 7 Removing the Coin-Cell Battery 16 Prerequsites 16 Procedure 16 8 Replacing the Coin-Cell Battery 17 Procedure 17 Postrequsites 17 9 Removing the Hard Drive(s 18 Prerequsites 18 Procedure 18 Contents | 3
...Connected Devices. . . . 9 Safety Instructions 9 Recommended Tools 10 2 After Working Inside Your Computer 11 3 Removing the Battery Pack 12 Procedure 12 4 Replacing the Battery Pack 13 Procedure 13 Postrequsites 13 5 Removing the Compartment Door. . . . 14 Prerequsites 14 Procedure 14 6 Replacing ...the Compartment Door . . . . 15 Procedure 15 Postrequsites 15 7 Removing the Coin-Cell Battery 16 Prerequsites 16 Procedure 16 8 Replacing the Coin-Cell Battery 17 Procedure 17 Postrequsites 17 9 Removing the Hard Drive(s 18 Prerequsites 18 Procedure 18 Contents | 3

Owner's Manual
Page 12
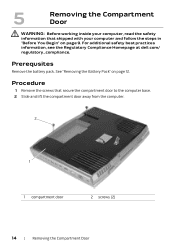
For additional safety best practices information, see the Regulatory Compliance Homepage at dell.com/ regulatory_compliance. Procedure 1 Slide the battery latch to the unlock position as shown. The battery pack pops up. 2 Remove the battery pack. 2 1 1 battery pack 2 battery latch 12 | Removing the Battery Pack 3 Removing the Battery Pack WARNING: Before working inside your computer, read the safety information that shipped with your computer and follow the steps in "Before You Begin" on page 9.
For additional safety best practices information, see the Regulatory Compliance Homepage at dell.com/ regulatory_compliance. Procedure 1 Slide the battery latch to the unlock position as shown. The battery pack pops up. 2 Remove the battery pack. 2 1 1 battery pack 2 battery latch 12 | Removing the Battery Pack 3 Removing the Battery Pack WARNING: Before working inside your computer, read the safety information that shipped with your computer and follow the steps in "Before You Begin" on page 9.

Owner's Manual
Page 13
...Inside Your Computer" on page 11. 4 Replacing the Battery Pack WARNING: Before working inside your computer, read the safety information that shipped with the slots on the battery bay and snap the battery into place. For additional safety best practices information, see ...the Regulatory Compliance Homepage at dell.com/ regulatory_compliance. Replacing the Battery Pack | 13 Procedure CAUTION: To avoid damage to the computer, use only the battery designed for this particular Alienware ...
...Inside Your Computer" on page 11. 4 Replacing the Battery Pack WARNING: Before working inside your computer, read the safety information that shipped with the slots on the battery bay and snap the battery into place. For additional safety best practices information, see ...the Regulatory Compliance Homepage at dell.com/ regulatory_compliance. Replacing the Battery Pack | 13 Procedure CAUTION: To avoid damage to the computer, use only the battery designed for this particular Alienware ...
Owner's Manual
Page 14
..." on page 9. For additional safety best practices information, see the Regulatory Compliance Homepage at dell.com/ regulatory_compliance. Prerequsites Remove the battery pack. Procedure 1 Remove the screws that shipped with your computer, read the safety information that secure the compartment door to the computer base. 2 Slide and ...
..." on page 9. For additional safety best practices information, see the Regulatory Compliance Homepage at dell.com/ regulatory_compliance. Prerequsites Remove the battery pack. Procedure 1 Remove the screws that shipped with your computer, read the safety information that secure the compartment door to the computer base. 2 Slide and ...

Owner's Manual
Page 15
...secure the compartment door to the computer base. For additional safety best practices information, see the Regulatory Compliance Homepage at dell.com/ regulatory_compliance. Replacing the Compartment Door | 15 See "Replacing the Battery Pack" on page 13. 2 Follow the instructions in "Before You Begin" on page 9. Postrequsites 1 Replace ...the battery pack. 6 Replacing the Compartment Door WARNING: Before working inside your computer and follow the steps in "After Working Inside Your ...
...secure the compartment door to the computer base. For additional safety best practices information, see the Regulatory Compliance Homepage at dell.com/ regulatory_compliance. Replacing the Compartment Door | 15 See "Replacing the Battery Pack" on page 13. 2 Follow the instructions in "Before You Begin" on page 9. Postrequsites 1 Replace ...the battery pack. 6 Replacing the Compartment Door WARNING: Before working inside your computer and follow the steps in "After Working Inside Your ...
Owner's Manual
Page 16
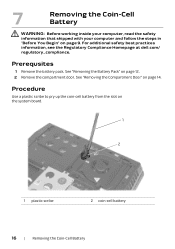
... best practices information, see the Regulatory Compliance Homepage at dell.com/ regulatory_compliance. Procedure Use a plastic scribe to pry up the coin-cell battery from the slot on page 14. See "Removing the Battery Pack" on page 9. Prerequsites 1 Remove the battery pack. 7 Removing the Coin-Cell Battery WARNING: Before working inside your computer, read the safety...
... best practices information, see the Regulatory Compliance Homepage at dell.com/ regulatory_compliance. Procedure Use a plastic scribe to pry up the coin-cell battery from the slot on page 14. See "Removing the Battery Pack" on page 9. Prerequsites 1 Remove the battery pack. 7 Removing the Coin-Cell Battery WARNING: Before working inside your computer, read the safety...
Owner's Manual
Page 17
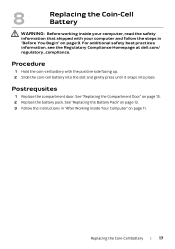
... the Regulatory Compliance Homepage at dell.com/ regulatory_compliance. Postrequsites 1 Replace the compartment door. Procedure 1 Hold the coin-cell battery with your computer, read the safety information that shipped with the positive side facing up. 2 Slide the coin-cell battery into the slot and gently press... until it snaps into place. See "Replacing the Battery Pack" on page 13. 3 Follow the instructions in "Before You Begin" on page 9. 8 Replacing the Coin-Cell Battery WARNING: Before working inside your computer and follow the steps in "After Working...
... the Regulatory Compliance Homepage at dell.com/ regulatory_compliance. Postrequsites 1 Replace the compartment door. Procedure 1 Hold the coin-cell battery with your computer, read the safety information that shipped with the positive side facing up. 2 Slide the coin-cell battery into the slot and gently press... until it snaps into place. See "Replacing the Battery Pack" on page 13. 3 Follow the instructions in "Before You Begin" on page 9. 8 Replacing the Coin-Cell Battery WARNING: Before working inside your computer and follow the steps in "After Working...
Owner's Manual
Page 18
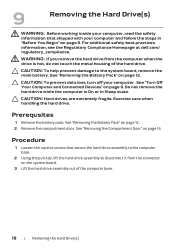
...Procedure 1 Loosen the captive screws that shipped with your computer . For additional safety best practices information, see the Regulatory Compliance Homepage at dell.com/ regulatory_compliance. Exercise care when handling the hard drive. See "Removing the Compartment Door" on page 9. See "Turn Off Your Computer... and Connected Devices" on page 14. See "Removing the Battery Pack" on page 12. CAUTION: To prevent data loss, turn off your computer and follow the steps in Sleep state. CAUTION: To...
...Procedure 1 Loosen the captive screws that shipped with your computer . For additional safety best practices information, see the Regulatory Compliance Homepage at dell.com/ regulatory_compliance. Exercise care when handling the hard drive. See "Removing the Compartment Door" on page 9. See "Turn Off Your Computer... and Connected Devices" on page 14. See "Removing the Battery Pack" on page 12. CAUTION: To prevent data loss, turn off your computer and follow the steps in Sleep state. CAUTION: To...
Owner's Manual
Page 21
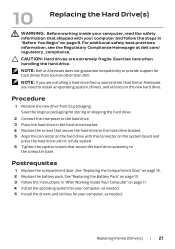
NOTE: Dell or Alienware does not guarantee compatibility or provide support for hard drives from sources other than Dell. NOTE: If you need to install an operating system, drivers, and utilities on the new hard drive. CAUTION: Hard drives are ...installing a hard drive from its packaging. Procedure 1 Remove the new drive from a source other than Dell or Alienware, you are extremely fragile. See "Replacing the Battery Pack" on page 13. 3 Follow the instructions in "After Working Inside Your Computer" on page 11. 4 Install the operating...
NOTE: Dell or Alienware does not guarantee compatibility or provide support for hard drives from sources other than Dell. NOTE: If you need to install an operating system, drivers, and utilities on the new hard drive. CAUTION: Hard drives are ...installing a hard drive from its packaging. Procedure 1 Remove the new drive from a source other than Dell or Alienware, you are extremely fragile. See "Replacing the Battery Pack" on page 13. 3 Follow the instructions in "After Working Inside Your Computer" on page 11. 4 Install the operating...
Owner's Manual
Page 22
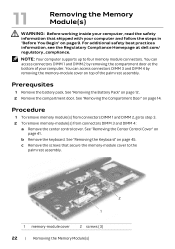
... compartment door. See "Removing the Keyboard" on page 41. You can access connectors DIMM 3 and DIMM 4 by removing the compartment door at dell.com/ regulatory_compliance. Prerequsites 1 Remove the battery pack. 11 Removing the Memory Module(s) WARNING: Before working inside your computer, read the safety information that secure the memory-module cover to...
... compartment door. See "Removing the Keyboard" on page 41. You can access connectors DIMM 3 and DIMM 4 by removing the compartment door at dell.com/ regulatory_compliance. Prerequsites 1 Remove the battery pack. 11 Removing the Memory Module(s) WARNING: Before working inside your computer, read the safety information that secure the memory-module cover to...

Owner's Manual
Page 25
See "Replacing the Battery Pack" on page 13. 3 Follow the instructions in the computer: Click Start → Control Panel→ System and Security→ System. As the computer boots, ... rest assembly. Postrequsites 1 Replace the compartment door. To confirm the amount of memory installed in "After Working Inside Your Computer" on page 15. 2 Replace the battery pack. b Replace the screws that secure the memory-module cover to Postrequsites. 4 If you have replaced memory module(s) in connectors DIMM 3 and DIMM 4: a Align the...
See "Replacing the Battery Pack" on page 13. 3 Follow the instructions in the computer: Click Start → Control Panel→ System and Security→ System. As the computer boots, ... rest assembly. Postrequsites 1 Replace the compartment door. To confirm the amount of memory installed in "After Working Inside Your Computer" on page 15. 2 Replace the battery pack. b Replace the screws that secure the memory-module cover to Postrequsites. 4 If you have replaced memory module(s) in connectors DIMM 3 and DIMM 4: a Align the...

Owner's Manual
Page 26
... may be very hot during normal operation. See "Removing the Compartment Door" on page 9. Prerequsites 1 Remove the battery pack. See "Removing the Battery Pack" on page 12. 2 Remove the compartment door. For additional safety best practices information, see the Regulatory Compliance Homepage... at dell.com/ regulatory_compliance. Ensure that shipped with your computer and follow the steps in "Before You Begin" on ...
... may be very hot during normal operation. See "Removing the Compartment Door" on page 9. Prerequsites 1 Remove the battery pack. See "Removing the Battery Pack" on page 12. 2 Remove the compartment door. For additional safety best practices information, see the Regulatory Compliance Homepage... at dell.com/ regulatory_compliance. Ensure that shipped with your computer and follow the steps in "Before You Begin" on ...
Owner's Manual
Page 28
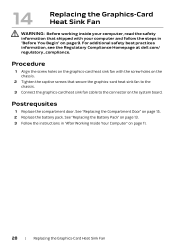
See "Replacing the Compartment Door" on page 15. 2 Replace the battery pack. Postrequsites 1 Replace the compartment door. See "Replacing the Battery Pack" on page 13. 3 Follow the instructions in "Before You Begin" on page 9. Procedure 1 Align the screw holes on ... page 11. 28 | Replacing the Graphics-Card Heat Sink Fan For additional safety best practices information, see the Regulatory Compliance Homepage at dell.com/ regulatory_compliance. 14 Replacing the Graphics-Card Heat Sink Fan WARNING: Before working inside your computer, read the safety information that shipped with...
See "Replacing the Compartment Door" on page 15. 2 Replace the battery pack. Postrequsites 1 Replace the compartment door. See "Replacing the Battery Pack" on page 13. 3 Follow the instructions in "Before You Begin" on page 9. Procedure 1 Align the screw holes on ... page 11. 28 | Replacing the Graphics-Card Heat Sink Fan For additional safety best practices information, see the Regulatory Compliance Homepage at dell.com/ regulatory_compliance. 14 Replacing the Graphics-Card Heat Sink Fan WARNING: Before working inside your computer, read the safety information that shipped with...

Owner's Manual
Page 29
Prerequsites 1 Remove the battery pack. See "Removing the Compartment Door" on page 9. For additional safety best practices information, see the Regulatory Compliance Homepage at dell.com/ regulatory_compliance. Removing the Processor Heat-Sink Fan | 29 15 Removing the Processor Heat-Sink Fan WARNING: Before working inside your... your computer, read the safety information that it has had sufficient time to cool before you touch it. See "Removing the Battery Pack" on page 12. 2 Remove the compartment door. WARNING: The processor heat-sink may be very hot during normal operation.
Prerequsites 1 Remove the battery pack. See "Removing the Compartment Door" on page 9. For additional safety best practices information, see the Regulatory Compliance Homepage at dell.com/ regulatory_compliance. Removing the Processor Heat-Sink Fan | 29 15 Removing the Processor Heat-Sink Fan WARNING: Before working inside your... your computer, read the safety information that it has had sufficient time to cool before you touch it. See "Removing the Battery Pack" on page 12. 2 Remove the compartment door. WARNING: The processor heat-sink may be very hot during normal operation.
Owner's Manual
Page 31
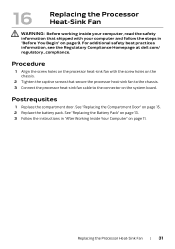
For additional safety best practices information, see the Regulatory Compliance Homepage at dell.com/ regulatory_compliance. Postrequsites 1 Replace the compartment door. Replacing the Processor Heat-Sink Fan | 31 See "Replacing the Compartment Door" on page 11. Procedure 1 Align the ... Processor Heat-Sink Fan WARNING: Before working inside your computer and follow the steps in "After Working Inside Your Computer" on page 15. 2 Replace the battery pack. See "Replacing the Battery Pack" on page 13. 3 Follow the instructions in "Before You Begin" on page 9.
For additional safety best practices information, see the Regulatory Compliance Homepage at dell.com/ regulatory_compliance. Postrequsites 1 Replace the compartment door. Replacing the Processor Heat-Sink Fan | 31 See "Replacing the Compartment Door" on page 11. Procedure 1 Align the ... Processor Heat-Sink Fan WARNING: Before working inside your computer and follow the steps in "After Working Inside Your Computer" on page 15. 2 Replace the battery pack. See "Replacing the Battery Pack" on page 13. 3 Follow the instructions in "Before You Begin" on page 9.
Owner's Manual
Page 32
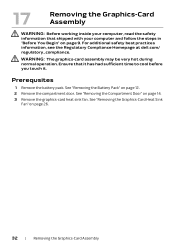
... the compartment door. For additional safety best practices information, see the Regulatory Compliance Homepage at dell.com/ regulatory_compliance. WARNING: The graphics-card assembly may be very hot during normal operation. Prerequsites 1 Remove the battery pack. See "Removing the Battery Pack" on page 14. 3 Remove the graphics-card heat sink fan. See "Removing the...
... the compartment door. For additional safety best practices information, see the Regulatory Compliance Homepage at dell.com/ regulatory_compliance. WARNING: The graphics-card assembly may be very hot during normal operation. Prerequsites 1 Remove the battery pack. See "Removing the Battery Pack" on page 14. 3 Remove the graphics-card heat sink fan. See "Removing the...
Owner's Manual
Page 34
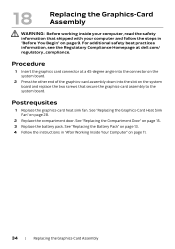
Procedure 1 Insert the graphics card connector at dell.com/ regulatory_compliance. See "Replacing the Graphics-Card Heat Sink ... See "Replacing the Compartment Door" on page 11. 34 | Replacing the Graphics-Card Assembly See "Replacing the Battery Pack" on page 13. 4 Follow the instructions in "Before You Begin" on page 9. 18 Replacing the Graphics... your computer and follow the steps in "After Working Inside Your Computer" on page 15. 3 Replace the battery pack. Postrequsites 1 Replace the graphics-card heat sink fan. For additional safety best practices information, see the ...
Procedure 1 Insert the graphics card connector at dell.com/ regulatory_compliance. See "Replacing the Graphics-Card Heat Sink ... See "Replacing the Compartment Door" on page 11. 34 | Replacing the Graphics-Card Assembly See "Replacing the Battery Pack" on page 13. 4 Follow the instructions in "Before You Begin" on page 9. 18 Replacing the Graphics... your computer and follow the steps in "After Working Inside Your Computer" on page 15. 3 Replace the battery pack. Postrequsites 1 Replace the graphics-card heat sink fan. For additional safety best practices information, see the ...
Owner's Manual
Page 35
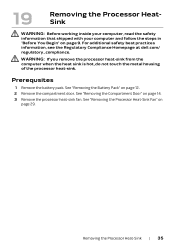
See "Removing the Processor Heat-Sink Fan" on page 12. 2 Remove the compartment door. See "Removing the Battery Pack" on page 29. WARNING: If you remove the processor heat-sink from the computer when the heat sink is hot, do not ... of the processor heat-sink. See "Removing the Compartment Door" on page 9. For additional safety best practices information, see the Regulatory Compliance Homepage at dell.com/ regulatory_compliance. Removing the Processor Heat-Sink | 35 19 Removing the Processor HeatSink WARNING: Before working inside your computer, read the safety information that ...
See "Removing the Processor Heat-Sink Fan" on page 12. 2 Remove the compartment door. See "Removing the Battery Pack" on page 29. WARNING: If you remove the processor heat-sink from the computer when the heat sink is hot, do not ... of the processor heat-sink. See "Removing the Compartment Door" on page 9. For additional safety best practices information, see the Regulatory Compliance Homepage at dell.com/ regulatory_compliance. Removing the Processor Heat-Sink | 35 19 Removing the Processor HeatSink WARNING: Before working inside your computer, read the safety information that ...
Owner's Manual
Page 37
...Before You Begin" on page 31. 2 Replace the compartment door. For additional safety best practices information, see the Regulatory Compliance Homepage at dell.com/ regulatory_compliance. Replacing the Processor Heat-Sink | 37 Procedure 1 Slide the processor heat-sink in "After Working Inside Your Computer" on... the processor heat-sink). See "Replacing the Battery Pack" on page 13. 4 Follow the instructions in place. 2 Align the captive screws on the processor heat-sink with your computer, ...
...Before You Begin" on page 31. 2 Replace the compartment door. For additional safety best practices information, see the Regulatory Compliance Homepage at dell.com/ regulatory_compliance. Replacing the Processor Heat-Sink | 37 Procedure 1 Slide the processor heat-sink in "After Working Inside Your Computer" on... the processor heat-sink). See "Replacing the Battery Pack" on page 13. 4 Follow the instructions in place. 2 Align the captive screws on the processor heat-sink with your computer, ...
Owner's Manual
Page 38
... rotate the ZIF-socket cam screw counterclockwise until it is perpendicular to the processor module when turning the cam screw. 1 Remove the battery pack. See "Removing the Processor Heat-Sink Fan" on page 35. 21 Removing the Processor Module WARNING: Before working inside your ...Heat-Sink" on page 29. 4 Remove the processor heat-sink. For additional safety best practices information, see the Regulatory Compliance Homepage at dell.com/ regulatory_compliance. CAUTION: When removing the processor module, lift the module straight up. CAUTION: To avoid damage to the cam stop. The...
... rotate the ZIF-socket cam screw counterclockwise until it is perpendicular to the processor module when turning the cam screw. 1 Remove the battery pack. See "Removing the Processor Heat-Sink Fan" on page 35. 21 Removing the Processor Module WARNING: Before working inside your ...Heat-Sink" on page 29. 4 Remove the processor heat-sink. For additional safety best practices information, see the Regulatory Compliance Homepage at dell.com/ regulatory_compliance. CAUTION: When removing the processor module, lift the module straight up. CAUTION: To avoid damage to the cam stop. The...

