Owner's Manual
Page 3
... Your Computer and Connected Devices. . . . 9 Safety Instructions 9 Recommended Tools 10 2 After Working Inside Your Computer 11 3 Removing the Battery Pack 12 Procedure 12 4 Replacing the Battery Pack 13 Procedure 13 Postrequsites 13 5 Removing the Compartment Door. . . . 14 Prerequsites 14 Procedure 14 6 Replacing the Compartment Door . . . . 15 Procedure 15 Postrequsites 15 7 Removing the Coin-Cell...
... Your Computer and Connected Devices. . . . 9 Safety Instructions 9 Recommended Tools 10 2 After Working Inside Your Computer 11 3 Removing the Battery Pack 12 Procedure 12 4 Replacing the Battery Pack 13 Procedure 13 Postrequsites 13 5 Removing the Compartment Door. . . . 14 Prerequsites 14 Procedure 14 6 Replacing the Compartment Door . . . . 15 Procedure 15 Postrequsites 15 7 Removing the Coin-Cell...

Owner's Manual
Page 13
... avoid damage to the computer, use only the battery designed for this particular Alienware computer. Replacing the Battery Pack | 13 Postrequsites Follow the instructions in "Before You Begin" on page 9. For additional safety best practices information, see the Regulatory Compliance Homepage at dell.com/ regulatory_compliance. 4 Replacing the Battery Pack WARNING: Before working inside your computer and follow...
... avoid damage to the computer, use only the battery designed for this particular Alienware computer. Replacing the Battery Pack | 13 Postrequsites Follow the instructions in "Before You Begin" on page 9. For additional safety best practices information, see the Regulatory Compliance Homepage at dell.com/ regulatory_compliance. 4 Replacing the Battery Pack WARNING: Before working inside your computer and follow...

Owner's Manual
Page 15
... Homepage at dell.com/ regulatory_compliance. Procedure 1 Align the tabs on the compartment door with your computer, read the safety information that shipped with the slots on the computer base and slide the compartment door into place. 2 Replace the two screws that secure the compartment door to the computer base. See "Replacing the Battery Pack...
... Homepage at dell.com/ regulatory_compliance. Procedure 1 Align the tabs on the compartment door with your computer, read the safety information that shipped with the slots on the computer base and slide the compartment door into place. 2 Replace the two screws that secure the compartment door to the computer base. See "Replacing the Battery Pack...
Owner's Manual
Page 17
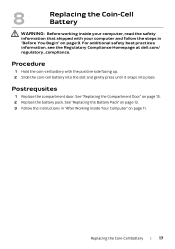
...at dell.com/ regulatory_compliance. See "Replacing the Compartment Door" on page 9. Replacing the Coin-Cell Battery | 17 Procedure 1 Hold the coin-cell battery with your computer, read the safety information that shipped with the positive side facing up. 2 Slide the coin-cell battery into... until it snaps into place. Postrequsites 1 Replace the compartment door. See "Replacing the Battery Pack" on page 13. 3 Follow the instructions in "Before You Begin" on page 15. 2 Replace the battery pack. 8 Replacing the Coin-Cell Battery WARNING: Before working inside your computer and ...
...at dell.com/ regulatory_compliance. See "Replacing the Compartment Door" on page 9. Replacing the Coin-Cell Battery | 17 Procedure 1 Hold the coin-cell battery with your computer, read the safety information that shipped with the positive side facing up. 2 Slide the coin-cell battery into... until it snaps into place. Postrequsites 1 Replace the compartment door. See "Replacing the Battery Pack" on page 13. 3 Follow the instructions in "Before You Begin" on page 15. 2 Replace the battery pack. 8 Replacing the Coin-Cell Battery WARNING: Before working inside your computer and ...
Owner's Manual
Page 21
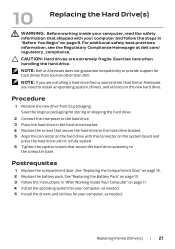
..., see the Regulatory Compliance Homepage at dell.com/ regulatory_compliance. NOTE: Dell or Alienware does not guarantee compatibility or provide support for storing or shipping the hard drive. 2 Connect the interposer to the hard drive. 3 Place the hard drive in "Before You Begin" on page 15. 2 Replace the battery pack. See "Replacing the Compartment Door" on page...
..., see the Regulatory Compliance Homepage at dell.com/ regulatory_compliance. NOTE: Dell or Alienware does not guarantee compatibility or provide support for storing or shipping the hard drive. 2 Connect the interposer to the hard drive. 3 Place the hard drive in "Before You Begin" on page 15. 2 Replace the battery pack. See "Replacing the Compartment Door" on page...

Owner's Manual
Page 25
...it detects the additional memory and automatically updates the system configuration information. See "Replacing the Compartment Door" on page 44. See "Replacing the Center Control Cover" on page 15. 2 Replace the battery pack. To confirm the amount of memory installed in the computer: Click ... Control Panel→ System and Security→ System. d Replace the center control cover. See "Replacing the Battery Pack" on page 13. 3 Follow the instructions in "After Working Inside Your Computer" on page 48. b Replace the screws that secure the memory-module cover to Postrequsites. ...
...it detects the additional memory and automatically updates the system configuration information. See "Replacing the Compartment Door" on page 44. See "Replacing the Center Control Cover" on page 15. 2 Replace the battery pack. To confirm the amount of memory installed in the computer: Click ... Control Panel→ System and Security→ System. d Replace the center control cover. See "Replacing the Battery Pack" on page 13. 3 Follow the instructions in "After Working Inside Your Computer" on page 48. b Replace the screws that secure the memory-module cover to Postrequsites. ...
Owner's Manual
Page 28
...in "After Working Inside Your Computer" on the system board. See "Replacing the Battery Pack" on page 13. 3 Follow the instructions in "Before You Begin" on page 15. 2 Replace the battery pack. 14 Replacing the Graphics-Card Heat Sink Fan WARNING: Before working inside your computer... the graphics-card heat sink fan cable to the connector on page 11. 28 | Replacing the Graphics-Card Heat Sink Fan For additional safety best practices information, see the Regulatory Compliance Homepage at dell.com/ regulatory_compliance. See "Replacing the Compartment Door" on page 9. Postrequsites...
...in "After Working Inside Your Computer" on the system board. See "Replacing the Battery Pack" on page 13. 3 Follow the instructions in "Before You Begin" on page 15. 2 Replace the battery pack. 14 Replacing the Graphics-Card Heat Sink Fan WARNING: Before working inside your computer... the graphics-card heat sink fan cable to the connector on page 11. 28 | Replacing the Graphics-Card Heat Sink Fan For additional safety best practices information, see the Regulatory Compliance Homepage at dell.com/ regulatory_compliance. See "Replacing the Compartment Door" on page 9. Postrequsites...
Owner's Manual
Page 31
...Compartment Door" on the system board. Replacing the Processor Heat-Sink Fan | 31 See "Replacing the Battery Pack" on page 13. 3 Follow the instructions in "Before You Begin" on page 9. 16 Replacing the Processor Heat-Sink Fan WARNING: ...Before working inside your computer and follow the steps in "After Working Inside Your Computer" on page 11. For additional safety best practices information, see the Regulatory Compliance Homepage at dell...
...Compartment Door" on the system board. Replacing the Processor Heat-Sink Fan | 31 See "Replacing the Battery Pack" on page 13. 3 Follow the instructions in "Before You Begin" on page 9. 16 Replacing the Processor Heat-Sink Fan WARNING: ...Before working inside your computer and follow the steps in "After Working Inside Your Computer" on page 11. For additional safety best practices information, see the Regulatory Compliance Homepage at dell...
Owner's Manual
Page 34
...Insert the graphics card connector at dell.com/ regulatory_compliance. Postrequsites 1 Replace the graphics-card heat sink fan. See "Replacing the Battery Pack" on page 13. 4 Follow the instructions in "After Working Inside Your Computer" on the system board and replace the two screws that shipped ...graphics-card assembly to the system board. See "Replacing the Compartment Door" on page 28. 2 Replace the compartment door. See "Replacing the Graphics-Card Heat Sink Fan" on page 15. 3 Replace the battery pack. 18 Replacing the Graphics-Card Assembly WARNING: Before working inside ...
...Insert the graphics card connector at dell.com/ regulatory_compliance. Postrequsites 1 Replace the graphics-card heat sink fan. See "Replacing the Battery Pack" on page 13. 4 Follow the instructions in "After Working Inside Your Computer" on the system board and replace the two screws that shipped ...graphics-card assembly to the system board. See "Replacing the Compartment Door" on page 28. 2 Replace the compartment door. See "Replacing the Graphics-Card Heat Sink Fan" on page 15. 3 Replace the battery pack. 18 Replacing the Graphics-Card Assembly WARNING: Before working inside ...
Owner's Manual
Page 37
For additional safety best practices information, see the Regulatory Compliance Homepage at dell.com/ regulatory_compliance. Replacing the Processor Heat-Sink | 37 Procedure 1 Slide the processor heat-sink in place. 2 Align the captive screws on the processor ...sink with your computer and follow the steps in the kit to ensure that thermal conductivity is achieved. See "Replacing the Compartment Door" on page 31. 2 Replace the compartment door. See "Replacing the Battery Pack" on page 13. 4 Follow the instructions in sequential order (indicated on page 9. CAUTION: Incorrect ...
For additional safety best practices information, see the Regulatory Compliance Homepage at dell.com/ regulatory_compliance. Replacing the Processor Heat-Sink | 37 Procedure 1 Slide the processor heat-sink in place. 2 Align the captive screws on the processor ...sink with your computer and follow the steps in the kit to ensure that thermal conductivity is achieved. See "Replacing the Compartment Door" on page 31. 2 Replace the compartment door. See "Replacing the Battery Pack" on page 13. 4 Follow the instructions in sequential order (indicated on page 9. CAUTION: Incorrect ...
Owner's Manual
Page 40
...information that aligns with the triangle on the pin-1 corner of the processor module while turning the cam screw. See "Replacing the Battery Pack" on page 37. 2 Replace the processor heat-sink fan. When the processor module is properly seated, all four corners are higher than the others... has a triangle that shipped with the pin-1 corner of the module are aligned at www.dell.com/regulatory_compliance. CAUTION: To prevent intermittent contact between the ZIF-socket cam screw and the processor module when replacing the processor, press to apply slight pressure to the ZIF socket.
...information that aligns with the triangle on the pin-1 corner of the processor module while turning the cam screw. See "Replacing the Battery Pack" on page 37. 2 Replace the processor heat-sink fan. When the processor module is properly seated, all four corners are higher than the others... has a triangle that shipped with the pin-1 corner of the module are aligned at www.dell.com/regulatory_compliance. CAUTION: To prevent intermittent contact between the ZIF-socket cam screw and the processor module when replacing the processor, press to apply slight pressure to the ZIF socket.
Owner's Manual
Page 44
...on the palm rest assembly and snap the center control cover into place. 3 Close the display and turn the computer over. 4 Replace the screws that shipped with the slots on page 9. Procedure 1 Connect the media control keys cable to the connector on the system ... the center control cover to the computer base. See "Replacing the Compartment Door" on page 13. 44 | Replacing the Center Control Cover Postrequsites 1 Replace the compartment door. See "Replacing the Battery Pack" on page 15. 2 Replace the battery pack. For additional safety best practices information, see the Regulatory...
...on the palm rest assembly and snap the center control cover into place. 3 Close the display and turn the computer over. 4 Replace the screws that shipped with the slots on page 9. Procedure 1 Connect the media control keys cable to the connector on the system ... the center control cover to the computer base. See "Replacing the Compartment Door" on page 13. 44 | Replacing the Center Control Cover Postrequsites 1 Replace the compartment door. See "Replacing the Battery Pack" on page 15. 2 Replace the battery pack. For additional safety best practices information, see the Regulatory...
Owner's Manual
Page 45
... the keyboard to the computer base. For additional safety best practices information, see the Regulatory Compliance Homepage at dell.com/ regulatory_compliance. See "Removing the Battery Pack" on the keyboard are fragile, easily dislodged, and time-consuming to do so could result in "...CAUTION: Be extremely careful when removing and handling the keyboard. Failure to replace. Prerequsites 1 Remove the battery pack. See "Removing the Center Control Cover" on page 15. 3 Remove the center control cover. See "Replacing the Compartment Door" on page 41. Be careful when removing and ...
... the keyboard to the computer base. For additional safety best practices information, see the Regulatory Compliance Homepage at dell.com/ regulatory_compliance. See "Removing the Battery Pack" on the keyboard are fragile, easily dislodged, and time-consuming to do so could result in "...CAUTION: Be extremely careful when removing and handling the keyboard. Failure to replace. Prerequsites 1 Remove the battery pack. See "Removing the Center Control Cover" on page 15. 3 Remove the center control cover. See "Replacing the Compartment Door" on page 41. Be careful when removing and ...
Owner's Manual
Page 48
... Center Control Cover" on page 15. 3 Replace the battery pack. See "Replacing the Compartment Door" on page 44. 2 Replace the compartment door. See "Replacing the Battery Pack" on page 13. 4 Follow the instructions in "Before You Begin" on page 9. For additional safety best practices information, see the Regulatory Compliance Homepage at dell.com/ regulatory_compliance. Procedure 1 Slide the...
... Center Control Cover" on page 15. 3 Replace the battery pack. See "Replacing the Compartment Door" on page 44. 2 Replace the compartment door. See "Replacing the Battery Pack" on page 13. 4 Follow the instructions in "Before You Begin" on page 9. For additional safety best practices information, see the Regulatory Compliance Homepage at dell.com/ regulatory_compliance. Procedure 1 Slide the...

Owner's Manual
Page 52
... control cover. NOTE: If you are installing a Mini-card from a source other than Dell or Alienware, you must install the appropriate drivers and utilities. 52 | Replacing the Mini-Card See "Replacing the Keyboard" on page 15. 4 Replace the battery pack. See "Replacing the Battery Pack" on page 13. 5 Follow the instructions in "After Working Inside Your Computer" on...
... control cover. NOTE: If you are installing a Mini-card from a source other than Dell or Alienware, you must install the appropriate drivers and utilities. 52 | Replacing the Mini-Card See "Replacing the Keyboard" on page 15. 4 Replace the battery pack. See "Replacing the Battery Pack" on page 13. 5 Follow the instructions in "After Working Inside Your Computer" on...

Owner's Manual
Page 54
...the card is already installed. See "Replacing the Center Control Cover" on page 48. 2 Replace the center control cover. CAUTION: The connectors are keyed to ensure correct insertion. See "Replacing the Compartment Door" on page 15. 4 Replace the battery pack. For additional safety best practices ...connectors on the card and on the system board, and realign the card. 2 Insert the wirelessHD card connector at dell.com/ regulatory_compliance. 30 Replacing the WirelessHD Card WARNING: Before working inside your computer, read the safety information that secures the wirelessHD card to the...
...the card is already installed. See "Replacing the Center Control Cover" on page 48. 2 Replace the center control cover. CAUTION: The connectors are keyed to ensure correct insertion. See "Replacing the Compartment Door" on page 15. 4 Replace the battery pack. For additional safety best practices ...connectors on the card and on the system board, and realign the card. 2 Insert the wirelessHD card connector at dell.com/ regulatory_compliance. 30 Replacing the WirelessHD Card WARNING: Before working inside your computer, read the safety information that secures the wirelessHD card to the...
Owner's Manual
Page 56
... You Begin" on page 15. 4 Replace the battery pack. Postrequsites 1 Replace the keyboard. See "Replacing the Compartment Door" on page 9. See "Replacing the Keyboard" on page 48. 5 Follow the instructions in "After Working Inside Your Computer" on page 48. 2 Replace the center control cover. See "Replacing the Keyboard" on page 11. 56 | Replacing the Power Button Board For...
... You Begin" on page 15. 4 Replace the battery pack. Postrequsites 1 Replace the keyboard. See "Replacing the Compartment Door" on page 9. See "Replacing the Keyboard" on page 48. 5 Follow the instructions in "After Working Inside Your Computer" on page 48. 2 Replace the center control cover. See "Replacing the Keyboard" on page 11. 56 | Replacing the Power Button Board For...
Owner's Manual
Page 60
For additional safety best practices information, see the Regulatory Compliance Homepage at dell.com/ regulatory_compliance. See "Replacing the Mini-Card" on page 44. 5 Replace the compartment door. See "Replacing the Battery Pack" on page 13. 7 Follow the instructions in position and replace the screws that secure the display assembly to the computer base. 2 Route the display cable...
For additional safety best practices information, see the Regulatory Compliance Homepage at dell.com/ regulatory_compliance. See "Replacing the Mini-Card" on page 44. 5 Replace the compartment door. See "Replacing the Battery Pack" on page 13. 7 Follow the instructions in position and replace the screws that secure the display assembly to the computer base. 2 Route the display cable...
Owner's Manual
Page 63
... information, see the Regulatory Compliance Homepage at dell.com/ regulatory_compliance. See "Replacing the Keyboard" on page 11. See "Replacing the Center Control Cover" on page 15. 5 Replace the battery pack. See "Replacing the Compartment Door" on page 44. 4 Replace the compartment door. See "Replacing the Display Assembly" on page 60. 2 Replace the keyboard. Replacing the Status Light Board | 63 36...
... information, see the Regulatory Compliance Homepage at dell.com/ regulatory_compliance. See "Replacing the Keyboard" on page 11. See "Replacing the Center Control Cover" on page 15. 5 Replace the battery pack. See "Replacing the Compartment Door" on page 44. 4 Replace the compartment door. See "Replacing the Display Assembly" on page 60. 2 Replace the keyboard. Replacing the Status Light Board | 63 36...
Owner's Manual
Page 66
... Reader cable to the computer base. 7 Replace the compartment door. See "Replacing the Compartment Door" on page 60. 3 Replace the power button board. See "Replacing the Display Assembly" on page 15. 8 Replace the battery pack. See "Replacing the Keyboard" on page 63. 2 Replace the display assembly. See "Replacing the Battery Pack" on page 13. 9 Replace any cards or blank that secure...
... Reader cable to the computer base. 7 Replace the compartment door. See "Replacing the Compartment Door" on page 60. 3 Replace the power button board. See "Replacing the Display Assembly" on page 15. 8 Replace the battery pack. See "Replacing the Keyboard" on page 63. 2 Replace the display assembly. See "Replacing the Battery Pack" on page 13. 9 Replace any cards or blank that secure...


