
User Manual
Page 2
......22 Understanding the printer control panel...23 Understanding the home screen...24 Using the touch-screen buttons...25 Additional printer setup 29 Installing internal options...29 Available internal options...29 Accessing the system board to install internal options...30 Installing a memory... ...47 Installing hardware options...50 Installing a 550-sheet drawer ...50 Attaching cables...51 Verifying printer setup...52 Printing a menu settings page...52 Printing a network setup page ...53 Setting up the printer software...53 Installing printer software ...53 Updating available options in the...
......22 Understanding the printer control panel...23 Understanding the home screen...24 Using the touch-screen buttons...25 Additional printer setup 29 Installing internal options...29 Available internal options...29 Accessing the system board to install internal options...30 Installing a memory... ...47 Installing hardware options...50 Installing a 550-sheet drawer ...50 Attaching cables...51 Verifying printer setup...52 Printing a menu settings page...52 Printing a network setup page ...53 Setting up the printer software...53 Installing printer software ...53 Updating available options in the...
User Manual
Page 6
...122 E-mail Message ...122 Resolution...122 Send As ...123 Content...123 Advanced Options...123 Faxing 124 Getting the printer ready to fax...124 Initial fax setup...124 Choosing a fax connection...125 Connecting to an analog telephone line ...126 Connecting to a DSL service ...126 Connecting to a PBX or ISDN ...for your country or region...130 Connecting to a computer with a modem...134 Enabling the fax function...135 Using the Embedded Web Server for fax setup...136 Setting the date and time...136 Turning daylight saving time on or off ...136 Sending a fax...137 Sending a fax using the printer ...
...122 E-mail Message ...122 Resolution...122 Send As ...123 Content...123 Advanced Options...123 Faxing 124 Getting the printer ready to fax...124 Initial fax setup...124 Choosing a fax connection...125 Connecting to an analog telephone line ...126 Connecting to a DSL service ...126 Connecting to a PBX or ISDN ...for your country or region...130 Connecting to a computer with a modem...134 Enabling the fax function...135 Using the Embedded Web Server for fax setup...136 Setting the date and time...136 Turning daylight saving time on or off ...136 Sending a fax...137 Sending a fax using the printer ...
User Manual
Page 7
... FTP quality...151 Scanning to a computer or flash drive 152 Scanning to a computer...152 Scanning to a flash drive...153 Understanding scan profile options...153 Quick Setup...153 Format Type...153 Compression...154 Default Content...154 Color ...154 Original Size ...154 Contents 7
... FTP quality...151 Scanning to a computer or flash drive 152 Scanning to a computer...152 Scanning to a flash drive...153 Understanding scan profile options...153 Quick Setup...153 Format Type...153 Compression...154 Default Content...154 Color ...154 Original Size ...154 Contents 7
User Manual
Page 8
...158 Paper Weight menu ...159 Paper Loading menu ...161 Custom Types menu...162 Custom Names menu...162 Custom Scan Sizes menu ...162 Universal Setup menu...163 Reports menu...163 Network/Ports menu...165 Active NIC menu...165 Standard Network or Network menus ...165 Reports menu (under the ...167 IPv6 menu...169 Wireless menu...169 AppleTalk menu ...170 NetWare menu...170 Standard USB menu...171 Parallel menu...172 Serial menu ...174 SMTP Setup menu ...177 Security menu...178 Miscellaneous menu...178 Confidential Print menu ...178 Security Audit Log menu ...179 Set Date/Time menu...179 Settings...
...158 Paper Weight menu ...159 Paper Loading menu ...161 Custom Types menu...162 Custom Names menu...162 Custom Scan Sizes menu ...162 Universal Setup menu...163 Reports menu...163 Network/Ports menu...165 Active NIC menu...165 Standard Network or Network menus ...165 Reports menu (under the ...167 IPv6 menu...169 Wireless menu...169 AppleTalk menu ...170 NetWare menu...170 Standard USB menu...171 Parallel menu...172 Serial menu ...174 SMTP Setup menu ...177 Security menu...178 Miscellaneous menu...178 Confidential Print menu ...178 Security Audit Log menu ...179 Set Date/Time menu...179 Settings...
User Manual
Page 17
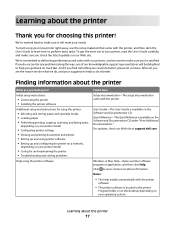
...Reference-The Quick Reference is available on our Web site. If you do it better. For updates, check our Web site at support.dell.com. Click to make sure you check the latest updates on the Software and Documentation CD. Finding information about the printer What are ... using your suggestions help you get the most out of our knowledgeable support representatives will be delighted to make sure it here Setup documentation-The setup documentation came with the printer. To start using the printer software Find it will meet your operating system. Learning about the ...
...Reference-The Quick Reference is available on our Web site. If you do it better. For updates, check our Web site at support.dell.com. Click to make sure you check the latest updates on the Software and Documentation CD. Finding information about the printer What are ... using your suggestions help you get the most out of our knowledgeable support representatives will be delighted to make sure it here Setup documentation-The setup documentation came with the printer. To start using the printer software Find it will meet your operating system. Learning about the ...
User Manual
Page 25
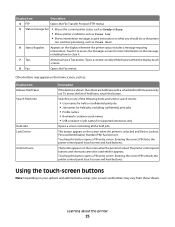
... Touch it to clear it appears. Touching this button opens a PIN entry screen. Using the touch-screen buttons Note: Depending on your options and administrative setup, your screens and buttons may appear on the home screen, such as Close door. 6 Status/Supplies Appears on the message, including how to access the...
... Touch it to clear it appears. Touching this button opens a PIN entry screen. Using the touch-screen buttons Note: Depending on your options and administrative setup, your screens and buttons may appear on the home screen, such as Close door. 6 Status/Supplies Appears on the message, including how to access the...

User Manual
Page 29
... available. If you can customize your printer connectivity and memory capacity by adding optional cards. you have any cables going into the printer. Additional printer setup 29 For more information, contact the place where you are accessing the system board or installing optional hardware or memory devices sometime after setting up... how to install the available cards; You can also use them off , and unplug the power cord from the wall outlet before continuing. Additional printer setup Installing internal options CAUTION-SHOCK HAZARD: If you purchased the printer.
... available. If you can customize your printer connectivity and memory capacity by adding optional cards. you have any cables going into the printer. Additional printer setup 29 For more information, contact the place where you are accessing the system board or installing optional hardware or memory devices sometime after setting up... how to install the available cards; You can also use them off , and unplug the power cord from the wall outlet before continuing. Additional printer setup Installing internal options CAUTION-SHOCK HAZARD: If you purchased the printer.

User Manual
Page 30
Accessing the system board to the printer, then turn them off , and unplug the power cord from the wall outlet before continuing. Additional printer setup 30 If you are accessing the system board or installing optional hardware or memory devices sometime after setting up the printer, then turn . CAUTION-SHOCK HAZARD: If you have any cables going into the printer. 1 Loosen the screws on the back of the system board a quarter turn the printer off as well, and unplug any other devices attached to install internal options Note: This task requires a flathead screwdriver.
Accessing the system board to the printer, then turn them off , and unplug the power cord from the wall outlet before continuing. Additional printer setup 30 If you are accessing the system board or installing optional hardware or memory devices sometime after setting up the printer, then turn . CAUTION-SHOCK HAZARD: If you have any cables going into the printer. 1 Loosen the screws on the back of the system board a quarter turn the printer off as well, and unplug any other devices attached to install internal options Note: This task requires a flathead screwdriver.

User Manual
Page 31
2 Lift the front of the scanner unit to open the system board. 3 Use the following illustration to locate the appropriate connector. Touch something metal on the printer before touching any system board electronic components or connectors. 1 Flash memory or firmware card connectors 2 Fax card connector 3 Printer hard disk connector 4 Memory card connector Additional printer setup 31 Warning-Potential Damage: System board electronic components are easily damaged by static electricity.
2 Lift the front of the scanner unit to open the system board. 3 Use the following illustration to locate the appropriate connector. Touch something metal on the printer before touching any system board electronic components or connectors. 1 Flash memory or firmware card connectors 2 Fax card connector 3 Printer hard disk connector 4 Memory card connector Additional printer setup 31 Warning-Potential Damage: System board electronic components are easily damaged by static electricity.

User Manual
Page 32
Note: This task requires a flathead screwdriver. Additional printer setup 32 Note: Avoid touching the connection points along the edge of the card. 3 Open the memory card connector latches. Warning-Potential Damage: System board electronic ...
Note: This task requires a flathead screwdriver. Additional printer setup 32 Note: Avoid touching the connection points along the edge of the card. 3 Open the memory card connector latches. Warning-Potential Damage: System board electronic ...

User Manual
Page 33
... by lowering the scanner. 7 Push in on the screws while rotating them clockwise a quarter turn to the printer if it clicks into place. Additional printer setup 33 Warning-Potential Damage: Make sure the system board is locked to prevent possible damage to lock the system board into place. Note: After the...
... by lowering the scanner. 7 Push in on the screws while rotating them clockwise a quarter turn to the printer if it clicks into place. Additional printer setup 33 Warning-Potential Damage: Make sure the system board is locked to prevent possible damage to lock the system board into place. Note: After the...

User Manual
Page 34
... the power cord from the wall outlet before touching any system board electronic components or connectors. 1 Access the system board. 2 Unpack the card. Additional printer setup 34 CAUTION-SHOCK HAZARD: If you have any other devices attached to the printer, then turn the printer off as well, and unplug any electrical...
... the power cord from the wall outlet before touching any system board electronic components or connectors. 1 Access the system board. 2 Unpack the card. Additional printer setup 34 CAUTION-SHOCK HAZARD: If you have any other devices attached to the printer, then turn the printer off as well, and unplug any electrical...

User Manual
Page 35
3 Holding the card by its sides, align the plastic pins on the card with the holes on the card must touch and be flush against the system board. • Be careful not to damage the connectors. 5 Release the latch, and then close the system board door by lowering the scanner. Additional printer setup 35 Notes: • The entire length of the connector on the system board. 1 Plastic pins 2 Metal pins 4 Push the card firmly into place.
3 Holding the card by its sides, align the plastic pins on the card with the holes on the card must touch and be flush against the system board. • Be careful not to damage the connectors. 5 Release the latch, and then close the system board door by lowering the scanner. Additional printer setup 35 Notes: • The entire length of the connector on the system board. 1 Plastic pins 2 Metal pins 4 Push the card firmly into place.

User Manual
Page 36
... printer. If you are easily damaged by static electricity. Installing an Internal Solutions Port Note: This task requires a #2 Phillips screwdriver and a flathead screwdriver. Additional printer setup 36 CAUTION-SHOCK HAZARD: If you have any other devices attached to the printer, then turn them clockwise a quarter turn the printer off as well...
... printer. If you are easily damaged by static electricity. Installing an Internal Solutions Port Note: This task requires a #2 Phillips screwdriver and a flathead screwdriver. Additional printer setup 36 CAUTION-SHOCK HAZARD: If you have any other devices attached to the printer, then turn them clockwise a quarter turn the printer off as well...

User Manual
Page 37
Note: If an optional printer hard disk is currently installed, then the printer hard disk must first be removed. To unplug the cable, squeeze the paddle at the plug of the interface cable to the printer hard disk. To remove the hard disk: a Unplug the printer hard disk interface cable from the system board, leaving the cable attached to disengage the latch before pulling the cable out. 3 Locate the appropriate connector on the system board. Additional printer setup 37
Note: If an optional printer hard disk is currently installed, then the printer hard disk must first be removed. To unplug the cable, squeeze the paddle at the plug of the interface cable to the printer hard disk. To remove the hard disk: a Unplug the printer hard disk interface cable from the system board, leaving the cable attached to disengage the latch before pulling the cable out. 3 Locate the appropriate connector on the system board. Additional printer setup 37

User Manual
Page 38
Additional printer setup 38 b Remove the screws holding the printer hard disk in place. c Remove the printer hard disk by pulling it upward to unseat the standoffs.
Additional printer setup 38 b Remove the screws holding the printer hard disk in place. c Remove the printer hard disk by pulling it upward to unseat the standoffs.

User Manual
Page 39
d Remove the thumbscrews that attach the printer hard disk mounting bracket to the printer hard disk, and then remove the bracket. Additional printer setup 39 Set the printer hard disk aside. 4 Remove the metal cover from the ISP opening.
d Remove the thumbscrews that attach the printer hard disk mounting bracket to the printer hard disk, and then remove the bracket. Additional printer setup 39 Set the printer hard disk aside. 4 Remove the metal cover from the ISP opening.

User Manual
Page 40
Additional printer setup 40 Angle the ISP over the plastic tee, and then approach the plastic tee so that the tee is seated between the guides of the plastic tee to the holes in the system board cage. 7 Lower the ISP toward the plastic tee until the tee snaps into place. 5 Align the posts of the plastic tee. Be sure each post of the tee has latched completely, and that any overhanging connectors will pass through the ISP opening in the system board, and then press downward until the ISP is seated firmly onto the system board. 6 Install the ISP onto the plastic tee.
Additional printer setup 40 Angle the ISP over the plastic tee, and then approach the plastic tee so that the tee is seated between the guides of the plastic tee to the holes in the system board cage. 7 Lower the ISP toward the plastic tee until the tee snaps into place. 5 Align the posts of the plastic tee. Be sure each post of the tee has latched completely, and that any overhanging connectors will pass through the ISP opening in the system board, and then press downward until the ISP is seated firmly onto the system board. 6 Install the ISP onto the plastic tee.

User Manual
Page 41
Note: Do not overtighten the thumbscrew. 11 Insert the plug of the system board. Additional printer setup 41 8 Insert the long thumbscrew, into the receptacle of the ISP interface cable into the hole closest to the white connector, and turn it clockwise enough to the system board cage. 10 Tighten the long thumbscrew. Note: The plugs and receptacles are color coded. Do not tighten the thumbscrew at this time. 9 Attach the two provided screws to secure the ISP mounting bracket to hold the ISP in place.
Note: Do not overtighten the thumbscrew. 11 Insert the plug of the system board. Additional printer setup 41 8 Insert the long thumbscrew, into the receptacle of the ISP interface cable into the hole closest to the white connector, and turn it clockwise enough to the system board cage. 10 Tighten the long thumbscrew. Note: The plugs and receptacles are color coded. Do not tighten the thumbscrew at this time. 9 Attach the two provided screws to secure the ISP mounting bracket to hold the ISP in place.

User Manual
Page 42
Additional printer setup 42 Warning-Potential Damage: Make sure the system board is moved. 12 If a printer hard disk was previously installed, then attach the printer hard disk to the printer if it is locked to prevent possible damage to the ISP. For more information, see "Installing a printer hard disk" on page 43. 13 Release the latch, and then close the system board door by lowering the scanner. 14 Push in on the screws while rotating them clockwise a quarter turn to lock the system board into place.
Additional printer setup 42 Warning-Potential Damage: Make sure the system board is moved. 12 If a printer hard disk was previously installed, then attach the printer hard disk to the printer if it is locked to prevent possible damage to the ISP. For more information, see "Installing a printer hard disk" on page 43. 13 Release the latch, and then close the system board door by lowering the scanner. 14 Push in on the screws while rotating them clockwise a quarter turn to lock the system board into place.


