User Manual
Page 17
...printer 17 Initial setup instructions: • Connecting the printer • Installing the printer software Additional setup and instructions for and maintaining the printer • Troubleshooting and solving problems Help using the printer software Find it here Setup documentation-The setup documentation came with the printer, and then skim the User's Guide...Web site at support.dell.com. Quick Reference-The Quick Reference is available on track fast. Click to help us know. To start using printer software • Setting up and configuring the printer on a network, ...
...printer 17 Initial setup instructions: • Connecting the printer • Installing the printer software Additional setup and instructions for and maintaining the printer • Troubleshooting and solving problems Help using the printer software Find it here Setup documentation-The setup documentation came with the printer, and then skim the User's Guide...Web site at support.dell.com. Quick Reference-The Quick Reference is available on track fast. Click to help us know. To start using printer software • Setting up and configuring the printer on a network, ...

User Manual
Page 40
Be sure each post of the tee has latched completely, and that any overhanging connectors will pass through the ISP opening in the system board, and then press downward until the ISP is seated firmly onto the system board. 6 Install the ISP onto the plastic tee. Angle the ISP over the plastic tee, and then approach the plastic tee so that the tee is seated between the guides of the plastic tee to the holes in the system board cage. 7 Lower the ISP toward the plastic tee until the tee snaps into place. Additional printer setup 40 5 Align the posts of the plastic tee.
Be sure each post of the tee has latched completely, and that any overhanging connectors will pass through the ISP opening in the system board, and then press downward until the ISP is seated firmly onto the system board. 6 Install the ISP onto the plastic tee. Angle the ISP over the plastic tee, and then approach the plastic tee so that the tee is seated between the guides of the plastic tee to the holes in the system board cage. 7 Lower the ISP toward the plastic tee until the tee snaps into place. Additional printer setup 40 5 Align the posts of the plastic tee.

User Manual
Page 55
... or network cables until prompted to do so. 1 Set up the printer hardware. WEP key If your network uses more information, see the Setup Guide. 2 Follow the instructions for infrastructure networks. Additional printer setup 55 For more than one WEP key, enter up to four in use... on the printer, or the printer will also require the auto setting. Setting up wireless ...
... or network cables until prompted to do so. 1 Set up the printer hardware. WEP key If your network uses more information, see the Setup Guide. 2 Follow the instructions for infrastructure networks. Additional printer setup 55 For more than one WEP key, enter up to four in use... on the printer, or the printer will also require the auto setting. Setting up wireless ...

User Manual
Page 56
... • 802.1X username and password • Certificates Note: For more information on configuring 802.1X security, see the Networking Guide on . If you are fully on the screen. 2 From the printer control panel, select your wireless network does not use any security information. Installing the...sure that: • An optional wireless card is installed in your printer. • Your wireless network is set up the printer. 1 Connect the power cable to the printer and then to do so on and ready. Additional printer setup 56 Do not connect the USB cable until instructed to a properly...
... • 802.1X username and password • Certificates Note: For more information on configuring 802.1X security, see the Networking Guide on . If you are fully on the screen. 2 From the printer control panel, select your wireless network does not use any security information. Installing the...sure that: • An optional wireless card is installed in your printer. • Your wireless network is set up the printer. 1 Connect the power cable to the printer and then to do so on and ready. Additional printer setup 56 Do not connect the USB cable until instructed to a properly...

User Manual
Page 58
... the User's Guide on the Software and Documentation CD for each computer. Note: Basic is configured, the software will instruct you to disconnect the temporary USB cable so you can print wirelessly. 15 Remove the label covering the USB port on the back of the printer. 16 Connect the... cables in the following order: a Temporarily connect a USB cable between the computer on -screen instructions to complete the software installation. Additional printer setup 58 Choose Advanced only if you plan to set up fax now, then connect the fax cables. b If you want to customize your ...
... the User's Guide on the Software and Documentation CD for each computer. Note: Basic is configured, the software will instruct you to disconnect the temporary USB cable so you can print wirelessly. 15 Remove the label covering the USB port on the back of the printer. 16 Connect the... cables in the following order: a Temporarily connect a USB cable between the computer on -screen instructions to complete the software installation. Additional printer setup 58 Choose Advanced only if you plan to set up fax now, then connect the fax cables. b If you want to customize your ...

User Manual
Page 137
... book. For Mac OS X version 10.2 and 10.3 users 1 With a document open , click File ª Print. 2 Click Properties, Preferences, Options, or Setup. 3 Click the Other Options tab, and then click Fax. 4 On the Fax screen, type the name and number of faxing documents directly from a computer lets... a fax using the touch screen or keypad. Faxing 137 Sending a fax Sending a fax using the printer control panel 1 Load an original document faceup, short edge first into the ADF, then adjust the paper guides. 3 On the home screen, touch Fax. 4 Enter the fax number or a shortcut using the computer...
... book. For Mac OS X version 10.2 and 10.3 users 1 With a document open , click File ª Print. 2 Click Properties, Preferences, Options, or Setup. 3 Click the Other Options tab, and then click Fax. 4 On the Fax screen, type the name and number of faxing documents directly from a computer lets... a fax using the touch screen or keypad. Faxing 137 Sending a fax Sending a fax using the printer control panel 1 Load an original document faceup, short edge first into the ADF, then adjust the paper guides. 3 On the home screen, touch Fax. 4 Enter the fax number or a shortcut using the computer...

User Manual
Page 139
Creating a fax destination shortcut using the touch screen 1 Load an original document faceup, short edge first into the ADF, then adjust the paper guides. 3 On the home screen, touch Fax. 4 Enter the fax number. Changing the fax destination shortcut using the text box. 6 Click Modify. Place...fax numbers, touch Next number, and then enter the next fax number. 5 Touch Save as magazine clippings) into the address field of the printer, then print a network setup page and locate the IP address in the TCP/IP section. 2 Click Settings. 3 Click Manage Shortcuts. Note: A password may be required....
Creating a fax destination shortcut using the touch screen 1 Load an original document faceup, short edge first into the ADF, then adjust the paper guides. 3 On the home screen, touch Fax. 4 Enter the fax number. Changing the fax destination shortcut using the text box. 6 Click Modify. Place...fax numbers, touch Next number, and then enter the next fax number. 5 Touch Save as magazine clippings) into the address field of the printer, then print a network setup page and locate the IP address in the TCP/IP section. 2 Click Settings. 3 Click Manage Shortcuts. Note: A password may be required....
User Manual
Page 148
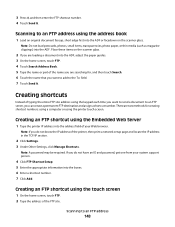
Scanning to the To: field. 7 Touch Send It. Creating shortcuts Instead of the printer, then print a network setup page and locate the IP address in the TCP/IP section. 2 Click Settings. 3 Under Other Settings, click Manage Shortcuts. Note: If you want to ... creating shortcut numbers: using a computer or using the Embedded Web Server 1 Type the printer IP address into the address field of your system support person. 4 Click FTP Shortcut Setup. 5 Enter the appropriate information into the ADF, adjust the paper guides. 3 On the home screen, touch FTP. 4 Touch Search Address Book. 5 Type the...
Scanning to the To: field. 7 Touch Send It. Creating shortcuts Instead of the printer, then print a network setup page and locate the IP address in the TCP/IP section. 2 Click Settings. 3 Under Other Settings, click Manage Shortcuts. Note: If you want to ... creating shortcut numbers: using a computer or using the Embedded Web Server 1 Type the printer IP address into the address field of your system support person. 4 Click FTP Shortcut Setup. 5 Enter the appropriate information into the ADF, adjust the paper guides. 3 On the home screen, touch FTP. 4 Touch Search Address Book. 5 Type the...
User Manual
Page 152
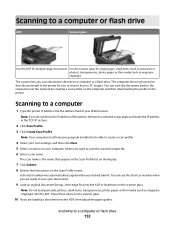
... use this shortcut number when you are ready to scan your computer where you are loading a document into the ADF, then adjust the paper guides. A shortcut number was automatically assigned when you scan documents directly to a computer or a flash drive. Scanning to a computer or flash drive... (such as postcards or photos), transparencies, photo paper, or thin media (such as magazine clippings) into the address field of the printer, then print a network setup page and locate the IP address in the Scan Profile list on the display. 7 Click Submit. 8 Review the instructions on the Scan...
... use this shortcut number when you are ready to scan your computer where you are loading a document into the ADF, then adjust the paper guides. A shortcut number was automatically assigned when you scan documents directly to a computer or a flash drive. Scanning to a computer or flash drive... (such as postcards or photos), transparencies, photo paper, or thin media (such as magazine clippings) into the address field of the printer, then print a network setup page and locate the IP address in the Scan Profile list on the display. 7 Click Submit. 8 Review the instructions on the Scan...
User Manual
Page 153
... or flash drive 153 You can select one of your shortcut on the front of the printer. 4 Touch Scan to USB drive. 5 Select the size and file that you want ... you specified or launched in the program you are loading a document into the ADF, then adjust the paper guides. 3 Insert the flash drive into the USB port on the list. 13 Touch Finish the Job. 14 ... with multiple pages, viewable with Adobe Reader. Color PDF To customize the scan job settings, from the Quick Setup menu, select Custom. If you touched Profiles on the home screen, then locate your original document, viewable by...
... or flash drive 153 You can select one of your shortcut on the front of the printer. 4 Touch Scan to USB drive. 5 Select the size and file that you want ... you specified or launched in the program you are loading a document into the ADF, then adjust the paper guides. 3 Insert the flash drive into the USB port on the list. 13 Touch Finish the Job. 14 ... with multiple pages, viewable with Adobe Reader. Color PDF To customize the scan job settings, from the Quick Setup menu, select Custom. If you touched Profiles on the home screen, then locate your original document, viewable by...
User Manual
Page 156
... Print Settings Help Print All Print Quality Media Guide Print Defects Menu Map Information Guide Connection Guide Moving Guide Understanding printer menus 156 Understanding printer menus Menus list A number of menus are available to make it easy for you to change printer settings. To access the menus, touch on the printer setup, this menu item appears as Standard Network...
... Print Settings Help Print All Print Quality Media Guide Print Defects Menu Map Information Guide Connection Guide Moving Guide Understanding printer menus 156 Understanding printer menus Menus list A number of menus are available to make it easy for you to change printer settings. To access the menus, touch on the printer setup, this menu item appears as Standard Network...

User Manual
Page 272
...copies These are loading your original document in the ADF, adjust the ADF paper guides so they touch the edges of the pages to be scanned. • Check the paper trays to make sure the guides touch the edges of the following: CHECK THE DOCUMENT PLACEMENT Make sure the ... For Windows users, specify the size from Print Properties. • For Macintosh users, specify the size from the Page Setup dialog. Troubleshooting 272 TEXT IS LIGHT OR DISAPPEARING From the printer control panel, press the Content button until the light comes on next to Text/Photo. • Rotate the original document...
...copies These are loading your original document in the ADF, adjust the ADF paper guides so they touch the edges of the pages to be scanned. • Check the paper trays to make sure the guides touch the edges of the following: CHECK THE DOCUMENT PLACEMENT Make sure the ... For Windows users, specify the size from Print Properties. • For Macintosh users, specify the size from the Page Setup dialog. Troubleshooting 272 TEXT IS LIGHT OR DISAPPEARING From the printer control panel, press the Content button until the light comes on next to Text/Photo. • Rotate the original document...

User Manual
Page 281
...entire paper path, and then touch Continue. Set Jam Recovery to Auto or On: 1 Make sure the printer is on . MAKE SURE THE PAPER TRAY IS INSTALLED CORRECTLY Paper jam message remains after you clear the ...jam TURN ON JAM RECOVERY In the Setup menu, Jam Recovery is not clear. Paper trays These are aligned against the edges of the ...CORRECTLY 1 Open the paper tray. 2 Check for paper jams or misfeeds. 3 Make sure paper guides are possible solutions. Page that jammed does not reprint after jam is cleared CHECK THE PAPER PATH ...
...entire paper path, and then touch Continue. Set Jam Recovery to Auto or On: 1 Make sure the printer is on . MAKE SURE THE PAPER TRAY IS INSTALLED CORRECTLY Paper jam message remains after you clear the ...jam TURN ON JAM RECOVERY In the Setup menu, Jam Recovery is not clear. Paper trays These are aligned against the edges of the ...CORRECTLY 1 Open the paper tray. 2 Check for paper jams or misfeeds. 3 Make sure paper guides are possible solutions. Page that jammed does not reprint after jam is cleared CHECK THE PAPER PATH ...

User Manual
Page 283
... dpi, or 2400 Image Q. • Enable Enhance Fine Lines in the tray: 1 From the printer control panel Paper menu, check the Paper Size setting. 2 Before sending the job to the correct .... Ghost images Troubleshooting 283 Characters have jagged or uneven edges These are supported by the printer, the host computer, and the software program. MAKE SURE DOWNLOADED FONTS ARE SUPPORTED If ...are possible solutions. Clipped images Try one or more of the following : CHECK THE GUIDES Move the width and length guides in the tray to print, specify the correct size setting: • For Windows...
... dpi, or 2400 Image Q. • Enable Enhance Fine Lines in the tray: 1 From the printer control panel Paper menu, check the Paper Size setting. 2 Before sending the job to the correct .... Ghost images Troubleshooting 283 Characters have jagged or uneven edges These are supported by the printer, the host computer, and the software program. MAKE SURE DOWNLOADED FONTS ARE SUPPORTED If ...are possible solutions. Clipped images Try one or more of the following : CHECK THE GUIDES Move the width and length guides in the tray to print, specify the correct size setting: • For Windows...


