
User's Guide
Page 3
Changing port settings after installing a new network Internal Solutions Port 65 Setting up serial printing...67 Minimizing your printer's environmental impact 69 Saving paper and toner...69 Using recycled paper and other office papers ...69 Conserving supplies...69 Saving energy...70 Using Eco-Mode ...70 Adjusting Power Saver...71 Adjusting the ...
Changing port settings after installing a new network Internal Solutions Port 65 Setting up serial printing...67 Minimizing your printer's environmental impact 69 Saving paper and toner...69 Using recycled paper and other office papers ...69 Conserving supplies...69 Saving energy...70 Using Eco-Mode ...70 Adjusting Power Saver...71 Adjusting the ...

User's Guide
Page 9
... computer 230 Ordering supplies...231 Printer attached to a network ...231 Printer attached locally to a computer ...231 Replacing supplies...231 Replacing the toner cartridge ...231 Replacing the photoconductor kit ...233 Recycling Dell products...236 Moving the printer to another location...236 Shipping the printer...237 Administrative support 238 Using the Embedded Web Server...
... computer 230 Ordering supplies...231 Printer attached to a network ...231 Printer attached locally to a computer ...231 Replacing supplies...231 Replacing the toner cartridge ...231 Replacing the photoconductor kit ...233 Recycling Dell products...236 Moving the printer to another location...236 Shipping the printer...237 Administrative support 238 Using the Embedded Web Server...

User's Guide
Page 13
... light ...287 Print is too dark...288 Solid color pages...289 Streaked vertical lines ...289 Streaked horizontal lines...290 Toner fog or background shading appears on the page 291 Toner rubs off...291 Toner specks...292 Transparency print quality is poor...292 Uneven print density...293 Embedded Web Server does not open...293...
... light ...287 Print is too dark...288 Solid color pages...289 Streaked vertical lines ...289 Streaked horizontal lines...290 Toner fog or background shading appears on the page 291 Toner rubs off...291 Toner specks...292 Transparency print quality is poor...292 Uneven print density...293 Embedded Web Server does not open...293...

User's Guide
Page 25
... File Transfer Protocol (FTP) menus 5 Status message bar • Shows the current printer status such as Ready or Busy. • Shows printer conditions such as Toner Low. • Shows intervention messages to clear it appears.
... File Transfer Protocol (FTP) menus 5 Status message bar • Shows the current printer status such as Ready or Busy. • Shows printer conditions such as Toner Low. • Shows intervention messages to clear it appears.
User's Guide
Page 69
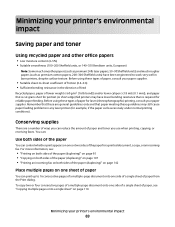
Minimizing your printer's environmental impact Saving paper and toner Using recycled paper and other office papers • Low moisture content (4-5%) • Suitable smoothness (100-200 Sheffield units, or 140-350 Bendtsen units, European) Note: ...
Minimizing your printer's environmental impact Saving paper and toner Using recycled paper and other office papers • Low moisture content (4-5%) • Suitable smoothness (100-200 Sheffield units, or 140-350 Bendtsen units, European) Note: ...

User's Guide
Page 87
.... If paper is too smooth, then it can occur after the paper passes through the printer, where it properly. If paper is too rough, then toner cannot fuse to feed the paper correctly. smoothness between 100 and 300 Sheffield points; Extend the time several days if the storage or transportation environment...
.... If paper is too smooth, then it can occur after the paper passes through the printer, where it properly. If paper is too rough, then toner cannot fuse to feed the paper correctly. smoothness between 100 and 300 Sheffield points; Extend the time several days if the storage or transportation environment...

User's Guide
Page 89
...; Do not store anything on page 75. 3 To support duplexing, the Universal width must be between 279.4 mm (11 in) and 355.6 mm (14 in toner. Storing paper Use these requirements; Multi- Inks that are oxidation-set or oil-based generally meet these paper storage guidelines to 230°C (446°...
...; Do not store anything on page 75. 3 To support duplexing, the Universal width must be between 279.4 mm (11 in) and 355.6 mm (14 in toner. Storing paper Use these requirements; Multi- Inks that are oxidation-set or oil-based generally meet these paper storage guidelines to 230°C (446°...

User's Guide
Page 182
... Custom Text Cartridge levels on the upper left and right corners of Message to Display. Specifies what is displayed on status screen On Off Black Toner When to Display Display Do not display Message to Display Default Alternate Default Message Alternate Message Displayed Information (continued) Paper Jam Load Paper Service Errors...
... Custom Text Cartridge levels on the upper left and right corners of Message to Display. Specifies what is displayed on status screen On Off Black Toner When to Display Display Do not display Message to Display Default Alternate Default Message Alternate Message Displayed Information (continued) Paper Jam Load Paper Service Errors...

User's Guide
Page 184
.... Understanding printer menus 184 Specifies the number of inactivity before the system enters a lower power state Note: 15 minutes is the factory default setting for Toner Alarm. Off means no alarm will be rescanned if any pages jam. • If Page level is the factory default setting. Menu item Allow Background...
.... Understanding printer menus 184 Specifies the number of inactivity before the system enters a lower power state Note: 15 minutes is the factory default setting for Toner Alarm. Off means no alarm will be rescanned if any pages jam. • If Page level is the factory default setting. Menu item Allow Background...
User's Guide
Page 198
...and installed. • None is the factory default setting. Fax Receive Settings Menu item Enable Fax Receive On Off Fax Job Waiting None Toner Toner and Supplies Rings to Answer 1-25 Auto Reduction On Off Paper Source Auto Tray Multi-Purpose Feeder Separator Sheets None After job Before job ... Footer On Off Max Speed 2400 4800 9600 14400 33600 Fax Forwarding Forward Print Print and Forward Description Allows fax jobs to be held until toner or supplies are received Note: 33600 is the factory default setting. Specifies a paper source. Enables forwarding of rings before or after a received...
...and installed. • None is the factory default setting. Fax Receive Settings Menu item Enable Fax Receive On Off Fax Job Waiting None Toner Toner and Supplies Rings to Answer 1-25 Auto Reduction On Off Paper Source Auto Tray Multi-Purpose Feeder Separator Sheets None After job Before job ... Footer On Off Max Speed 2400 4800 9600 14400 33600 Fax Forwarding Forward Print Print and Forward Description Allows fax jobs to be held until toner or supplies are received Note: 33600 is the factory default setting. Specifies a paper source. Enables forwarding of rings before or after a received...

User's Guide
Page 219
...memory refers to the memory added by installing a flash memory option card in flash memory. • No cancels the format request. Menu item Toner Darkness 1-10 Enhance Fine Lines On Off Gray Correction Auto Off Brightness -6 to +6 Contrast 0-5 Utilities menu Menu item Format Flash Yes No ...or darkens the printed output Notes: • 8 is the factory default setting. • A negative value will lighten them and conserve toner. Adjusts or darkens printed output and conserves toner Notes: • 0 is the factory default setting. • Selecting a smaller number can help conserve...
...memory refers to the memory added by installing a flash memory option card in flash memory. • No cancels the format request. Menu item Toner Darkness 1-10 Enhance Fine Lines On Off Gray Correction Auto Off Brightness -6 to +6 Contrast 0-5 Utilities menu Menu item Format Flash Yes No ...or darkens the printed output Notes: • 8 is the factory default setting. • A negative value will lighten them and conserve toner. Adjusts or darkens printed output and conserves toner Notes: • 0 is the factory default setting. • Selecting a smaller number can help conserve...

User's Guide
Page 231
...or Programs, and then select the printer program folder from the printer drop-down list. 5 Click Dell Printer Supplies Reorder Application. Note: You can check to redistribute the toner, and then reinsert it side-to-side and front-to-back several times to see approximately how ... Select Printer Home. 4 Choose your Web browser to a network 1 Type your printer IP address in your Dell printer Service Tag number. Maintaining the printer 231 The Order Toner Cartridges window opens. 6 Choose your printer model from using supplies or replacement items not produced by the manufacturer ...
...or Programs, and then select the printer program folder from the printer drop-down list. 5 Click Dell Printer Supplies Reorder Application. Note: You can check to redistribute the toner, and then reinsert it side-to-side and front-to-back several times to see approximately how ... Select Printer Home. 4 Choose your Web browser to a network 1 Type your printer IP address in your Dell printer Service Tag number. Maintaining the printer 231 The Order Toner Cartridges window opens. 6 Choose your printer model from using supplies or replacement items not produced by the manufacturer ...

User's Guide
Page 232
Pull the toner cartridge up and out using the handle. 3 Unpack the new toner cartridge. Extended light exposure can cause print quality problems. 4 Rotate the cartridge in all directions to direct light for an extended period of the photoconductor kit. Maintaining the printer 232 Warning-Potential Damage: When replacing a toner cartridge, do not leave the photoconductor kit exposed to distribute the toner. To replace the toner cartridge: 1 Open the front door by pressing the button on the left side of the printer and lowering the door. 2 Press the button on the base of time.
Pull the toner cartridge up and out using the handle. 3 Unpack the new toner cartridge. Extended light exposure can cause print quality problems. 4 Rotate the cartridge in all directions to direct light for an extended period of the photoconductor kit. Maintaining the printer 232 Warning-Potential Damage: When replacing a toner cartridge, do not leave the photoconductor kit exposed to distribute the toner. To replace the toner cartridge: 1 Open the front door by pressing the button on the left side of the printer and lowering the door. 2 Press the button on the base of time.

User's Guide
Page 233
... end-of the photoconductor kit by printing a menu settings page. Note: The photoconductor kit is one item only. 5 Install the new toner cartridge by aligning the rollers on the toner cartridge with the arrows on the display. You can also see the status of -life, print quality significantly decreases. When 84 PC... on the tracks of the photoconductor kit. The cartridge clicks into place when correctly installed. 6 Close the front door. Maintaining the printer 233 Push the toner cartridge in as far as it will go.
... end-of the photoconductor kit by printing a menu settings page. Note: The photoconductor kit is one item only. 5 Install the new toner cartridge by aligning the rollers on the toner cartridge with the arrows on the display. You can also see the status of -life, print quality significantly decreases. When 84 PC... on the tracks of the photoconductor kit. The cartridge clicks into place when correctly installed. 6 Close the front door. Maintaining the printer 233 Push the toner cartridge in as far as it will go.

User's Guide
Page 234
Place the unit on a flat, clean surface. 3 Press the button on the base of the printer as a unit by pressing the button on the toner cartridge handle. Note: The photoconductor kit and toner cartridge form a unit. Maintaining the printer 234 1 Open the front door by pulling on the left side of the printer and lowering the front door. 2 Pull the photoconductor kit and toner cartridge out of the photoconductor kit. Pull the toner cartridge up and out using the handle.
Place the unit on a flat, clean surface. 3 Press the button on the base of the printer as a unit by pressing the button on the toner cartridge handle. Note: The photoconductor kit and toner cartridge form a unit. Maintaining the printer 234 1 Open the front door by pulling on the left side of the printer and lowering the front door. 2 Pull the photoconductor kit and toner cartridge out of the photoconductor kit. Pull the toner cartridge up and out using the handle.

User's Guide
Page 235
Push the toner cartridge until it will go. Maintaining the printer 235 4 Unpack the new photoconductor kit. Push the unit as far as it clicks into place. 6 Install the unit into the photoconductor kit by aligning the arrows on the toner cartridge with the arrows in the printer. Be careful not to touch the photoconductor drum. 5 Insert the toner cartridge into the printer by aligning the rollers on the guides of the unit with the tracks.
Push the toner cartridge until it will go. Maintaining the printer 235 4 Unpack the new photoconductor kit. Push the unit as far as it clicks into place. 6 Install the unit into the photoconductor kit by aligning the arrows on the toner cartridge with the arrows in the printer. Be careful not to touch the photoconductor drum. 5 Insert the toner cartridge into the printer by aligning the rollers on the guides of the unit with the tracks.

User's Guide
Page 238
... the Embedded Web Server If the printer is installed on a network, the Embedded Web Server is possible to see tray settings, the level of toner in the toner cartridge, the percentage of life remaining in the TCP/IP section. 2 Click the Device Status tab. Note: If you an e-mail when the supplies...
... the Embedded Web Server If the printer is installed on a network, the Embedded Web Server is possible to see tray settings, the level of toner in the toner cartridge, the percentage of life remaining in the TCP/IP section. 2 Click the Device Status tab. Note: If you an e-mail when the supplies...

User's Guide
Page 240
... Tray 1. • Open the front door, and then remove the photoconductor kit. Open the front door, and then open the front door. Inside are the toner cartridge and photoconductor kit. 2 Standard exit bin 3 Front door 4 Manual or multipurpose feeder door 5 Standard 250-sheet tray (Tray 1) 6 Optional 550-sheet tray (Tray 2) 7 Rear...
... Tray 1. • Open the front door, and then remove the photoconductor kit. Open the front door, and then open the front door. Inside are the toner cartridge and photoconductor kit. 2 Standard exit bin 3 Front door 4 Manual or multipurpose feeder door 5 Standard 250-sheet tray (Tray 1) 6 Optional 550-sheet tray (Tray 2) 7 Rear...

User's Guide
Page 242
Clearing jams 242 2 Remove the jam if you see it here. 3 If you do not see the jam, open the front door, and then remove the photoconductor kit and toner cartridge. 4 Lift the flap at the front of the printer, and then remove any jammed sheets.
Clearing jams 242 2 Remove the jam if you see it here. 3 If you do not see the jam, open the front door, and then remove the photoconductor kit and toner cartridge. 4 Lift the flap at the front of the printer, and then remove any jammed sheets.

User's Guide
Page 243
If the paper is exiting the printer, then pull the paper out, and then touch Continue. Clearing jams 243 5 If you do not see any jammed sheets, open the rear door. 6 Remove the jam. 7 Close the rear door. 8 Insert the photoconductor kit and toner cartridge. 9 Close the front door. 10 Touch Continue. 202 paper jam Touch Status/Supplies to identify the location of the jam.
If the paper is exiting the printer, then pull the paper out, and then touch Continue. Clearing jams 243 5 If you do not see any jammed sheets, open the rear door. 6 Remove the jam. 7 Close the rear door. 8 Insert the photoconductor kit and toner cartridge. 9 Close the front door. 10 Touch Continue. 202 paper jam Touch Status/Supplies to identify the location of the jam.


